

Remote Desktop Services, known as Terminal Services in Windows Server 2008 and earlier, is one of the components of Microsoft Windows that allow a user to take control of a remote computer or virtual machine over a network connection. Here are the step-by-step guide for installing Remote Desktop Services Setup on Windows Server. Kindly refer to these related guides: Changed expired RDP password: How to change a password on a Remote Desktop session, how to fix “the logon attempt failed for the remote desktop connection“, and how to Resolve Microsoft RDP Connection Black Screen.
Step 1: Prerequisite Remote Desktop Services Setup on Windows Server
- Users need to be created in AD
- You need a User Access group and
- Computer groups are all created in AD to access this Terminal server.
Kindly stay put! I will be creating two new guides on how to deploy RDS using Quick Start and Standard deployment using Windows Server 2019. Please see this guide on Publish Remote Desktop Web Client: How to install HTML 5 Web Client for Microsoft RDS Server. Below is the core architecture of RDS.

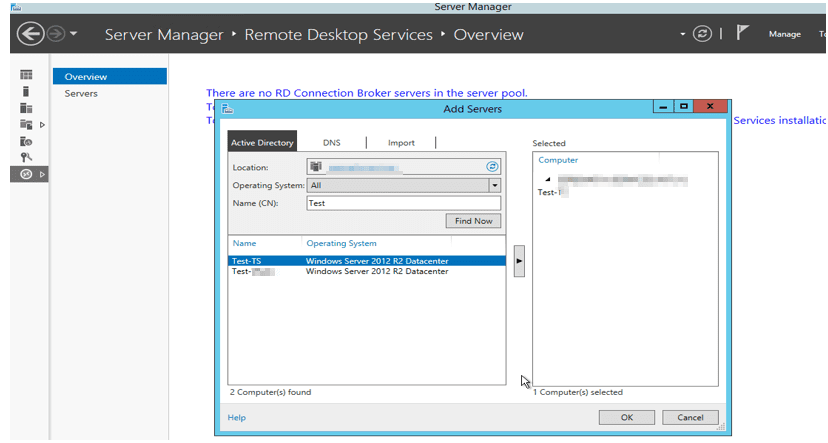
We have to add the Server we wish to configure RDS as shown below. Select the DNS name and search using the FQDN of the VM. Here is a comprehensive guide on “how to install RDS via Quick Start Deployment: Install, Publish, Update and Uninstall Remote Desktop Web Client“

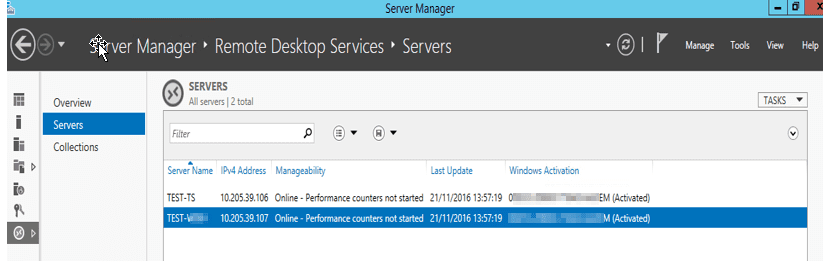
Click on the arrow and click on OK. Now on the Server Manager, navigate to the All Servers tab and click on it. Then it would display the two added servers.
Note: This server must be added with the domain administrator’s right if joined to the domain where special permissions are assigned and not the local administrator’s password.
Since we have all servers necessary for configuring the RDS, now let’s add the Remote Desktop Services role and features to the Terminal server itself.
You may be interested in these guides: How to change a password on a Remote Desktop session, How to Activate and Press Ctrl+Alt+Del in Anydesk for Remote Access Connection to Windows system, and how to Deploy MVC Application to AWS EC2 Using RDP Connection and Web Deploy.
Step 2: Installing the Remote Desktop Services Roles on the Test-RDPServer
Click on Manage,
Select add Roles and Features wizard,
The installation type is Remote Desktop Services Installation.

The deployment type chosen is a standard deployment

Deployment Scenario is a Session-based desktop deployment

Below are the roles services tat will be installed

The RD connection Broker, select the Test-RDP Server VM and click on next

For RD Web Access select the added server in step 1 which is the test-VM from the server pool.
Note: By selecting this option, the web access role services are being installed to the test-VM server (which will act as our RD gateway)

For the RD Session Host, select the RDP from the Pool of servers

In the confirmation option, select restart the destination server automatically if required, or else you can’t proceed.

Note: The server restarts afterward and continues with the installation and if completed successfully it displays success.
From the Server Manager, open Remote Desktop Services, and Test-RDP VM
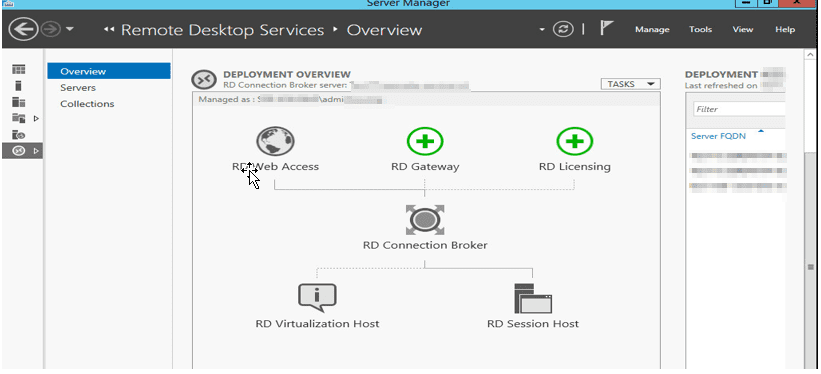
Part 3: Here we currently have the RD Licensing option missing
Add the licensing Server as the Terminal Server itself.

Click on next and select add and after it succeeds, click on close.

Now install RD Gateway server, this would be added server in step 1. This is the test-VM
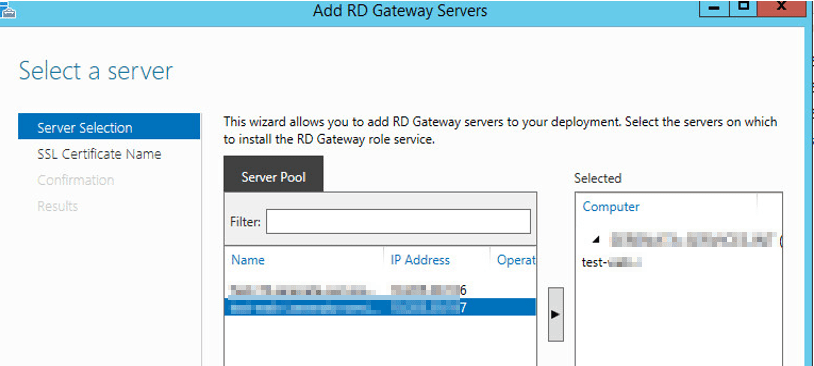
Click on next and then Install the SSL certificates. This is needed to encrypt the communication between the RD Gateway server and remote desktop services clients.

The entered URL will be used by the clients to access the remote gateway server. Ensure you have an A record created for this in your DNS server.

And click on Add

After this step, still on the Terminal Server (locate). Open the Remote Desktop Services
Navigate to the deployment overview and select Edit deployment Properties
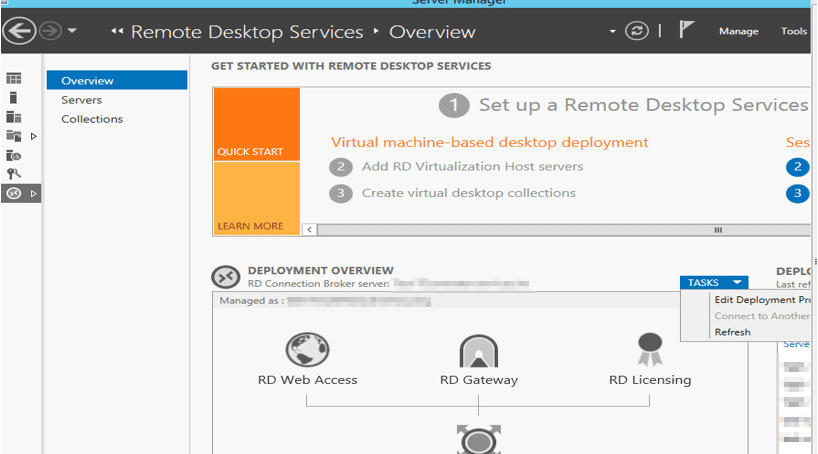
And Modify the deployment of these configurations
– Remote Desktop Gateway
– RD Licensing,
– RD Web Access:
– Certificates
Now type https://xxxxxxxxxx.com/rdweb to any web browser and access.
For the certificates, we can see they are not configured
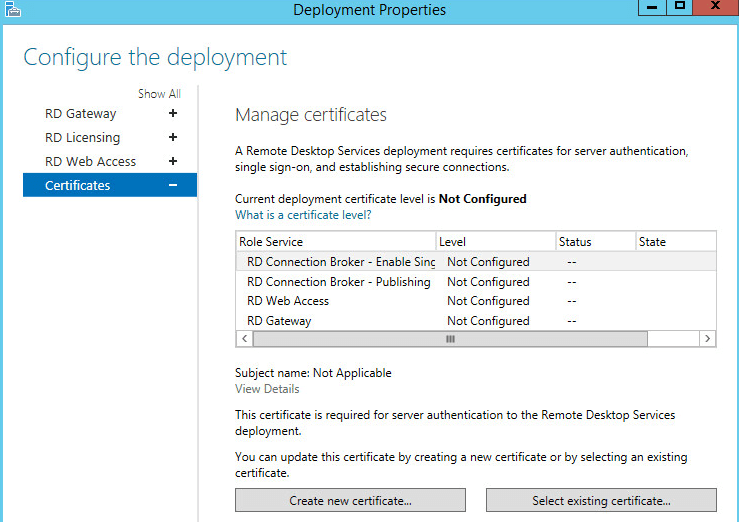
Click on select existing certificates and enter the password for all the role services not configured.
Create Collections
This is necessary to have users that are allowed to access the Remote Desktop Services and to let the RDS Know what to publish.
Open Server Manager,
- Click on Remote Desktop Services,
- Click on Session Collections,
- Click Tasks and
- Click Create Session Collection.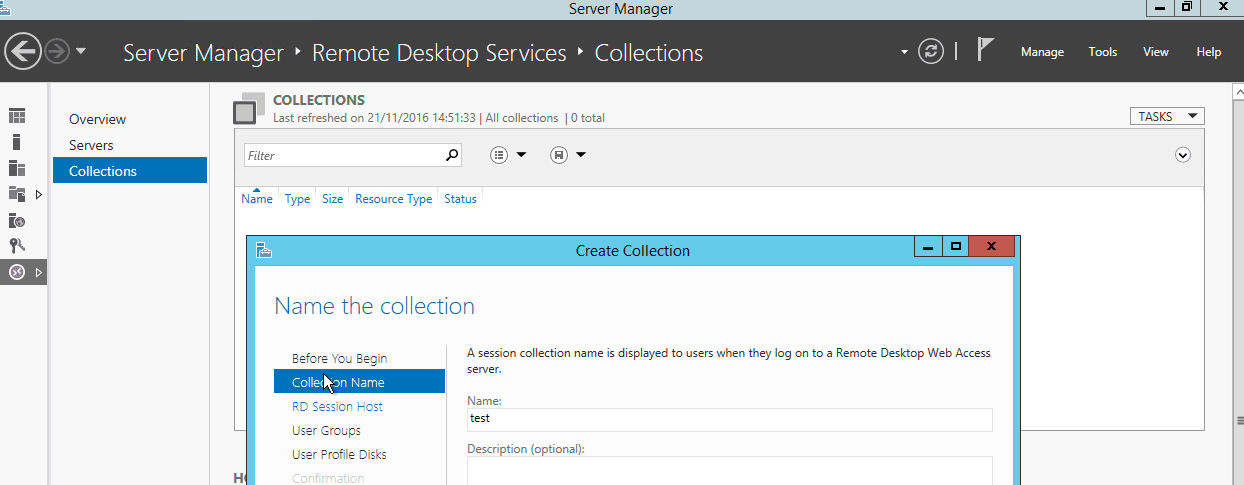
Specify the Collection name e.g. Test representing the Customer or user, and select the RD Session Host servers by click the add (arrow) button to add the users

Add the user group created to access the RDS Server to restrict access to the specified groups only.
And deselect User Profile Disks.

Verify that all entered information is valid and click on create a collection as shown below.

And finally if succeeded, you will be prompted with the screen below
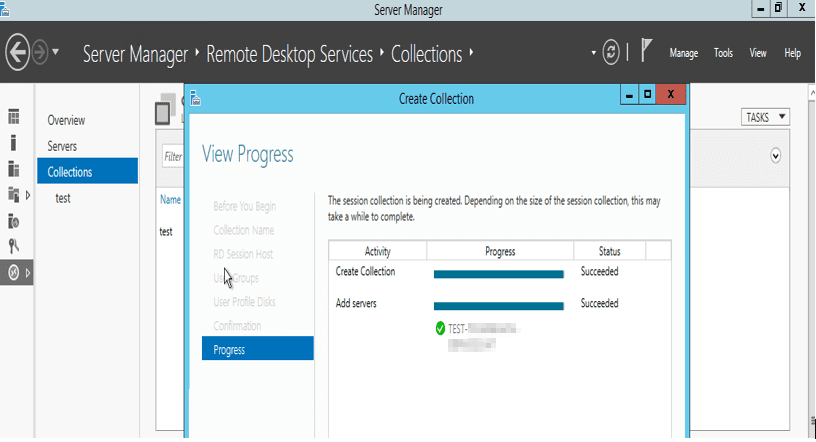
After completion, you should have your collection displayed as below.

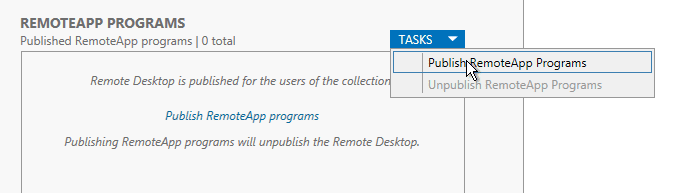
Now to publish Remote app programs

Select the created Collection
Navigate to remote App Programs
Select Tasks,
Click on publish Remote App as shown below
Select the Programs you wish to publish or add additional programs you wish to publish.
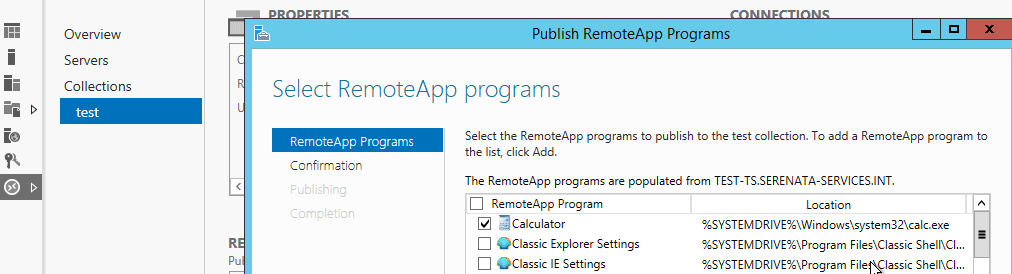
Here we have the Calculator and WordPad selected as shown below

And click on publish and when completed it shows
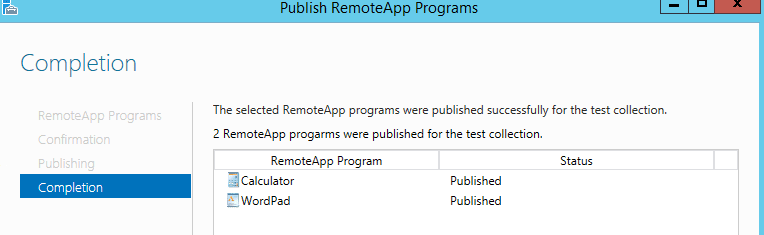
Now you have the programs published under RemoteApp Programs
Part 4: On the test Web Server, (Acting as the RD Gateway)
Add both Servers to the Sever pool, which are test-TS and Test VM as well.
Remote Desktop Services: Access the RD Gateway manager
Now access the RD Gateway manager to assign the user and computer group that can access the Terminal Server.
– Connect to the Test-Web-I server
– Open Remote Desktop Services,
– Click on Servers as shown below
Select from the Server pool the Test VM and right-click on it
Select RD Gateway Manager
Expand the Test VM
Expand the Policies node and Select the Connection Authorisation Policies as shown below. It allows you to specify users who can access the Server.
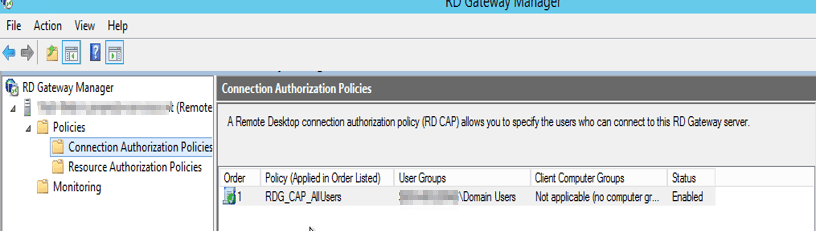
On the connection Authorization Tab, double click on the Policy or right-click and select properties
Note: You can create new policies and disable the existing ones or modify the existing one. Here we are modifying it.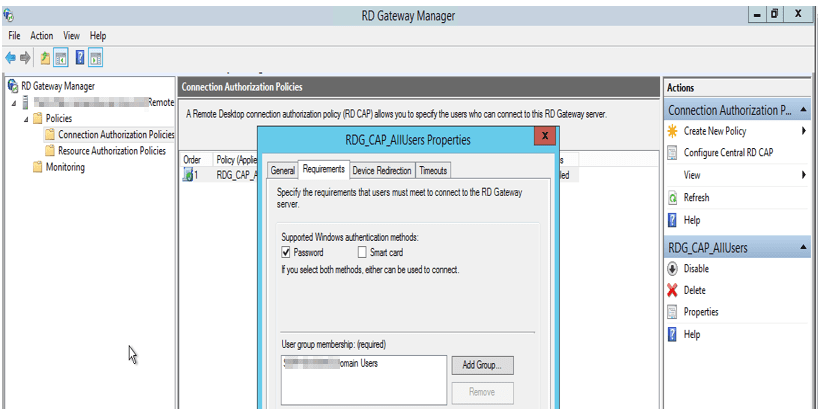
Here navigate through the various properties TAB
Under General: You can give the policy whatever name you want
Requirements: Add the user group from the Active Directory. Here we have the test-User-Access group created (populated with the users) that can access this Terminal Server.
Navigate through the Device Redirection and Timeout to define the required idle timeout. Click on apply and close.
Now select the second Resource Authorization Policies.
Here you also have to add the Remote User group,
And under Network resource, select the test-RDGW-Acc_Computer group created. Click on apply and finish.
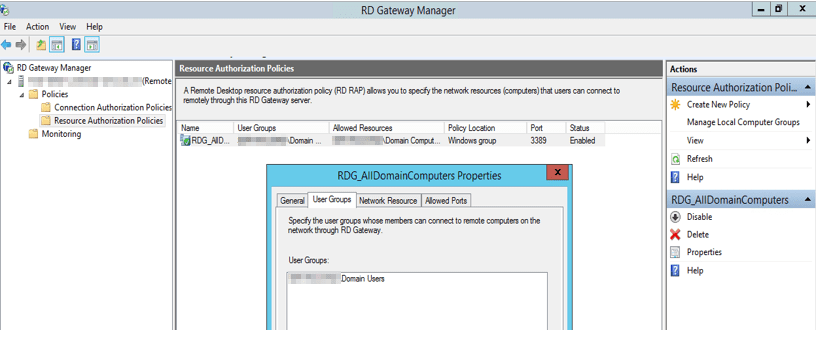
Note: You can get details of connected users here from the Monitory as shown in the diagram.
I hope you found this blog post helpful on the steps to install Remote Desktop Services Setup on Windows Server. If you have any questions, please let me know in the comment session.