

In this article, you will learn how to delete obsolete drivers from the Driver Store in Windows. The driver store is a trusted collection of inbox and third-party driver packages. See the following guide for “how to rename a Printer in Windows 10“.. Also, see reasons to deploy AAD, how to set up Azure AD Tenant, and how to add or delete users, and set permissions in Azure Active Directory. The operating system maintains this collection in a secure location on the local hard disk. Only the driver packages in the driver store can be installed for a device.
When a driver package is copied to the driver store, all of its files are copied. This includes the INF file and all files that are referenced by the INF file. All files that are in the driver package are considered critical to the device installation.
When you install or update device drivers in Windows, older driver versions are still stored in the system. Each time you install or update your device driver, Windows OS since the introduction of Windows Vista continues to store the old version of the driver in the system Driver Store. Thereby, if the system doesn’t work correctly with the new driver, the user can roll back to an older version of the driver.
Caution: Before deleting obsolete drivers
Before proceeding to clear unused drivers, please adhere to the following points discussed below
- Do not delete any files from the DriverStore manually.
- Prior to clearing the Driver Store, it is strongly recommended that you create a system restore point before deleting the Drivers or backup your system image.
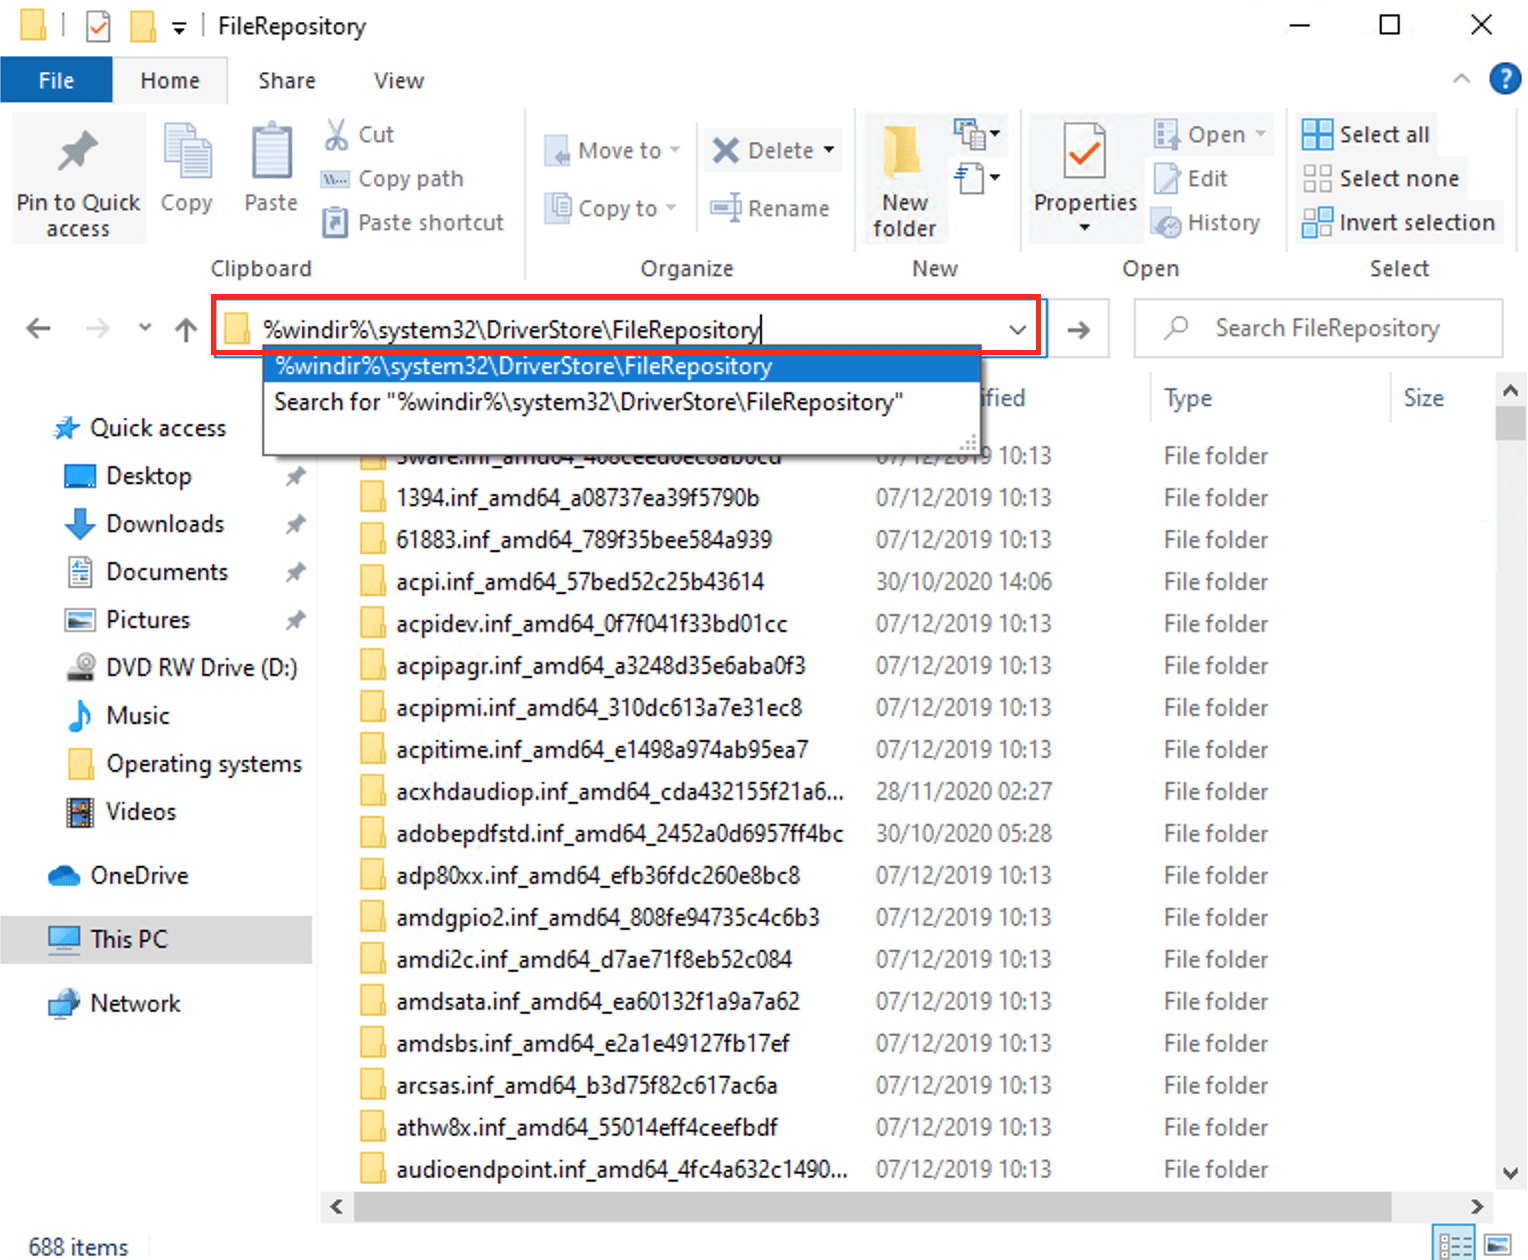
Windows Driver Store is located in the folder C:\windows\system32\DriverStore\FileRepository. You may notice that over time, the folder begins to increase more and more and will fill the disk space.
There are numerous ways to have this done, but I will be discussing the following handy steps
Method 1: Delete Obsolete Drivers from the Driver Store
Via Windows Settings (Remove Printer Driver From Print Server Properties): We can remove Drivers from the Driver Store by using the following methods below.
Launch the Windows Settings, click on Devices, and click on Printer and Scanners. Finally, On the right pane of the Windows, click on “Print Server Properties”
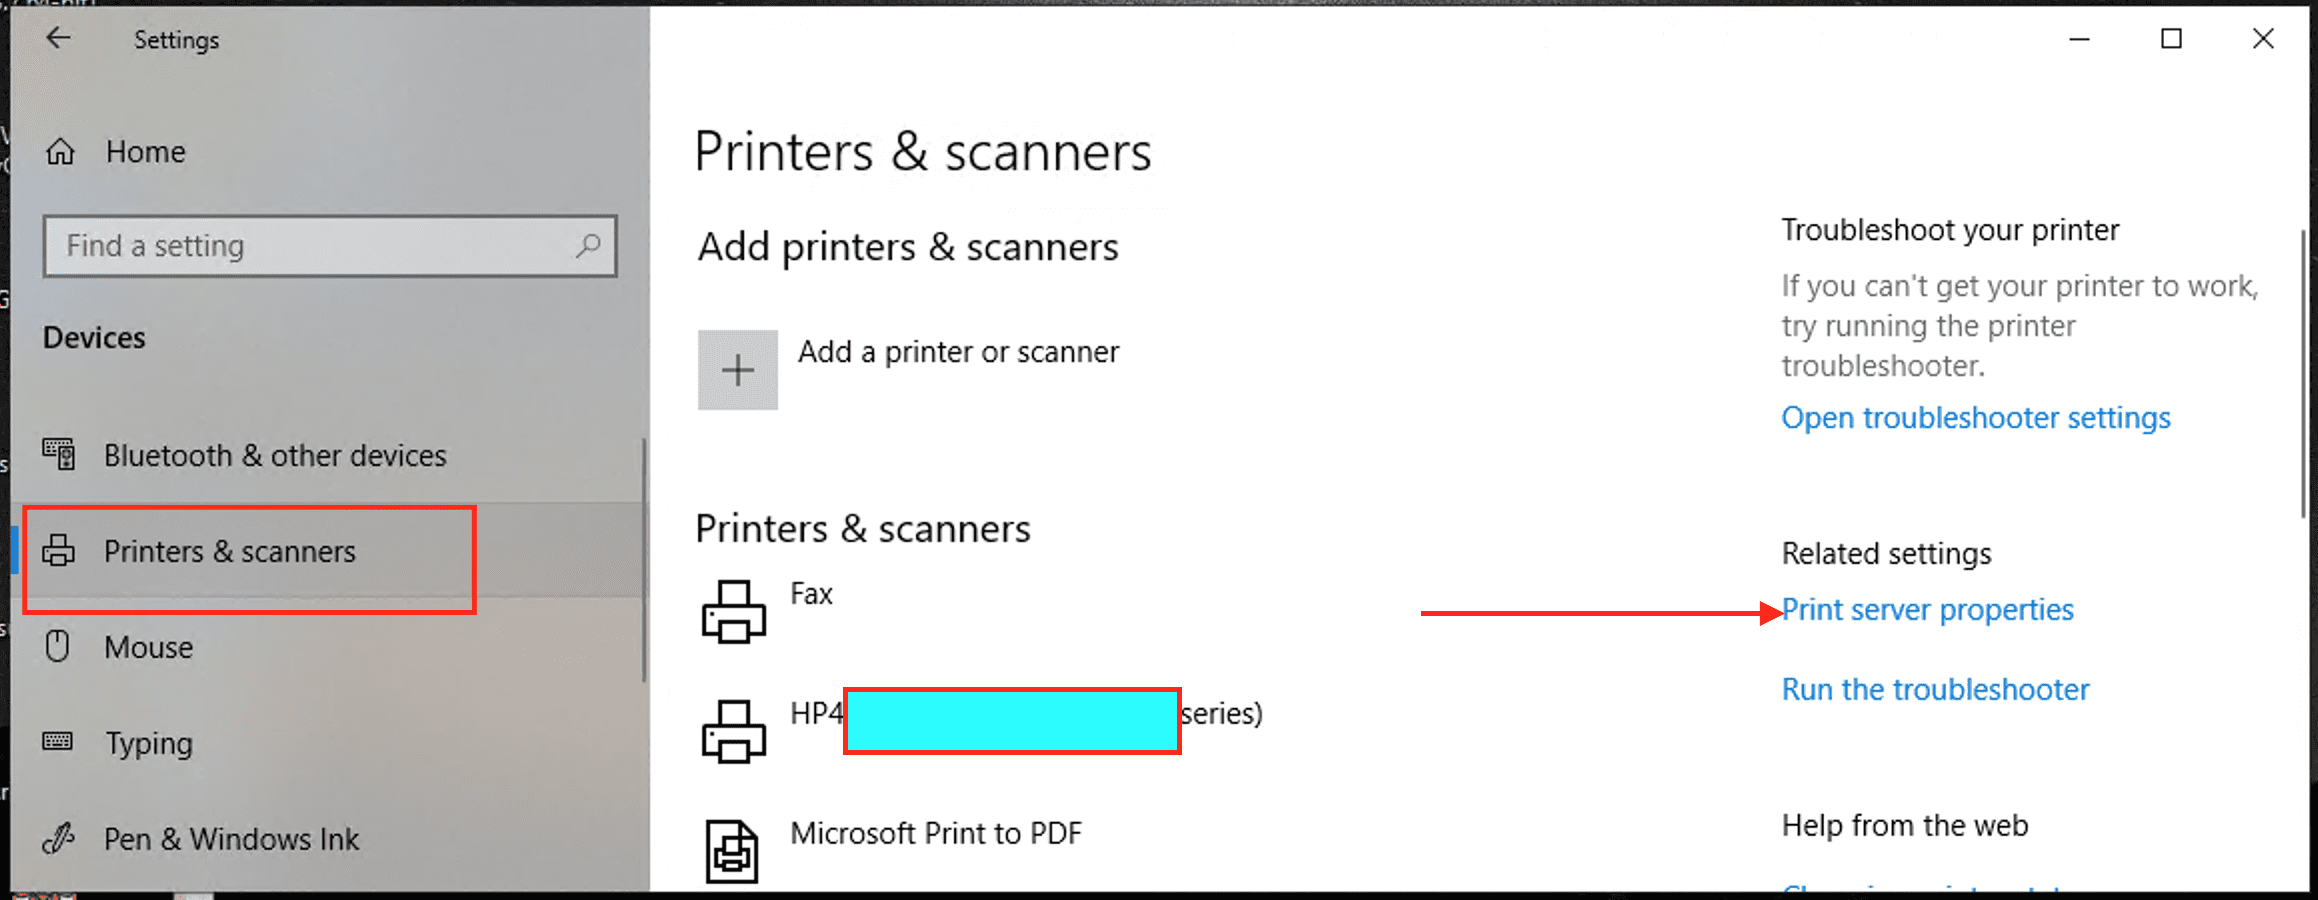
This will open up the Print Server Properties window as shown below. Click on the Driver you wish to uninstall.

Next, select Remove, and the following window will be prompted. Select remove driver and Driver packages and press ok.

Method 2: Delete Obsolete Print Drivers from the Driver Store
Delete printer driver using Print Management
– Launch the Control Panel and navigate to the following and click on Administrative Tool as shown below.
Control Panel\System and Security\Administrative ToolsSearch through the Administrative Tools and select “Print Management” as shown below.

This will open up the Print Management window as shown below. Expand the Custom Filters branch, and click on All Drivers from the left navigation pane.
Right-click the printer driver on the right side, and then select the Delete option.

Method 3: Using the PNPUtil
To delete a driver, you can use the PNPUtil command: Pnputil.exe is a command-line utility that you can use to manage the driver store. You can use this command to add driver packages and remove them as described here.
Note: The driver uninstall package will fail if this file is not an installed OEM INF.
pnputil.exe -d oemxxx.inf
Alternatively, you could use the command /delete-driver. This command deletes a driver package from the driver store. According to Microsoft, this command is available starting in Windows 10, version 1607.
PNPUTIL /delete-driver [/uninstall] [/force] [/reboot]Flags:
/uninstall– uninstall driver package from any devices using it/force– delete driver package even when it is in use by devices/reboot– reboot system if needed to complete the operation
Method 3: Using Disk Cleanup to Delete Unused Drivers from the Driver Store
Disk Cleanup tool (cleanmgr.exe) that also allows for deleting deprecated updates. To have this done, follow the steps below.
Run Disk Cleanup utility as shown below: 
This will open up the Disk Cleanup for the C: as shown below. Select “Clean up system files”

This will expand the Disk Cleanup option. You will notice a new “More Option” as shown below. Check Device driver packages in the list

Click on Okay. As you can see, I also selected another option to clear. This is absolutely up to you. Now, the Disk clean-up will delete all obsolete or unused driver versions.
Note 1: AFter performing this operation, be aware that the Rollback driver button in the Driver Properties tab of Device Manage will become inactive.
Note 2: You can also uninstall the printer driver via the Control Panel or Windows Settings through the uninstall program and features wizard.
I hope you found this blog post helpful on how to delete obsolete drivers from the Driver Store in Windows. If you have any questions, please let me know in the comment session.