

In this guide we will discuss “Azure DevOps: Docker and Kubernetes Deployment with GitHub”. That is show you how to dockerized an existing web application, put it in the source control, and get it deployed to Azure Kubernetes Service (AKS), and also set up a CI/CD pipeline. We will be looking at the integration between Azure DevOps and GitHub. Click here to learn more about Azure Kubernetes Service. The first thing we will do is to create the Kubernetes Cluster on Azure. Please seeCI/CD Pipeline: Your First in Azure DevOps with ASP.Net Core.
Kindly refer to these related guides: How to create and deploy a local Registry Server with Docker Image, how to Pull your first Nginx Container Image from Docker Hub and deploy it to your local machine, Azure DevOps and GitHub integration for Docker and Kubernetes deployment, how to create a static pod in Kubernetes, and how to install, register and start GitLab Runner on Windows.
To do so: Sign in to Azure Portal
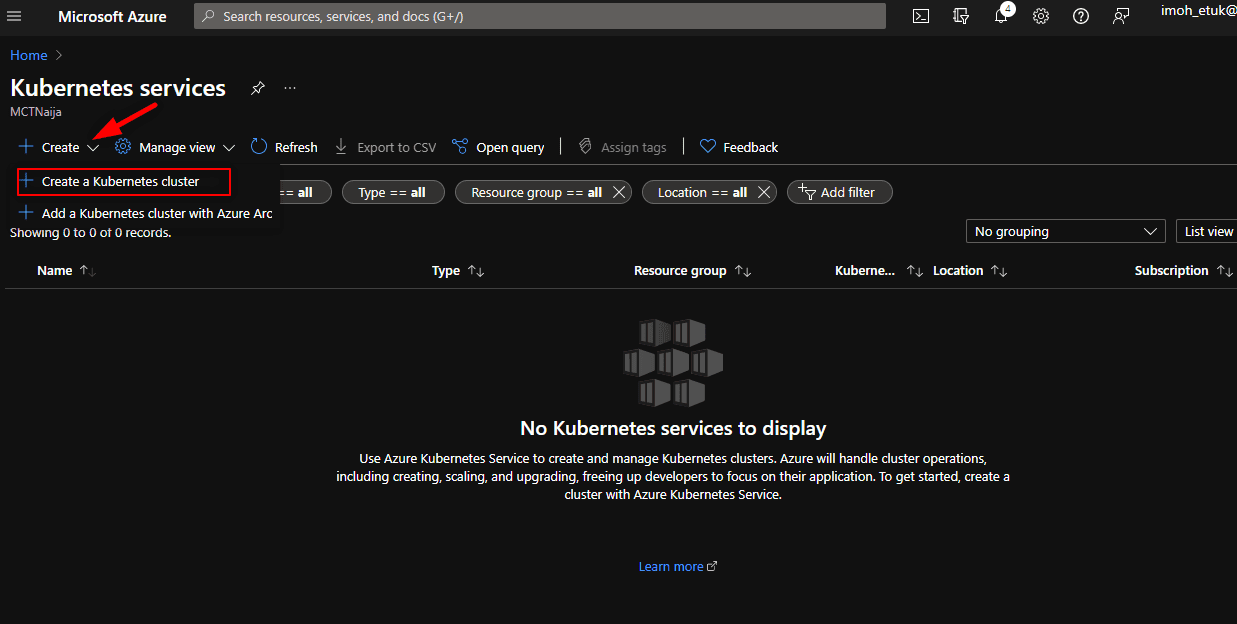
- Search for Azure Kubernetes Service
- In the horizontal search bar. See the screenshot below
3. Click on Kubernetes Services. Select create
4. Specify the cluster name and other information

Cluster Configuration and Availability Zones Azure DevOps
In my selection, the name of my cluster is akscluster the region is East US while I selected 3 Availability Zones.
Availability Zones is a high-availability offering that allows you to spread the nodes in your node pool across multiple physical locations, protecting your applications from datacenter failures.
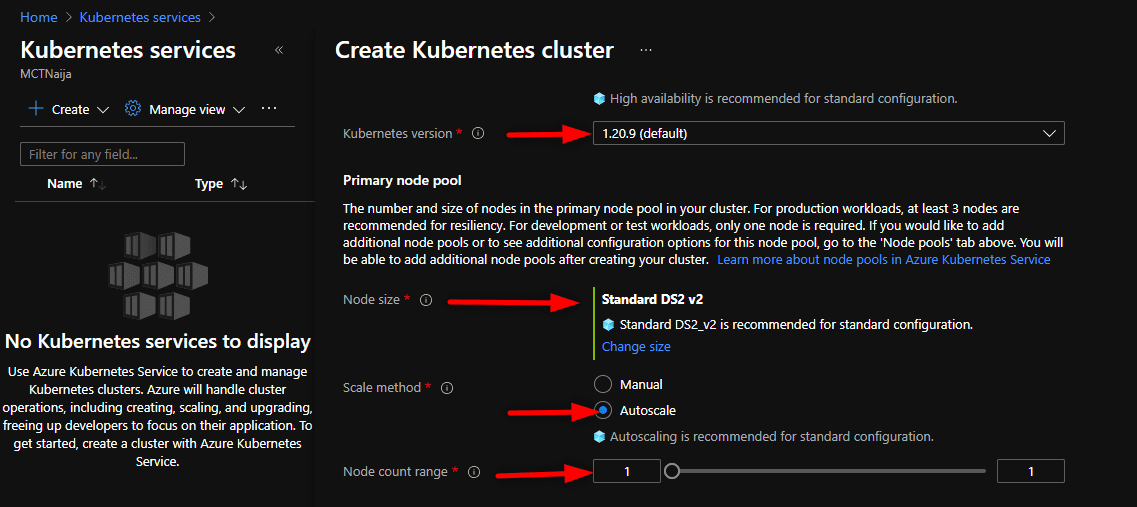
Next screenshot above shows you the node size which is the size of the virtual machines that will form the nodes in the cluster. This cannot be changed after creating the cluster. The scale method gives you the option of choosing between manual or automatic scaling for your cluster.
Autoscaling can help ensure that your cluster is running efficiently with the right number of nodes for the workloads present. Go ahead to choose the Kubernetes version (the version of Kubernetes that should be used for your cluster.
You will be able to upgrade this version after creating the cluster) and choose the node count range by setting the minimum and maximum node counts for your node pool.
Adjusting Node Pool Minimums: Considerations and Manual Scaling
You cannot set a lower minimum than the current node count in this node pool. If you want to set a lower minimum node count, you will need to manually scale down the cluster first.
Note:
Increasing the number beyond the maximum allowed node counts for your subscription will throw an error message of (The maximum node count you have selected is higher than the remaining quota for this subscription. Autoscaling may fail above 10 nodes due to quota restrictions 20 cores remaining).
5. Click on the Create + Review button and review and create your AKS. See the screenshot below:

6. Finally, click Create to create your AKS
Having created the AKS on Azure Portal, the next is to start out all the procedures necessary to ensure the successful deployment of Azure DevOps and GitHub Integration for Docker and Kubernetes deployment.
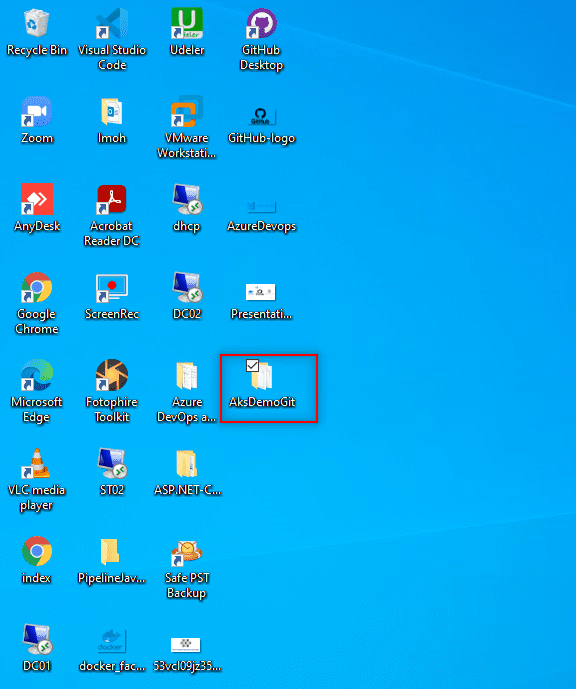
The first to do is to get my code ready in my local system. I will do this by creating a folder called "AksDemoGit" on my Desktop screen. See the screenshot below;
See How to Install Azure DevOps Server 2022, How to Integrate SonarCloud with Azure DevOps Pipeline, and Azure CI/CD: Configuring Email Notifications in Azure DevOps.
Code Integration and Visualization with Visual Studio Code (VScode) Azure DevOps
Next, I will add my code to the folder and open it with Visual Studio Code (VScode). As shown in the screenshot below. Take your time to access the code in Dockerfile and the YAML files.

The steps below will be applied to get our code pushed to GitHub. The reason why we are pushing our codes to GitHub is because we will be building our CI/CD Pipeline in Azure DevOps this time around with our codes hosted remotely on GitHub.
In one of my previous guides, I talked about how you can build CI/CD Pipeline with codes in your local system. In case, you didn’t read it, you can read now how to build your first CI/CD Pipeline in Azure DevOps using ASP.Net Core Application
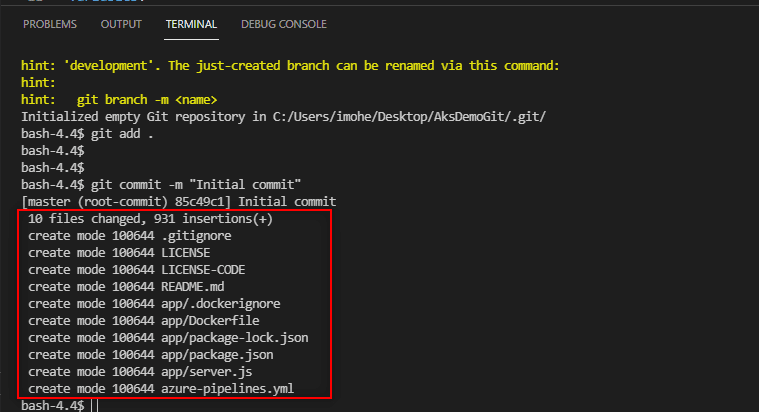
Open a Terminal in your VScode or any of your favourite IDE in the "AksDemoGit" folder directory and run git init to initialize the local repository -> run git add . to add all the files -> commit the files by running git commit -m command followed your commit message.
Here I added my commit message as "Initial commit" See the below screenshots for more info!

Creating a Remote Repository on GitHub
The next thing to do is to go to Github and create a remote repository. Here, I am using AksDemoGit as the name of my repository. Do this by clicking on the Plus + sign beside your GitHub profile picture and select"New repository" as shown on the screenshots below.
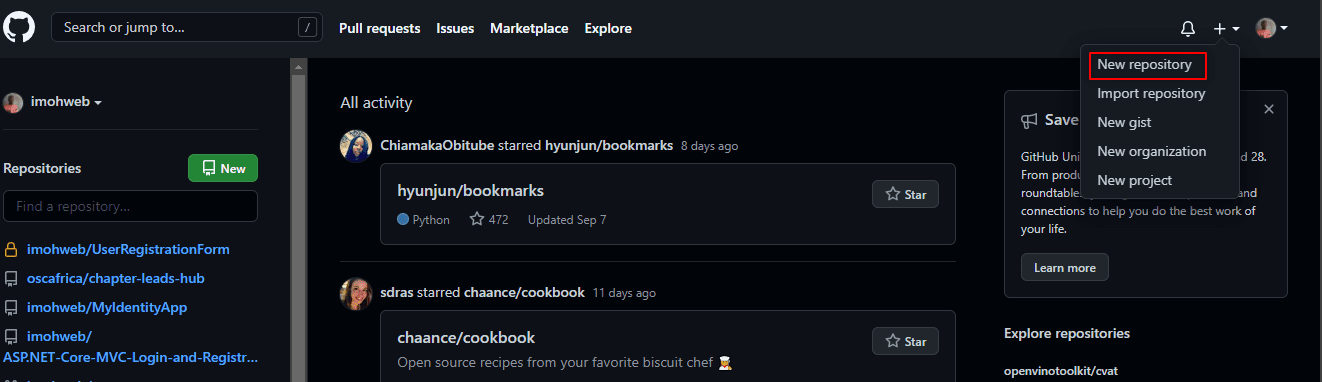
Take a look at the below screenshot to see the name name of my repository. Supply yours by choosing what you desired as a repository name and click on "Create repository" to have it created for you.

Having created our repository, the next thing is to add the remote repository to our local repo using git remote add origin https://github.com/imohweb/AksDemoGit.git. You do this by copying the remote repository URL from your GitHub account. See the screenshot below.

Run git remote -v to check what you have just done to make sure you’re on track. Things are all done correctly here that’s it

Verifying Remote Repository Setup and Pushing Code
Now that you have added the remote repository, run the git remote -v command to check what you have just done to make sure you’re on track. Things are all done correctly here from the above screenshot. That’s it!
The next thing is to push the code to the remote repository. To do that run git push -u origin master. As shown in the below screenshot, our code is successfully pushed to the remote repository. Take time to inspect it.

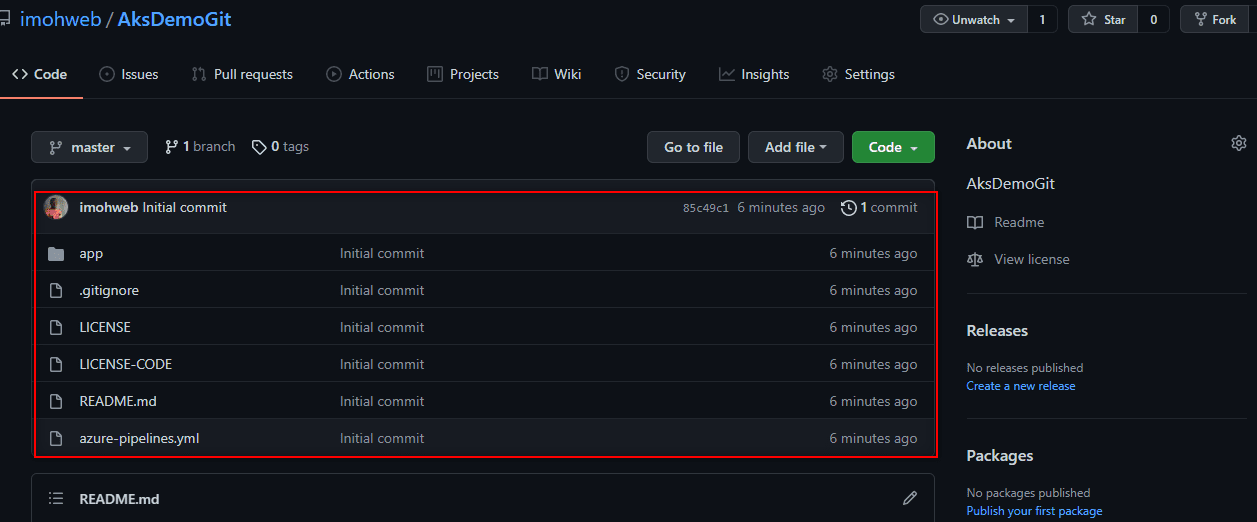
Now it’s time to refresh your GitHub Repository to see the codes you just pushed. See the screenshot to see that my codes are right there.
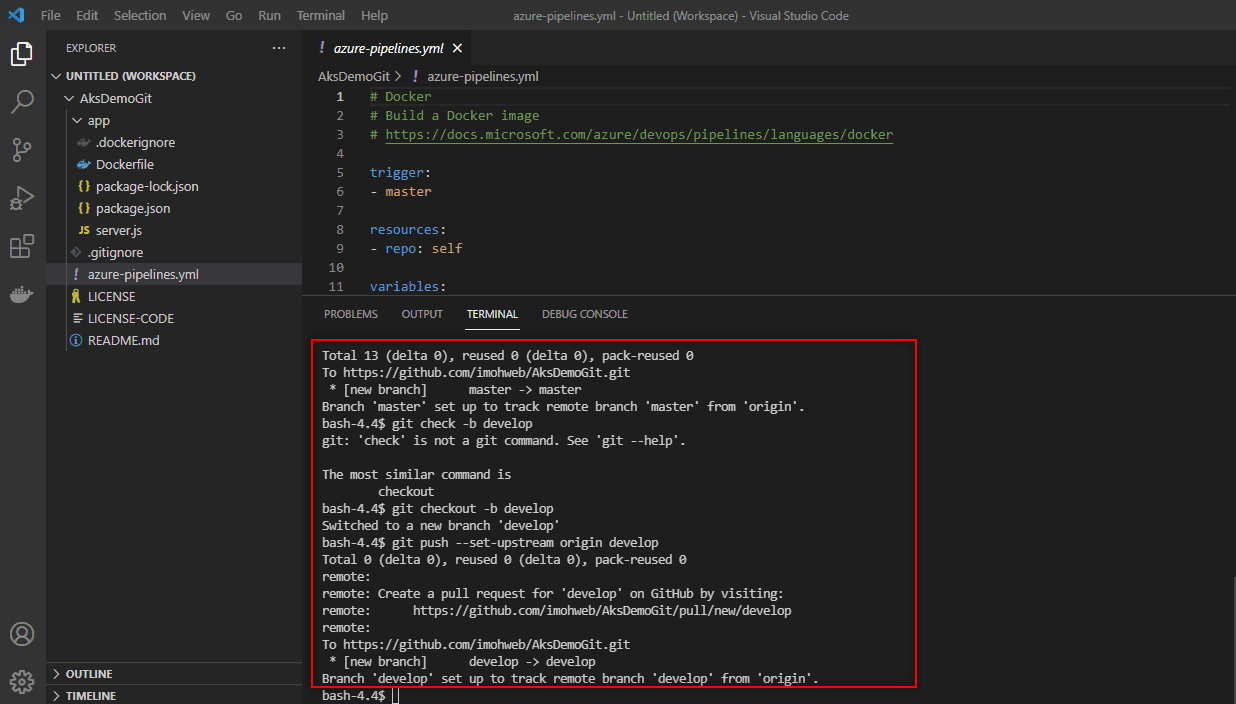
Now that our codes are seated on GitHub repo, I will go ahead and create a branch by running git checkout -b develop to create a new branch named "develop".
Next, set the upstream by running git push --set-upstream origin develop. The screenshot below has more details on this.
Branch Selection and Its Role in the Pipeline Process Azure DevOps
We are going to be working off the develop branch for now. I will tell you why when we get to the pipeline stage.
So the next thing we want to do is to create a project in Azure DevOps signing into Azure DevOps
The steps to create Azure DevOps project are simple. Create Azure DevOps Organization first if there is no existing one and then create Azure DevOps Project.
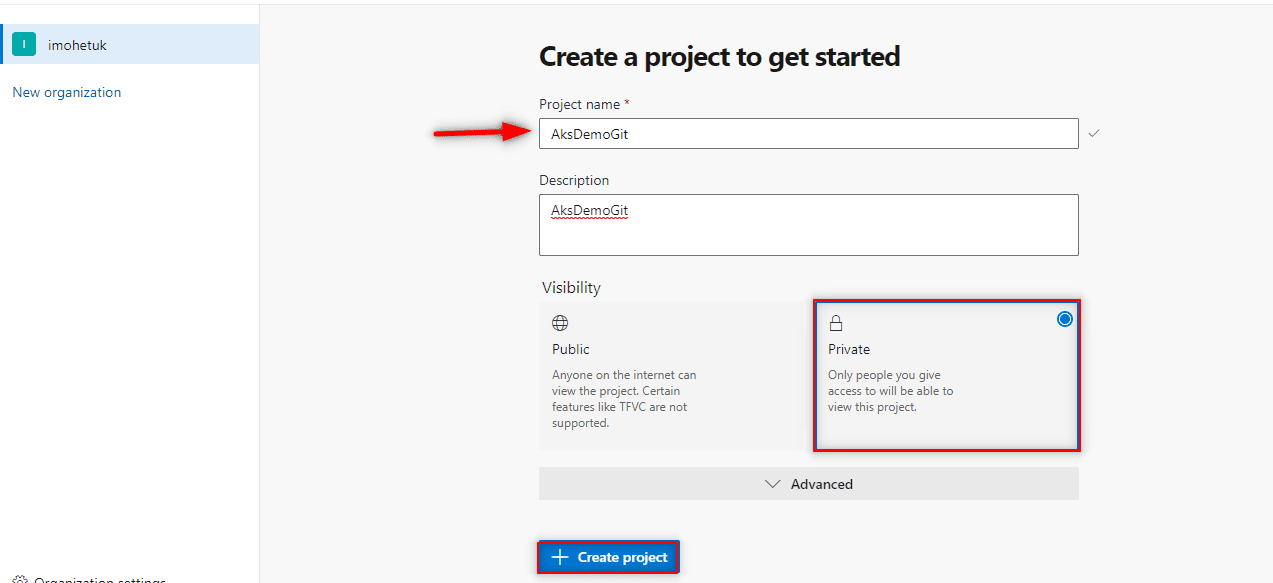
To learn more about Azure DevOps Organization and Project see related guide. See the below screenshot to see the name of my project. I still retain the name as AksDemoGit. Supply the name of your project and make it Public or Private. Here I chose Private as an option and then, click Create project.
Integration between Azure DevOps and GitHub
Next thing is to create Personal Access Token on GitHub and use it to establish connect between Azure DevOps and GitHub. To do so, head to your GitHub account -> Profile Icon-> Settings -> Developer Settings-> Personal Access Token -> Generate Token. The below screenshot explains more.

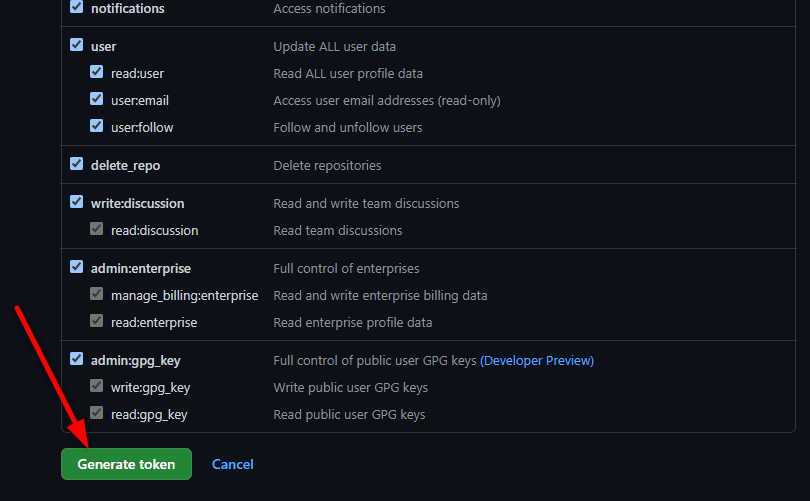
From screenshot below, I have supplied the name of my PAT and gave the maximum permission necessary. Feel free to do the same and click on Generate token when you’re done. Your PAT will be generated for you.
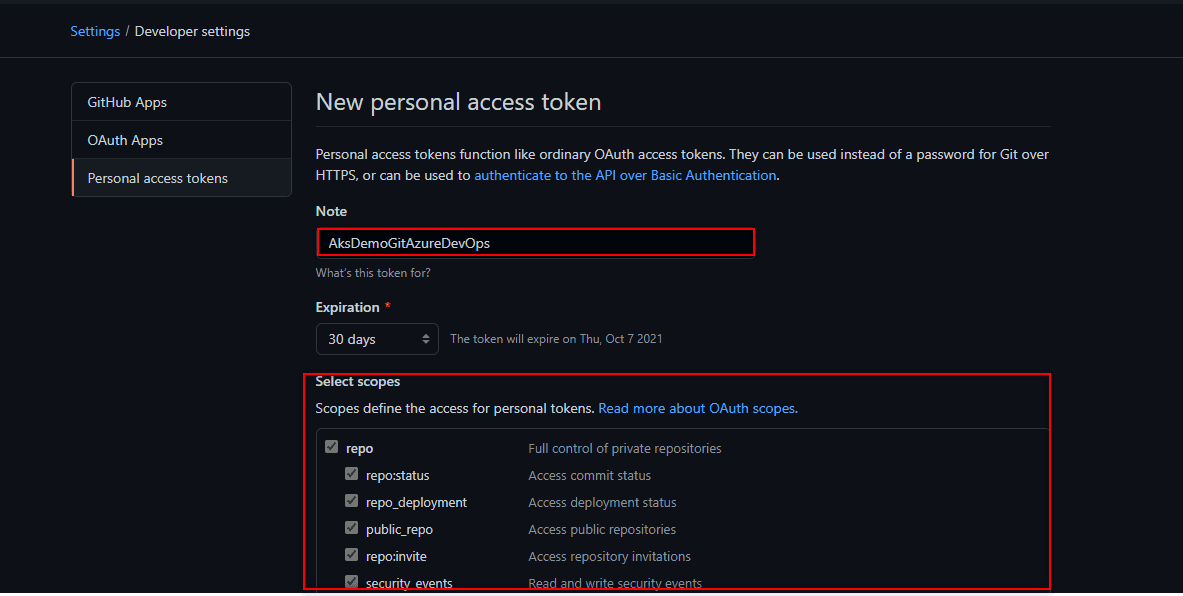
Step to Create PAT on GitHub
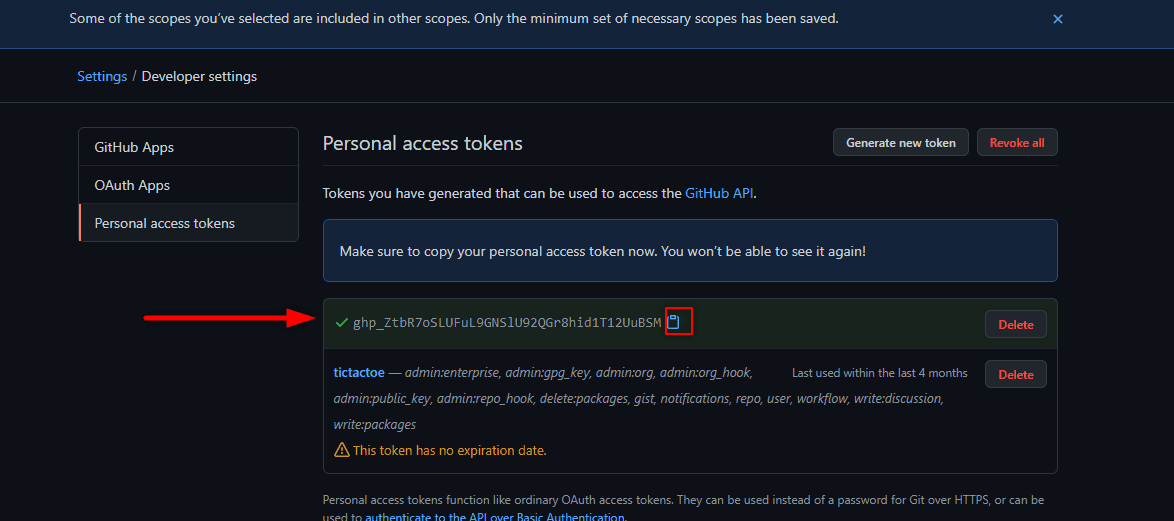
Next, you will copy out the generated token and go to Azure DevOps project as shown on the screenshot below;
Connecting Azure DevOps to GitHub: Setting Up the Integration
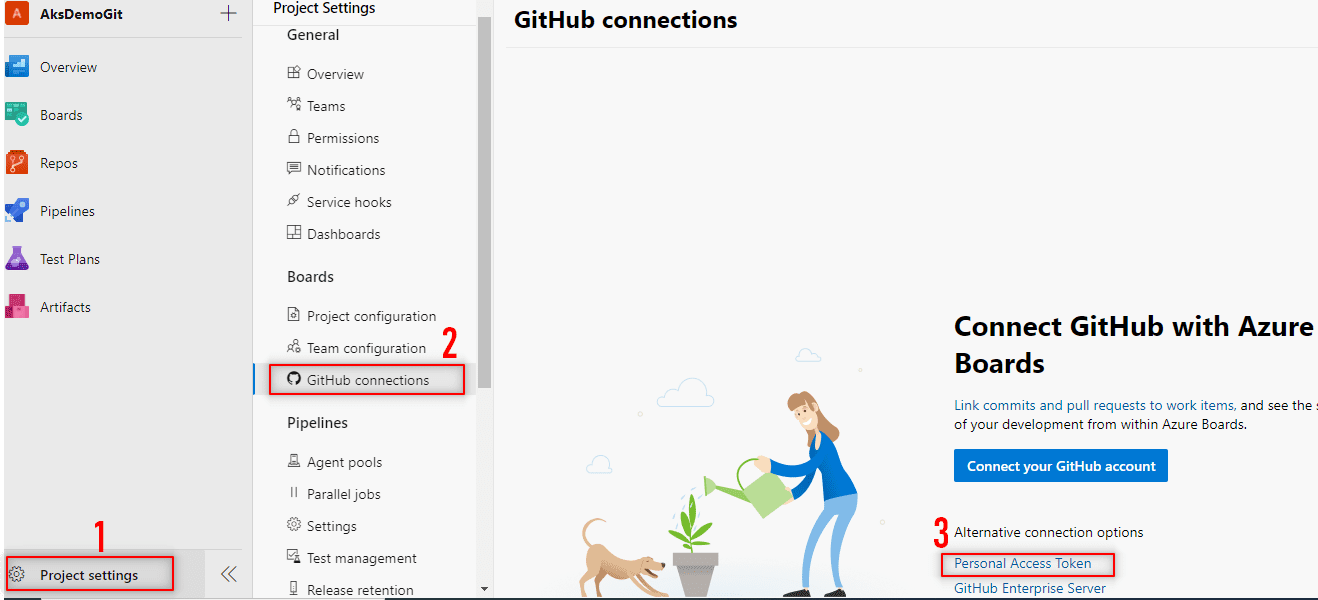
Now head to your Azure Project and create the GitHub connection by following these steps: Click on Project Settings -> GitHub Connection -> Personal Access Token -> Paste the PAT copied from GitHub -> Save. See the below screenshots for more explanations.
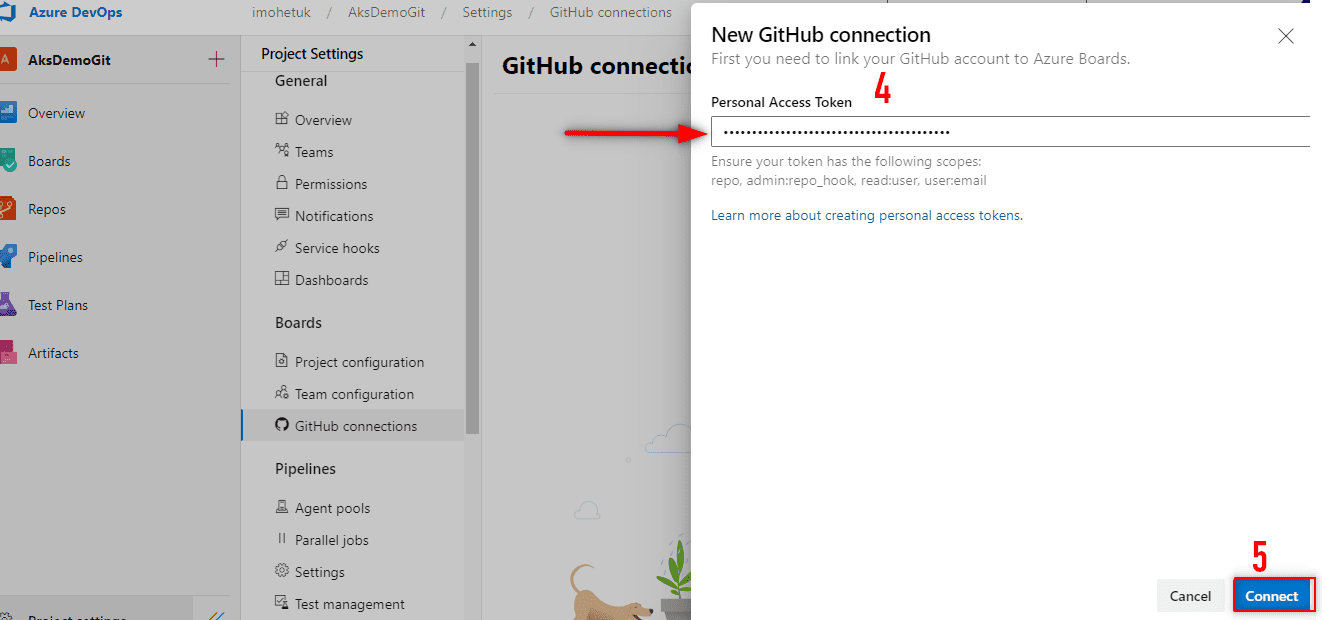
After clicking Save, you will be prompted to choose your GitHub repository. Choose exactly the same one you have your code in and click Save as shown in the screenshot below.

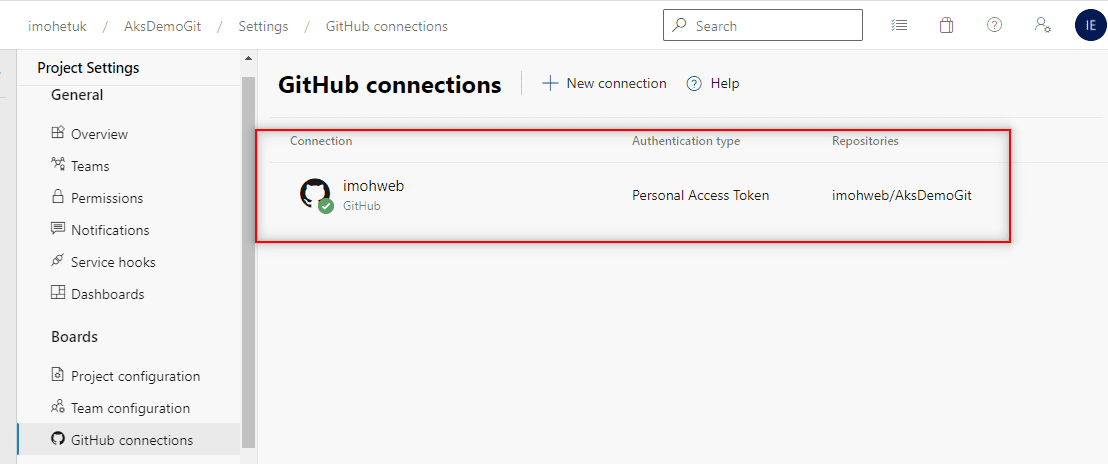
Now we have established a connection between GitHub and Azure DevOps Project. The screenshot below shows that my connection is perfect.
Create Namespaces and resources on Azure DevOps: Now its time to create namespaces and resources in Azure DevOps Project. We will be creating the following environment and resources.
- Dev – The dev environment is where changes and updates are pushed to other deployment environment
- Quality Assurance (QA) – The QA environment is the one where the testing of the code takes place. This environment is owned and managed by the QA team.
- Staging – Staging environments are made to test codes, builds, and updates to ensure quality under an environment that’s similar to the production environment before application deployment.
- Production (Prod) – This is where the latest versions of software, products, or updates are pushed live to the intended users. Think of it as a final phase of production. This is the environment where the end user can see, experience, and interact with the new product.
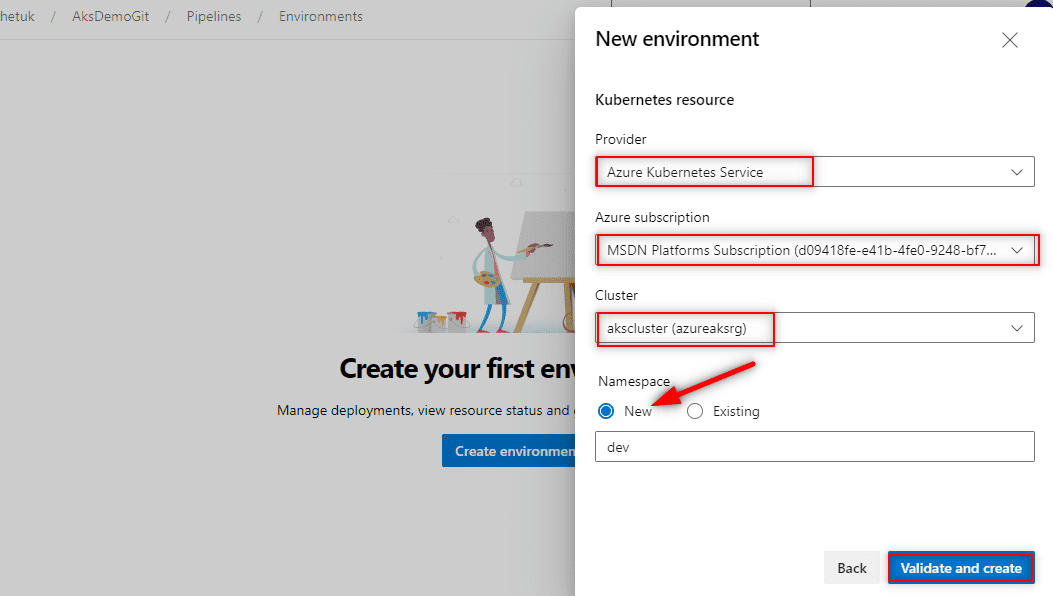
Go back to the Azure DevOps Project and click on Pipelines -> Environment -> Create Environment -> Name of the environment(we want to create the dev environment first) -> Add the description and then select {Kubernetes} because we are going to be deploying to Kubernetes -> Create -> Next. Choose Azure Kubernetes Service as provider, remember we have already created our Kubernetes Cluster on Azure. You will be prompted to sign into the subscription you want to use, update the right subscription and click on "Validate and create"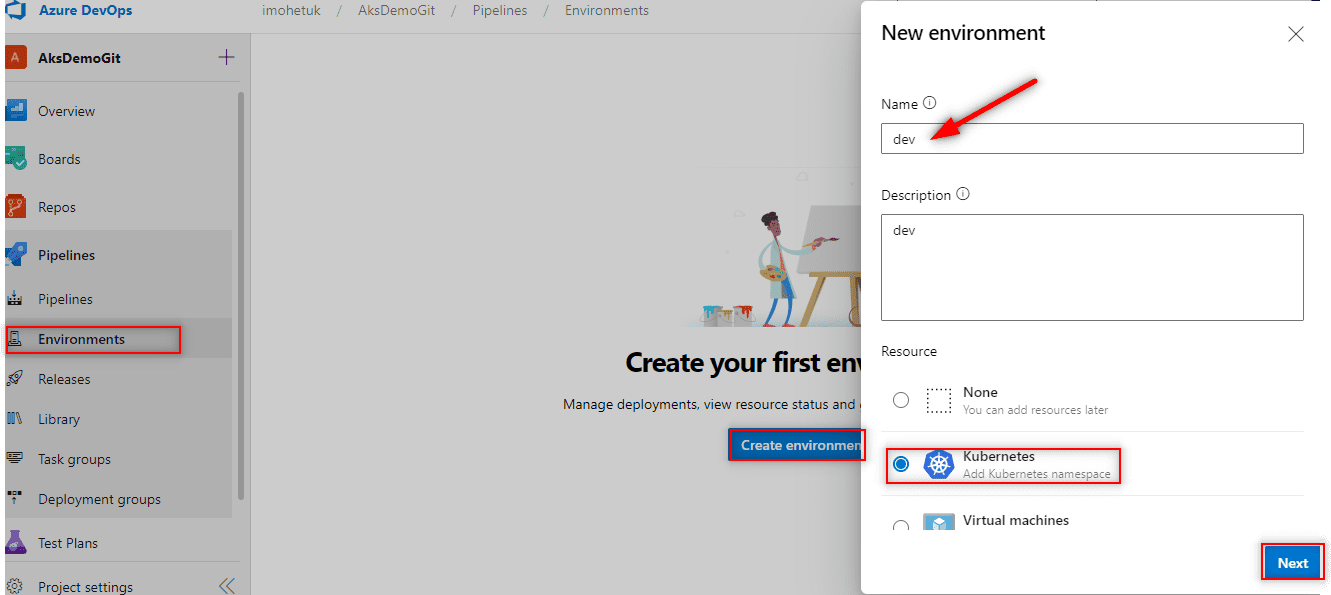
Congrats! You have created your first environment. Now go ahead and repeat the above steps for the remaining environments.
Creating an Azure DevOps Container Registry for the Environment
Having created all the environment required, there is one more thing we are going to create but before doing so we have to create Azure Container Registry on Azure Portal.
To do so, search for Container registries in the horizontal search bar at the top of the Azure Portal. See the screenshot below;
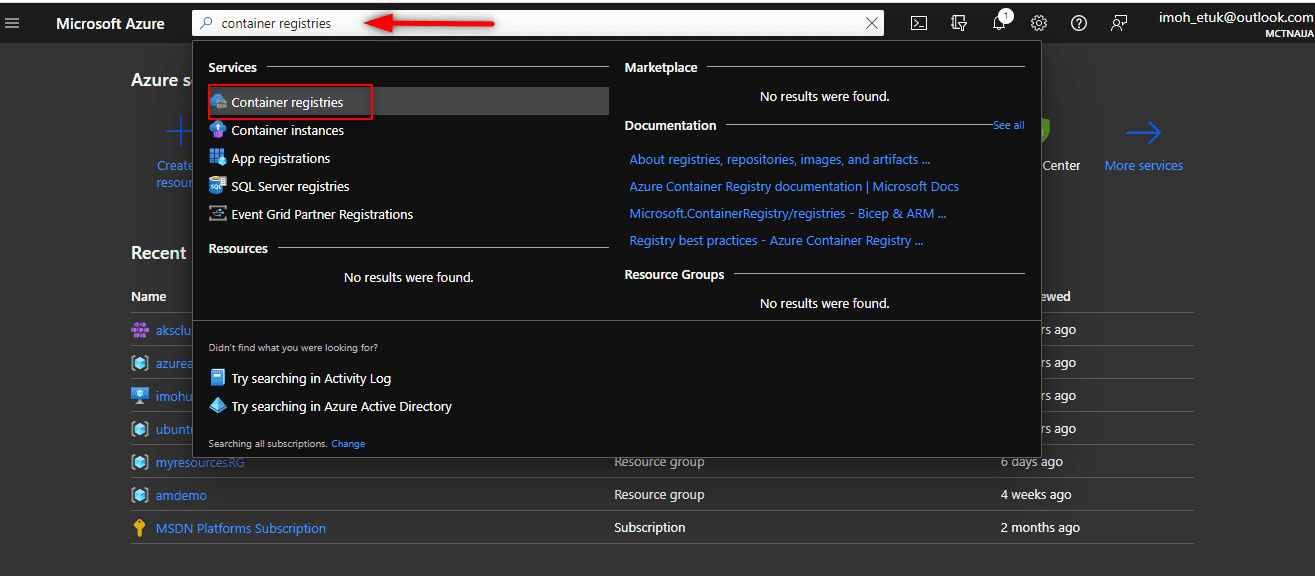
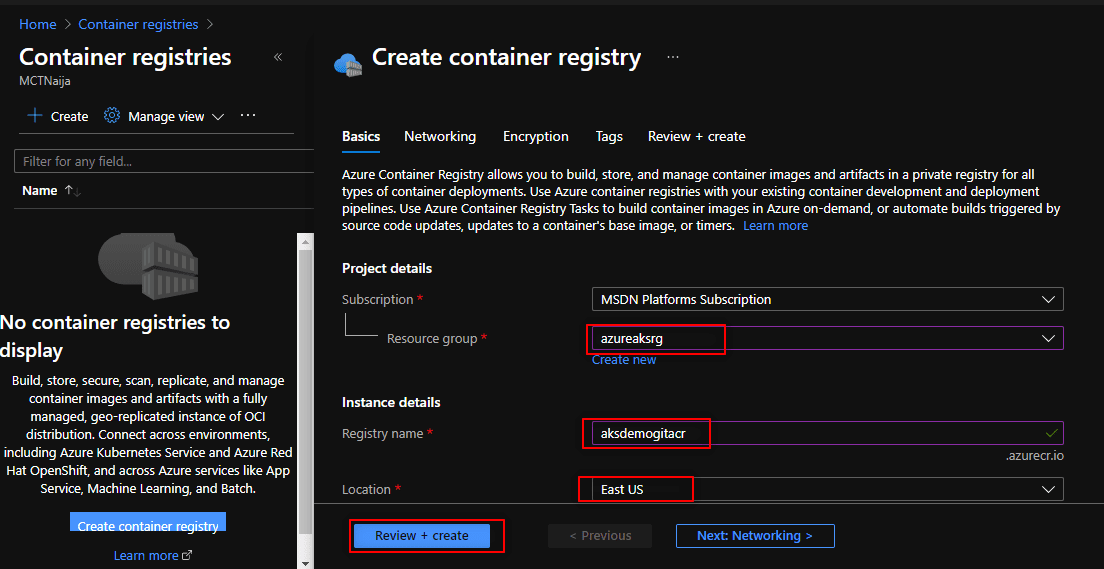
Supply all the required information. As you can see from the screenshot below, the name of my Container Registry is aksdemogitacr.
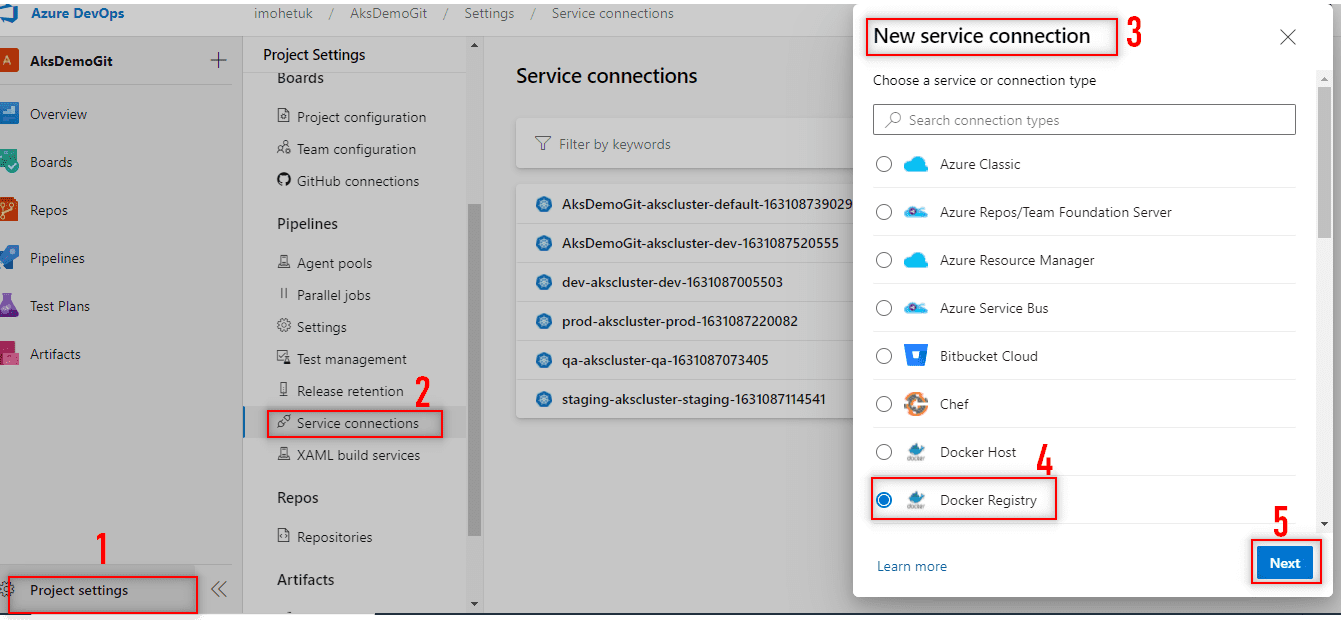
One more thing to create is the Service Connection for Docker. To do so, navigate to the project settings -> Service Connections -> New Service Connection -> Docker registry -> Azure Container Registry -> Select the name of the Azure container registry you just created in Azure -> Supply the name for your Docker Connection, remember to check "Grant access permissions to all pipelines" and click Save. See the screenshots below for more details.

You can go to your Azure DevOps Project to check the repo to show that there is no code in there before running the Pipelines. See the below screenshot to see that the repository is empty.

Create Pipeline
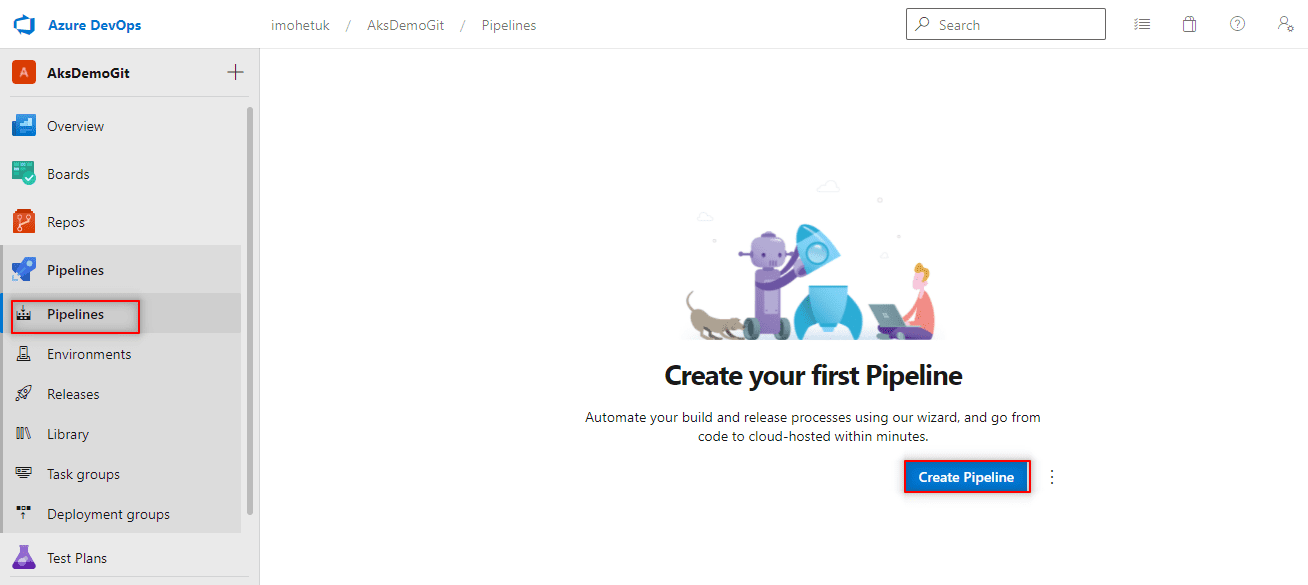
The last thing to do to wrap up the whole process is to run our pipelines Azure DevOps. To do so, follow the steps below:
- Click on Pipelines in your Azure DevOps Project
- Click
Create Pipeline
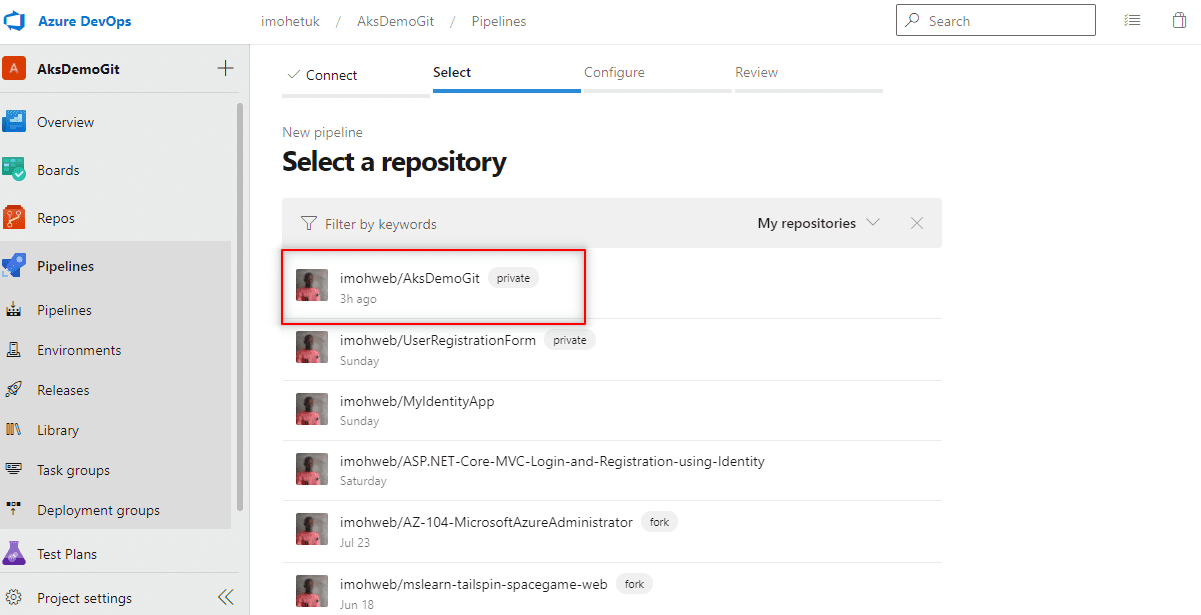
Select the location where you have your code, that’s GitHub

The below screenshot shows the selected GitHub Repo that my Pipeline will run from.
Once the code location has been selected, Azure DevOps will automatically configure the YAML files for your review as shown in the below screenshots. Review the YAML files and click Run when done to get your pipeline running.
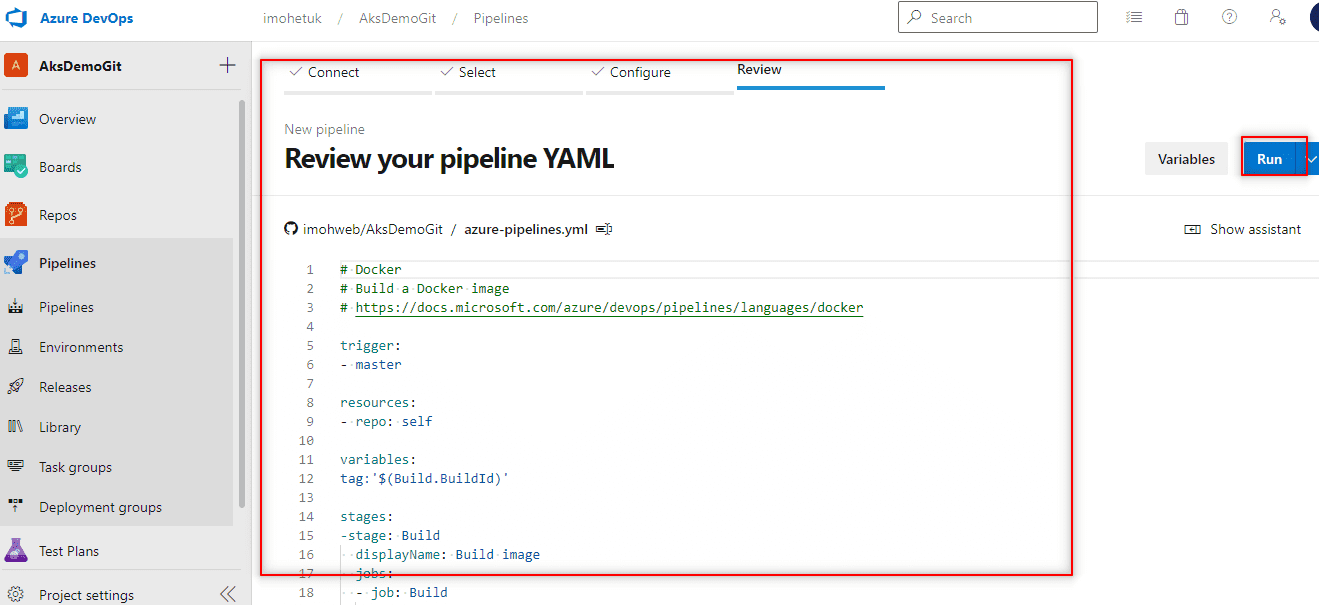
As soon as you click on the run button as shown above in the screenshot, your pipeline will start running automatically across all the environment created above.
In conclusion, in this guide you have learned about how to create Azure Kubernetes, Azure container Registry, set up Personal Access Token (PAT) on GitHub to establish the connection, create deployment environments and run your pipeline across the environments.
I hope you found this guide useful on Azure DevOps: Docker and Kubernetes Deployment with GitHub. Please feel free to leave a comment below.