
In this guide, we will install the NFS Server on Windows Server. NFS stands for Network File System and it applies to Windows Server 2022, Windows Server 2019, Windows Server 2016, Windows Server 2012 R2, and Windows Server 2012. We are installing and configuring it on Windows Server 2019. Nevertheless, you are free to use any version of Windows Server. In this article, we shall discuss Network File System: How to install NFS Server on Windows Server. In this guide, I will discuss “Network File System: How to install NFS Server on Windows Server”.
Furthermore, NFS is an efficient way to share a directory with other client machines in your organization. You can use it as a central repository that can be mounted to clients so they are able to access similar files as though they were part of the system. Please see how to fix “Failed to open session in VirtualBox to install Windows 11 Image” and how to install and upgrade Docker Engine from binaries on Windows Server.
Note: Network File System (NFS) provides a file-sharing solution that lets you transfer files between computers running Windows Server and UNIX operating systems using the NFS protocol. This topic describes the steps you should follow to deploy NFS.
Network File System
To get the NFS setup, we will do the following:
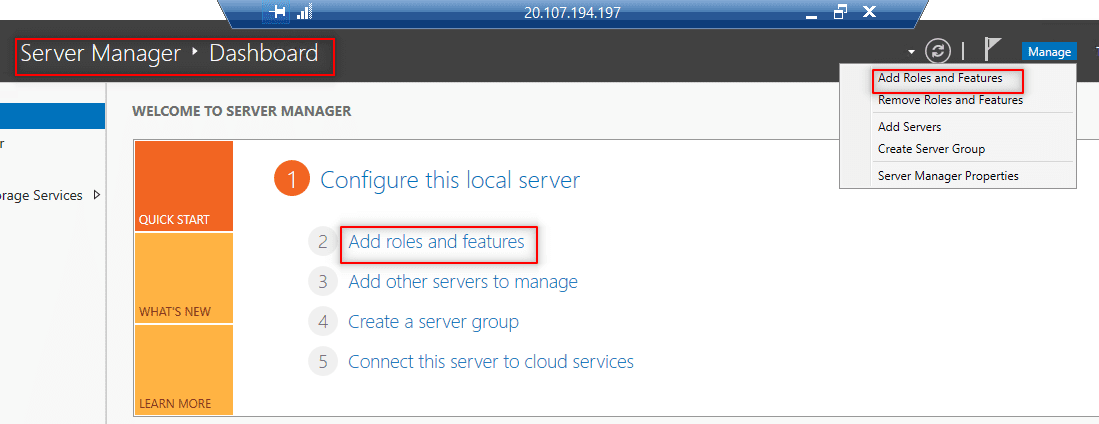
- First Launch the Server Manager.
- Then the Role-based
- Choose NFS Server (Host)
- Select Server Roles
- Features
- Confirm and Install
- How to Connect to NFS Server on Windows Server NFS Server’s Share using umount.exe
- Confirm the share in File Manager
Firstly, Launch Server Manager. Click on Add Roles and Features and click Next on the wizard.
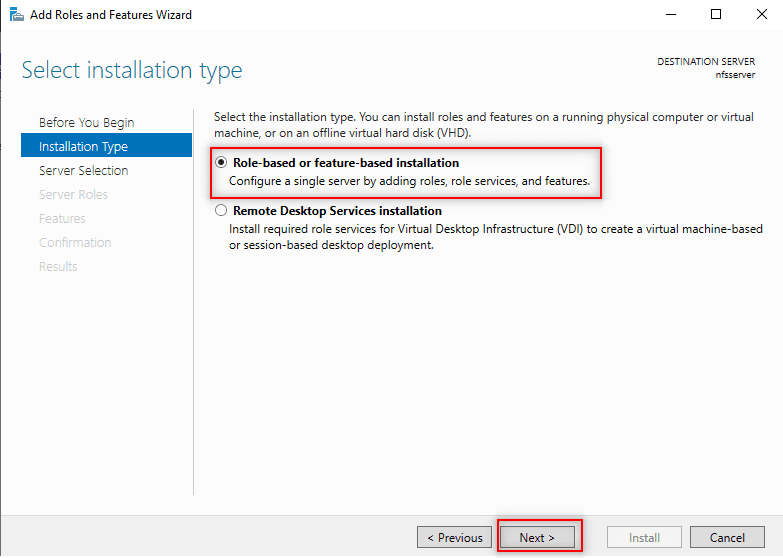
2. Secondly, on the Select Installation type page. Select Role-based or feature-based installation and click Next.
3. Thirdly, select the server or host you will like to install NFS on. Then click Next. Our Server or the hostname is nfsserver from the screenshot below.

You also check out the following guides: How to block upgrade to Windows 11 through Local Group Policy or Registry Editor from Windows 10, how to upgrade Windows 10 with an unsupported CPU and TPM 1.0 to Windows 11.
Select Server for NFS Role
4. Fourthly, in this Select Server roles part, expand the File and Storage Services options. Select File and iSCSI Services. Ensure the server for NFS is selected as highlighted below in the screenshot click Next.

5. Also, in this Select the features page, check the Client for NFS box. Then click Next.

6. Also, confirm and install – Confirm your installation selections and click on install to install on the NFS Server.

NFS Server Role installed
Let it finish installing then click Close and you will have finished the NFS Client installation process.

7. When Installation is complete. You may now click the close button and do nothing more!
Finally, with the help of this ultimate guide, we’ve been able to install the NFS Server on a Windows Server.