

Azure is a Public Cloud Platform provided by Microsoft. It provides Infrastructure as a Service (IaaS), which is a cloud-based virtualization platform. In addition, Azure also give users the opportunity to benefits from their Platform as a Service (PaaS) and Software as a Service (SaaS) Cloud-models. In this post, we are going to learn about how to manage all aspects of Azure Virtual Machine with Windows Admin Center and Serial Console. Please see How to find Computer Model and Serial Number, and how to Apply and Enable Automatic Windows Admin Center Update.
Windows Admin Center is a lightweight browser-based toolset used by IT Admin to manage all aspects of your Windows 10, 11, Servers, Clusters and Hyper-Converged infrastructure through a web browser.
This allows you to be able to access the system properties including networking, Remote Access, and a lot of endless administrative management possibilities for your Virtual Machines.
Windows Admin Center can also be installed on Windows 10 or Windows 11 and they will serve as a trusted host. See how to Install Windows Admin Center on Windows 10 & 11. You may also be interested in learning about the following how to fix CPU at 100% when nothing is running problem on Windows, how to Disable Or Enable Secure Boot on Windows 10 & 11, and how to Solve “The parameter is incorrect” problem on External Hard Disk in Windows.Install Windows Admin Center
To get started if you want to install Windows Admin Center on you PC and use it to manage your Virtual Machines on Azure, head to Microsoft Evaluation Center to download the MSI installation file.
You can simply use Windows Admin Center to manage your VMs on Azure via the blade of the Virtual Machine that you wish to manage with it as shown in the screenshot below.

In this write, we will use the two connection methods that are connecting to our VM via the Virtual Machine blade on the Azure portal and the manually installed Windows Admin Center on our Windows 10 PC.
Connecting from Windows 10 PC On-Premises
We have the Windows Admin Center installed already and the certificate configured. Note the default connection port is 6516. You can change this to any port number of your choice during setup installation.

After the certificate has been configured, we launch straight to the Windows Admin Center Interface

The next thing is to add our VM hosted on Azure. You can add an existing VM or Create a new one. We’re going to add an existing VM.

Next is to authenticate with the Azure account that’s associated with the Azure VM you wish to add.

After the authentication is successful, the active subscription on your Azure Account will load up automatically. You will need to select the Resource Group that holds the Azure VM to bring up the name of your VM.
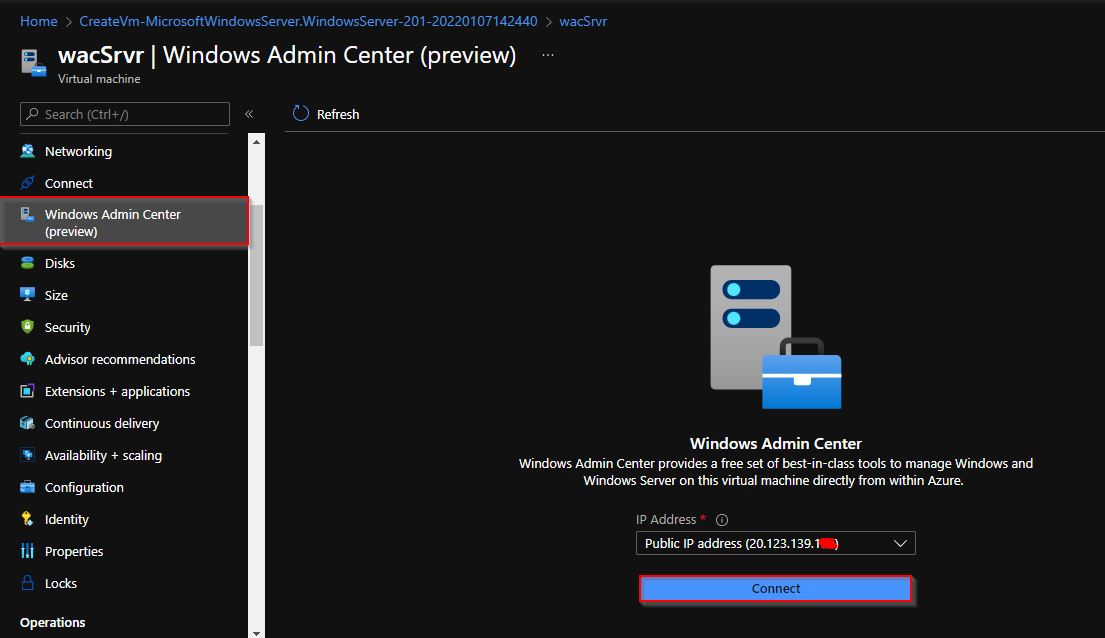
Select the name of the VM you wish to connect to if you have multiple VMs, and then select public IP Address.

From the above screenshot, the connection is established as shown in the below screenshot.

Now that we have successfully connected our VM, we can go ahead and manage the Virtual Machine right within the Windows Admin Center.
Connecting via the Virtual Machine blade on the Azure portal
Now, let’s establish a connection to enable us to manage our Azure VM with Windows Admin Center via the Virtual Machine blade within Azure Portal.
You will need to check the “Open this port for me (Recommended for testing only)” and Open an outbound port for WAC to install. Please note the first option is only recommended for testing purposes as shown in the screenshot below.

When you click the installation button, the outbound port will open and thereafter install the Windows Admin Center and take you to where you can connect to your VM as shown in the screenshot below.
The next screen will be to supply your the login credentials to your Virtual Machine.

Now we can access all the VM properties and manage it the way we want it

Having talked about managing your Azure VM via Windows Admin Center, let’s go ahead and look at managing your VM with Azure Serial Console.
What is Azure Serial Console?
Microsoft recently announced that the Azure Virtual Machine Serial Console is generally available in global Azure regions.
With this feature, we are being able to access the Virtual Machine (Windows or Linux) via a text-based console, which is connected to the COM1 virtual machines port.
Prerequisites for using Azure Serial Console
1: Azure Serial Console is ONLY available in ARM resources and NOT in ASM (Classic)
2: Boot diagnostics MUST be enabled
3: To access this feature from the Azure Portal, the account MUST have contributor role.
4: The VM which want to access using the Azure Serial Console MUST have a password-based admin account.
Note: Serial Console Supports Ctrl + Shift + C and Ctrl + Shift + V to copy and paste into the terminalWhy use Azure Virtual Machines Serial Console?
To better understand how we can use this serial console we will deny connection to port 3389 Remote Desktop Protocol (RDP) under the networking section of the VM blade.

Denying the RDP connection will prevent any Remote Desktop Connection to our Virtual Machine. This is when the Serial Console connectivity comes to play.
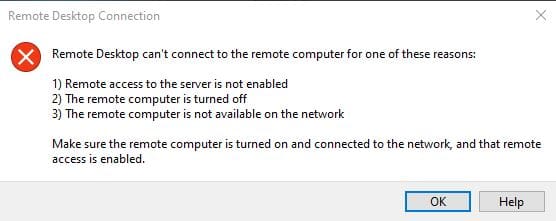
After disabling the rules, we try to access the Virtual Machine via RDP.
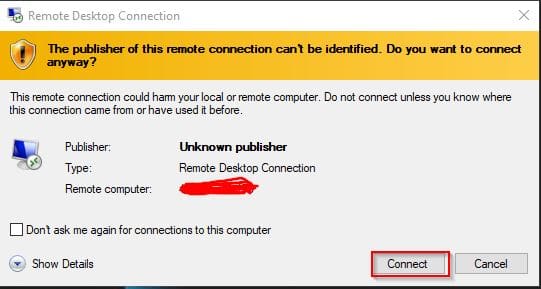
Of course, we’re all aware of the well-known error message we usually get whenever we cannot establish RDP connection
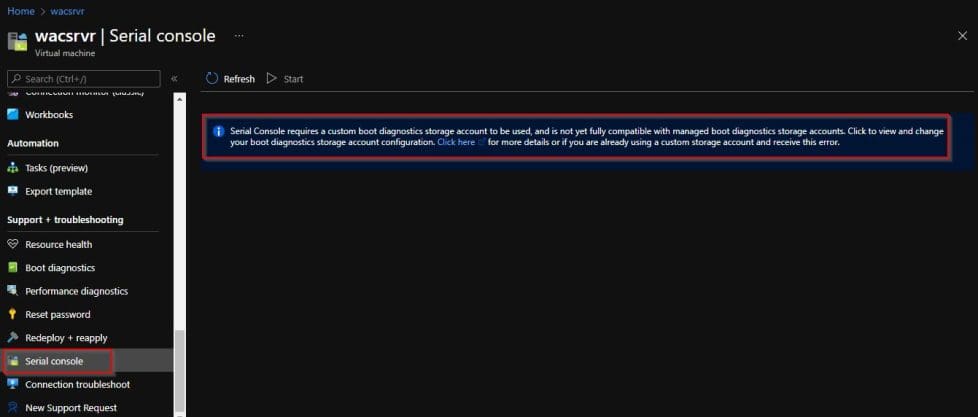
Now the solution is to simply to use the Serial Console to be able to connect to our VM. To do this we first open the Azure Portal in the Virtual Machine main blade and select the Serial Console under the Support + troubleshooting tab.
When you first open the Serial Console you would be prompted with the message that:
Serial Console requires a custom boot diagnostics storage account to be used, and is not yet fully compatible with managed boot diagnostics storage accounts. Click to view and change your boot diagnostics storage account configuration. Click here for more details or if you are already using a custom storage account and receive this error.Setting up a Custom boot Azure Virtual Machines diagnostic storage account.
To do this, click on the instruction message as shown in the previous screenshot and select the Enable with custom storage account.
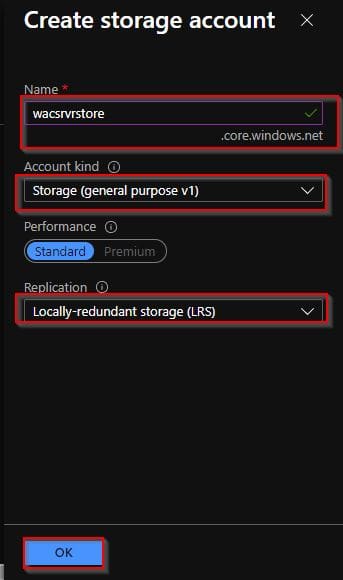
This will prompt for a diagnostic storage account, select an existing one if any if not click on create new to create a fresh one as shown on the screenshots below.

Create a storage account
The Serial Console will open up as shown below:

From the above screen, we can now log into our VM using the admin username and password.
To do so click the buttons Esc + Tab and we are ready to log in using the windows credentials. Type Username, Domain (if any), Password, and press Enter.

After we log in we have access to the VM, and we are able to run commands via cmd. For demo purposes, we need to disable the Windows Firewall by executing the following command,
NetSh Advfirewall set allprofiles state off
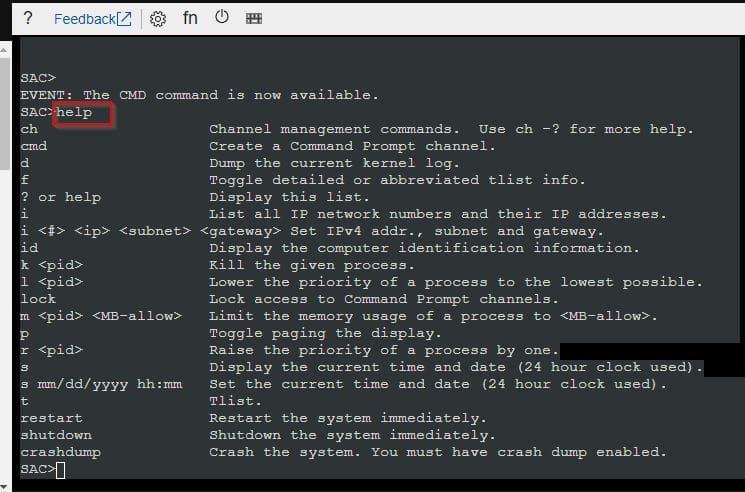
The screenshot below shows a bunch of commands you can use to manage you VM. You can get these commands by simply typing help in the serial console.
I hope you found this blog post on how to manage Azure Virtual Machine with Windows Admin Center and Serial Console helpful. If you have any questions, please let me know in the comment session.