

Group Policy Objects is a unique administrative tool that comes with Windows Server Operating System. Apart from having it available on Windows Server. There is also standalone Group Policy Objects accessible through the local group policy on Windows 10, 11, and other versions of Windows Operating System. In this post, you will learn “how to create, configure and apply Group Policy Objects on Windows Server 2019″Desktop Wallpaper and Screen Saver Management: Configure and apply Group Policy Objects on Windows Server”. Please see how to Configure Network Load Balancing In Windows Server. Also, see how to Install Web Server IIS in Windows Server 2019.
It is expected that at the end of reading through this post, you will be able to implement GPO in your workplace. Please see how to install Network File System: How to install NFS Server on Windows Server. How to install and configure an FTP Server on Windows Server, and how to install Windows Server 2022 on VMware Workstation.
What is Group Policy Object?
Let’s now get started by understanding the meaning of GPO. The Group Policy feature of Windows Server operating systems has served as the only feature that helps administrators to centrally define, create and then deploy infrastructure across other computers in their organizations.
In other words, Group Policy essentially provides a centralized place for administrators to manage and configure operating systems, applications, and users’ settings. Group Policies, when used correctly, can enable you to increase the security of users’ computers and help defend against both insider threats and external attacks.
In Windows Operating Systems such as Windows 8, 8.1, 10 and 11, Group Policy usually serves as a handy feature that lets you control your accounts and customize the advanced settings that you cannot access via the Settings app. You can work with Group Policy through a convenient interface called Local Group Policy Editor.Microsoft provides a program snap-in that allows you to use the Group Policy Management Console (GPMC). The selections result in a Group Policy Object. The GPO is associated with selected Active Directory containers, such as sites, domains or organizational units (OU).
The GPMC allows you to create a GPO that defines registry-based policies, security options, software installation and maintenance options, scripts options and folder redirection options.
Types of Group Policy Objects
There are three major types of GPOs: local, non-local, and starter.
- Local Group Policy Objects. A local Group Policy Object refers to the collection of group policy settings that is only applicable to the local computer (that is, computers that are not on Domain) as well as to the users who log on to that computer. They are used only when policy settings need to apply to a single computer or user. Local GPOs exist by default on all computers with Windows Operating System.
- Non-local Group Policy Objects. A non-local group policy object is used when policy settings have to apply to one or more Windows computers or users. Non-local GPOs apply to Windows computers or users once they’re linked to Active Directory objects, such as sites, domains or organizational units.
- Starter Group Policy Objects. Introduced in Windows Server 2008, starter GPOs are templates for Group Policy settings. The Starter GPO enables the administrator to configure and deploy a new GPO from a pre-configured GPO templates. It helps to retain some specific policy settings that may serve as best practices for your environment.
Impact of Group Policy Object on Data and Network Security
Some settings in the Group Policy can help secure a company’s network. Group Policy enforces resource restrictions and sets domain-wide screensavers using scripts.
Some of the security measures you can put in place through the GPO include:
- Disabling Command Prompt – Company utilizes Command Prompts for user access and system bypass. That’s why it’s prudent to disable Command Prompt to ensure the security of system resources. Disabled Command Prompt shows system message on attempted access.
- Preventing the Editing of GPO Settings – Admins restrict user registry access via GPO: Enable ‘Administrative Template Policy Definition’ node.
- Limiting access to Control Panel – Admins manage users’ computers organization-wide via Control Panel in Group Policy Administrative Template node. Access restrictions safeguard data and resources, enhancing computer security for companies.
- Prevent software installations – Preventing software installation is crucial to avoid malware and protect company systems from potential data compromise. As a result, it’s better to prevent software installations through Group Policy settings.
Also, see how to install and Configure Hyper-V on Windows Server on Windows Server 2019, and 2022 via the Server Manager, PowerShell or DISM. How to install a windows server container host, and How to create and configure a Shared Folder on Windows Server.
Creating and Configuring GPO on Windows Server 2019
We are going to take the following steps to create and configure GPO on our Server 2019.
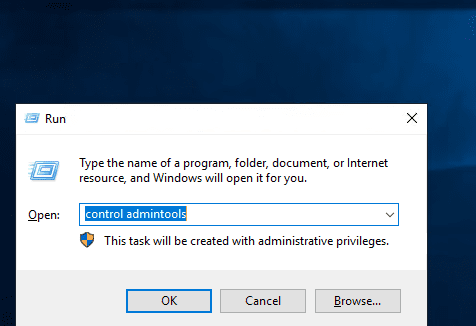
Step 1 – Open the Group Policy Management console by pressing the Windows Key + R to open the Run dialog box and type control admintools command and press enter to open the Windows Administrative Tools.
Note you can also access the Windows admin tools by clicking the start menu. Next, navigate to the Group Policy Objects container as shown in one of the screenshots below.


Step 2 – Create a new GPO – Do this by expanding the domain name tab and Right-clicking on the Group Policy Objects node, and select New as shown in the screenshot below. Still within this step will be to name our new Group Policy. Here we named it as Techdirectarchive Policy


Step 3 – Open the newly created GPO for editing and modifying some user settings.

Next, we’re going to the Administrative Template Policy Definition node to enable the Prevent access to registry editing tools.
To do this, expand the Admin Templates Policy Definition node -> System ->Prevent access to registry editing tools -> Enabled ->Apply-> Ok

Configuring Screen Saver Timeout via Group Policy
Next, define Screen Saver timeout policy for user’s computer in administrative tasks.
To do this, expand the Group Policy Control Panel node and select Personalization, select Screen saver timeout and then select Enabled set the timing to 400 seconds, and click Apply and Ok. Note, you can set the Screen saver timeout to any number of seconds you wish.

Next, set password policy for Domain Controller to protect Screen Saver settings.We will still do this within Personalization node in the Control Panel node by selecting Password Protect the Screen saver and select Enabled and then click on Apply and Ok.

The point under this step is for us to set a policy that controls a central Wallpaper that will appear on all users’ computer desktops.
To do this, navigate to the Desktop tab under the Administrative Templates. Select "Desktop Wallpaper", and then select Enabled.
At this point, you have to use a local path that's linked to the folder where the image you want to use for the Wallpaper is stored. Go ahead and enter the path in the space provided. Click Apply and Ok to put this policy into effect. Now, the same wallpaper will be shown across all users Desktop screens.

Managing User Policy Settings with GPO
Finally in modifying User Policy Settings GPO, take a look at the image below. The highlighted portion of the image simply tells us where all the Group Policy settings that control users’ behaviours can be carried out.
If you look through again, you will see that all of the policies that controls Network Connections can also be defined.

Step 4 – In this last step, we’re going to link the Group Policy we have just created as Techdirectarchive Policy to the domain techdirectarchive.com for it to take effect.
To do this, Right-Click on the domain techdirectarchive.com and select Link an Existing GPO. A dialog box opens up. In the new dialog box, select the Group Policy you wish to link and click Ok. Here we are selecting Techdirectarchive Policy.


Now that the new Group Policy is linked to the domain. All the policies defined under the Group Policy settings will apply across all the computers connected to the domain within your organization.
You can go and switch to a Windows 10 operating system that is part of your organization’s domain.
In Windows 10, check and try to adjust the screen saver timeout to see that it’s grayed out, or you try to run the command regedit using the Run dialog box and see that a prompt that this has been disabled by your admin will pop out.
I hope you found this blog post on “how to “Desktop Wallpaper and Screen Saver Management: Configure and apply Group Policy Objects on Windows Server” helpful. If you have any questions, please let me know in the comment session.