
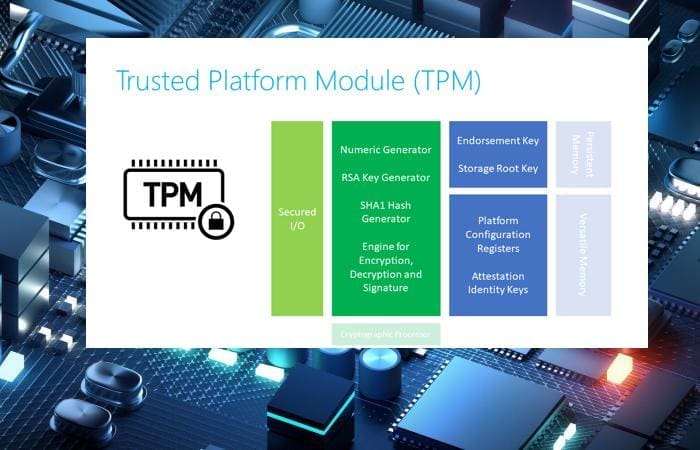
The TPM Chip, also known as the Trusted Platform Module is a hardware security module on your motherboard, designed by the Trusted Computing Group Consortium. It is designed to provide hardware-based, security-related functions. In this article, I will show you how to fix unable to find compatible TPM. Kindly refer to the following TPM-related guides: How to upgrade Windows 10 with an unsupported CPU and TPM 1.0 to Windows 11, and how to Install Windows 11 in Oracle VirtualBox with no TPM Support,
A TPM chip is a secure crypto-processor that is designed to carry out cryptographic operations. The chip includes multiple physical security mechanisms to make it tamper-resistant, and malicious software is unable to tamper with the security functions of the TPM.
Kindly refer to these related guides: How to determine if TPM is present and how to enable TPM in the BIOS via the Command Prompt, How to delegate permissions for backing up TPM password, and how to fix your device cannot use a Trusted Platform Module: Allow BitLocker without a compatible TPM.
Why this TPM error may happen
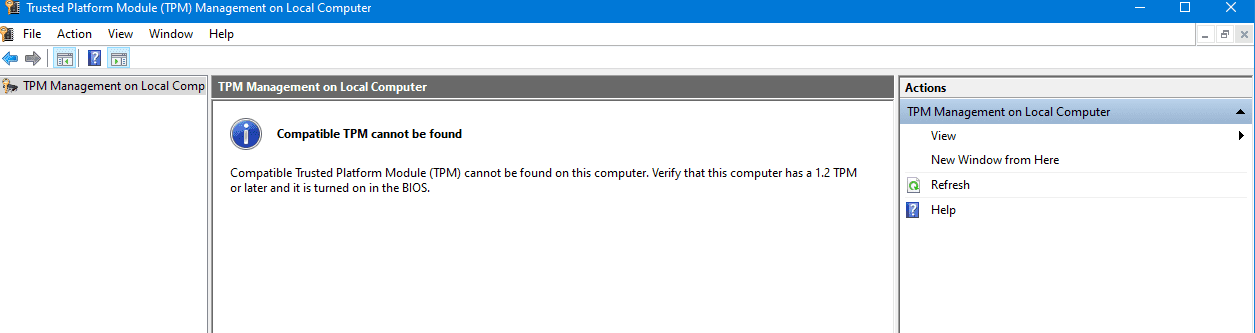
This error means that TPM has not been enabled in the BIOS. The image below is from the MBAM reports stating the device isn’t compliant and the reason for it.

Also, from the TPM snap-in, you would see a similar error showing that the TPM could not be found.
Here is an exciting article: How to delegate permissions for backing up TPM password, and How to clear the TPM via the management console or Windows Defender Center App.
How to resolve this TPM issue
MBAM reports might show a “compatible TPM not found” status. TPM error occurred due to inactive BIOS TPM or the absence of compatible TPM on the device.
To resolve this issue, however, is actually very simple. You will need to enable the TPM in the BIOS. Here are TPM guides to enhance your understanding: Learn TPM presence detection and BIOS-based TPM activation via Command Prompt.
To enable TPM (Trusted Platform Module), follow the steps discussed below. Kindly refer to this guide for more information “how to clear, enable or disable TPM in Windows via the BIOS or UEFI“, and “How to clear the TPM via the management console or Windows Defender Center App“.

- Boot computer using F2 into the BIOS setup mode
- Locate the “Security” option on the left and expand
- Locate the “TPM” option nested under the “Security” setting
- To activate TPM settings, mark the box labeled “TPM Security.” This enables encryption for the TPM hard drive security.
- To guarantee TPM functionality, activate the “Activate” radio button.
- Encryption won’t happen if TPM is ‘Deactivated’ or TPM Security isn’t enabled, until configuring these settings.
- Restarting is occasionally necessary to verify applied TPM changes.
Verifying the resolution of the TPM issue
After enabling TPM in the BIOS, several methods exist to confirm its activation.
You can check this via the following basic steps “Device Manager, and the TPM Management snap-in (tpm.msc), or via the Windows Settings”. Kindly take a look at this guide for other steps to determine if TPM is present on your device: How to check if you have Secure Boot and TPM enabled.
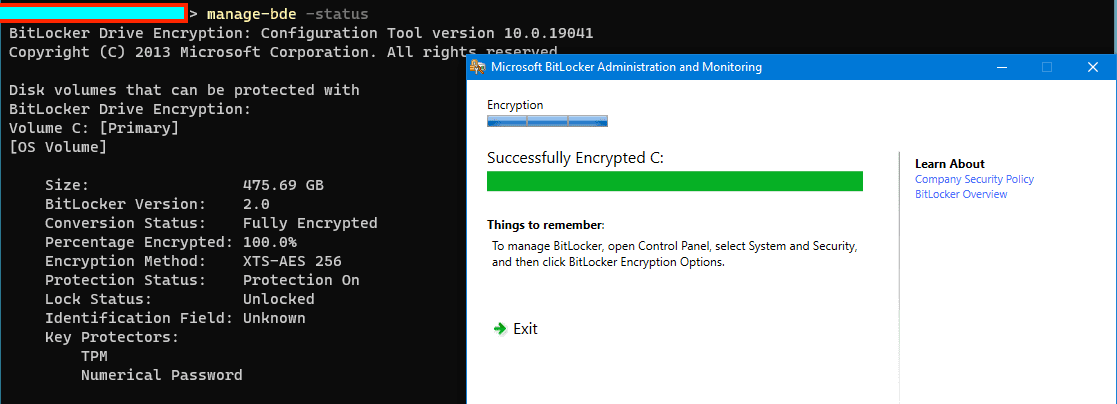
As shown below, the device is now encrypted, allowing the MBAM agent to proceed with drive encryption.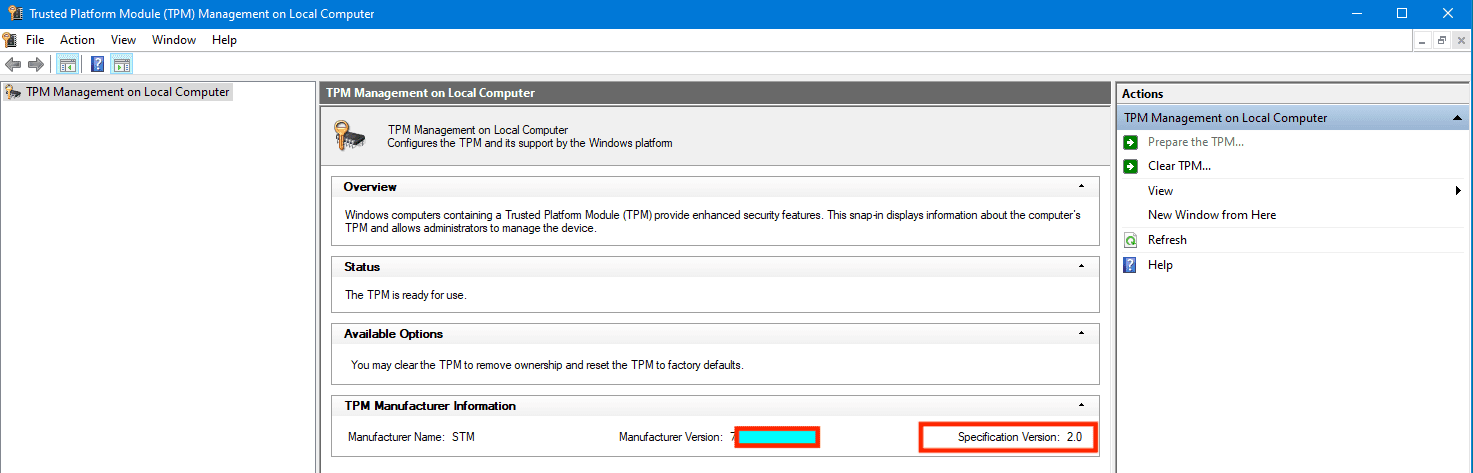
Below is the result of a successfully encrypted device.
I hope you found this blog post on How to fix unable to find compatible TPM helpful. If you have any questions, please let me know in the comment session.