Provisioning Azure Resources using Azure Az PowerShell Cmdlet from Cloud Shell

In this article, we shall discuss how to provision Azure Resources using Azure Az PowerShell Cmdlet from Cloud Shell. Provisioning Azure resources using Azure Az PowerShell Cmdlet from Cloud Shell is an essential aspect of developing and managing applications on the cloud platform. Please see VMSA-2022-0026: An arbitrary file read vulnerability in VMware Aria Operations, how to Fix Scanning and Repairing Drive on Every Boot, and how to Get your free Microsoft 365 E5 Sandbox today.
When it comes to automation and operations management scripting language like PowerShell is an amazing tool for system administrators, Cloud Engineers, and DevOps Engineers.
Furthermore, this guide discusses the step-by-step on how you can create resources like Resource Group, Virtual Network (VNet), Virtual Network Subnet, Virtual Machine (VM) on Azure to launch your first Virtual Machine (VM) using Azure Az PowerShell Command-let.
What is Azure Az PowerShell Module?
The Azure Az PowerShell module is a rollup module. Installing it downloads the generally available Az PowerShell modules, and makes their cmdlets available for use.
PowerShell 7.x and later is the recommended version of PowerShell for use with the Azure Az PowerShell module on all platformsThe Azure Az PowerShell module works with PowerShell 7.x and later on all platforms. Azure PowerShell has no additional requirements when run on PowerShell 7.x and later. See the latest version of PowerShell available for your operating system.
Let’s get started by looking at what PowerShell is all about.What is PowerShell?
PowerShell is a task automation and configuration management framework from Microsoft, consisting of a command-line shell and associated scripting language. Formally, codenamed “Monad” a long time ago.
PowerShell provides an environment for executing line commands and creating powerful scripts. It is built on the .Net Framework (now .Net Core) and is focused around objects enabling rich sequences to be created that can perform complex automation tasks. They are a command-line tool that allows you to write simple commands and take control of your environment.
Initially, Windows PowerShell was built on the .NET Framework and only worked on Windows systems. With the current release, PowerShell uses .NET 5.0 as its runtime. PowerShell now runs on Windows, macOS, and Linux platforms.
How to Use PowerShell
- Tasks are executed by command-lets (cmdlets)
- Each
command-let contains verb which describesaction that will be taken e.g. Get-Process, Join-Path, and Connect-PSSession. - All
PowerShell command-lets are parameterized to ensure maximum flexibility
This will take us to Azure PowerShellAzure PowerShell Overview
Azure PowerShell is a set of cmdlets designed to help with the management of Azure resources directly from the PowerShell command-line interface. Running PowerShell from Cloud Shell you will not need to run the Connect-AzAccount cmdlet because it will automatically inherit your session from the browser.
Common Scenarios
Azure PowerShell (same goes for CLI) can be used for:
- Day to day operations such as automation of repetitive tasks, scheduling and deployment of resources
- DevOps scenarios
- Learning (all the intelliSense can help you learn fast)
- And achieving things that are hard otherwise
Basic Modules: Two Module bundles of PowerShell are:
- AzureRM
- Az (new modules; recommended)
For clarification, AzureRM which is the short form for Azure Resource Management is the old module while the Az module is the new module and it is recommended that you use the Az module whenever you automate your tasks. If you intend to run your PowerShell cmdlet from your local machine, follow the below process:
Easy Installation
The Azure Az PowerShell module is preinstalled in Azure Cloud Shell so you won’t need to install it to connect to your Azure account. All you need is an active Azure subscription before you can access the Cloud Shell from Azure Portal.
If you don’t have an Azure subscription, Sign up for Azure Free Account today to get one. But if you are using PowerShell from your local machine, it must be installed first.
The Installations are very simple. Simply run these commands on your local machine and you are good to go:
- Install-Module Az-Force-AllowClobber
- Import-Module Az – This will import the cmdlet for Az module into your local machine
Az VS. AzureRM compatibility
So what happens if you found AzureRM script on the internet or some blogs and you already have some old modules, can you upgrade? Yes, you can! There is a compatibility command-let that allows you to easily upgrade from AzureRM to Az modules.
Az modules are natural upgrades from AzureRm modules. If you want to use Az but you have plenty of AzureRm based scripts simply run the compatibility command-let.
TheUpdate-Module cmdlet installs a module’s newest version from an online gallery. You’re prompted to confirm the update before it’s installed. Updates are installed only for modules that were installed on the local computer with Install-Module. Update-Module searches $env:PSModulePath for installed modules.
Running Enable-AzureRmAlias command-let will make Get-AzurermVm an alias of Get-AzVm
Next, I will go further in looking at some demo scenarios for this write-up.Demos: To install the Az Module on your local machine, follow the steps below:
-> Open the windows menu
-> Click on PowerShell
-> run it as an administrator
If you have already had PowerShell installed on your local computer, run the Get-Module – ListAvailable Az cmdlet to find the installed version. When the PowerShell interface is open, simply run the Install-Module Az –Force –AllowClobber cmdlet to install the Az PowerShell Module and use the Import-Module cmdlet to import the PowerShell Az cmdlet.
Using Pipe in PowerShell
Piping in PowerShell (PS) allows you to grab the output of a command into another command. It is a series of commands connected by pipeline operators (|) (ASCII 124). Each pipeline operator sends the results of the preceding command to the next command.
The output of the first command can be sent for processing as input to the second command. And that output can be sent to yet another command. The result is a complex command chain or pipeline that is composed of a series of simple commands.
Examples of Piping in PS
Below are some exaples of piping in PowerShell:
- Get-AzResourceGroup | Format-Table – List the available resource groups on your account in tabular format.
- Get-AzReourceGroup | Format-List – This will return almost the same stuff as running the Get-AzResouceGroup cmdlet.
- Get-AzResourceGroup | Format-Wide – This will return the simpler version of the details for our resource groups.
- Get-AzResourceGroup | Export –Csv – To export your output from the previous command directly into a CSV. This is one of the very good ways to do an operation and other automation task.
- Get-AzResourceGroup | Out-GridView – This will give you a pop-out on your screen that you can actually start selecting
- Get-AzResourceGroup | Out-GridView – PassThru – This will allow you to grab the output from the previous command to the screen
- Get-AzResourceGroup | Select ResourceGroupName, Location – This will act like an SQL query that will allows you to select resource groups from the previous commands based on locations.
- Get-AzResourceGroup | Where-Object {$_.Location –eq ‘northeurope’}
– This is called filtering. It will give the list of resource groups from North Europe location only. - Get-AzResourceGroup | Where-Object {$_.Location –eq ‘northeurope’} | Select ResourceGroupName, Location – This will allow you to filter everything (both Resource Group Names and their Locations) at the same time for your resource groups.
The Piping commands stated here will allow you to make interactive sessions for users to run using PowerShell very easily and how to manage your Azure Resources based on your needs.
Creating Resource Group, and VM using Azure Az PowerShell Cmdlet from Cloud ShellCreating Resource Group (RG)
You can launch Cloud Shell directly from Azure Portal or you can simply visit shell.azure.com to launch it directly from your web browser.

To create other resources on Azure you need to first create a resource group. To understand better, let me briefly talk about what a Resource group is.
What is a Resource Group?
Resource Group is a logical container (I call it a folder at times) that holds all your Azure resources such as virtual machines, virtual networks, storage accounts, web apps, and databases.
Related resources on Azure are grouped using a resource group. They are part of the Azure resource group management model, which provides four levels or scopes of management to help you organize your resources.
Having understood what Resource Group is all about, let’s move on to creating one using the Az PowerShell command-let. Lunch Cloud Shell directly from Azure Portal and select “PowerShell as your preferred scripting language. See screenshot below: Run
New-AzResourceGroup –Name -Location ‘Choose your preferred location’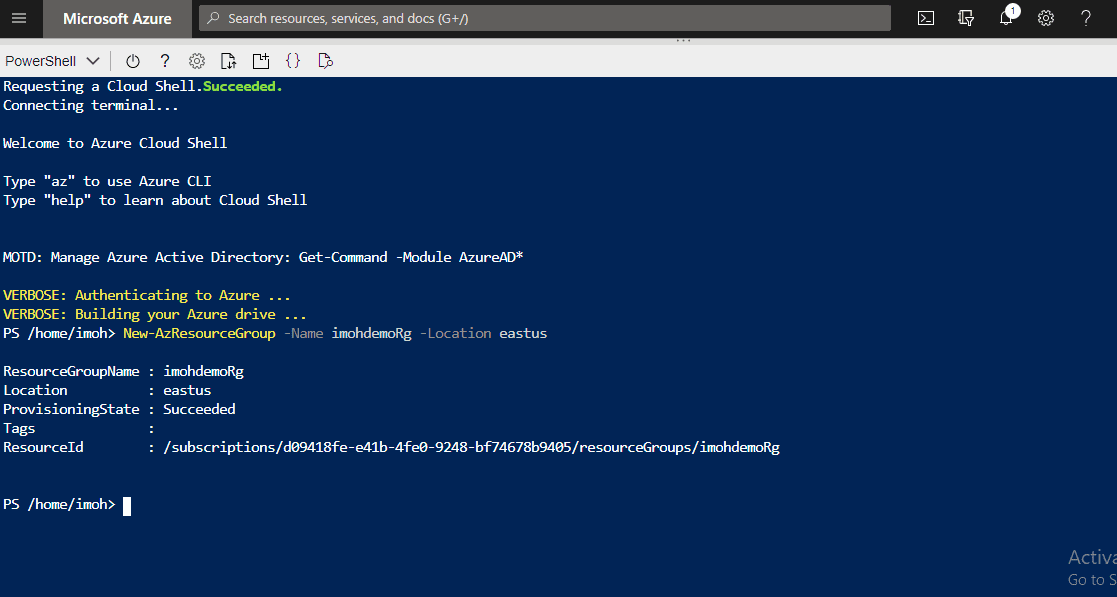
From the screenshot above, in my case, I chose “imohdemoRg” as the name of my resource group and “EastUs” as my preferred Location.
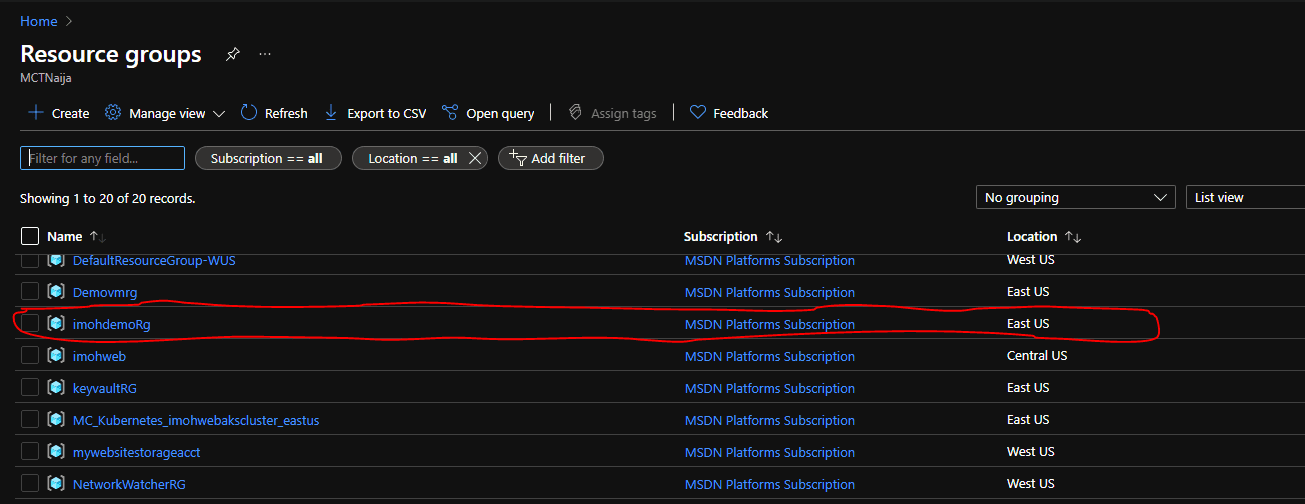
Now that we have created and verified that the resource group is in the list of resource groups, we will move on to create the Virtual Network, Add a subnet and then create our virtual machine.
Create the virtual network
A virtual network lets Azure resources, like virtual machines (VMs), communicate privately with each other, and with the internet. Create a virtual network with New-AzVirtualNetwork. This example creates a default virtual network named “imohdemoVNet” in the “EastUS” location:
$vnet = @{
    Name = 'imohdemoVNet'
    ResourceGroupName = 'imohdemoRg'
    Location = 'EastUS'
    AddressPrefix = '10.0.0.0/16'
}
$virtualNetwork = New-AzVirtualNetwork @vnet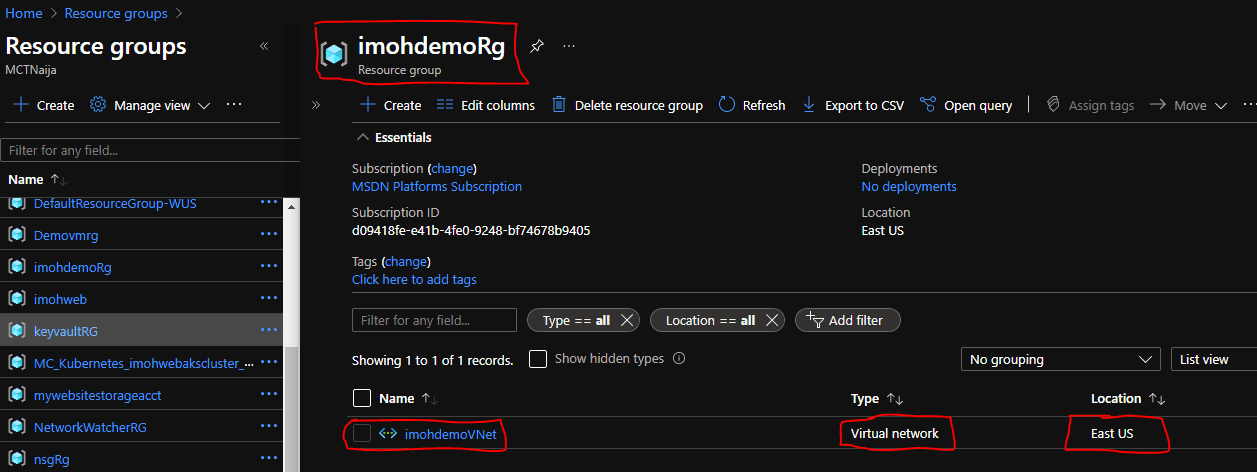
You can see that the Virtual Network we just created is right there in the resource group named “imohdemoRG” in the “EastUS” location
Add a subnet
Azure deploys resources to a subnet within a virtual network, so you need to create a subnet. Create a subnet configuration named subnet1 with Add-AzVirtualNetworkSubnetConfig:
$subnet = @{
    Name = 'subnet1'
    VirtualNetwork = $virtualNetwork
    AddressPrefix = '10.0.0.0/24'
}
$subnetConfig = Add-AzVirtualNetworkSubnetConfig @subnet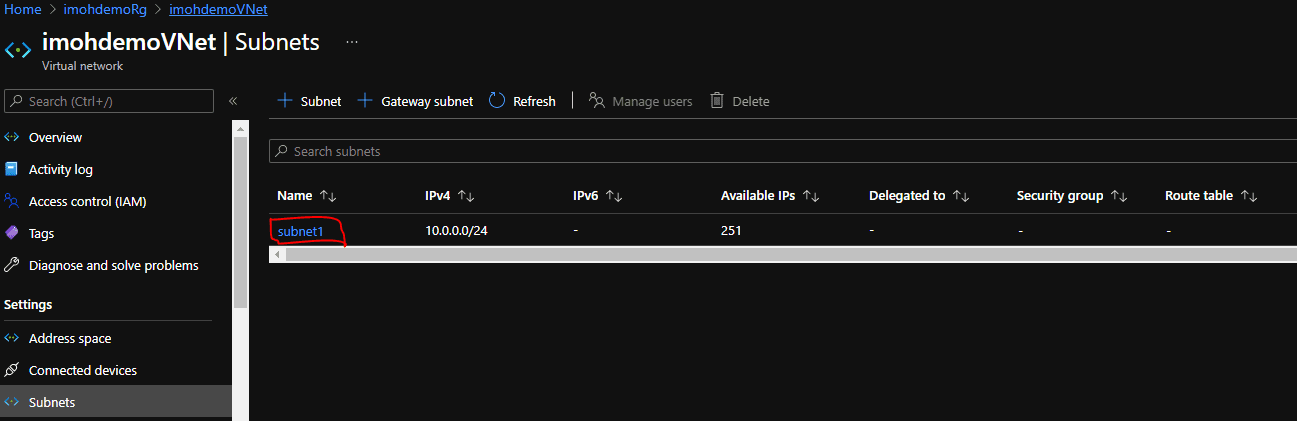
Creating a Virtual Machine (VM)
Azure Virtual Machines (VM) is one of several types of on-demand, scalable computing resources that Azure offers. Typically, you choose a VM when you need more control over the computing environment than the other choices offer.
An Azure VM gives you the flexibility of virtualization without having to buy and maintain the physical hardware that runs it. However, you still need to maintain the VM by performing tasks, such as configuring, patching, and installing the software that runs on it. Create the virtual machine by running:
$imohdemoVM = @{
    ResourceGroupName = 'imohdemoRg'
    Location = 'EastUS'
    Name = 'imohdemoVm'
    VirtualNetworkName = 'imohdemoVNet'
    SubnetName = 'subnet1'
}
New-AzVM @imohdemoVM -AsJob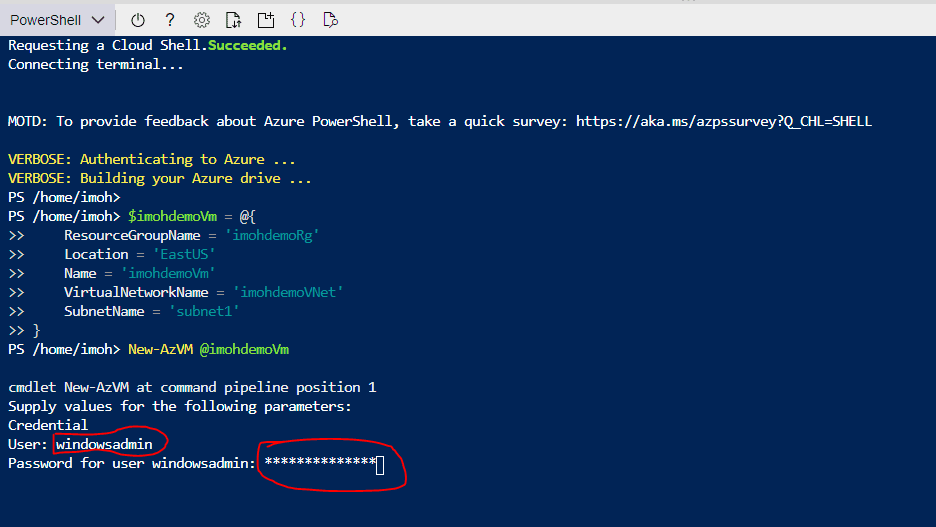
By pressing the enter key from here, PowerShell will prompt you to supply the VM sign-in credentials (user name and password). Make sure you supply them accurately. See the screenshot above!
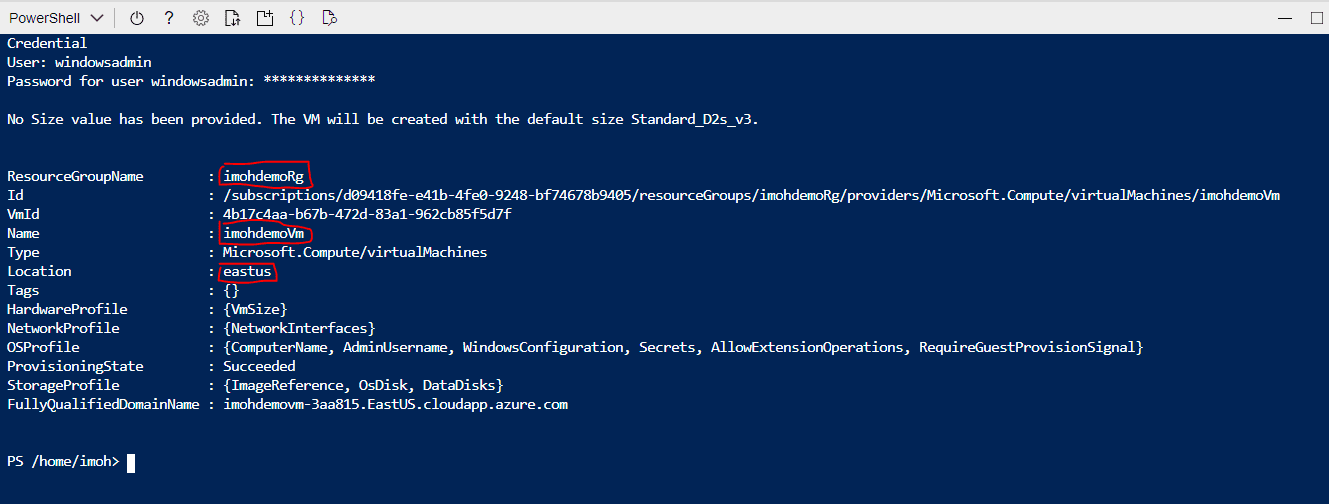
From the VM Success screen above, you can see that the VM is right there in the resource group we created in the previous session. The name and the location of the VM are also clearly specified.
Don’t forget to head to the Azure Portal to verify that your newly created resources are there. In my case, the resources are there. See the screenshot below:

Connect to a VM from the internet
To get the public IP address of the VM, use Get-AzPublicIpAddress. This example returns the public IP address of the imohdemoVm VM:
$ip = @{
    Name = 'imohdemoVm'
    ResourceGroupName = 'imohdemoRg'
}
Get-AzPublicIpAddress @ip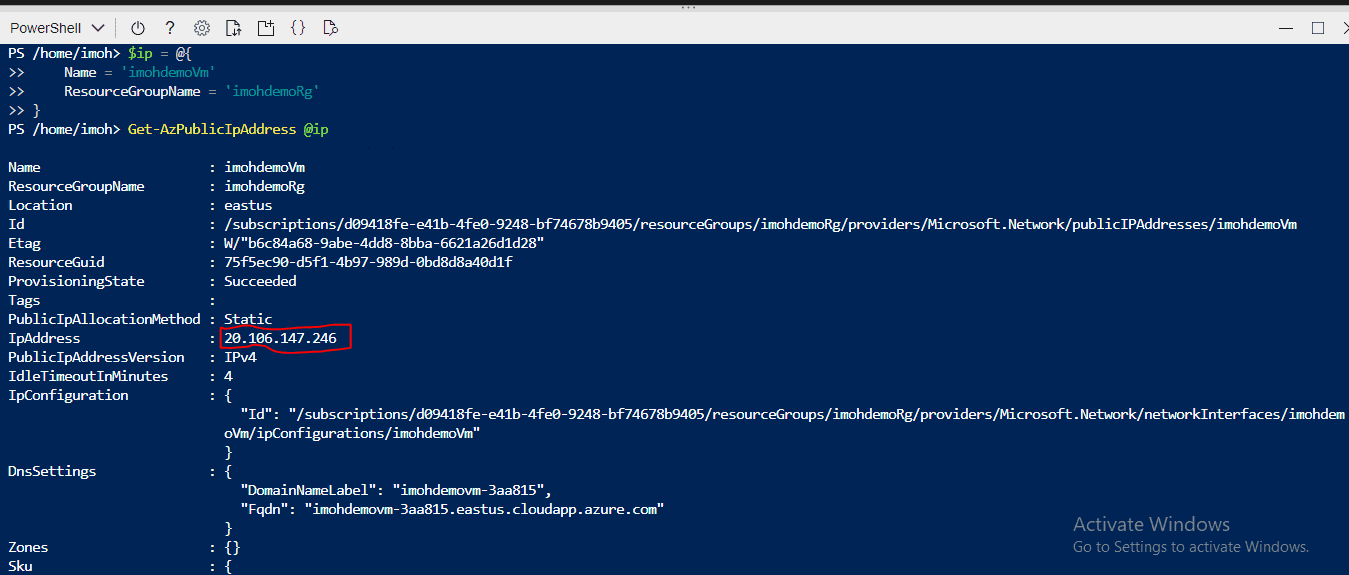
From the screen, you can see that my public IP address is 20.106.147.246. Yours will be different!
Now, open a command prompt on your local computer. Run the mstsccommand. Replace <publicIpAddress> with the public IP address returned from the last step:
mstsc /v:20.106.147.246
If prompted, select Connect. Enter the user name and password you specified when creating the VM as shown above.
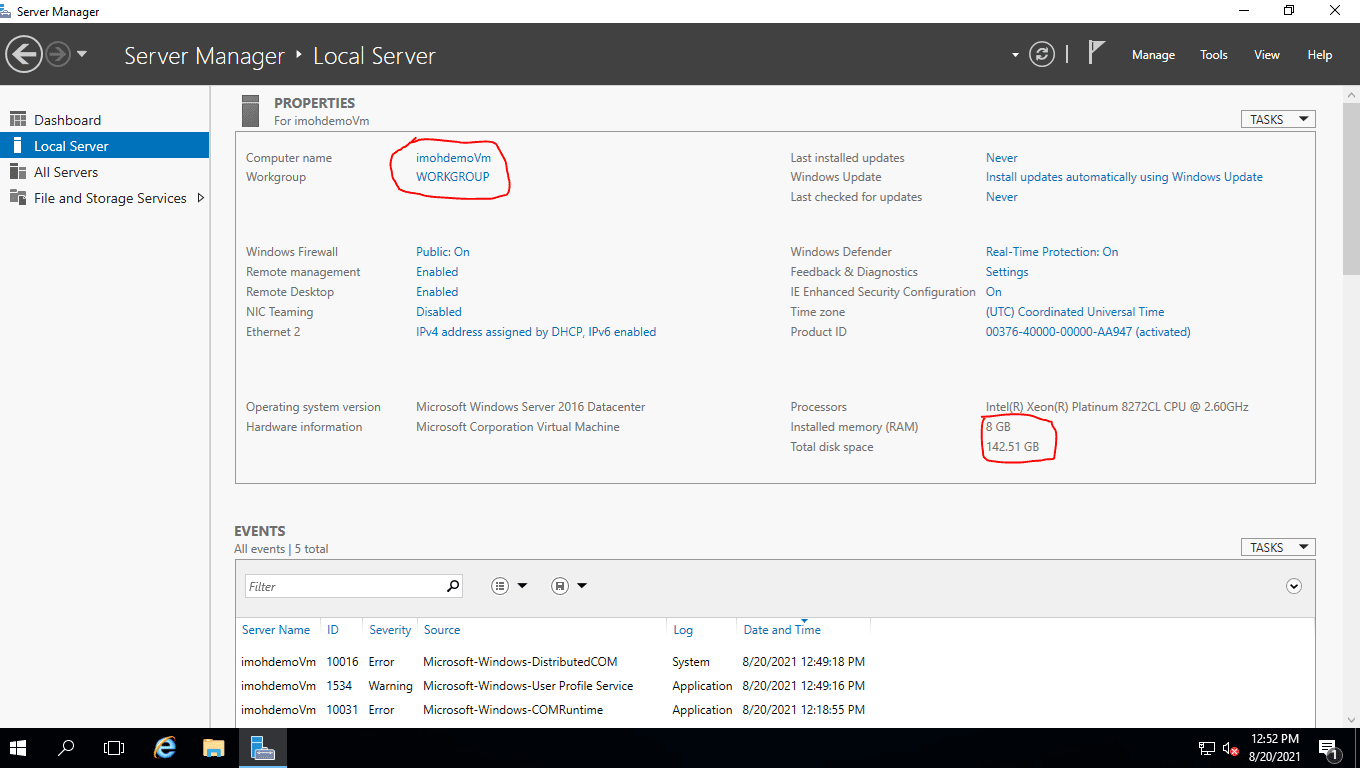
From the server manager, click on the Local Server on the right pane of the window.
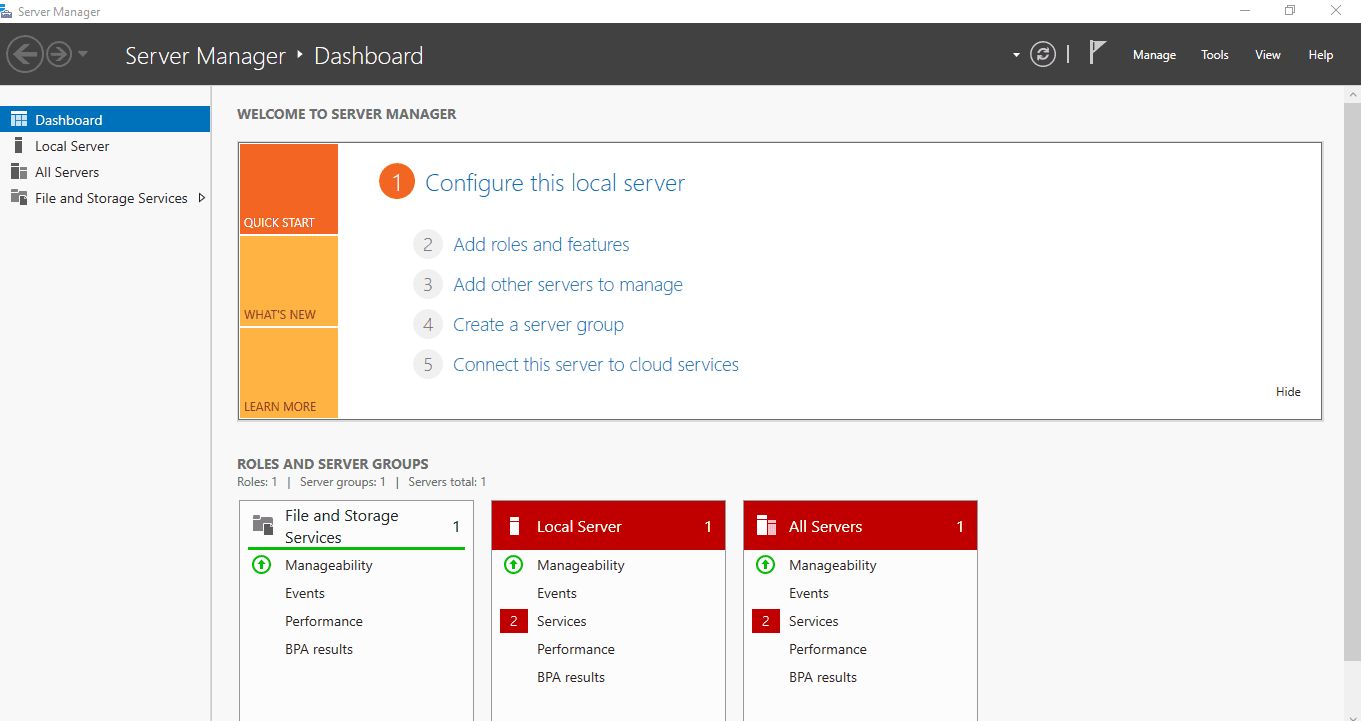
Below are the server properties of the newly provisioned server.
Clean up resource
When you're done with the virtual network and the VMs, use Remove-AzResourceGroup to remove the resource group and all the resources it has:
Remove-AzResourceGroup -Name '' -ForceWhy do you need to clean up resources?
The Azure resources that you created by following this write-up can incur ongoing costs. To avoid such costs, delete the resource group that contains all those resources.
In summary, PowerShell is a robust scripting language that helps users automate a range of tedious or time-consuming administrative tasks and find, filter, and export information about the computers on a network.
This is done by combining commands, called “cmdlets,” and creating scripts. With PowerShell, IT Pros can leverage improved access to and control over Windows Management Instrumentation (WMI) and the Component Object Model (COM) to fine-tune administrative management. One of such administrative tasks could also include managing Active Directory (AD) within a Windows network.
PowerShell automation can be very helpful for executing typical management tasks. We've explored how to get started with provisioning Azure resources using the Azure Az PowerShell cmdlets from Cloud Shell. We also covered Azure PowerShell, its compatibility and resource group.
I hope you found this article on Provisioning Azure Resources using Azure Az PowerShell Cmdlet from Cloud Shell useful. Please feel free to leave a comment below.


