Skip to content

TechDirectArchive

Hands-on IT, Cloud, Security & DevOps Insights

  • Home
  • About
  • Advertise With US
  • Reviews
  • Contact
  • Toggle search form
Home » Windows » How to enable or disable Windows Defender Antivirus Scanning periodically on Windows via Windows Settings

How to enable or disable Windows Defender Antivirus Scanning periodically on Windows via Windows Settings

Posted on 01/09/202215/12/2023 Matthew By Matthew No Comments on How to enable or disable Windows Defender Antivirus Scanning periodically on Windows via Windows Settings
Featured-image_Periodic-scanning
Windows Defender Periodic Scanning

In this article, we shall discuss How to enable or disable Windows Defender Antivirus Scanning periodically on Windows via Windows Settings. Microsoft Defender Antivirus offers “Periodic Scanning,” which scans and removes threats that other Windows Security may have missed. View periodic scanning as an extra defence layer against cyber threats if you utilize non-Windows Defender products like CrowdStrike Falcon, Bitdefender, or McAfee (Trilix). Please see how to view Microsoft Defender Antivirus update details on Windows 10 image (install.wim), and new Windows 11 encryption features and security enhancements will help protect hybrid work.

This mechanism identifies and prevents computer threats, collaborating with Windows Security software and third-party antivirus on Windows 10 and 11. Active Windows Defender security enables automatic Limited Periodic Scanning, protection and monitoring. Activate periodic scanning the Microsoft Defender is passive. However, it will monitor missed threats.

Individuals who use Microsoft Defender as their primary antivirus on their machine can enable Microsoft Defender to check for viruses on a regular basis by following this extensive guide: Periodic Scanning: How to schedule Windows Defender Antivirus to scan on Windows | Learn [Solve IT].

According to Microsoft, this feature is not needed for use in enterprise environments. Mostly for individual users, Periodic Scanning detects malware using limited Windows Security features, missing more threats managed by the primary security.

Learn more about Windows Security encryption features in these related posts: How to restore quarantined files in Microsoft Defender Antivirus, How to find and remove Malware with Microsoft Defender Offline, and how to remove Microsoft Defender update on Windows 10 and Windows Server image.

How to enable periodic scanning

If you have a third-party security program installed on your computer, follow the steps below to start Limited Periodic Scanning.

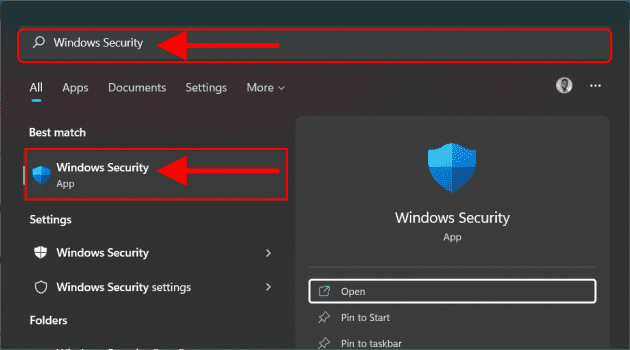
Activate the Start menu by pressing the Windows key.

Windows Safety
Opening Windows Security in Start menu

Click on Virus & Threat Protection. You should be able to see the antivirus program you’re running in the Virus & Threat Protection section.

System Protection
Windows Security

Scroll down and click on the Microsoft Defender Antivirus options setting and turn on Periodic scanning. You may need admin access to complete this task.

PC Security
Turn on Periodic scanning

After activating this feature, you will observe extra options: virus settings, intrusion prevention, and the choice for advanced scans.

image4
Current threats details

How to disable periodic scanning Windows Security

To disable Windows Defender Antivirus periodic scanning, follow the steps below:

Open Windows Security and click on Virus & threat protection. Scroll down and click on the Microsoft Defender Antivirus options setting and turn off the Periodic scanning.

image3
Turn off Periodic scanning

After you complete the procedures, Microsoft Defender Antivirus will no longer scan your computer for viruses on a regular basis if a third-party solution is installed on the device.

I hope you found this article useful on How to enable or disable Windows Defender Antivirus Scanning periodically on Windows via Windows Settings. Please feel free to leave a comment below.

Rate this post

Thank you for reading this post. Kindly share it with others.

  • Share on X (Opens in new window) X
  • Share on Reddit (Opens in new window) Reddit
  • Share on LinkedIn (Opens in new window) LinkedIn
  • Share on Facebook (Opens in new window) Facebook
  • Share on Pinterest (Opens in new window) Pinterest
  • Share on Tumblr (Opens in new window) Tumblr
  • Share on Telegram (Opens in new window) Telegram
  • Share on WhatsApp (Opens in new window) WhatsApp
  • Share on Mastodon (Opens in new window) Mastodon
  • Share on Bluesky (Opens in new window) Bluesky
  • Share on Threads (Opens in new window) Threads
  • Share on Nextdoor (Opens in new window) Nextdoor
Security | Vulnerability Scans and Assessment, Windows Tags:AntiMalware, AntiVirus, Defender Antivirus, Microsoft Defender Antivirus, Microsoft Windows, scan, Windows 10, Windows 11, Windows Defender Antivirus

Post navigation

Previous Post: Prevent your PC from sending Diagnostics Feedback off via Windows Settings and Group Policy
Next Post: How to Install and Configure WordPress on Your Windows Computer Using WAMP SERVER

Related Posts

  • Windows 11 default Icons
    Windows Desktop Icon: How to Make Default System Icons Visible Windows
  • domain14 1
    How To Configure a Domain Password Policy Windows
  • Disable Hardware Acceleration in Browsers and Windows
    How to Disable Hardware Acceleration in Browsers and Windows Windows
  • Banner
    How to Scan Your Code by Integrating SonarCloud into Your GitHub Repository Security | Vulnerability Scans and Assessment
  • Feature image .msixbundle
     How to Bundle MSIX Packages Windows
  • Install ROOT CA Enterprise
    How to Install ROOT CA Enterprise and NPS Wifi Certificate Windows

More Related Articles

Windows 11 default Icons Windows Desktop Icon: How to Make Default System Icons Visible Windows
domain14 1 How To Configure a Domain Password Policy Windows
Disable Hardware Acceleration in Browsers and Windows How to Disable Hardware Acceleration in Browsers and Windows Windows
Banner How to Scan Your Code by Integrating SonarCloud into Your GitHub Repository Security | Vulnerability Scans and Assessment
Feature image .msixbundle  How to Bundle MSIX Packages Windows
Install ROOT CA Enterprise How to Install ROOT CA Enterprise and NPS Wifi Certificate Windows

Leave a Reply Cancel reply

You must be logged in to post a comment.

Microsoft MVP

VEEAMLEGEND

vexpert-badge-stars-5

Virtual Background

GoogleNews

Categories

veeaam100

sysadmin top30a

  • ext
    How to install Standalone Installation DriveLock Encryption software Security | Vulnerability Scans and Assessment
  • DC 3
    How to demote and remove a Domain Controller on Windows Servers Windows Server
  • 1 kajkbmlyehn0inifwrh 8w
    How to install Kerberos packages with Cygwin on Windows Windows Server
  • featureunions
    How to Install Unison on Linux System Linux
  • Wiki in Linux
    How to Use Wiki from Linux Terminal Linux
  • dvssvd
    Windows Cached Credentials: How does cached domain logon work? Windows
  • How to Fix MS SQL Error 832
    MSSQL Server Error 833: Synthesis of Real-World Case Studies Oracle/MSSQL/MySQL
  • maxresdefault 2 2
    Fix Outlook Not Responding and Outlook Crashing or freezing Network | Monitoring

Subscribe to Blog via Email

Enter your email address to subscribe to this blog and receive notifications of new posts by email.

Join 1,825 other subscribers
  • RSS - Posts
  • RSS - Comments
  • About
  • Authors
  • Write for us
  • Advertise with us
  • General Terms and Conditions
  • Privacy policy
  • Feedly
  • Telegram
  • Youtube
  • Facebook
  • Instagram
  • LinkedIn
  • Tumblr
  • Pinterest
  • Twitter
  • mastodon

Tags

AWS Azure Bitlocker Microsoft Windows PowerShell WDS Windows 10 Windows 11 Windows Deployment Services Windows Server 2016

Copyright © 2025 TechDirectArchive


Loading Comments...
 

You must be logged in to post a comment.