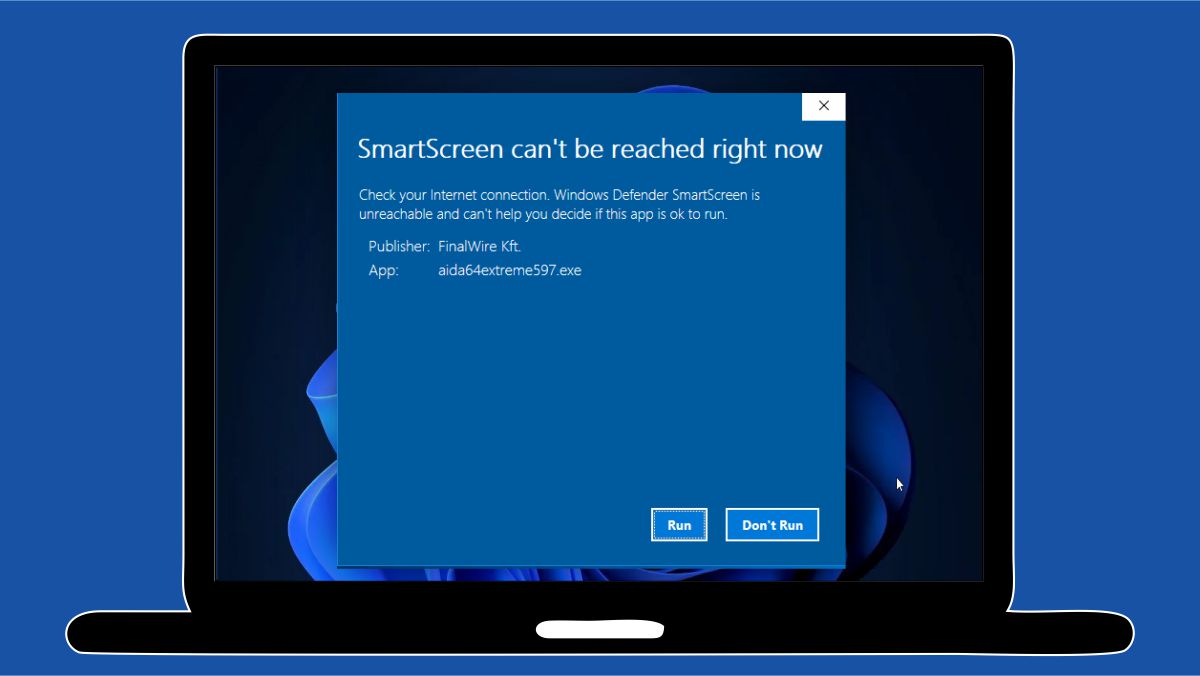
Microsoft Defender Antivirus protection feature helps to protect your machine and data from almost all types of malware and hackers. Although this is among the best antivirus software, it is not perfect, and carefully written dangerous programs can occasionally make their way into the system and quickly take control, causing permanent harm. In this guide, we shall discuss how to find and remove Malware with Microsoft Defender Offline. Please, see How to set up the OOTBI Virtual Appliance on Proxmox VE, and What you need to know about Microsoft Defender Antivirus.
For a more secure system, please see how to turn on the Windows defender tamper protection feature. This isn’t exclusive to Microsoft Defender. This may happen with any third-party antivirus software that you install on your computer.
However, if your computer becomes infected with a terrible hard-to-remove infection while running Windows, you may utilize the Microsoft Defender Offline scan option. In this article, you will learn how to find and Remove Malware with Microsoft Defender Offline.
The offline option is an automated feature that helps the anti-malware engine to detect and remove most infections more quickly while the machine is not running. In this post, we’ll show you how to run an offline malware scan with Windows Defender Antivirus.
Run Microsoft Defender Offline Find and remove Malware on Windows
To scan and remove viruses with the Microsoft Defender Antivirus Offline scan feature, press the Windows key + I to open Settings. Click Privacy and Security, then select Windows Security on the right side.

In Windows Security, click on Open Windows Security. This will open the windows defender app.

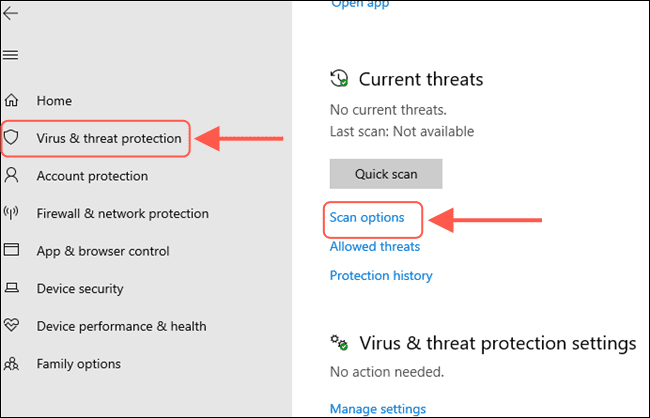
In the windows defender app, click on “Virus & Threat Protection.”

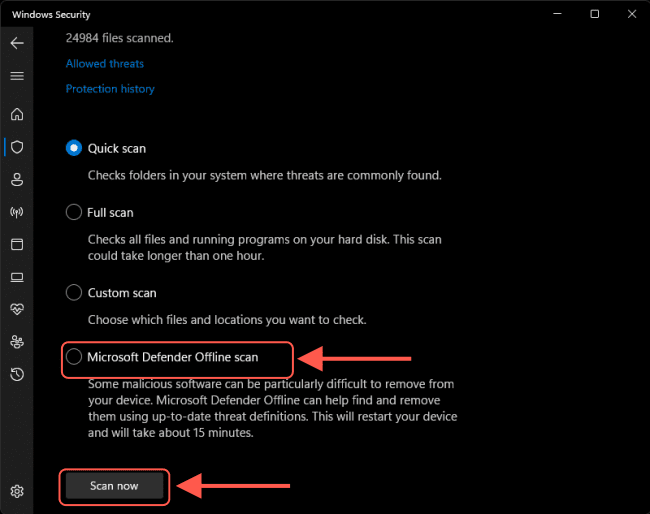
Under the “Current threats” section, click the Scan options setting.

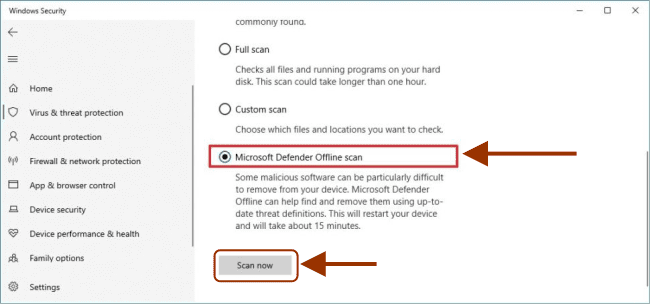
In the Virus and Threat Protection section, scroll down and select “Microsoft Defender Offline Scan,” and then click “Scan Now.”
When you click “Scan” on the prompt, your Windows 11 PC will restart and begin the scan.
Here is an exciting guide on Smart App Control and how to enable Phishing Protection: Windows 11 New Security Features, New Windows 11 encryption features and security enhancements will help protect hybrid work.
Use Windows Security to manage Antivirus
Press the Windows key to open Start menu, then type Windows Security and select the result that best match your search.

Select Virus & threat protection to open the Virus & threat protection settings. Under the “Current threats” section, click the Scan options setting.
Select the Microsoft Defender Offline scan option. Then click the Scan now button.
When you click “Scan” on the prompt, your Windows 10 PC will restart and begin the scan. When you complete the steps, your computer will reboot into Windows Recovery Environment (WinRE), where the command-line version of Microsoft Defender Antivirus will run without loading the system.
Without user intervention, the scan will discover and destroy any difficult-to-remove infections it finds. The offline scan will take around 10-15 minutes, after which the machine will automatically restart.
Here are other related guides: How to turn on Windows 10 Tamper Protection for Microsoft Defender, and how to manage Microsoft Defender Antivirus with Group Policy and Microsoft Malware Protection via the Command Line Utility.
View the results of your Malware Scan with Microsoft Defender Offline
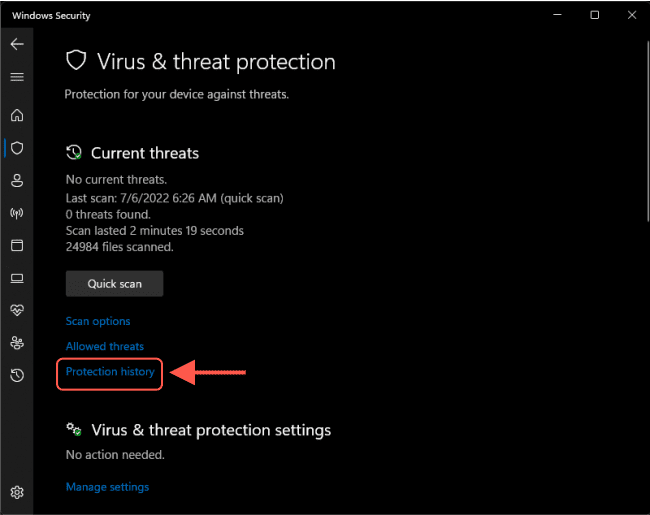
To review the scan information, open Windows Security, and click on Virus & threat protection. Under the “Current threats” section, click the Protection history setting.
If there is no information in the history, the antivirus was unable to trace anything on the system.
Run Offline Scan from PowerShell
To Run a Microsoft Defender Offline Scan from PowerShell, please see the more usage options for the Start-MpWDOScan command, see: Start-MpWDOScan
1 Open an elevated PowerShell.
2 Copy and paste the Start-MpWDOScan command into the elevated PowerShell, and press Enter.
Note: You can specify a switch as shown above. The -ScanType parameter allows the user to specify the type of scan to be performed: the acceptable values for this parameter are:
– FullScan
– QuickScan
– CustomScan
Run Offline Scan from Command Prompt
To Run a Microsoft Defender Offline Scan from Command Prompt, please see the usage options for the Start-MpWDOScan command.
1: Open an elevated command prompt.
2 Copy and paste the PowerShell Start-MpWDOScan command into the elevated command prompt, and hit Enter.
It’s also a good idea to pay attention to the dates of the items because the list shows all the most recent activities, and you may notice items from earlier scans or real-time detections.
I hope you found this blog post helpful on how to find and remove Malware with Microsoft Defender Offline. Please let me know in the comment session if you have any questions.