
You can use app package-servicing commands to add, remove, and list provisioned app packages (.appx or .appxbundle) in a Windows image. A .appxbundle, new for Windows 10, is a collection of app and resource packages used together to enrich the app experience while minimizing the disk footprint on a given PC. Please see How to determine Apps UWP and remove pre-provisioned appx in Windows 10, and How to deploy MBAM Client as part of a Windows Deployment.
These apps are available to users upon login on Windows 10 devices. Windows starts to install apps for that particular user. These apps are referred to as provisioned apps (pre-installed apps).
Pre-provisioned apps can be useless for some organisations. Often times, these apps are deleted and there are new updates from Microsoft prompting you to upgrade your Operating System. Most times, after these OS are upgraded to the latest version of Windows, these preinstalled apps appear again. To mitigate this issue, this appx needs to be removed in the Windows Image even before installing the OS.Here are some possible errors you can encounter while resolving this issue Error 0xc1570103: The license file was not found in the specified path, and how to fix error 0xc1510114: The wim file needs to be remounted.
Remove Windows 10 Apps with DISM
For related articles, please see how to fix error 0xc1510114: The wim file needs to be remounted, Error 0x80070002: When trying to mount an image file, Error code 15601:
The idea is, when an upgrade is performed. This appx will not be detected by the upgrade and therefore the appx will not be deployed. Before proceeding with the steps below. The Install.wim file needs to be mounted, after which you can manipulate the windows image file with DISM Tool. To mount a wim file, please use the command below.
dism /Mount-Wim /WimFile:<Path>image.wim /Index:<indexnumber> /MountDir:<mountDir>dism /Mount-Wim /WimFile:G:\Path-to-the-install.wim-file\install.wim /Index:2 /MountDir:G:\Path-to-the-mount-file\MountZHow to resolve DISM unspecified error when removing preinstalled packages, and Error 0xc1420127: The specified image in the specified wim is already mounted for read and write access.
How to remove Pre-installed Applications?
Via PowerShell or DISM. This guide will teach you how to remove packages in an install.wim image.
1: DISM:
Querying the Windows image for pre-installed apps requires using any of the following commands.
dism /Image: <MountedDir> /Get-Provisionedappxpackagesdism /image:G:\Path-to-the-mount-file\MountZ /Get-ProvisionedappxpackagesNow that you have determined the Package Family name (UWP), we can proceed to remove them.
Note: This Family name changes from one version of Windows to the other. Please pay attention to it or else you will get an error.
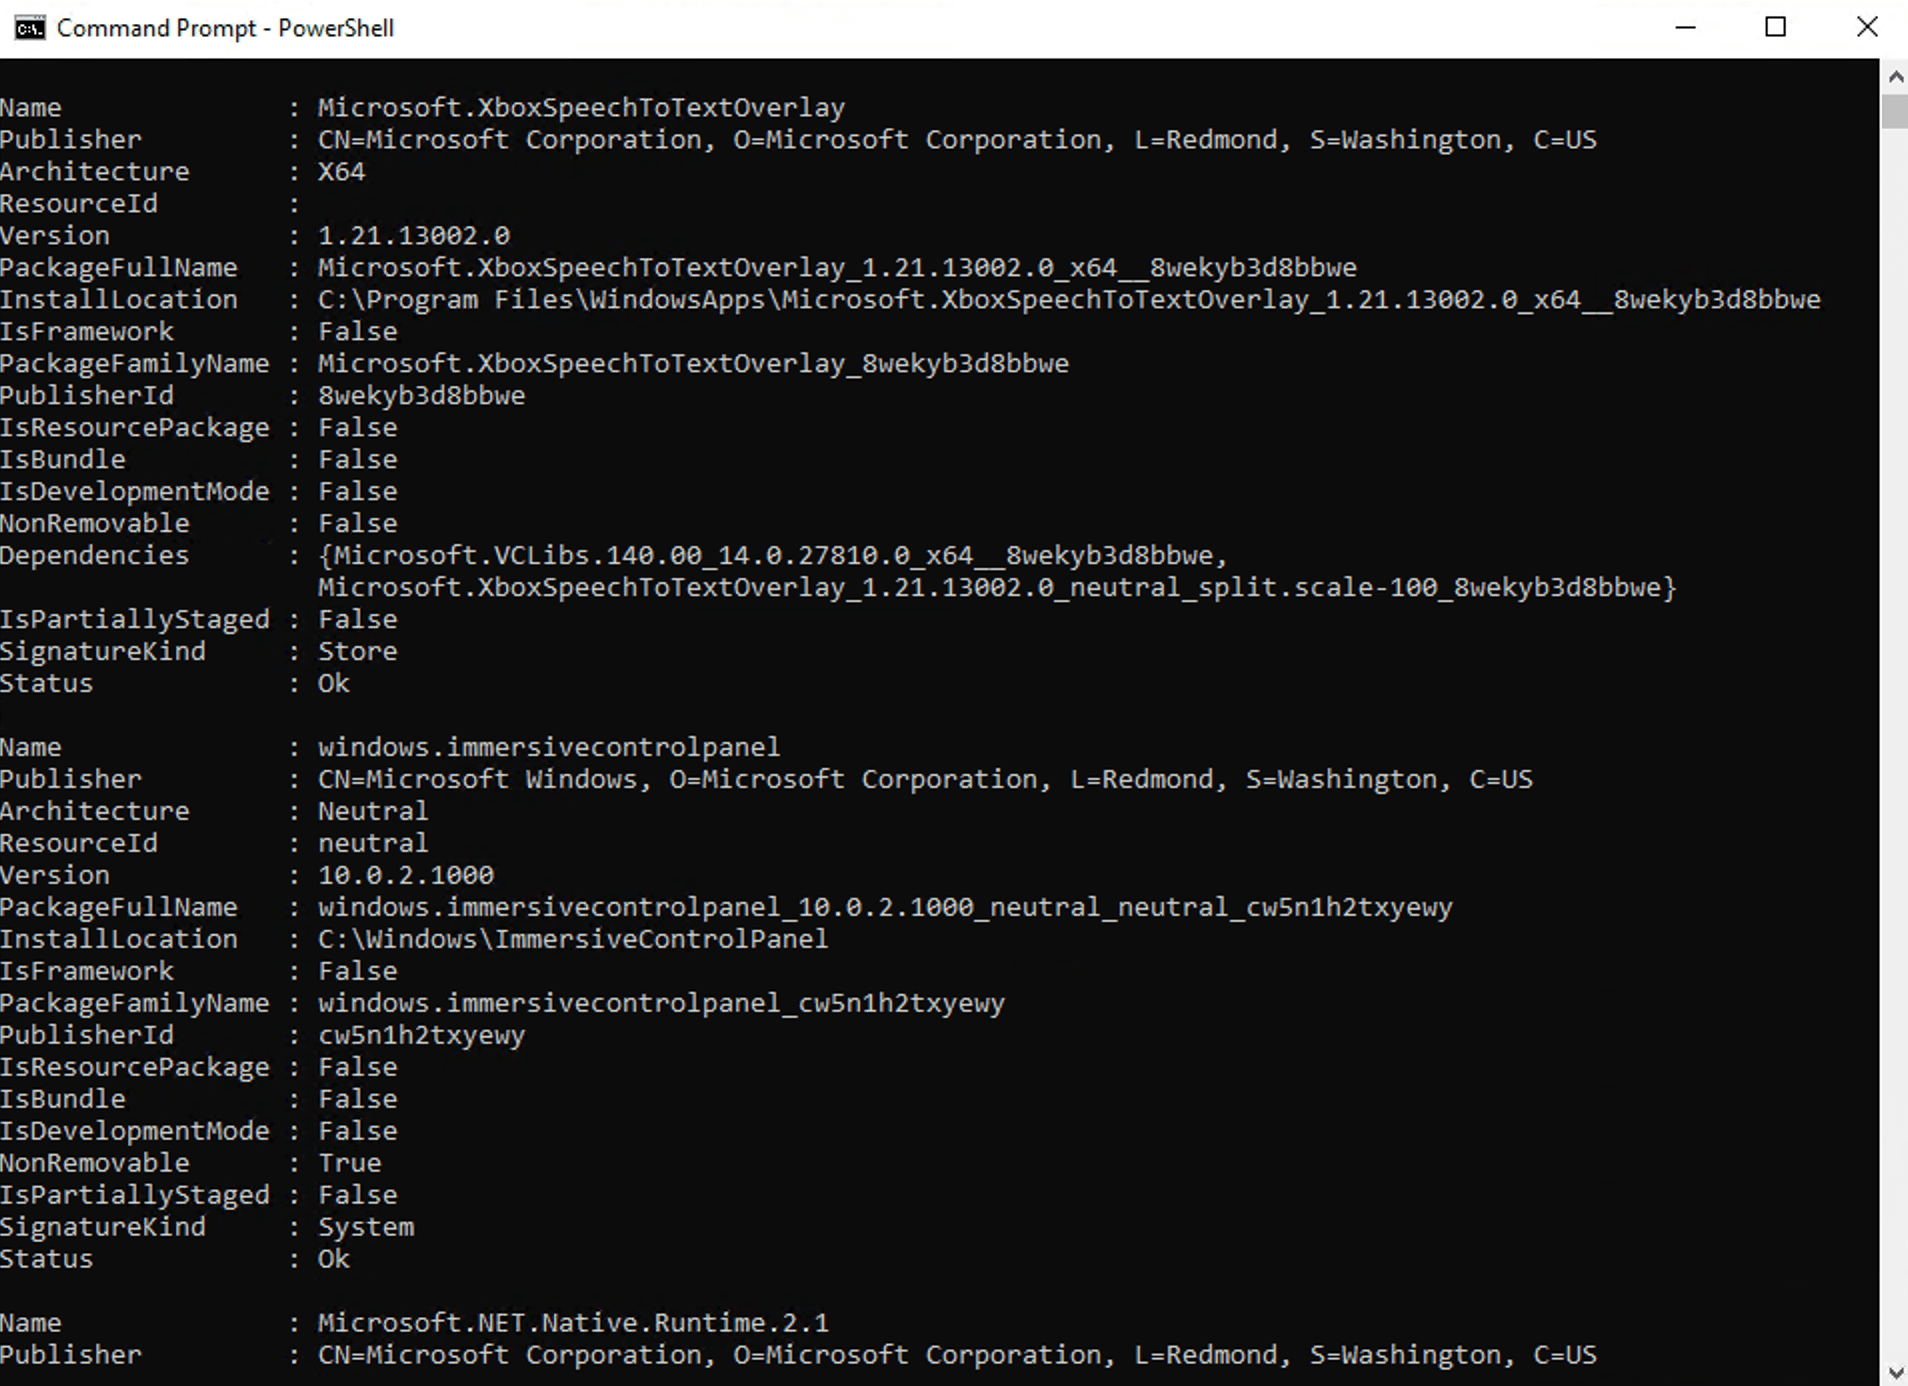
Next step in removing Windows 10 Apps with DISM is determining. Now, you can proceed to remove the appx after determining the PackageFullName to use as shown in the image above. use the /Remove-Package – Removes packages from the image to get rid of the package name this way.
dism /image:G:\Path-to-the-mount-file\MountZ /Remove-Provisionedappxpackage /PackageName:Microsoft.WindowsCalculator_2015.1009.20.0_neutral_~_8wekyb3d8bbwedism /image:G:\Path-to-the-mount-file\MountZ /Remove-Provisionedappxpackage /PackageName:Microsoft.XboxSpeechToTextOverlay_1.21.13002.0_x64__8wekyb3d8bbweEnter the following command again to check whether your selected apps have been removed.
dism /image:G:\Path-to-the-mount-file\MountZ /Get-ProvisionedappxpackagesOnce you finish modifying the WIM file, simply commit (save) it. This will unmount and save the newest state.
dism /unmount-wim /mountdir:G:\Path-to-the-mount-file\MountZ /commit2: PowerShell
You can also use PowerShell to add, remove, and list app packages (.appx or .appxbundle) per image or per user in a Windows installation. See the following articles on how to use the PowerShell instead of DISM.
Mount-WindowsImage -Path .\mount\ -ImagePath .\install.wim -Index 2Remove-AppxProvisionedPackage -PackageName Microsoft.WindowsCalculator_2015.1009.20.0_neutral_~_8wekyb3d8bbwe -Path .\mountDismount-WindowsImage -Path .\mount -SaveI hope you found this blog post helpful. By now, you should have a vivid knowledge of how to remove Windows 10 Apps with DISM. Please let me know in the comment session if you have any questions.


Nice! Thanks for explaining this