The Microsoft BitLocker Administration and Monitoring (MBAM) client enables administrators to enforce and monitor BitLocker drive encryption on computers in the enterprise. Kindly refer to some of these related guides: How to query MBAM to display the report for BitLocker Recovery for a specified period of time, What are the effects of renaming an MBAM or BitLocker-protected Computer, and how to fix unable to find compatible TPM.
You can also distribute the BitLocker client via electronic software distribution systems like Active Directory Domain Services or Microsoft System Center Configuration Manager. But in this guide, we will be deploying MBAM client as part the imaging process for a new deployment.
The steps I will be discussing below do not pertain to Configuration Manager BitLocker Management. The Invoke-MbamClientDeployment.ps1 PowerShell script is not supported for use with BitLocker Management in Configuration Manager as it can result in serious problems with the Configuration Manager site etc.
Also see Domain Name System: How to create a DNS record, and and DNS Bad key 9017: The Cluster Name registration failed of one or more associated DNS names.
Method 1: MBAM Client Deployment as part of Windows Image deployment process – Recommended by Microsoft
Prerequisites needed to enable BitLocker
Before we proceed, it will be worth discussing the prerequisites needed to enable BitLocker by deploying MBAM client as part of a Windows Deployment:
- An existing Windows image deployment process, Microsoft Deployment Toolkit (MDT), Microsoft System Center Configuration Manager, or some other imaging tool or process must already be in operation
- You must enable TPM in the BIOS and ensure that the OS can detect it.
- MBAM server is also running
- While imaging, make sure to join the machine to the domain to enable full MBAM-supported BitLocker functionality. As part of the deployment process, you can actually create some rule/task to have the device join the domain
- Create the necessary system partition required by BitLocker.
See how to fix System Partition not available or large enough on Microsoft BitLocker Administration and Monitoring [Part 1], and how to fix System Partition not available or large enough on Microsoft BitLocker Administration and Monitoring [Part 2].
Enable BitLocker during a Windows Deployment
Often times, you do not have to recreate a BitLocker partition. This is because BitLocker setup includes the ability to prepare and repartition drive as required. Most system drives are set up with BitLocker by default. Additionally, make sure to have your device installed in UEFI mode, not legacy BIOS mode.
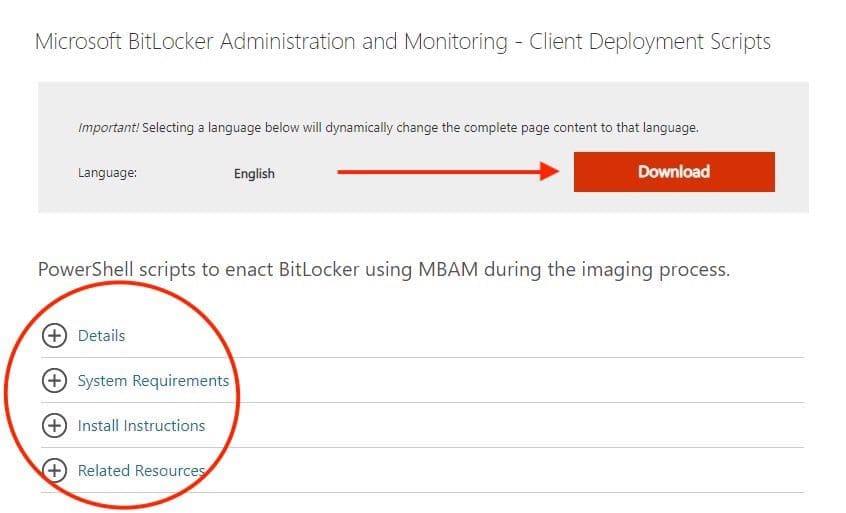
The recommended approach to enable BitLocker during a Windows Deployment is by using the Invoke-MbamClientDeployment.ps1 PowerShell script for MBAM 2.5 SP1. You can download the Invoke-MbamClientDeployment.ps1 script from Microsoft.com Download Center.
This is the main script that your deployment system will call to set up BitLocker drive encryption and record recovery keys with the MBAM Server.
Note: If your download does not start after 30 seconds, you can manually click to download it. this window will be prompted.
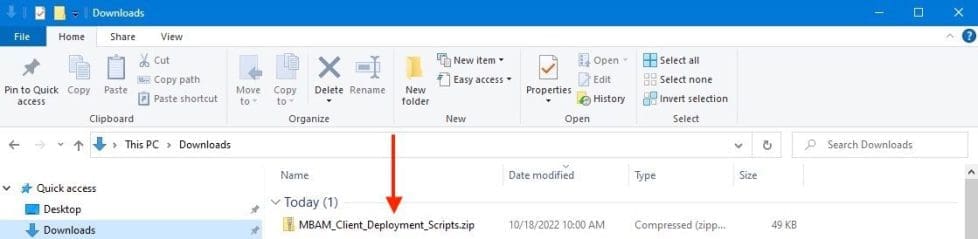
Consequently, after downloading, you will need to unzip theMbamClientDeployment in order to locate the script. As you can see, we have successfully unzipped.
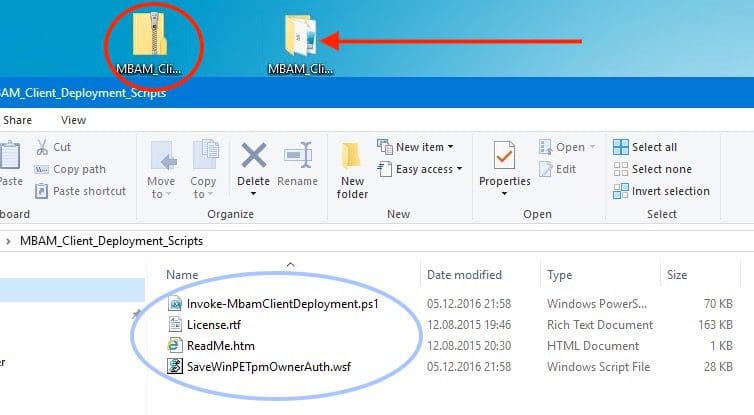
Now, we have gotten the tools that we need to perform the deployment. Before showing you the steps to integrate this PowerShell script with MDT, let us first discuss the features of the script.
Please, see Fix the following error occurred when DNS was queried for the service location, how to fix “Unable to Sign In: Domain Not Available”, and how to setup a cache-only DNS server
Features of the Invoke-MbamClientDeployment.ps1 script
The deployment of MBAM Client involves using the Invoke-MbamClientDeployment.ps1 script which enacts BitLocker during the imaging process
- Easy to use with MDT, System Center Configuration Manager, or standalone imaging processes
- Compatible with PowerShell 2.0 or higher
- Encrypt OS volume with TPM key protector
- Fully support BitLocker pre-provisioning, and can optionally encrypt FDDs
- Escrow recovery keys and recovery key packages
- Report encryption status immediately
- New WMI providers
- Detailed logging
- Robust error handling
For Windows 10, version 1607 or later, ONLY Windows can take ownership of the TPM at the time of writing this piece. In addition, Windows will not retain the TPM owner’s password when provisioning the TPM.
This behavior isn’t so for Windows 7 and Windows 8.1. See part of this information here “Microsoft Bitlocker Administration and Management: Effect of renaming an MBAM or BitLocker protected Computer“.
Note 1: When required by BitLocker policy, the MBAM agent immediately prompts the domain user to create a PIN or password when the domain user first logs on after imaging. Since I am using TPM only, this will not be the case.
Note 2: Also, if a computer isn’t part of a domain, the MBAM Key Recovery service won’t store the recovery password. By default, MBAM prevents encryption without the ability to store the recovery key.
Note: If a computer starts in recovery mode before the recovery key is stored on the MBAM Server, no recovery method is available, and the computer has to be reimaged.
Integrating the PowerShell Script with the imaging process in Microsoft Deployment Toolkit
You can use an existing DeploymentShareor create a new DeploymentShare as you wish. In this section, I will be showing you how to integrate the PowerShell script with MDT for deploying MBAM Client.
As I mentioned previously, the steps are similar to integrating them with any other process or tool. Kindly note the following vital points below.
- MBAM 2.5 SP1 introduced WMI methods to aid BitLocker activation via the Invoke-MbamClientDeployment.ps1 PowerShell script.
- If you are using BitLocker pre-provisioning (WinPE) and want to maintain the TPM owner authorization value, you must add the
SaveWinPETpmOwnerAuth.wsfscript in WinPE immediately before the installation reboots into the full operating system. If you do not use this script, you will lose the TPM owner authorization value on reboot. In my case, I do not use BitLocker pre-provisioning (WinPE).
Here are some nice guides on this topic: How to debug a PowerShell script, how to install and debug logs with the CMTrace Tool, how to perform PowerShell syntax check using PSScriptAnalyzer, and Script debugging: Difference between testing and debugging.
Modified the Invoke-MbamClientDeployment script
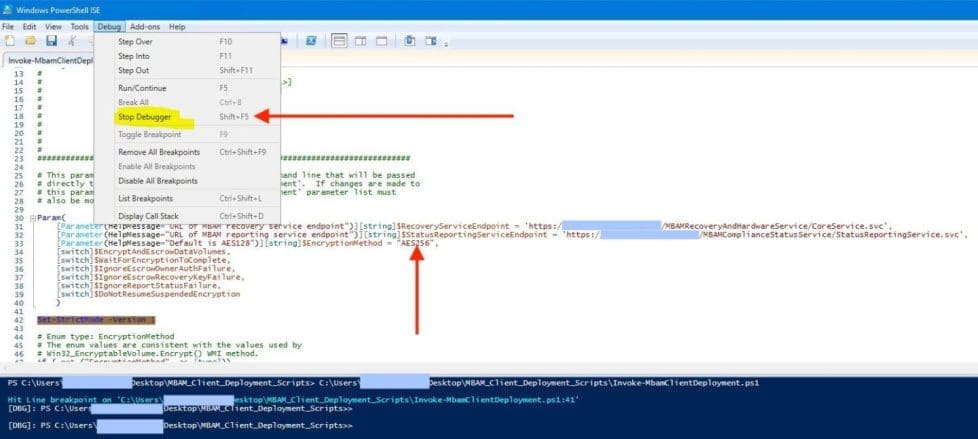
A: Firstly, ensure you have modified the Invoke-MbamClientDeployment.ps1 PowerShell script. Then, correctly configure the RecoveryServiceEndpoint.
| -RecoveryServiceEndpoint | Required | MBAM recovery service endpoint |
| -StatusReportingServiceEndpoint | Optional | MBAM status reporting service endpoint |
| -EncryptionMethod | Optional | Encryption method (default: AES 128) |
| -EncryptAndEscrowDataVolume | Switch | Specify to encrypt data volume(s) and escrow data volume recovery key(s) |
| -WaitForEncryptionToComplete | Switch | Specify to wait for the encryption to complete |
| -DoNotResumeSuspendedEncryption | Switch | Specify that the deployment script will not resume suspended encryption |
| -IgnoreEscrowOwnerAuthFailure | Switch | Specify to ignore TPM owner-auth escrow failure. It should be used in scenarios where MBAM is not able to read the TPM owner-auth, e.g. if TPM auto-provisioning is enabled |
| -IgnoreEscrowRecoveryKeyFailure | Switch | Specify to ignore volume recovery key escrow failure |
| -IgnoreReportStatusFailure | Switch | Specify to ignore status reporting failure |
As you can see below, the Invoke-MbamClientDeployment.ps1 has been modified to reflect my need. I advise you to also do so.
Note: After modifying the script, I had to test it to ensure the script is free of errors. Therefore, I had to use the Debug functionality.

Now to proceed, please copy the Invoke-MbamClientDeployment.ps1 to the DeploymentShare>\Scripts.
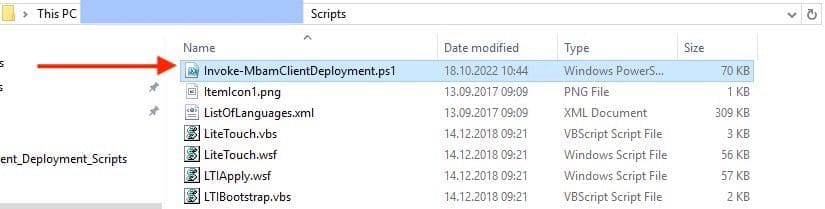
Note: If you are using pre-provisioning, copy the SaveWinPETpmOwnerAuth.wsf file into \Scripts. In my case, I am not using the BitLocker pre-provisioning WinPE. Therefore, I do not care about this specific step.
Add the MBAM 2.5 SP1 client application to the Applications node
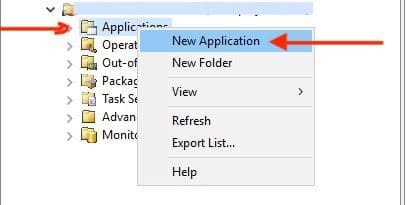
Next, you will have to add the MBAM 2.5 SP1 client application to the Applications node in the deployment share. Under the Applications node, click New Application.
Note: If you are running MBAM SP1 and do not have the update bundled with the MBAM client installer or installed separately, you may run into issues. See this guide on how to fix “MBAM Policy was detected: Verify the OU used for pre-deployment does not apply MBAM policy”
Select Application with Source Files. Click Next.

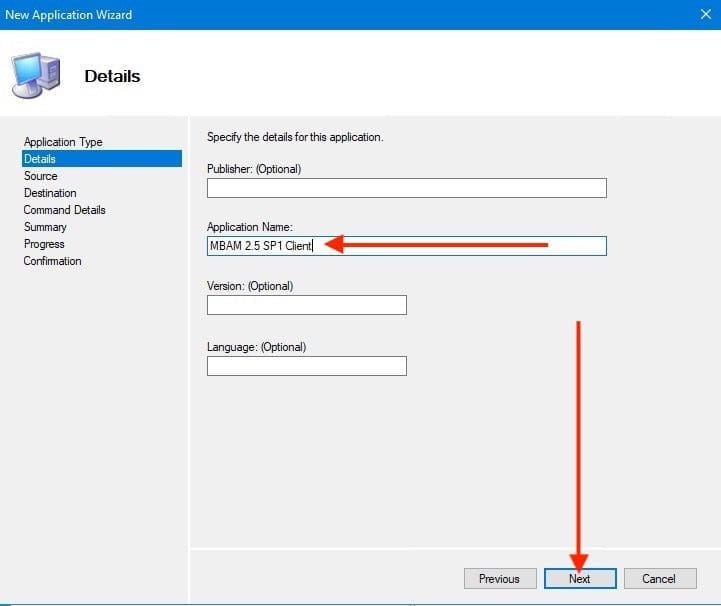
In the Application Name, type “MBAM 2.5 SP1 Client”. Click Next.
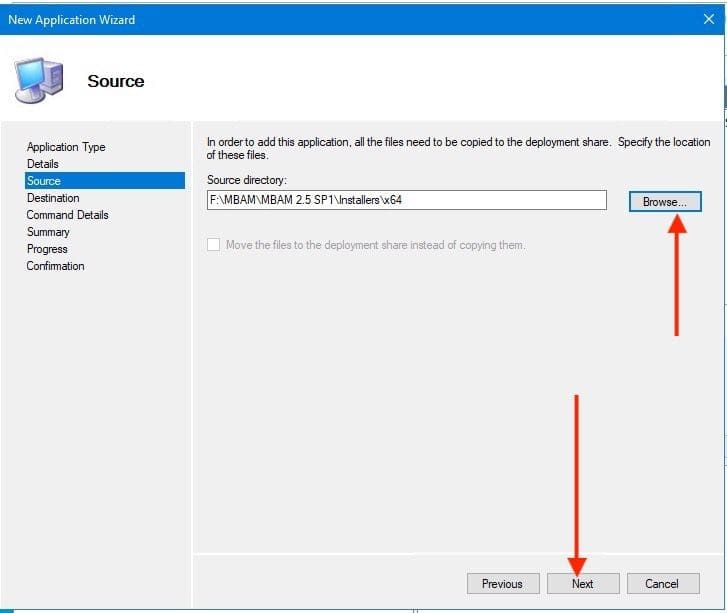
Browse to the directory containing MBAMClientSetup.msi. Click Next.
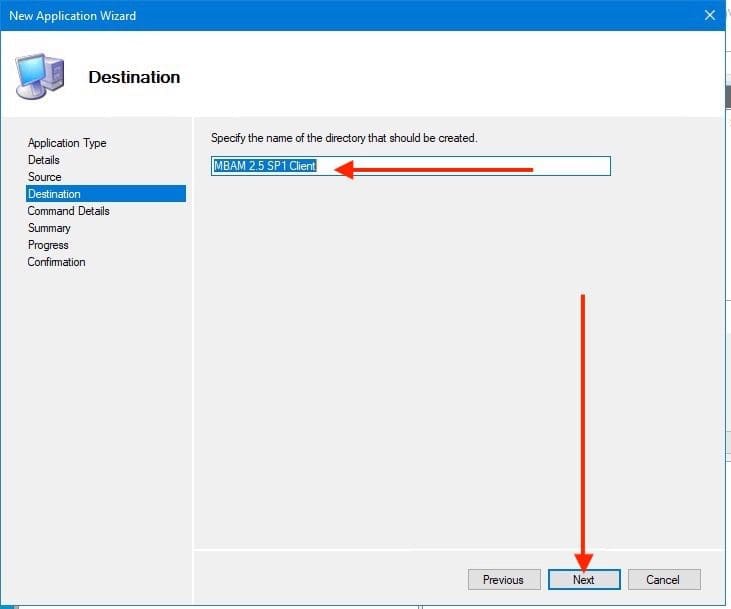
Type “MBAM 2.5 SP1 Client” as the directory to create. Click Next.
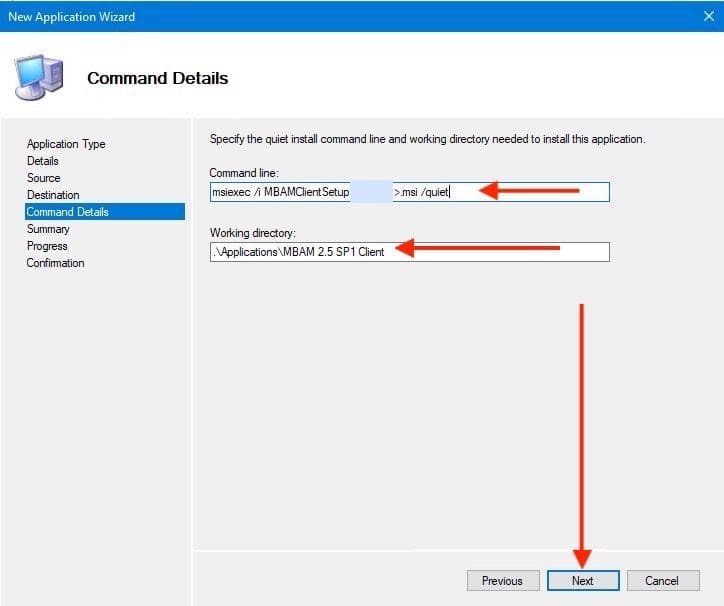
Enter msiexec /i MBAMClientSetup-<Version>.msi /quiet at the command line. Click Next.
For other ways to have this client installed other than what has been mentioned, please see these guides: Kindly refer to these guides on how to install Windows Package Manager (Winget CLI), how to install, upgrade and uninstall Chocolatey, how to install, upgrade and uninstall software with Chocolatey, and how to install Winget CLI.
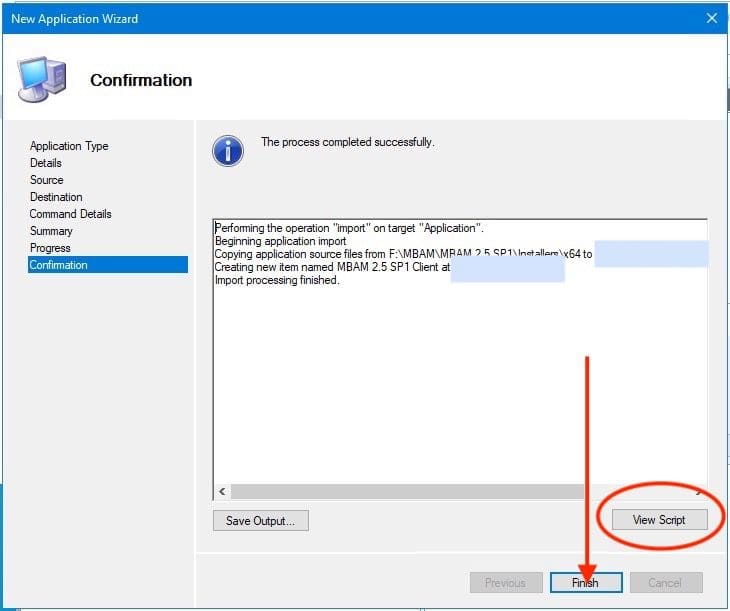
Accept the remaining defaults to complete the New Application wizard. After that the step is complete, click on Finish.
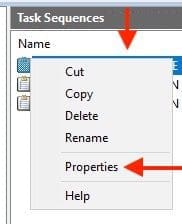
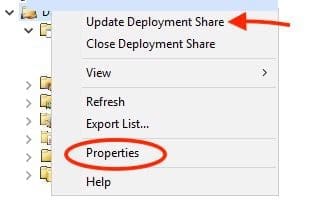
In MDT, right-click the name of the deployment share and click Properties. Click the Rules tab. Then, add the following lines, and click on OK to close the window.
SkipBitLocker=YES``BDEInstall=TPM``BDEInstallSuppress=NO``BDEWaitForEncryption=YES

Please see how to fix the following errors occurred attempting to join the domain: The specified domain either does not exist or could not be contacted, and “Integrate Hyper-V: Install System Center Virtual Machine Manager (post Windows Server setup section).
Create a new task sequence
Under the Task Sequences node, edit an existing task sequence used for Windows Deployment or create a new task sequence by right-clicking the Task Sequences node, selecting New Task Sequence, and completing the wizard for deploying MBAM Client.
On the Task Sequence tab of the selected task sequence, perform these steps:
Note: Under the Preinstall folder, enable the optional task Enable BitLocker (Offline). If you want BitLocker enabled in WinPE, which encrypts used space only. I’m not interested in encrypting only the used space, so I won’t take this step.
Note: Why I do not care about WinPE encryption: Under the Preinstall folder, enable the optional task Enable BitLocker (Offline). If you want BitLocker enabled in WinPE, which encrypts used space only. I will not be performing this step as I am not interested in encrypting used space only.
Note: If you are still using Windows 7 and 8.1, you will need to ensure TPM OwnerAuth when using pre-provisioning persists. Kindly refer to Microsoft documentation on this. Therefore, I will not be performing this step.
Install MBAM 2.5 SP1 client application
In the State Restore folder, delete the Enable BitLocker task.

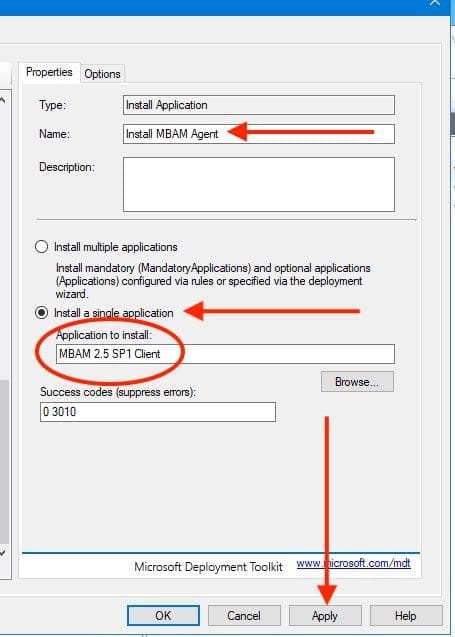
In the State Restore folder under Custom Tasks, create a new Install Application task and name it Install MBAM Agent. Click the Install Single Application radio button and browse to the MBAM 2.5 SP1 client application created earlier.
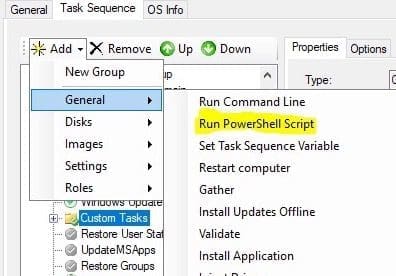
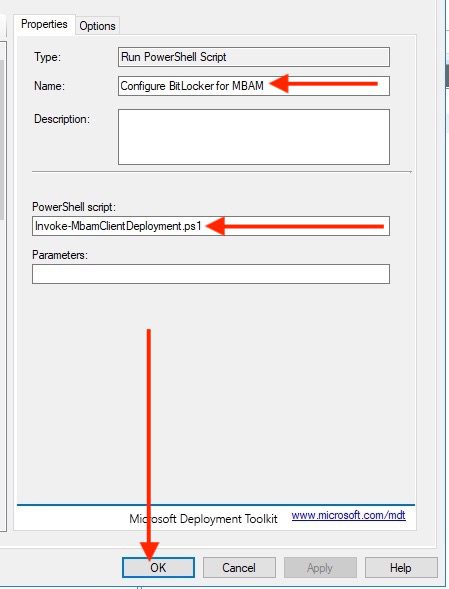
In the State Restore folder under Custom Tasks, create a new Run PowerShell Script task (after the MBAM 2.5 SP1 Client application step) with the following settings (update the parameters as appropriate for your environment):
- Name: Configure BitLocker for MBAM
- PowerShell script: Invoke-MbamClientDeployment.ps1
- Parameters:
While using these step to configure BitLocker settings and initiate the process of deploying MBAM Client, ensure the deployment properties are up to date. When this has been determined, kindly update the deployment share.
Lastly, do not forget to take the boot image (LiteTouchWinPE.wim) to WDS.
Now, you can start your Windows Deployment again, similar to what I have documented in the article “Install ADK, MDT, and WDS: How to deploy Windows images via Microsoft Deployment Toolkit and Windows Deployment Services“. Here is a related guide: Windows Deployment Services (How to boot (deploy) operating systems images through the network).
Other related activities
You Device will restart multiple times depending on your tasks etc, but do not be perturbed! Everything is alright, and the deployment is running. For instance, when the TS task to install the MBAM agent and configure is not initiated yet, your device remains unprotected and fully decrypted.

When the task is to install the MBAM agent and configure BitLocker completes, it will run without issues, and you should be able to view the encryption status.

As shown above, we completed the MBAM deployment with negligible errors unrelated to MBAM/BitLocker integration, and the encryption process is still running. To avoid slowing down your deployment, we recommend installing the agent near the end of the OSD task sequence so that any encryption initiated will not impede the deployment.
As I said above, there are different ways to achieve this. Microsoft recommends the steps above for implementing MBAM SP1. If you wish to use other methods, please see the second method below. To enable BitLocker using MBAM 2.5 or earlier as part of a Windows deployment, please take a look at this link.
Here is an interesting guide on how to view BitLocker’s status. Is BitLocker Enabled? How to view BitLocker Disk Encryption Status in Windows.
Methods 2: Deploy the MBAM Client to Desktop or Laptop Computers via MDT and WDS
These steps in method 2 have not been tested. But should work and this is why I am sharing it with you in order to see what is obtainable.
Step 1
Import the MBAM client.msi file into the MDT Application Installer by right-clicking the Applications folder in the MDT Deployment Share tree structure and running the New Application Wizard
Step 2
Add that MBAM Client application to your Task Sequence after you have installed any applications or modifications of your image.
Note 1: To install MBAM during the deployment, just create an application package/program to install the agent. It’s recommended that you install the agent near the end of the OSD task sequence so any encryption you do start will not slow your deployment down.
Note 2: It’s also smart to create a step in the Task Sequence (TS) to eject the CD-ROM before the MBAM Service starts if you have one. BitLocker cannot start the encryption process with a disk in the drive. If you have started your OSD with a CD to boot to the WinPE environment this is especially important.
After the client is installed you can then start the TPM-only encryption process by following these procedures and adding steps to your TS.
You’ll need to modify the registry by inserting a new registry key. This key mimics the settings a GPO would apply to the workstation so it will begin the encryption process. A registry file is deposited in the MBAM client installation directory under “C:\Program Files\Microsoft\MDOP MBAM.”
Copy this file to the MDT Deployment Share in the Scripts Root Directory and then call it via the custom command as shown below. Here is an example Key:
[HKEY_LOCAL_MACHINE\SOFTWARE\Microsoft\MBAM] “KeyRecoveryOptions”=dword:00000001
“UseKeyRecoveryService”=dword:00000001
“KeyRecoveryServiceEndPoint”=https://<yourserverhere>/MBAMRecoveryAndHardwareService/CoreService.svc
“DeploymentTime”=dword:00000001
You will need to modify the “KeyRecoveryServiceEndPoint” in the imported .reg file. Assign the right permissions to the user account used during the MDT deployment process and to the Domain User. With these permissions in place, the integration should work effortlessly.
After the service has started BitLocker and the encryption process has begun, you must remove the registry keys imported earlier in the process. This can be done by running Regedit on the registry import file with a minus sign added to the keys that were imported. Example, the “KeyRecoveryOptions”=dword:00000001 entry becomes “KeyRecoveryOptions”=- )
Part 2 – Common Errors when deploying MBAM Client fails
These error codes are returned for troubleshooting when deploying MBAM client fails. Kindly refer to the table for the list of common error messages
| Common return values | Error message |
|---|---|
| S_OK 0 (0x0) | The method was successful for deploying MBAM Client |
| MBAM_E_TPM_NOT_PRESENT 2147746304 (0x80040200) | TPM is not present in the computer or is disabled in the BIOS configuration. |
| MBAM_E_TPM_INCORRECT_STATE 2147746305 (0x80040201) | TPM is not in the correct state (enabled, activated and owner installation allowed). |
| MBAM_E_TPM_AUTO_PROVISIONING_PENDING 2147746306 (0x80040202) | MBAM cannot take ownership of TPM because auto-provisioning is pending. Try again after auto-provisioning is completed. |
| MBAM_E_TPM_OWNERAUTH_READFAIL 2147746307 (0x80040203) | MBAM cannot read the TPM owner authorization value. The value might have been removed after a successful escrow. On Windows 7, MBAM cannot read the value if the TPM is owned by others. |
| MBAM_E_REBOOT_REQUIRED 2147746308 (0x80040204) | The computer must be restarted to set TPM to the correct state. You might need to manually reboot the computer. |
| MBAM_E_SHUTDOWN_REQUIRED 2147746309 (0x80040205) | The computer must be shut down and turned back on to set TPM to the correct state. You might need to manually reboot the computer. |
| WS_E_ENDPOINT_ACCESS_DENIED 2151481349 (0x803D0005) | Access was denied by the remote endpoint. |
| WS_E_ENDPOINT_NOT_FOUND 2151481357 (0x803D000D) | The remote endpoint does not exist or could not be located. |
| **WS_E_ENDPOINT_FAILURE 2151481357 (0x803D000F) | The remote endpoint could not process the request. |
| WS_E_ENDPOINT_UNREACHABLE 2151481360 (0x803D0010) | The remote endpoint was not reachable. |
| WS_E_ENDPOINT_FAULT_RECEIVED 2151481363 (0x803D0013) | A message containing a fault was received from the remote endpoint. Make sure you are connecting to the correct service endpoint. |
| WS_E_INVALID_ENDPOINT_URL 2151481376 (0x803D0020) | The endpoint address URL is not valid. The URL must start with “http” or “https”. |
ReportStatus:
Reads the compliance status of the volume and sends it to the MBAM compliance status database by using the MBAM status reporting service. The status includes cipher strength, protector type, protector state, and encryption state.
If it fails, an error code is returned for troubleshooting. Here is a list of common error messages:
| Common return values | Error message |
|---|---|
| S_OK 0 (0x0) | The method was successful |
| WS_E_ENDPOINT_ACCESS_DENIED 2151481349 (0x803D0005) | Access was denied by the remote endpoint. |
| WS_E_ENDPOINT_NOT_FOUND 2151481357 (0x803D000D) | The remote endpoint does not exist or could not be located. |
| WS_E_ENDPOINT_FAILURE 2151481357 (0x803D000F) | The remote endpoint could not process the request. |
| WS_E_ENDPOINT_UNREACHABLE 2151481360 (0x803D0010) | The remote endpoint was not reachable. |
| WS_E_ENDPOINT_FAULT_RECEIVED 2151481363 (0x803D0013) | A message containing a fault was received from the remote endpoint. Make sure you are connecting to the correct service endpoint. |
| WS_E_INVALID_ENDPOINT_URL 2151481376 (0x803D0020) | The endpoint address URL is not valid. The URL must start with “http” or “https”. |
MBAM_Volume WMI Class EscrowRecoveryKey:
Reads the recovery numerical password and a key package of the volume and sends them to the MBAM recovery database by using the MBAM recovery service.
Note: If it fails, an error code is returned for troubleshooting. Here is a list of common error messages:
| Common return values | Error message |
|---|---|
| S_OK 0 (0x0) | The method was successful |
| FVE_E_LOCKED_VOLUME 2150694912 (0x80310000) | The volume is locked. |
| FVE_E_PROTECTOR_NOT_FOUND 2150694963 (0x80310033) | A Numerical Password protector was not found for the volume. |
| WS_E_ENDPOINT_ACCESS_DENIED 2151481349 (0x803D0005) | Access was denied by the remote endpoint. |
| WS_E_ENDPOINT_NOT_FOUND 2151481357 (0x803D000D) | The remote endpoint does not exist or could not be located. |
| WS_E_ENDPOINT_FAILURE 2151481357 (0x803D000F) | The remote endpoint could not process the request. |
| WS_E_ENDPOINT_UNREACHABLE 2151481360 (0x803D0010) | The remote endpoint was not reachable. |
| WS_E_ENDPOINT_FAULT_RECEIVED 2151481363 (0x803D0013) | A message containing a fault was received from the remote endpoint. Make sure you are connecting to the correct service endpoint. |
| WS_E_INVALID_ENDPOINT_URL 2151481376 (0x803D0020) | The endpoint address URL is not valid. The URL must start with “http” or “https”. |
Please see How to fix Domain Join Error during Windows Deployment, how to Integrate Hyper-V [SCVMM] with Veeam Recovery Orchestrator, and how to Integrate Hyper-V: Install System Center Virtual Machine Manager.
FAQs relating to MBAM
Launch the MBAM UI directly from “C:\Program files\Microsoft\MDOP MBAM\MBAMClientUI.exe”
When MBAM reaches its end-of-life, support and updates will cease. Organizations should transition to using Microsoft Endpoint Configuration Manager (formerly SCCM) or other modern tools to manage BitLocker and continue generating compliance and recovery reports such as Trellix.
I hope you found this blog post how to deploy MBAM Client as part of a Windows Deployment helpful. Please let me know in the comment session if you have any questions.