Turn off Automatic Updates in Windows via Windows Registry and Group Policy

Microsoft releases Windows updates to address specific issues every month. These updates provide protection against malicious attacks and sometimes add new features to the operating system (OS). Therefore, these updates are critical. In general, Windows automatically downloads and installs updates to make sure your device is secure and up to date except there are settings preventing this. Sometimes, these updates are problematic. In this article, we shall discuss how to turn off automatic Windows Updates via the Registry and GPO. Please see How to enable or disable automatic software updates on Mac.
Reasons to Disable Windows Update
Most users delay or disable automatic Windows updates just to avoid possible issues. There are users who would like to stay with their current stable operating system. They will do everything not to update Windows just because everything is working. The learning curve of new features overwhelms some users.
Automatic updates in Windows may trigger automatic reboots, which can be inconvenient, especially in scenarios where continuous operation is essential. Turning off automatic updates gives users the flexibility to schedule reboots at more convenient times.
Therefore, this kind of people would rather disable Windows updates to stop Windows automatic updates. Also, see how to Fix Windows cannot check for updates in Windows 8, 7, and 10, How to start an application automatically on Mac, and Why Group Policy is not the best solution for managing Windows Updates.
See the following article on the reasons why you may want to disable or pause Windows Updates. They are “How to disable automatic Windows updates via Windows Settings“, and “How to Pause Windows Update via Windows Settings“.
Disable Automatic Windows Updates via Windows Registry
To disable Automatic Windows Updates, follow the steps given steps. Type Regedit in the Start menu or taskbar search box and then press Enter key. Click the Yes button when the User Account Control dialog appears.
Or via the run dialogbox as shown below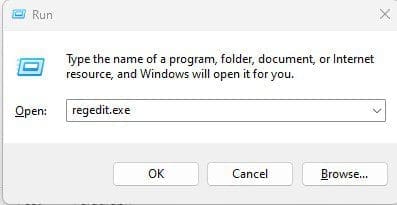
In the Registry Editor, navigate to the following key:
HKEY_LOCAL_MACHINE\SOFTWARE\Policies\Microsoft\Windows
Right-click on the Windows key (as shown in the below picture), click New and then click Key.

New key created

Now that you have created the WindowsUpdate key. Right-click on the WindowsUpdate key, select New, select Key, and then enter the name as AU.

Click on the AU key. On the right pane of the window. Right-click on the empty space, click New, select DWORD (32-bit) Value, and name it “NoAutoUpdate“.

Next, double-click on NoAutoUpdate. Set the value data to one of the following numbers:
0 – To enable automatic updates
1 – To turn off automatic updates
When you turn off automatic updates using the instructions mentioned above. Windows will never check for updates. When you navigate to the Advanced options of Windows Settings in the Settings app, you will see Never check for updates as the status under the Choose how updates are Installed section.
Another available settings to Turn off Automatic Windows Updates via the Registry
Based on the remark above, if you do not want to completely turn off automatic updates but want to control how the updates are installed, kindly choose any of the options below.
Same steps as above, navigate to the following Windows Registry Key.
HKEY_LOCAL_MACHINE\SOFTWARE\Policies\Microsoft\WindowsSelect AU key, on the right side, create a new 32-bit DWORD and name it as AUOptions. Then set the value as one of the following numbers below. Note: We have created these Keys and DWORD already above.
2 – Notify before downloading and installing updates
3 – Auto download updates and notify for install
4 – Auto download updates and schedule the install
5 – Allow local admin to choose setting
Enter the value 2 for example. Now you have set some lenient Windows update option
Disable Automatic Updates in the Group Policy Editor
Launch The Group Policy Editor via the run dialog box.

This will open the Local Group Policy Editor.

Navigate through the following locations
Computer Configuration -> Administrative Templates -> Windows Components -> Windows Update
Configure disable automatic updates

FAQs on disabling Windows Updates
What are the potential risks of turning off automatic updates?
Delaying or turning off updates might leave your system exposed to security vulnerabilities that are patched in the latest updates.
In some organisations, there are legal and compliance requirements that mandate regular security updates. Turning off updates might put you at odds with these requirements.
Other reasons to turn off automatic updates in Windows?
Some users or organizations prefer to have more control over when and how updates are installed. This allows them to ensure that updates don’t disrupt critical operations or workflows during specific times.
Systems Administrators may want to test updates in a test environment before deploying them widely. Disabling automatic updates allows for more strategic testing and deployment.
I hope you found this blog post on how to Turn off Automatic Windows Updates via the Registry and GPO helpful. Please let me know in the comment section if you have any questions.


