This article will discuss the step-by-step guide on how to set up the Synology DS923+ NAS. It covers the entire process from unboxing to configuration thereby ensuring you have a smooth experience even if it’s your first time using a Synology NAS. Please see Stop Apps from running automatically on MAC, Information on BOOTP Vendor Extensions and DHCP Options, and how to fix Windows Can’t find the path: Please check the spelling and try again.
It will interest you to know that Synology NAS devices offer various features such as backup, storage, networking, and surveillance. Compared to other NAS devices, it currently costs 599 Euro or 599 Dollar when writing this piece. This is indeed a great bargain considering the feature set.
Before unpacking the NAS device, take a moment to familiarise yourself with the various hardware components depicted in the image below.

Please see how to Setup RAID 5 and 10 with MegaRAID Storage Manager on RX300 S5, and Synology NAS brute-force attack: Employ Synology Best Practice to remediate StealthWorker Botnet attack.
Why purchase a DS923+ or similar NAS Model
Are you looking to upgrade your existing NAS device with the 4-bay powerhouse, the DiskStation DS923+ is the perfect choice. Below are some of the reasons why you would want to invest the sum of 599 Euro or 599 Dollar on this lucrative storage system.
Efficient Data Storage and Management: Synology NAS provides a centralised and efficient solution for storing and managing your data. With features like RAID configurations, it ensures data integrity and offers flexible storage options tailored to your needs.
User-Friendly Interface and Accessibility: Synology’s intuitive DiskStation Manager (DSM 7.2) interface simplifies DS923+ NAS management. Users can easily access, organize, and share files through a user-friendly web-based interface, making it accessible to individuals with varying technical expertise.
Robust Backup and Recovery Options: Synology NAS offers comprehensive backup and recovery tools. This includes built-in apps and support for third-party solutions.
This ensures the safety of your data through scheduled backups, versioning, and the ability to restore data in case of accidental deletion or hardware failure.
Multifunctional Applications for Diverse Needs: Beyond storage, Synology NAS serves as a versatile platform with a wide array of applications. From multimedia streaming and surveillance to collaboration tools and virtualization support.
Synology NAS caters to diverse needs, making it a valuable addition to both home and business environments.
Enhanced Security Features: Synology prioritizes security with features such as two-factor authentication, firewall management, and regular security updates. By proactively addressing potential vulnerabilities, Synology NAS helps safeguard your data against unauthorized access and cyber threats.
Please see how to Migrate Veeam Configuration Database to PostgreSQL Server, and Missing Windows Defender? Install and manage Microsoft Defender via Windows Security on Windows Server.
The Synology DS923+ Unboxing
The DS923+ comes in an eco-friendly packaging that is informative. Start by carefully unpacking the Synology NAS and inspecting the contents.
Verify that you have all the necessary components, including the NAS unit, power adapter, Ethernet cable, and any additional accessories. As evident below, I have unpacked the unit and accessories from the delivery package.


The NAS device comes equipped with four drive bays. Installing a 3.5-inch HDD is exceptionally straightforward. If opting for 2.5-inch SSDs, users should utilise the provided screws to securely mount the drives.
As you can see below, my NAS arrived with a Main Unit, 2x 4TB Synology HDD, an Accessory Pack, AC Power Adapter, AC Power Cord, 2 RJ-45 LAN Cable, and a quick Installation Guide.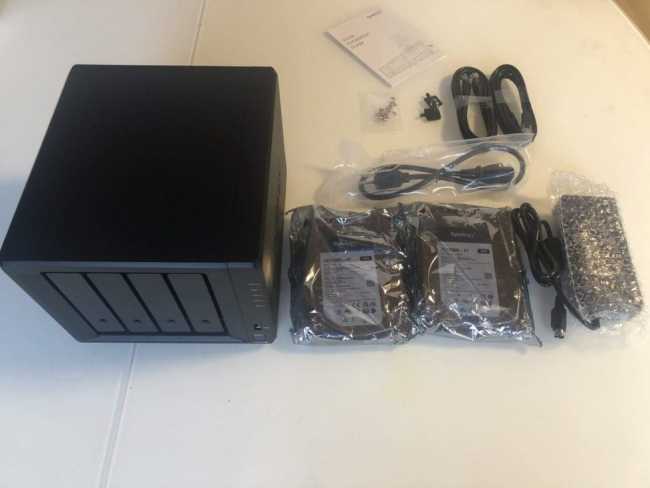
Fortunately, my NAS device includes 2x 4TB drives, which is not the norm as one has to purchase the NAS HDD separately.
As advertised by Amazon, the IronWolf stands out as an excellent NAS HDD to insert into the DiskStation DS923+ demonstrating long-term reliability. Please unpack the drives and install them into the bays.
Note: Insert the drive into the NAS from left to right

Also, DS923+ introduces a noteworthy feature, the ability to utilize M.2 NVMe SSDs for storage, a functionality previously restricted to SSD caching. This advancement allows users to insert an M.2 SSD and employ it as a storage drive, akin to a conventional 3.5-inch HDD or 2.5-inch SSD.
One important consideration is that the M.2 drive bays cannot be used independently. You must install a mechanical hard drive or SSD in one of the four drive bays first. Thereafter, you can proceed to slot in the M.2 SSDs.
Good airflow is facilitated by vented sides and dual 92mm fans at the back of the NAS. This prevents the drives from overheating during high-load operations. The chassis, constructed from aluminum, features plastic drive bays.


Finally, connect the supplied Ethernet cable from the NAS to the router, and then plug the external power supply into the NAS.
Comparing DS923+ NAS to other Synlogy NAS
By assessing the specifications and features of each Synology NAS model. You can make an informed decision based on your unique storage and performance needs.
For me, the DS923+ suits my need and below are some great considerations and specification you need to consider it if you’re planning an upgrade.
| S1621+ | DS923+ | DS1522+ | |
| Drive Bays | 6 x SATA, 2 x NVMe | 4 x SATA, 2 x NVMe | 5 x SATA, 2 x NVMe |
|---|---|---|---|
| CPU | AMD Ryzen V1500B Quad-Core | AMD Ryzen R1600 Dual-Core (4 Threads) | AMD Ryzen R1600 Dual-Core (4 Threads) |
| RAM (RAM) (MB/s) | AMD Ryzen V1500B Quad-Core | 4 GB DDR4 ECC – Up to 32GB | 8GB DDR4 ECC – Up to 32GB |
| network ports | 4 x 1GbE, 10GbE expandable | 2 x 1GbE, 10GbE expandable | 4 x 1GbE, 10GbE expandable |
| Read performance (MB/s) | 451 MB/s | 625 MB/s | 763 MB/s |
| Write performance (MB/s) | 449 MB/s | 559 MB/s | 796 MB/s |
| External device interface | 2 x USB 3.2 Gen 1 2 x expansion port | 2 x USB 3.2 Gen 1 1 x expansion port | 2 x USB 3.2 Gen 1 2 x expansion port |
| Protection period | 3 years, can be extended to 5 years | 3 years, can be extended to 5 years | 3 years, can be extended to 5 years |
As you can see above, there is a standard 3 year warranty as it is with all DiskStation models. This can be extended during the setup or after setup.
DS923+ Specification
This section provides details on both the hardware and software specifications of the DS923+ device. The device’s enhanced speed for everyday use is primarily due to the Ryzen hardware, resulting in significant performance gains. Additionally, the NAS system consumes less power, making it more energy-efficient.
To upgrade from the 2x Gigabit Ethernet (which supports Link Aggregation and Failover) to 10 Gigabit networking. You can incorporate a cost-effective add-on, as illustrated in the table above.
| Product Size (Height x Width x Depth) | 166 mm x 199 mm x 223 mm |
| Hot Swappable Drive* | Yes |
|---|---|
| CPU Architecture | 64-bit |
| CPU Frequency | 2-core 2.6 (base) / 3.1 (turbo) GHz |
| Maximum Memory Capacity | 32 GB (16 GB x 2) |
| Supported File system – Internal – External | – Btrfs, EXT4 (Configured Btrfs) – Btrfs, ext4, ext3, FAT, NTFS, HFS+, and exFAT |
| USB ports | 2 x USB 3.1 Gen1 |
| M.2 slots | Storage and SSD caching |
| File Protocol | SMB, AFP, NFS, FTP, WebDAV, Rsync |
| System Fan (Cooling) | 2 x 92mm, 20.7dB(A) |
| Fan Speed Mode | Full-Speed Mode, Cool Mode, and the Quiet Mode |
| Extensibility | 1 x eSATA port, 5 additional drive bays |
| AC Input Power Voltage | 100V to 240V AC |
| Power Consumption | 35.51 W (Access), 11.52 W (HDD Hibernation) |
| Supported RAID Type | Synology Hybrid RAID, Basic, JBOD, RAID 0, RAID 1, RAID 5, RAID 6, RAID 10 |
| Supported Browsers | Chrome, Firefox, Edge, and Safari |
| Virtual Machine Manager | 4 (Recommended Virtual Machine Instances) |
| VPN Server | Yes (Maximum connection recommended 40) |
Note: The hot swappable drive feature is not supported by M.2 SSD slots. Flip it over and you will find a pair of M.2 NVMe SSD slots underneath.
In summary, the DS923+ excels in running VMs. Its 2x Gigabit Ethernet, supporting Link Aggregation and Failover, along with the option to switch to 10GbE networking via E10G22-T1-Mini card thereby providing versatility for everyday use. The NAS boasts expandable RAM and M.2 slots for storage, making it an ideal choice for home users, Veeam professionals or vExperts.
Initial configuration
These steps involves setting up your NAS after unboxing. Navigate to the URL find.synology.com in the address bar of your web browser to find your Synology NAS on the Web Assistant page
Alternatively, you can download the Synology Assistant desktop utility in order to find your NAS on the network.

Once you locate your NAS, initiate the installation of DSM (DiskStation Manager). Follow the prompts to install Synology NAS.

Accept the End User License Agreement and click Next.

Ensure you read the Synology Privacy Statement. When done, click continue.

On the setup page, click install.

This step ensures that your NAS receives the latest features and security updates. Click Next to continue.

When prompted, a warning will appear, indicating the deletion of all data on any drives within the NAS. Click the “I understand” button

Proceed by clicking “Continue”.

The NAS is currently in the process of downloading and installing Disk Station Manager (DSM), and this operation is expected to take a few minutes.

As stated above, this will take a while and will be restarted. From the image below, you can see that the built-in packages are being launched.


DSM 7.2 Installation
After a swift installation, the NAS undergoes a rapid reboot, initiating subsequent configuration steps. Initially, users must choose between configuring it as a fresh NAS or restoring it from a backup by clicking the link at the bottom of the wizard page.
Note: DSM 7.2 introduces immutable storage and backup, fast full-volume encryption, and stricter access controls. The new DSM lets you turn your system into a true data fortress.
Click Start to continue!

This section requires you to personalise your NAS device. Enter the Device name, admin account and password. Then click Next.

I am fine with the recommended option, click Next.

Now, you have to create your Synology account. Hit the create button to do this.

Since I do not have an accunt previously, I will follow the prompts as shown below to create one


You will be required to agree to the terms and condiftions and thereafter sign-in

Quick Connect
The Quick Connect empowers you to access your NAS from anywhere in the world with an internet connection. Since I will be utilising the Surveillance Station Client later on, I will an acceptable ID and submit.

My quick connect id is ready. hit the OK button.

On the explore other useful tools, enable the tools and click submit. We shall be exploring these in subsequent articles. Stay tuned!


You will be requested to sign in. Enter your username in this window, followed by your password in the next.

If you are not interested in these apps, you can skip them. For me, I will be installing them.

Register for extended synology warranty
At this time, the extended warranty cost about 63 euros. I will think about this after some days 🙂

Note: If you decide later to register for extended synology warranty. This can be done from the Control Panel and under the Synology Account.

Like, I said I will be skipping the extended warranty for now. Sign in to your account with the username and password created above.

See how to extend a VM Hard Disk on VMware Workstation, how to Deploy Azure Resources Using Azure Bicep, and how to Configure Server Core using Sconfig.
Configure the Drives
Creation of the initial pool and volume is a process that needs to be done before we can utilise the NAS and install any apps or services on it. This step set up the storage pool and volumes which ensures you have organised and accessible storage on your NAS.
Create Storage Pool and Volumes
Proceed to create a storage pool by clicking the button “Create Now”. This involves forming a collection of disks where your data will reside.

Click Start as shown below to continue this process.

Synology RAID Setup
Decide between Basic, RAID, or SHR configurations based on your storage needs and redundancy preferences. Upon clicking the Start button, the system prompts you to select a RAID configuration. Opt for SHR (Synology Hybrid Raid) as it provides data protection in case one of your disks fails.
Note: With SHR a two-bay NAS that houses two 4TB drives will yield only 4TB of storage since each disk must serve as a backup for the other. We will see this very shortly.
To equip your Synology NAS with storage, acquire enterprise hard drives separately, as the NAS is sold without them. Starting with two hard drives is acceptable.
In the future, I will be getting an addition 2x 4TB drives for my 4-bay NAS. This will provide me with 12TB of storage, incorporating a single-disk redundancy feature through SHR configuration.
Click Next to continue the storage pool and volume set up.

It is advisable to select al drives and click Next

Drive Check may take longer to complete. Regardless, please select this option and click next.

In this next window, you will be asked to allocate volume capacity. For maximum efficiency click the Max button and click on Next

Choose the Btrfs file system when prompted, and proceed to the next page.
Choosing the right file system for the volume is important. Once created the volume can’t be converted without destroying the volume first!

At this stage, I will not be encrypting the volume.

Review the Storage Pool Settings and click Apply.

On the prompt, click on OK.

Congrats, you have successfully setup your DS923+ NAS device.

Perform Synology Data Scrubbling
Synology recommends performing data scrubbing periodically to ensure data consistency and avoid data loss in the event of a drive failure.
To do this, click on the storage pool on which you want to perform data scrubbing. Click Run Now under the Data Scrubbing section and click save.

Note: I did not perform this “Run data scribbling only during specific periods” as I do not care about the performance.

Setup Synology Event Notification
You can see from the notification setup window that enabling this feature will notify you when specific events occurs on your NAS box.

Select the checkbox, and setup email notification. When complete click on Apply.

Let’s assume, I want to select Gmail. You will be required to sign-in and agree to the terms.

Do not forget to save and apply. If you have click on Apply above, it is sufficient to
Optional: Select this option if you have a custom SMTP server
How to Install Apps on Synology
With Synology Package Center, you can browse, search, download and purchase packages for your Synology Device. These packages for your Synology NAS are an effective way to expand the capabilities of your NAS.
To install an app, navigate to the Main Menu > Package Center. By the way, as you can see, it is also available on the shortcut.
Click on the Package Center to open it. All Packages page lists all packages compatible with your Synology NAS model. You can click on a package name to view more details. Select a package and click Install.
Note: Once installed, the package appears in Main Menu

Agree to the Package Center Terms and Condition and click OK.

Install exFAT Access
Since I use Mac and Windows, I sometimes format my drives with this file system in order to be able to use it across devices.

Installed and state changed to running.

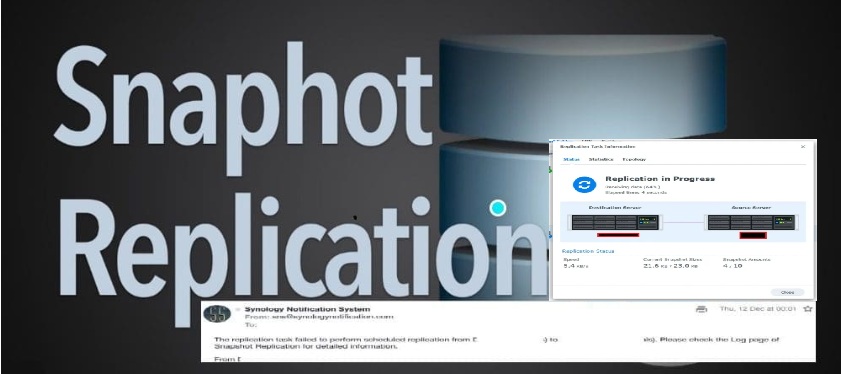
Install Snapshot Replication
Snapshot Replication leverages the modern Btrfs file system to create point-in-time copies of shared folders and LUNs that can be replicated to other Synology.
Search for Snapshot Replication and Install it.

Select yes!

As you can see, the snapshot replication app is running.

As you can see below, I will be showing you how to install and use these apps in subsequent guides.

Complete Synology DS923+ NAS set up: Create and managing shared folders
To do this, navigate to Control Panel on the Synology DSM

Click Shared Folder.

Click on create and select “Create Shared Folder”

Give your new folder a name, description. I will also enable Recycle Bin and restrict access to Administrators only to the recycle bin and click next.

I’m currently not interested in enabling additional security measures, so I’ll skip this step for now.

For data integrity, enable data checksum and click next

Go through the settings for confirmation and click next

If you wish, configure user permission and apply.

As you can see below, the shared folder has been created

Complete Synology DS923+ NAS set up: Configure Automatic Trashing of the Recycle Bin
It’s easy to configure synology to empty the Recycle bin automatically. All you need to do is open control panel, click on Task Scheduler as shown below.

Click Create and select Recycle Bin

On the General tab, select the checkbox and enter the task name.

Define your desired task run

On the Schedule Settings, click run on the following days as you wish

On the task settings, select empty all Recycle Bins. Define your retention periods and click ok.

Optional: If you wish to exclude some files from being deleted. You can used the advanced button below. When done, click on. and click Ok again as shown above.

Select Yes to enable the Recycle Bin.

As you can see, our job to automatically empty the recycle bin has been created.

Access Synology Shared Folder from Mac
This is one of the easiest ways to access your DS923 from a Mac device. In subsequent articles, I will show you how to connect from Mac to Synology using SMB.
Open Finder on your macOS, and click on the Network tab. You should see your NAS displayed under the name you assigned to it. Click Connect As as shown below.

On the prompt, click connect

Enter your DSM Name and Password and click connect.

As you can see, you are connected and can share files back and forth.

Now that you have completed the installation of DSM. What else can you do? How to protect Synology DS923+ NAS.
DSM HELP
The DSM (DiskStation Manager) HELP provides comprehensive assistance for users navigating the features and functionalities of the Synology NAS operating system. You can enhance your knowledge of DSM. Below is an image of how to enable notifcation directly from DSM help.

Whether you need assistance with configuration, troubleshooting, or exploring advanced features, DSM HELP is designed to empower users with the knowledge and support they need for optimal NAS management.
Access DSM HELP through the DSM interface, and stay informed about the latest updates and best practices to make the most of your Synology NAS experience.
To do this, click on DSM Help from the shortcut as shown below.
All these will be treated in the next Security” guide on synology. In this way, you will be able to keep your Synology NAS device secure and protected.


How to contact Synology Support
In case of technical assistance, you can utilise online communities for additional support and you can also share your valuable experiences.
Synology Support Center is the knowledgeable resource that will support your Synology Unified Controller issues for the length of the product warranty.
To use this service and file a support ticket, go to Support Center > Contact Support. You can reach the support center from the Main Menu or use the online center

To do this from Synology, click on the Main Menu and Select “Support Center”.

Also, via the search button, search for “Support Center”.

You can create an issue directed from this wizard as shown below. When you are done, click on Next and follow the prompts.

Note: To follow up with your issues, please go to the Synology Account page to view and reply existing tickets.
Note: When required by support to enable Remote Access etc, you will do that from here

Conclusion
The DS923+ excels in various daily use scenarios, showcasing significant speed improvements. Whether running Docker containers, backing up machines through Active Backup, or performing other tasks, the DS923+ consistently delivers superior performance.
DS923+ can handle more demanding application workloads and a greater number of concurrent users compared to prior-generation systems. Unlock versatility by utilizing features like a VM manager, mail server, custom VPN server, and various other powerful tools available within the suite. These functionalities open up an expansive range of possibilities, allowing you to optimize your NAS experience to its full potential.
I hope you have found this article useful on the step-by-step guide on how to set up the Synology DS923+ NAS. Feel free to leave a comment below.