How to create an Amazon Relational Database Service Instance

Amazon Relational Database Service is a fully managed database service in the cloud. It offers capabilities for setting up, operating, and scaling relational databases with ease. In this article, we shall discuss How to create an Amazon Relational Database Service Instance. Please see How to install Amazon RDS using Terraform, how to Migrate Veeam MSSQL Database to a new MSSQL Server, and How to add and remove RDS Collection.
Opt for AWS RDS solutions, such as PostgreSQL, to streamline database management, ensuring efficient operations, automated backups, and seamless scalability, all while leveraging the robust infrastructure and security features provided by Amazon Web Services.
Also, see how to Remove Remote Desktop Services Role on Windows Server, and how to fix “The following servers in this deployment are not part of the deployment Pool: Create an RDS Session Host and Collection“.
Creating an Amazon RDS DB instance
Sign in to the AWS Management Console and click on services, database and then RDS as shown below.

Select “Create database”

Choose Create database, then choose Standard create. For the Engine type, I will select PostgreSQL. See how to how to install PostgreSQL on Windows server as Veeam Database Engine

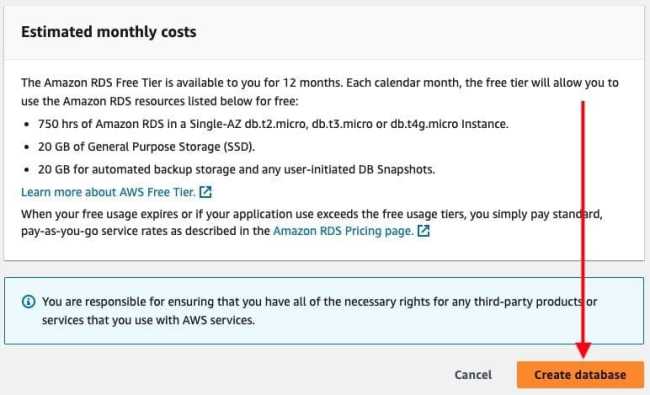
Note: The Amazon RDS Free Tier is available to you for 12 months. Each month during the free tier, you will be able to use the Amazon RDS resources listed below for free:
- 750 hrs of Amazon RDS in a Single-AZ db.t2.micro Instance.
- 20 GB of General Purpose Storage (SSD).
- 20 GB for automated backup storage and any user-initiated DB Snapshots.
Select Free tier as shown below.

Because it is a free tier option, the deployment options are grayed out. Enter your DB instance name.

Change the Master username value, and Enter the same password in Master password and Confirm password.

I am fine with the below default options due to my free tier option.

In the Connectivity section under VPC, I will select the VPC I created in this guide “VPC, Subnet, NACL, Security Group: Create your own Network on AWS from Scratch [Part 2]“. Create a new subnet group for your PostgreSQL instance.
Note: You can configure connectivity between an Amazon EC2 instance and the new DB instance during DB instance creation. But I will not be doing this at this time.

Note: If you choose to create a Public accessible RDS instance, Your request to create DB instance PostgreRDS will fail. This is because, you cannot create a publicly accessible DBInstance when the specified VPC does not support DNS resolution, DNS hostnames, or both. You will have to update your VPC and then try again.At this time, I will select No.

Database Authentication
I will choose “Password and IAM database authentication” as shown below.

Enter your initial DB name as shown below.

Disable Automated Backup
I will be disabling automated backup because, I will be using Veeam to protect this instance. The reasons t use Veeam instead of this option will be discussed in the guide on how to protect EC2 and RDS instance with Veeam Backup for AWS.

I am fine with the “No preference option” below.

Choose Create database.
As you can see, our database is being created with the status “creating”.

Shortly, the status changes to “Available”. This is because, the database instance has been created and ready for use.

Note: The A blue/green deployment copies a production database environment to a separate, synchronized staging environment. By using Amazon RDS Blue/Green Deployments, you can make changes to the database in the staging environment without affecting the production environment.
For example, you can upgrade the major or minor DB engine version, change database parameters, or make schema changes in the staging environment. When you’re ready, you can promote the staging environment to be the new production database environment, with downtime typically under one minute.
Note: Currently, Blue/Green Deployments are supported for RDS for MariaDB, RDS for MySQL, and RDS for PostgreSQL only at the time of writing this article.
View AWS RDS Connection Details
You can view the connection details by clicking on the “view connection details”.

Alternatively, you can do this via the connectivity and security tab of your DB instance.

Temporarily Shut down your RDS Instance
To temporarily shut down an RDS (Relational Database Service) instance in Amazon Web Services (AWS), select the RDS instance as shown below and from the “Actions” dropdown, select “Stop Temporarily”.

AWS will prompt you to confirm the action, as stopping an instance will make it temporarily unavailable. Confirm the action by clicking on the “Stop temporararily.

If you were to be using a PRODUCTION template instead of a Free Tier, you will benefit a lot from this action. This is because, when the instance is moved to a “stopped” state. You will not incur charges for the compute resources associated with the instance. But for the storage associated with the instance.

I hope you found this article useful on how to create an Amazon Relational Database Service Instance. Please feel free to leave a comment below.


