Skip to content

TechDirectArchive

Hands-on IT, Cloud, Security & DevOps Insights

  • Home
  • About
  • Advertise With US
  • Reviews
  • Contact
  • Toggle search form
Home » AWS/Azure/OpenShift » How to backup Azure VM with VM Settings
  • Prevent Local Administrators from turning off BitLocker 1
    Prevent Local Administrators from managing BitLocker with the manage-bde command Windows
  • jmeterlogo 3
    Install and conduct performance testing using Apache JMeter on your Web App Configuration Management Tool
  • VMware and HyperV are not compatible
    How to fix VMware and HyperV are not compatible Virtualization
  • powershell01
    How to add servers to the Trusted Hosts list Scripts
  • IAM AWS
    Creating IAM Users, Adding MFA and Policies on AWS AWS/Azure/OpenShift
  • screenshot 2020 04 07 at 21.02.45
    Trend Micro WorryFree Business Security Server Setup Anti-Virus Solution
  • ESNAS Virtualization 01
    How to remove Recent vSphere Client Connections Virtualization
  • azure just in time
    How to secure access to your Virtual Machine with Just-in-Time (JIT) VM Access AWS/Azure/OpenShift

How to backup Azure VM with VM Settings

Posted on 19/11/202107/12/2023 Imoh Etuk By Imoh Etuk No Comments on How to backup Azure VM with VM Settings
How-to-backup-Azure-VIM-2
Azure Virtual Machine Backup

In this article, I will explain how to backup Azure VM with VM Settings (Azure Backup service). Therefore, you can back up Azure VMs using a couple of methods. This guide describes how to back up a single Azure VM directly from the VM menu settings. When it comes to cloud computing, Microsoft Azure is one of the leading cloud providers in the Infrastructure as a Service (IaaS) cloud model. If you want to get started with Azure DevOps, see also how to build your first CI/CD Pipeline in Azure DevOps using ASP.Net Core Application.

Just as you will have your on-premises PC backed up either to external hard disk storage, and keep the backup drive offsite that’s at a place different from your business premises to avoid any disaster that may result in data loss or breach the same way Azure also allows you to backup your Virtual Machine in the cloud.

Meanwhile, you may be interested in learning about how to provision Azure Resources using Azure Az PowerShell Cmdlet from Cloud Shell. Also, learn about how to how to secure access to your Virtual Machine with Just-in-Time (JIT) VM Access.

Requirements for Initiating Azure VM Backup

Before you start, you need the following:

  1. An active subscription on Azure VM. If you don’t have one already, you can sign up for Azure free account.
  2. Azure VM agent extension must be installed and running on the machine.
The point to note is if your Virtual Machine was created from an Azure Marketplace image, the agent will be running automatically immediately the VM deployment is complete. A situation where you will be required to manually installed the agent is if you create a custom VM, you migrate a machine from on-premises to Azure. 

Thus, if you do need to install the Azure VM agent manually, follow the instructions for Windows or Linux VMs. Once the agent is installed, enabling backup triggers the installation of Azure Backup extension onto the agent. In addition, it updates and patches the extension without user intervention.

Create VM from Azure Portal

Sign into Azure Portal at portal.azure.com. Type virtual machines in the search. Under Services, select Virtual machines.

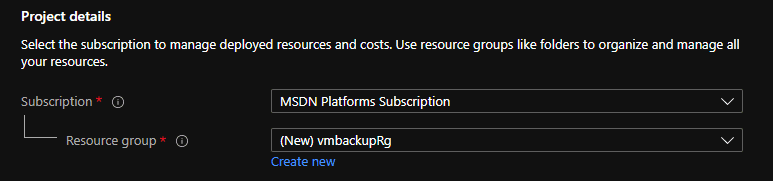
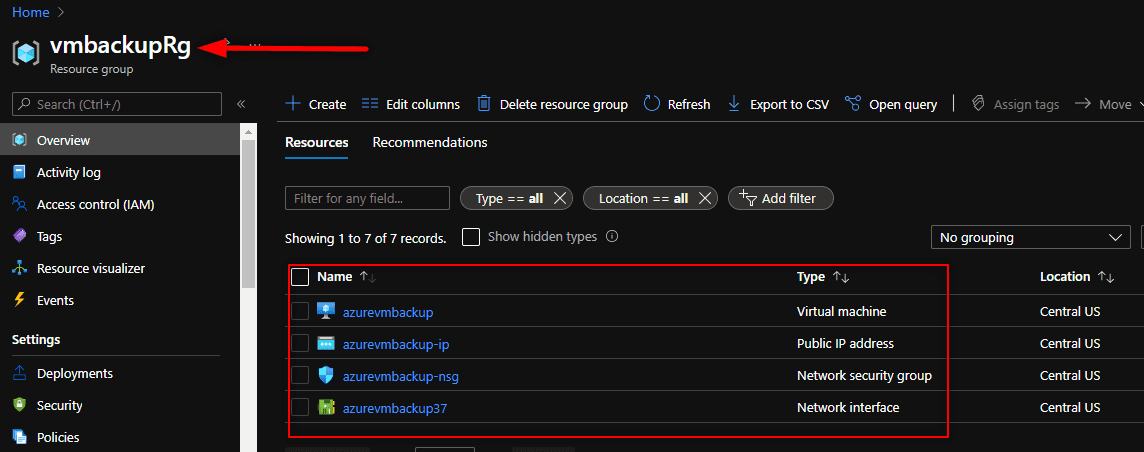
In the Virtual machines page, select Create then Virtual machine. Confirm the subscription in the “Basics” tab and opt for a new resource group creation under “Project details.” Then. Type a name for your Resource Group. Here we use vmbackupRg

Creating-Azure-VM

Under Instance details, type the name for the Virtual machine and choose the Region of your choice.

Choose Windows Server 2019 Datacenter for the Image and Standard_DS1_v2 for the Size. Leave the other defaults. Click Review + Create

After the VM has been created successfully, click to go to resource. This will open up the VM you just created.

Back up from Azure VM settings

With VM still open down, select Backup on the VM menu

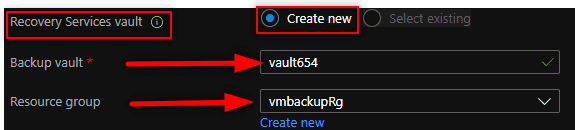
  • In Recovery Services vault, do the following:
    • If you already have a vault, select Select existing, and select a vault.
    • If you don’t have a vault, select Create new. Specify a name for the vault. It’s created in the same region and resource group as the VM. You can’t modify these settings when you enable backup directly from the Azure VM settings.
Azure-Recovery-Service

3. In Choose backup policy, do one of the following:

- Leave the default policy. This backs up the VM once a day at the time specified, and    retains backups in the vault for 30 days.
- Select an existing backup policy if you have one.
- Create a new policy, and define the policy settings.

4. Click Edit this policy. Please note this is not compulsory as you choose to go with the default settings.

Meanwhile, you might just do this to enable you to explore the available backup policy options you can select based on your preference.

VM-Back-policy
VM Backup Policy Settings

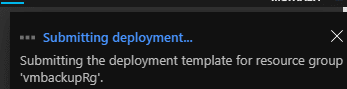
5. Select Enable Backup. This however associates the backup policy with the VM.

Summary-of-Backup-policy
Summary of Back Policy

The screenshot above shows the summary of the backup policy we defined. Thus, you can track the configuration progress in the portal notifications.

Deployment-Template
VM Backup Deployment Progress

After the job completes, in the Azure VM menu, select Backup. Following this, the page shows the backup status for the VM, information about recovery points, jobs running, and alerts issued.

Back-up-Status
VM Backup Status
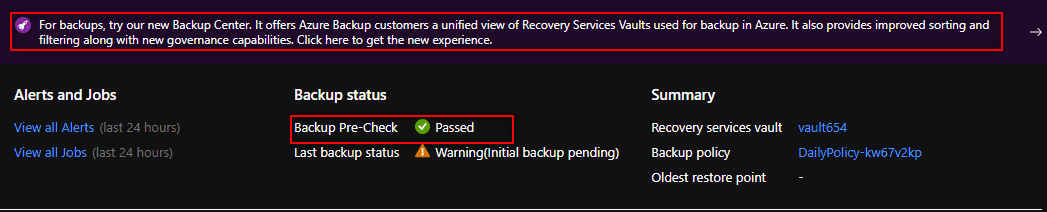
After enabling backup, an initial backup runs. You can start the initial backup immediately, or wait until it starts in accordance with the backup schedule. Until the initial backup completes, Last backup status shows as Warning (Initial backup pending). To see when the next scheduled backup will run, select the backup policy name.

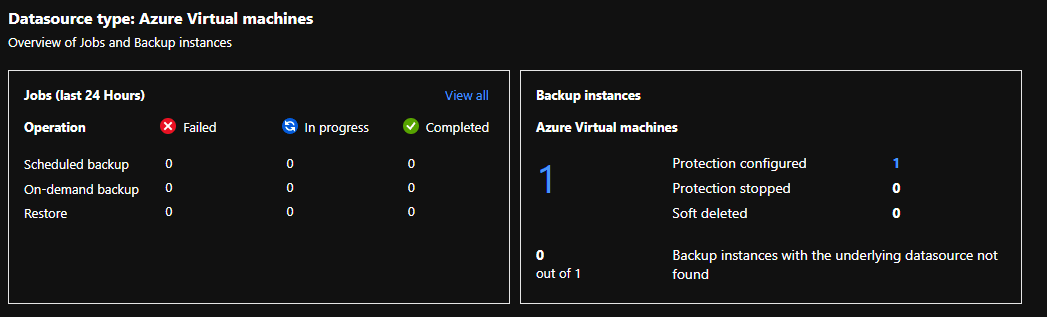
Afterwards, the below screen shows you the overview screen of the jobs and backup instances.

Data-Source-Azure-VM
Backup Summary

Run a VM backup immediately

1: To run a backup immediately after the initial backup is complete, in the VM menu, select Backup > Backup now.

Backup-Immediately
Backup VM Immediately

2. In Backup Now, use the calendar control to select until when the recovery point will be retained and OK.

Back-schedule
Backup Schedule

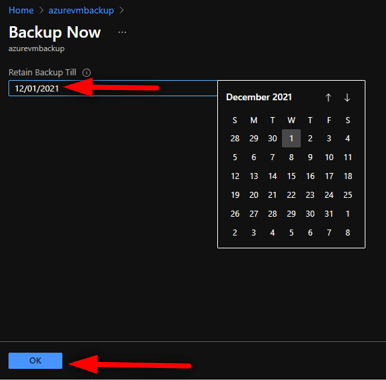
As you can see from the screenshot, my next backup will occur on December 1st, 2021.

Congratulations, you have just succeeded in configuring backup for your Azure Virtual Machine.

Clean up your environment

One last thing you need to do is to clean up your environment to avoid incurring unnecessary charges from Azure VM. To do so, launch the Cloud Shell directly on the Azure Portal, Select the PowerShell option and run the PowerShell command shown below:

Remove-AzResourceGroup -Name YourResourceGroup
PowerShell
Deleting Resource Group via PowerShell

However, remember Resource group is the logical folder where the VM and the Backup we created above are stored. So deleting it will delete everything at once for you.

RG
Resource Group

I hope you found this blog post on how to backup Azure VM with VM Settings helpful. Hence, if you have any questions, please let me know in the comment session.

Rate this post

Thank you for reading this post. Kindly share it with others.

  • Click to share on X (Opens in new window) X
  • Click to share on Reddit (Opens in new window) Reddit
  • Click to share on LinkedIn (Opens in new window) LinkedIn
  • Click to share on Facebook (Opens in new window) Facebook
  • Click to share on Pinterest (Opens in new window) Pinterest
  • Click to share on Tumblr (Opens in new window) Tumblr
  • Click to share on Telegram (Opens in new window) Telegram
  • Click to share on WhatsApp (Opens in new window) WhatsApp
  • Click to share on Pocket (Opens in new window) Pocket
  • Click to share on Mastodon (Opens in new window) Mastodon
  • Click to share on Bluesky (Opens in new window) Bluesky
  • Click to share on Threads (Opens in new window) Threads
  • Click to share on Nextdoor (Opens in new window) Nextdoor
AWS/Azure/OpenShift, Backup Tags:Azure, Image backup, Windows Server Backup

Post navigation

Previous Post: How to create a Traffic Manager Profile in Azure
Next Post: How to use the DigiCert certificate utility for Windows to create a CSR

Related Posts

  • Synology Cloud Sync
    How to Sync Data in Cloud Drives to Synology NAS Backup
  • vmwarevinchin
    3 Ways to Convert VMware VMs to Hyper-V Backup
  • ADO Self hosted agent
    How to Create Self-Hosted Agent for Azure DevOps Pipelines Automation
  • ackup Repository and Add HyperV to VBR Inventory
    Create local Backup Repository and Add HyperV to VBR Inventory Backup
  • Screenshot 2020 05 13 at 19.23.25
    AWS Command-Line Interface: How to configure AWS CLI [Part 1] AWS/Azure/OpenShift
  • BLOG LOGO
    How to create a static pod in Kubernetes AWS/Azure/OpenShift

More Related Articles

Synology Cloud Sync How to Sync Data in Cloud Drives to Synology NAS Backup
vmwarevinchin 3 Ways to Convert VMware VMs to Hyper-V Backup
ADO Self hosted agent How to Create Self-Hosted Agent for Azure DevOps Pipelines Automation
ackup Repository and Add HyperV to VBR Inventory Create local Backup Repository and Add HyperV to VBR Inventory Backup
Screenshot 2020 05 13 at 19.23.25 AWS Command-Line Interface: How to configure AWS CLI [Part 1] AWS/Azure/OpenShift
BLOG LOGO How to create a static pod in Kubernetes AWS/Azure/OpenShift

Leave a Reply Cancel reply

You must be logged in to post a comment.

Microsoft MVP

VEEAMLEGEND

vexpert-badge-stars-5

Virtual Background

GoogleNews

Categories

sysadmin top30a
 
  • Prevent Local Administrators from turning off BitLocker 1
    Prevent Local Administrators from managing BitLocker with the manage-bde command Windows
  • jmeterlogo 3
    Install and conduct performance testing using Apache JMeter on your Web App Configuration Management Tool
  • VMware and HyperV are not compatible
    How to fix VMware and HyperV are not compatible Virtualization
  • powershell01
    How to add servers to the Trusted Hosts list Scripts
  • IAM AWS
    Creating IAM Users, Adding MFA and Policies on AWS AWS/Azure/OpenShift
  • screenshot 2020 04 07 at 21.02.45
    Trend Micro WorryFree Business Security Server Setup Anti-Virus Solution
  • ESNAS Virtualization 01
    How to remove Recent vSphere Client Connections Virtualization
  • azure just in time
    How to secure access to your Virtual Machine with Just-in-Time (JIT) VM Access AWS/Azure/OpenShift

Subscribe to Blog via Email

Enter your email address to subscribe to this blog and receive notifications of new posts by email.

Join 1,841 other subscribers

veeaam100

  • RSS - Posts
  • RSS - Comments
  • About
  • Authors
  • Write for us
  • Advertise with us
  • General Terms and Conditions
  • Privacy policy
  • Feedly
  • Telegram
  • Youtube
  • Facebook
  • Instagram
  • LinkedIn
  • Tumblr
  • Pinterest
  • Twitter
  • mastodon

Tags

AWS Azure Bitlocker Microsoft Windows PowerShell WDS Windows 10 Windows 11 Windows Deployment Services Windows Server 2016

Copyright © 2025 TechDirectArchive


Loading Comments...
 

You must be logged in to post a comment.