How to create and configure a Shared Folder on Windows Server

Having talked about how to configure NFS Server on Windows Server in my previous post, this post will focus on how to create the shared folder on server. Also, we’re going to create a folder(s) to store data created by multiple application instances in your organization and use NFS to share the folder between them. Also, see Install Workstation Pro 17: Fix failed to initialise library for mounting and unmounting virtual disks, and and how to back up an Azure VM from the VM settings.
Create folders for both Manager and Sessions and complete the steps below for each applications storage folder.
Moreover, to see other related guides on how to upgrade Windows 10 with an unsupported CPU and TPM 1.0 to Windows 11, and Azure virtual networks: how to prepare Azure and on-premises virtual networks using Azure CLI commands.
Let’s get started by doing the following:
Open Fire Explorer and create a Shared Folder in C:\ drive. Examples: “temp-storage” and “shared-storage”
Right-click on the new folder and select Properties. On the ‘Properties’ window, select the ‘NFS Sharing‘ tab. When done, select the ‘Manage NFS Sharing…‘ button.

5. In the NFS Advanced Sharing widget, check the ‘Share this folder‘ checkbox, then select Permissions.

6. From the NFS Share Permissions screen, do the following:
- Select ‘Read-Write‘ option in the ‘Type of access:’ field
- Select the checkbox ‘Allow root access.’

7. Select OK, then Close, to complete sharing the newly created Shared Folder.
Configure Shared Server’s Firewall
Let’s assume we are running MySQL database application as our internal application. To configure the Firewall on the Shared Server to enable the MySQL database application nodes to access the components installed.
Open the ports of the following components:
- MySQL is running on port 3306 while NFS is running on port 2049.
To do so, we will do the following:
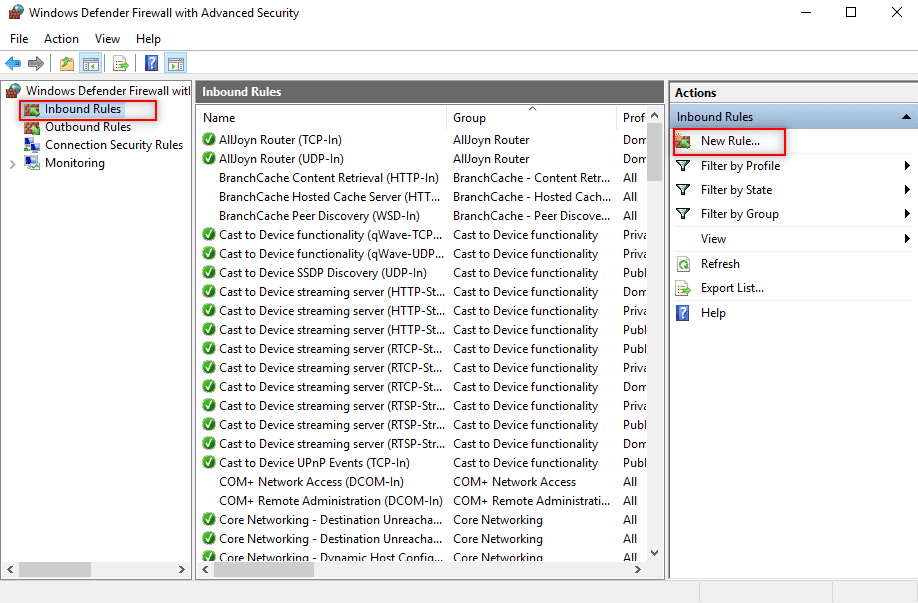
- From the Control Panel, open Windows Defender Firewall.
- Then Select Advanced settings.

3. On the Windows Defender Firewall with Advanced Security window, select Inbound Rules from the left panel.
4. When done, Select New Rule. In the Inbound Rules from the right panel.
5. On the New Inbound Rule Wizard screen, select the option 'Port' and click Next. focus on how to Create and Configure the Shared Folder on Windows Server.

6. On the Protocol and Ports screen, do the following:
- Select
TCPoption - Then Select
Specific local portsoption, and enter the port values ofMySQLandNFS, separate each value by a comma. For example we have:3306,2049. - Click
Nextwhen you are done.

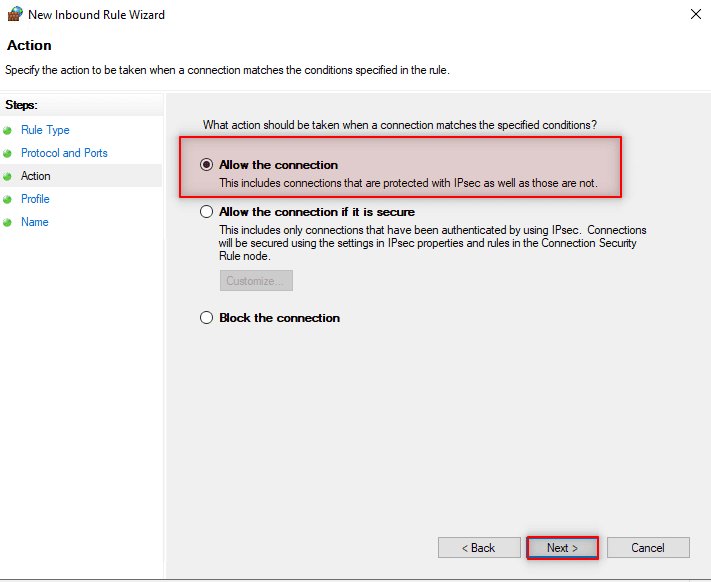
7. On the Action screen, make sure the option Allow the connection is selected, then click Next.
8. On the Profile screen, make sure all the options for Domain, Private and Public are checked, then click Next.

9. On the Name screen, enter a name for your new rule, e.g. ‘Shared Ports (Shared Folder) for MySQL database application', then click Finish.

Finally, you’re done to create, configure and set up the shared server on Windows .
Please note that you must restart the server for the changes and configurations to take effect!
In summary, I hope you found this blog post “how to Create and Configure the Shared Folder on Windows Server” helpful. Also, If you have any questions, please let me know in the comment session.