Skip to content

TechDirectArchive

Hands-on IT, Cloud, Security, Veeam & DevOps

  • Home
  • About
  • Advertise With US
  • Reviews
  • Contact
  • Toggle search form

How to fix unable to find compatible TPM

Posted on 03/02/202217/07/2024 IT Expert By IT Expert No Comments on How to fix unable to find compatible TPM
  1. Home
  2. Windows
  3. How to fix unable to find compatible TPM
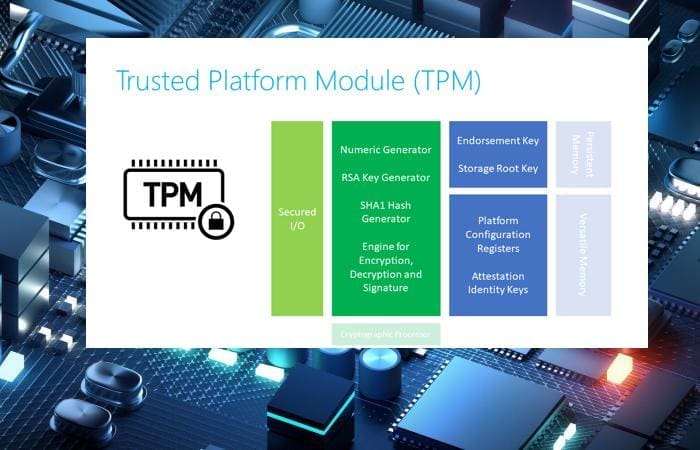
Trust Platform Module

The TPM Chip, also known as the Trusted Platform Module is a hardware security module on your motherboard, designed by the Trusted Computing Group Consortium. It is designed to provide hardware-based, and security-related functions. In this article, I will show you how to fix unable to find compatible TPM. Kindly refer to the following TPM-related guides: How to upgrade Windows 10 with an unsupported CPU and TPM 1.0 to Windows 11​, and how to Install Windows 11 in Oracle VirtualBox with no TPM Support, 

A TPM chip is a secure crypto-processor that is designed to carry out cryptographic operations. The chip includes multiple physical security mechanisms to make it tamper-resistant, and malicious software is unable to tamper with the security functions of the TPM.

Kindly refer to these related guides: How to determine if TPM is present and how to enable TPM in the BIOS via the Command Prompt, How to delegate permissions for backing up TPM password, and how to fix your device cannot use a Trusted Platform Module: Allow BitLocker without a compatible TPM.

Why this TPM error may happen

This error means that TPM has not been enabled in the BIOS. The image below is from the MBAM reports stating the device isn’t compliant and the reason for it.

Capture-01

Also, from the TPM snap-in. You would see a similar error showing that the TPM could not be found.
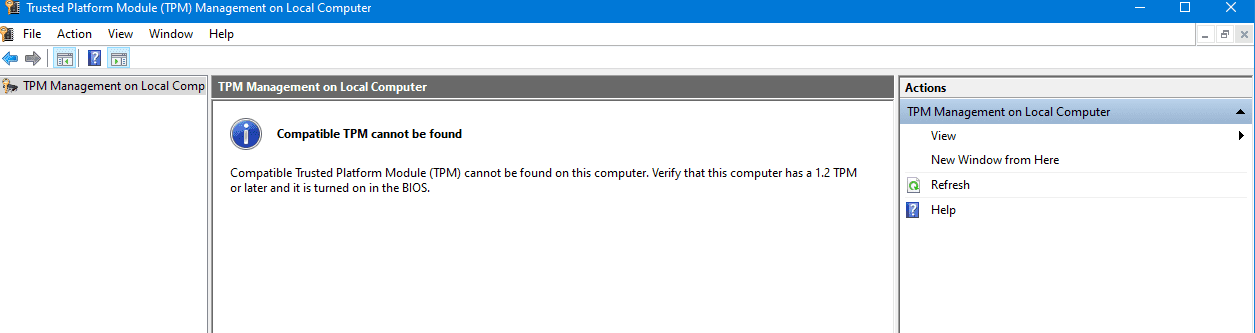
TPM error saying Compatible TPM cannot be found

Here is an exciting article: How to delegate permissions for backing up TPM password, and How to clear the TPM via the management console or Windows Defender Center App.

How to resolve this TPM issue

MBAM reports might show a “compatible TPM not found” status. TPM error occurred due to inactive BIOS TPM or the absence of compatible TPM on the device.

To resolve this issue, however, is actually very simple. You will need to enable the TPM in the BIOS. Here are TPM guides to enhance your understanding: Learn TPM presence detection and BIOS-based TPM activation via Command Prompt.

To enable  TPM (Trusted Platform Module), follow the steps discussed below. Kindly refer to this guide for more information “how to clear, enable or disable TPM in Windows via the BIOS or UEFI“, and “How to clear the TPM via the management console or Windows Defender Center App“.

TPM enabled
  1. Boot computer using F2 into the BIOS setup mode
  2. Locate the “Security” option on the left and expand
  3. Locate the “TPM” option nested under the “Security” setting
  4. To activate TPM settings, mark the box labeled “TPM Security.” This enables encryption for the TPM hard drive security.
  5. To guarantee TPM functionality, activate the “Activate” radio button.
  6. Encryption won’t happen if TPM is ‘Deactivated‘ or TPM Security isn't enabled, until configuring these settings.
  7. Restarting is occasionally necessary to verify applied TPM changes.

Verifying the resolution of the TPM issue

After enabling TPM in the BIOS, several methods exist to confirm its activation.

You can check this via the following basic steps “Device Manager, and the TPM Management snap-in (tpm.msc), or via the Windows Settings”. Kindly take a look at this guide for other steps to determine if TPM is present on your device: How to check if you have Secure Boot and TPM enabled.

As shown below, the device is now encrypted, allowing the MBAM agent to proceed with drive encryption.
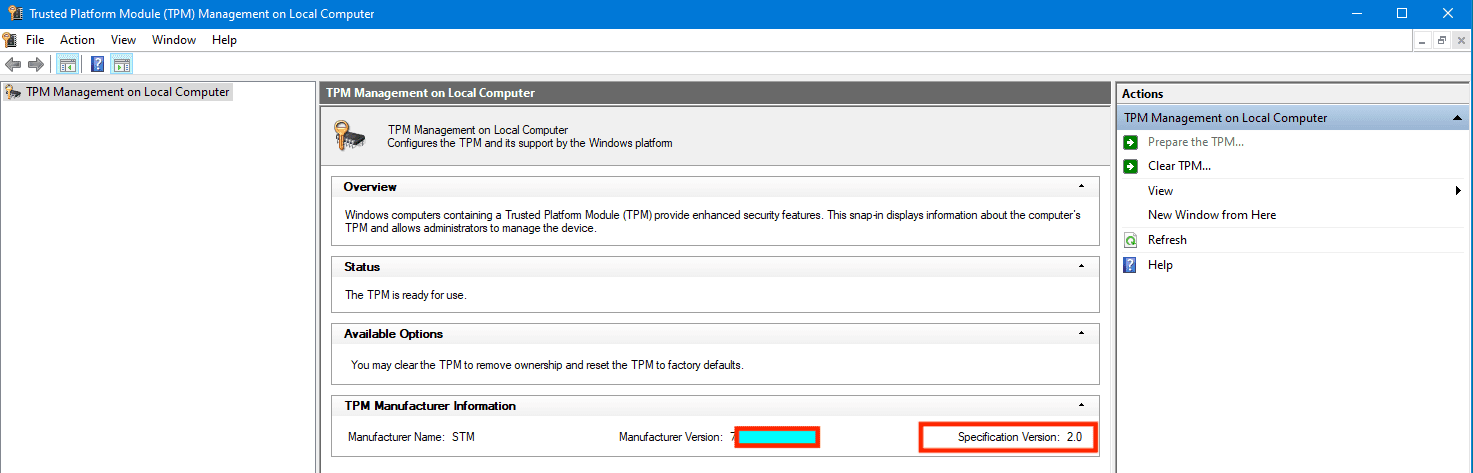
TPM enable, MBAM agent can now get device encrypted

Successfully encrypted device.

Drive successfully encrypted

FAQs

How many characters does the BitLocker key contain?

The recovery password consists of a 48 character numeric string that is generated and displayed by the system. This must be manually entered by the user to recover the volume. After being generated at set-up time, the recovery password can be viewed, saved locally or printed by the user and is sent to the AD server if required by Group Policy.

What happens when AD is not available when setting BitLocker up?

If AD is not available, and AD password saving is required (by policy). Then the BitLocker set-up is halted (stopped). If AD is not required and the user sees the Recovery Password Creation screen. He/she will need to click on one of the links (see the password, save it, print it) to actually generate the password.

I hope you found this blog post on How to fix unable to find compatible TPM helpful. If you have any questions, please let me know in the comment session.

5/5 - (1 vote)

Thank you for reading this post. Kindly share it with others.

  • Share on X (Opens in new window) X
  • Share on Reddit (Opens in new window) Reddit
  • Share on LinkedIn (Opens in new window) LinkedIn
  • Share on Facebook (Opens in new window) Facebook
  • Share on Pinterest (Opens in new window) Pinterest
  • Share on Tumblr (Opens in new window) Tumblr
  • Share on Telegram (Opens in new window) Telegram
  • Share on WhatsApp (Opens in new window) WhatsApp
  • Share on Mastodon (Opens in new window) Mastodon
  • Share on Bluesky (Opens in new window) Bluesky
  • Share on Threads (Opens in new window) Threads
  • Share on Nextdoor (Opens in new window) Nextdoor
Windows Tags:Bitlocker, BitLocker Status, MBAM, Microsoft BitLocker Administration and Monitoring, TPM, Windows 10, Windows 11

Post navigation

Previous Post: System check found some issues during MBAM encryption: Fail, the Power cable must be connected
Next Post: Install Docker Desktop and register GitLab-Runner with Docker-windows executor

Related Posts

  • TrueCrypt to BitLocker
    How to Migrate from TrueCrypt to BitLocker Backup
  • How To Put Multiple OS ISO Files In One Bootable USB Disk
    USB Drive: Create a Multiboot with Multiple OS ISOs Windows
  • unnamed
    Remove Xbox from automatic startup: How to enable and disable automatic startup in Windows 11 Windows
  • Featured image 5
    How to uninstall and prevent the installation of Microsoft Teams on Windows Windows
  • image 130
    How to fix the Security Database on the Server does not have a Computer Account for this Workstation Trust Relationship on Windows Server [Part 2] Scripts
  • Featured image externaldis
    How to fix the external display not working on Windows 11 Windows

More Related Articles

TrueCrypt to BitLocker How to Migrate from TrueCrypt to BitLocker Backup
How To Put Multiple OS ISO Files In One Bootable USB Disk USB Drive: Create a Multiboot with Multiple OS ISOs Windows
unnamed Remove Xbox from automatic startup: How to enable and disable automatic startup in Windows 11 Windows
Featured image 5 How to uninstall and prevent the installation of Microsoft Teams on Windows Windows
image 130 How to fix the Security Database on the Server does not have a Computer Account for this Workstation Trust Relationship on Windows Server [Part 2] Scripts
Featured image externaldis How to fix the external display not working on Windows 11 Windows

Leave a Reply Cancel reply

You must be logged in to post a comment.

Microsoft MVP

VEEAMLEGEND

vexpert-badge-stars-5

Virtual Background

GoogleNews

Categories

veeaam100

Veeam Vanguard

  • fgbv
    Export and Import Scheduled Tasks in Windows Windows Server
  • screenshot 2020 03 13 at 20.24.17
    How to install additional packages via Cygwin Windows Server
  • maxresdefault 12
    How to check Windows activation status and change your product key Windows
  • image
    How to find Computer Serial Number stated change to be filled by OEM Windows Server
  • FEATUREDC
    How to create Confidential VMs in Azure AWS/Azure/OpenShift
  • NortonEvents
    View and Clear or Print Norton Security Events on a Mac Anti-Virus Solution
  • sql 1
    Editions of MSSQL Server: What are the differences between various Editions of Microsoft SQL Server Oracle/MSSQL/MySQL
  • Screenshot 2024 02 09 at 1.06.54 PM
    Programmatically Deploying App Service Resources in Azure AWS/Azure/OpenShift

Subscribe to Blog via Email

Enter your email address to subscribe to this blog and receive notifications of new posts by email.

Join 1,784 other subscribers
  • RSS - Posts
  • RSS - Comments
  • About
  • Authors
  • Write for us
  • Advertise with us
  • General Terms and Conditions
  • Privacy policy
  • Feedly
  • Telegram
  • Youtube
  • Facebook
  • Instagram
  • LinkedIn
  • Tumblr
  • Pinterest
  • Twitter
  • mastodon

Tags

Active Directory Azure Bitlocker Microsoft Windows PowerShell WDS Windows 10 Windows 11 Windows Deployment Services Windows Server 2016

Copyright © 2025 TechDirectArchive

Loading Comments...

You must be logged in to post a comment.