Skip to content

TechDirectArchive

Hands-on IT, Cloud, Security & DevOps Insights

  • Home
  • About
  • Advertise With US
  • Contact
  • Reviews
  • Toggle search form
Home » AWS/Azure/OpenShift » Set up and configure Route 53 for your Domain in AWS

Set up and configure Route 53 for your Domain in AWS

Posted on 12/03/202229/12/2023 Dickson Victor By Dickson Victor No Comments on Set up and configure Route 53 for your Domain in AWS
Route53AWS

In this tutorial, I will show you how to set up and configure Route 53 for your Domain in AWS. Route 53 is a highly available and scalable DNS service from AWS. It is designed to give the developers full control over their DNS entries and provide a cost-effective way to route end-users to the correct resources. Apart from being a popular DNS service Route53 is also a domain registrar. As you will see in the tutorial next, you can buy new domain names on Route53. Kindly refer to these related guides: Creating IAM Users, Adding MFA and Policies on AWS, how to setup SPF and TXT Records in AWS, and Domain Name System: How to create a DNS record.

Route53 integrates seamlessly with AWS Services like S3, Elastic Load Balancers etc, which makes route53 a popular choice as a DNS server for AWS applications.

It makes it easier for the end-users to manage their global traffic through a variety of routing types – Weighted routing, Latency Based Routing, GeoProximity Routing and more.

Set up and configure Route 53for your Domain in AWS accounts

Sign in to the AWS Management Console, and navigate to Route 53 dashboard.

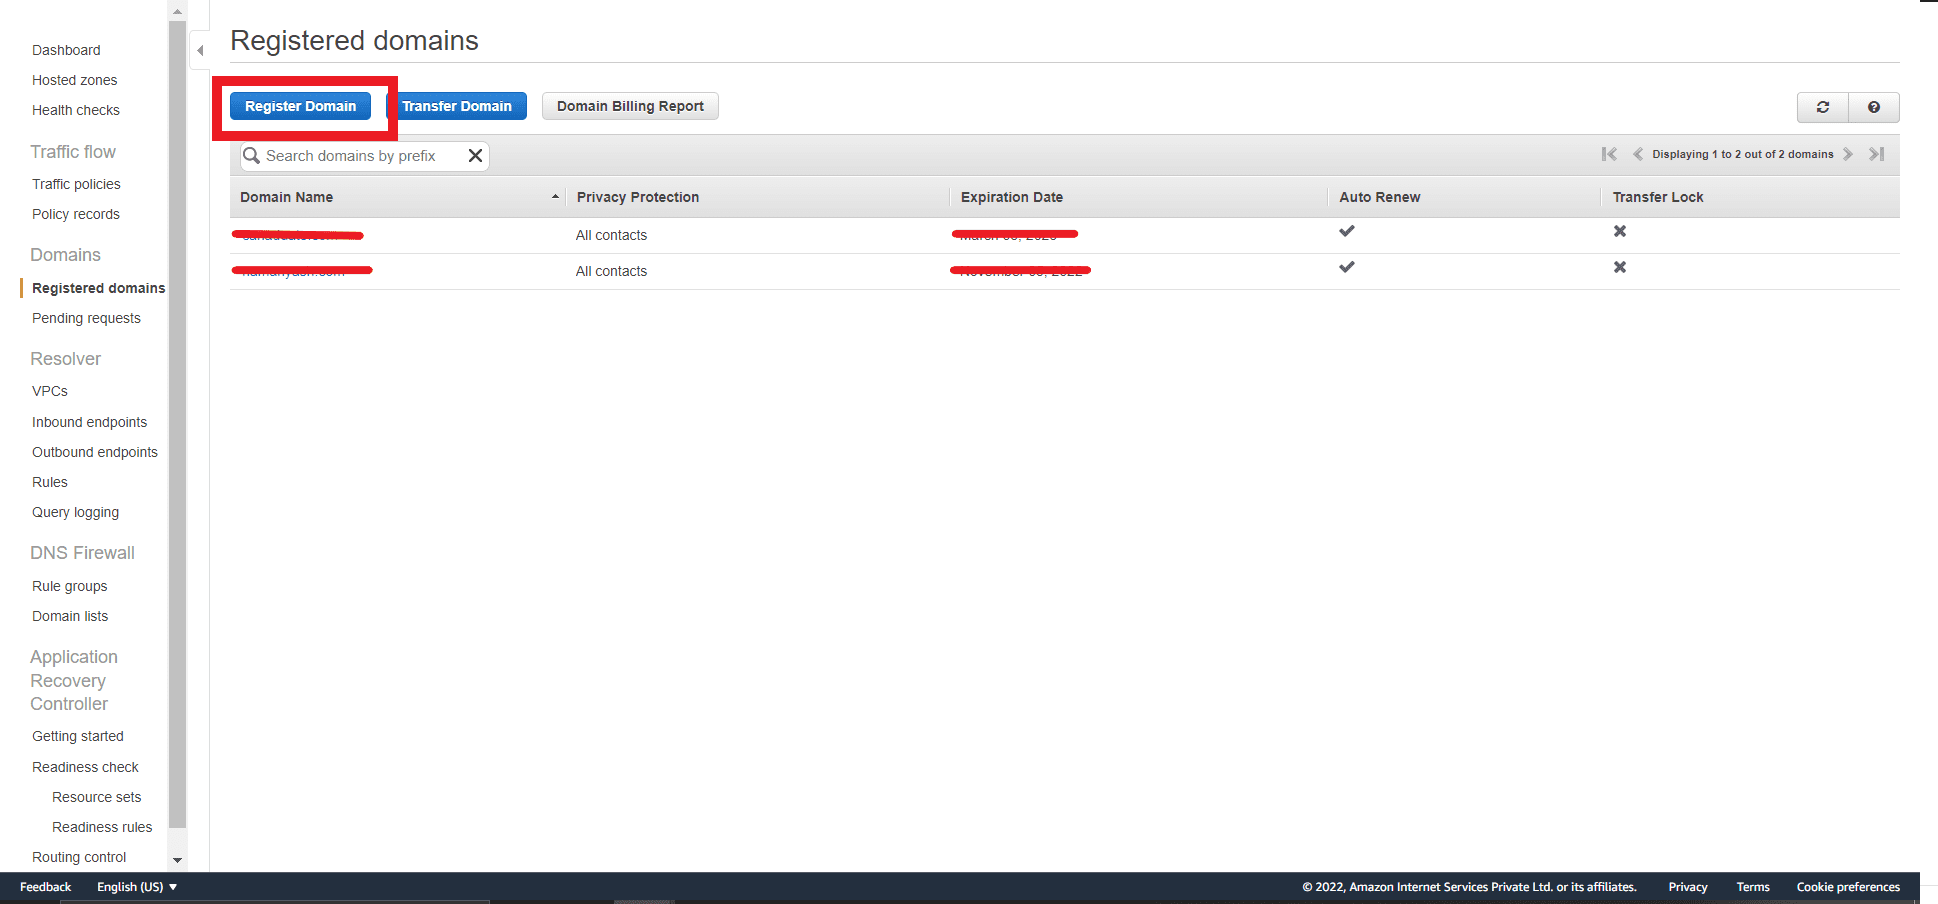
In the Route53 Dashboard find the “Registered Domains” option, under Domains in the dashboard on the left.

1-final
Route 53 Console

Domain Registration

Now that you are on the Registered Domain Page you will see that there are two ways to set up a domain in Route53 – register a new domain and transfer a new domain.

This is the page where you see the list of all your registered domains like in the image below.

Let us go ahead and register a new domain by clicking the “Register Domain” button here.

2-final
Registered Domains Page

Enter your domain name and click on check. If the domain name is available you will see an output similar to the following image. Choose the domain name you want to register and click “Add to cart”.

4-final
Domain Search

If you agree to the pricing, click Continue.

Please see A-Z of Domain Name System: All you need to know about DNS, how to manage cost with AWS Budgets, and how to Deploy Dynamic Website to AWS EC2.

Register your Organisation’s Contact Details

On the next page, you can add your Registrant Contact, Admin Contact, and the “Tech Contact” details for your domain. Fill in the details and click Continue at the bottom of the page.

5-1
Contact Details Page

On the Verify & Purchase, you can verify your contact information. If you want Route53 to automatically renew your domain name after a year select the Enable option as shown below.

Finally agree to the Terms and Conditions as shown below and click “Complete Order”.

5-2-final

If you go to the pending requests options as shown below. You will see that your domain registration request is in progress.

You can now head to the Orders and invoices page and complete the payment for your domain registration.

If you do not see any new orders yet, please wait, it may take some time for AWS to process the request. After the status of your request changes, you can also head to the billing dashboard by clicking the button as shown below.

6-final

After your payment is done, you will see your domain name on the “Registered domains” page.

7-final

Head over to the Hosted zones option. You will see that Route53 has already created a Hosted Zone for your domain.

Click on your domain name to get started with Route53 and create records for your domain.

8-final
You have now successfully set up Route53 for your new domain name. 

I hope you found this blog post helpful on how to Set up and configure Route 53 for your Domain in AWS. If you have any questions, please let me know in the comment session.

Rate this post

Thank you for reading this post. Kindly share it with others.

  • Share on X (Opens in new window) X
  • Share on Reddit (Opens in new window) Reddit
  • Share on LinkedIn (Opens in new window) LinkedIn
  • Share on Facebook (Opens in new window) Facebook
  • Share on Pinterest (Opens in new window) Pinterest
  • Share on Tumblr (Opens in new window) Tumblr
  • Share on Telegram (Opens in new window) Telegram
  • Share on WhatsApp (Opens in new window) WhatsApp
  • Share on Mastodon (Opens in new window) Mastodon
  • Share on Bluesky (Opens in new window) Bluesky
  • Share on Threads (Opens in new window) Threads
  • Share on Nextdoor (Opens in new window) Nextdoor
AWS/Azure/OpenShift Tags:AWS

Post navigation

Previous Post: How to use Command-Line on Git Bash and GitHub Desktop to PUSH local code to GitHub
Next Post: How to deploy a React Application to AWS S3

Related Posts

  • Webp.net resizeimage 4
    Create, list, lock, deploy, and delete Azure Resource Group via Azure CLI AWS/Azure/OpenShift
  • maxresdefault 2 5
    Why am I unable to ping the Public IP Address of an EC2 instance AWS/Azure/OpenShift
  • HYBRID BENEFITS FEATURE
    Azure Hybrid Use Cases and Benefits AWS/Azure/OpenShift
  • Backup for Microsoft 365 and Azure
    Veeam Backup Deployment options for Microsoft 365 Data AWS/Azure/OpenShift
  • Azure App Service
    How to Restore Deleted Azure App Service Using PowerShell Automation
  • Amazon
    Import Virtual Machines to AWS as AMI AWS/Azure/OpenShift

More Related Articles

Webp.net resizeimage 4 Create, list, lock, deploy, and delete Azure Resource Group via Azure CLI AWS/Azure/OpenShift
maxresdefault 2 5 Why am I unable to ping the Public IP Address of an EC2 instance AWS/Azure/OpenShift
HYBRID BENEFITS FEATURE Azure Hybrid Use Cases and Benefits AWS/Azure/OpenShift
Backup for Microsoft 365 and Azure Veeam Backup Deployment options for Microsoft 365 Data AWS/Azure/OpenShift
Azure App Service How to Restore Deleted Azure App Service Using PowerShell Automation
Amazon Import Virtual Machines to AWS as AMI AWS/Azure/OpenShift

Leave a Reply Cancel reply

You must be logged in to post a comment.

Microsoft MVP

VEEAMLEGEND

vexpert-badge-stars-5

Virtual Background

GoogleNews

Categories

veeaam100

Veeam Vanguard

  • Veeam Zero Trust Data Resilience
    Demystifying Zero Trust with Veeam: Design your Architecture Backup
  • windows 7 stuck at loading screen thumbnail
    Disable the Windows welcome screen and shutdown screen Windows
  • Featured image
    How to Disable or Uninstall OneDrive on Windows 10 and 11 Backup
  • WinRM and Kerberos Delegation troubleshooting
    Troubleshooting WinRM and Kerberos Delegation for WAC Network | Monitoring
  • awscli56
    Configure AWS Command Line Interface AWS/Azure/OpenShift
  • featureimagepshell 1
    Running PowerShell remotely on Azure VMs AWS/Azure/OpenShift
  • Windows 11 New Security Features
    Smart App Control: Enabling Phishing Protection in Windows 11 Windows
  • WindowsWebClientcoverPH67
    ​​​​​Install HTML Web Client for Microsoft RDS Windows

Subscribe to Blog via Email

Enter your email address to subscribe to this blog and receive notifications of new posts by email.

Join 1,821 other subscribers
  • RSS - Posts
  • RSS - Comments
  • About
  • Authors
  • Write for us
  • Advertise with us
  • General Terms and Conditions
  • Privacy policy
  • Feedly
  • Telegram
  • Youtube
  • Facebook
  • Instagram
  • LinkedIn
  • Tumblr
  • Pinterest
  • Twitter
  • mastodon

Tags

Active Directory Azure Bitlocker Microsoft Windows PowerShell WDS Windows 10 Windows 11 Windows Deployment Services Windows Server 2016

Copyright © 2025 TechDirectArchive


Loading Comments...
 

You must be logged in to post a comment.