In this guide, we are going to discuss “Creating IAM Users: Adding MFA and Policies on AWS”. Let’s put you through what the IAM concept is before you start creating groups and users via the AWS management console. Please see Microsoft Azure Multi-Factor Authentication (MFA), What you need to know before integrating on-premise AD with Azure Active Directory and MFA, and how to Setup HTTPS users using Git credentials and Pushing Code to AWS CodeCommit.
You must have noticed that the creation of IAM users that access the AWS console changed to being managed in Identity Center instead of regular IA. This transition occurred gradually starting in mid-2021. Previously, individual IAM users would be created directly in IAM and assigned permissions to access the AWS Management Console.
Now, Identity Center acts as a central point of administration and user management. When Identity Center is set up, IAM users are no longer created directly in IAM. Please see “MFA on Root Account: Create a User on AWS and Register MFA“.
What is IAM?
IAM means Identity and Access Management which is used to control who is allowed to sign in or authenticate and also who is authorized or permitted to use or access a resource.
The AWS Identity and Access Management (IAM) is a web service that can assist you with access to AWS services and resources. When you sign up for an AWS account, you are first assigned with a single login that has access to all AWS services in the account. This login identity is called the Root user account which you can access just by signing with your email credentials.
But it is strongly advised that you do not use the root user login details for your everyday tasks which include admin tasks but follow the best practice of using this initial root user account to create your first IAM user.
Use the root user to perform few service management tasks and make sure you securely lock the account away. You might also want to read how to manage cost with AWS Budgets and if you are planning to deploy your application to AWS you can go through this guide on How to Deploy an Angular App to AWS S3

Also, see Rolling out Multi-factor Authentication – Recommendations, and how to create Profiles for your AWS Access Credentials for AWS Toolkit in Visual Studio.
IAM features
- Shared access to your AWS account
- Granular permissions
- Secure access to AWS resources for EC2 applications
- Multi-factor authentication (MFA)
- Identity federation
- Identity information for assurance
- PCI DSS Compliance
- Free to use
Tools to Access IAM
- AWS Management Console
- AWS Command Line Tools
- AWS SDKs
- IAM HTTPS API
IAM users
Furthermore, When you create an IAM user which consists of a name and credentials. However, this user represents the person or application that uses the account to interact with AWS.
Moreover, It is very possible to create one or more IAM users in the same AWS account. When a new staff joins your organization or when personnel joins your unit there might be a need for an IAM account to be created for such ones or when there is a need for a new application that needs to make API calls to some AWS Services.
In addition, Please note that an IAM user with administrator rights or permission is different from an AWS account root user.
Steps to create IAM Users, Adding MFA and Policies on AWS
The steps below will highlight all you need to know to realise this objectives.
Different ways to create IAM user
- Creating IAM users via Console
- Creating IAM users via AWS CLI
- Creating IAM users via AWS API
Creating IAM users via Console
Using the AWS Management Console to create IAM users. Sign in to the IAM console via AWS Management Console https://console.aws.amazon.com/iam/
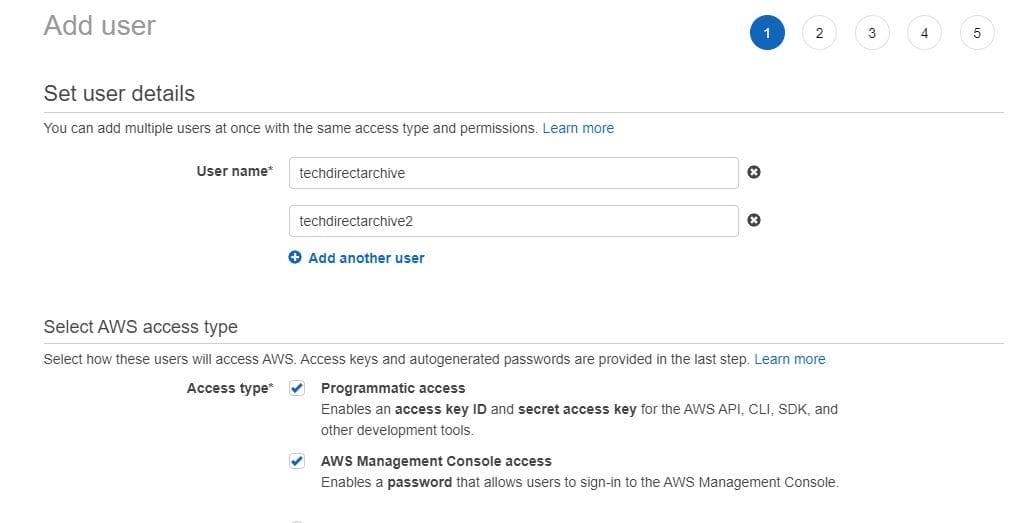
- In the left Menu, select Users and then choose Add users.

Enter the user name for the new user which will be used as the sign-in name for AWS. Nonetheless, You can add more than one user by clicking Add another user for every additional user. It is very possible to add up to 10 users at one time.
Go ahead and pick the type of access this set of users will have. You can either select programmatic access or AWS Management Console or both.
- Programmatic access: Consequently, You select this when the users require access to the API, AWS CLI or Windows PowerShell. With this, you get an access key for new users.
- AWS Management Console access: this provides access to the AWS Management Console.
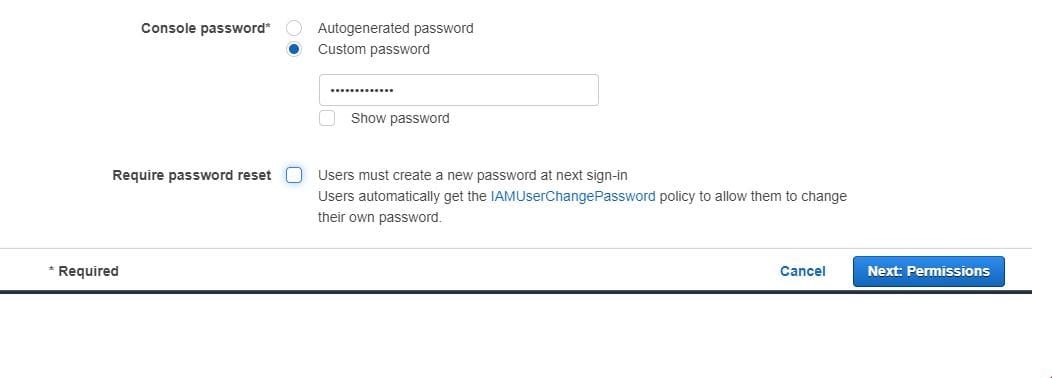
- On the Console password select one of the following:
- Autogenerated password: Similarly, The system randomly generates a password that meets the account password policy.
- Custom password: you personally assign a custom password.
Nevertheless, You can force a user to change their password on the first time sign in by selecting Require password reset.
Click Next: Permissions. On the next page Set permissions this is where you will specify how you want to assign permissions to new users. Below are three options for you to select from:
Add user to the group. Therefore, If you plan to assign the users you created to one or more groups with assigned permissions policies, then this option is the best option. If the group is not yet created then you can Create a group.
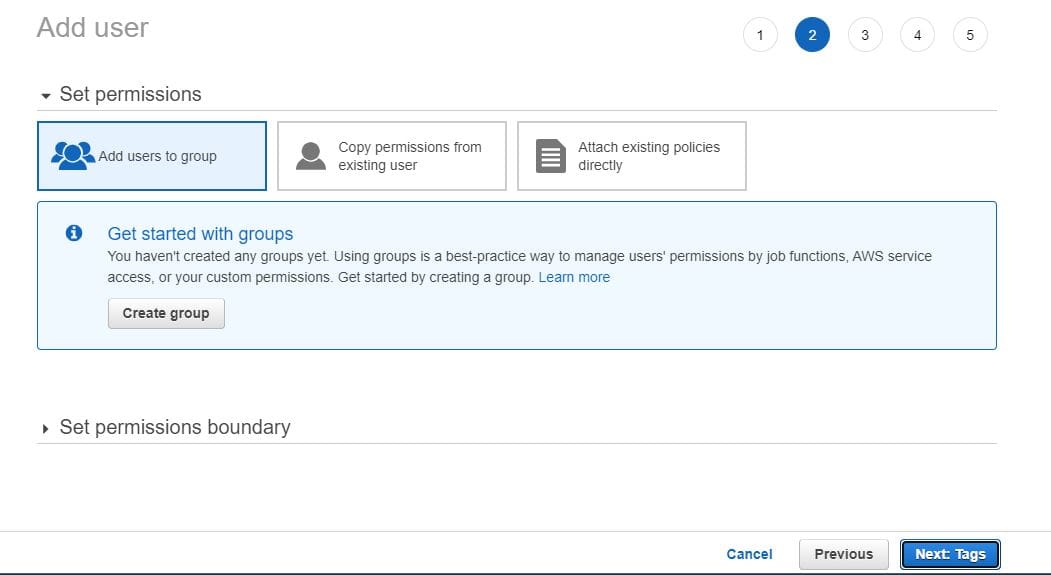
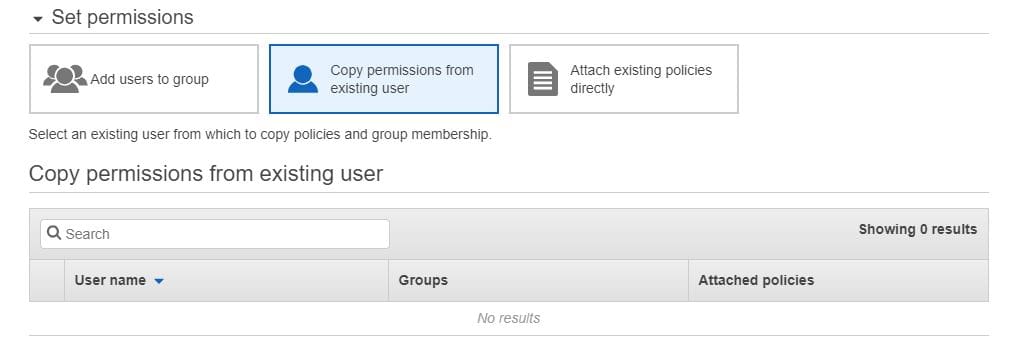
2. Copy permissions from existing user. Additionally, You can select this option if you plan to copy permissions from an existing user. Furthermore, IAM has the ability to display the list of users in your account and from the list you can choose the one the permissions matches the new users.
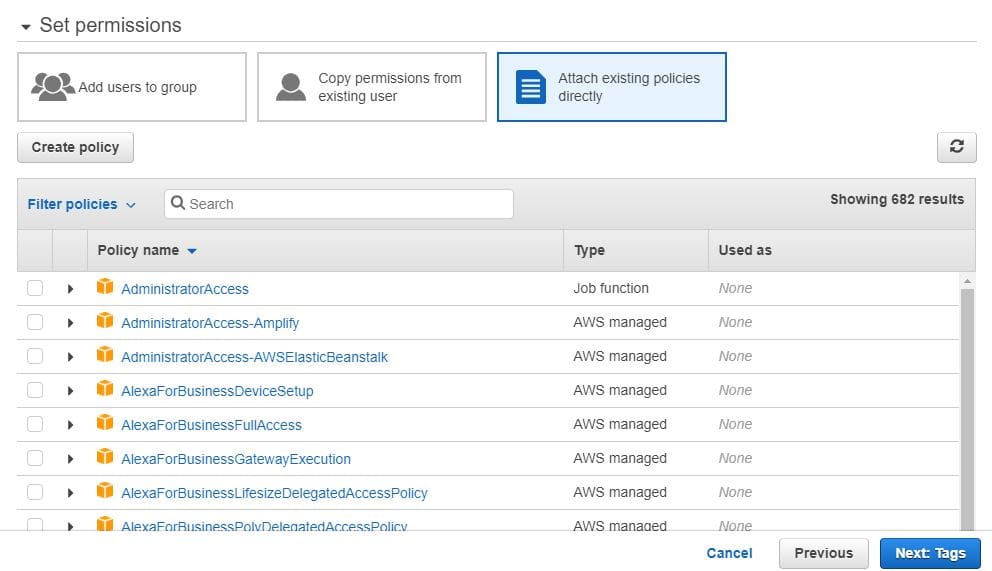
3. Attach existing policies directly. However, With this option, you will see a list of AWS managed and customer-managed policies in your account. From this list, you can choose the policies that match the one you want to attach to the new users created. Moreover, or you can decide to create a new policy by clicking on Create policy, and after creating it, you can attach it to the user.
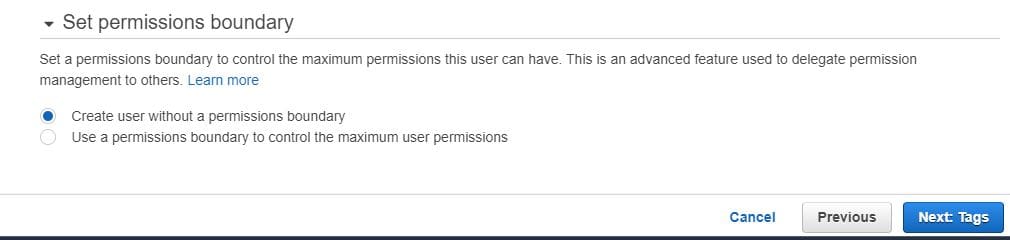
In addition, In the Set permissions boundary section, you can decide to select Create user without a permissions boundary or Use a permissions boundary to control the maximum user permissions.

Click Next: Tags. Nonetheless, The next section is optional; you can add tags to your user. These tags can be in the form of user information, email addresses and many more.

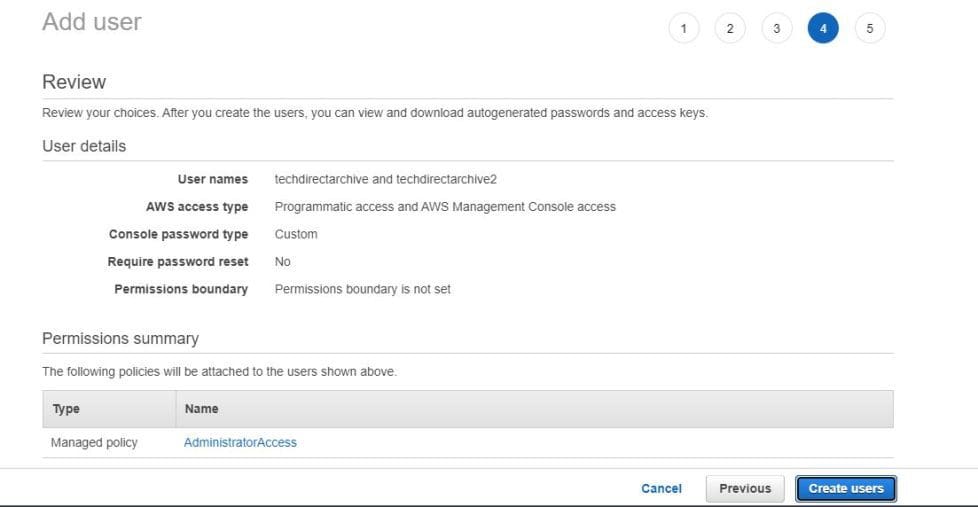
Consequently, Click Next: Review to display all the choices you have selected and configured and after the review, you can proceed by clicking Create users.
The next page is a success page confirming and displaying all the users created. Similarly, You will need to click on the Download .csv which consists of the sign-in details, make sure you save the file and share it with the users or you can click on the Send email to send the login details to the user.
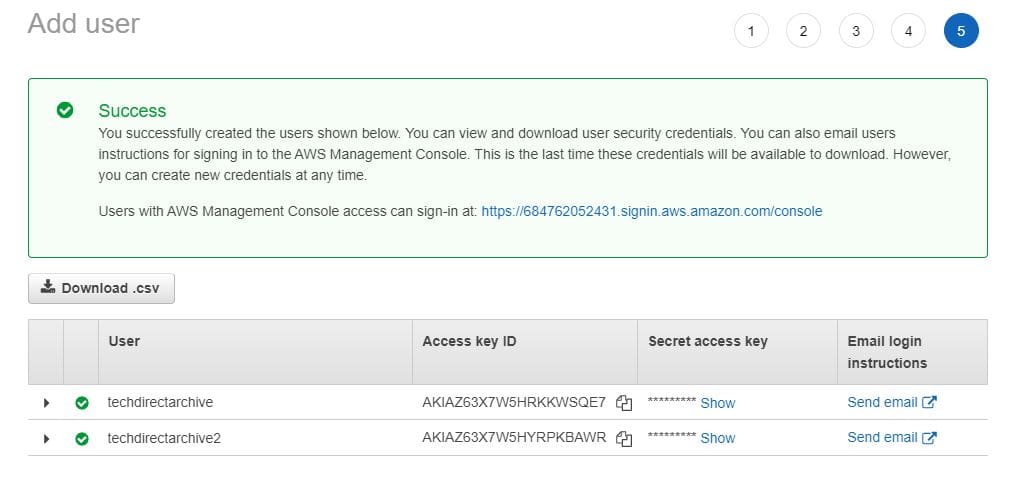
Nevertheless, The below image is a description of the downloaded csv file that contains the sign in details

What is MFA?
Therefore, Multi-factor authority helps provide additional security to your AWS account. Additionally, it requires users to supply further unique authentication in addition to the regular sign-in credentials to an AWS account.
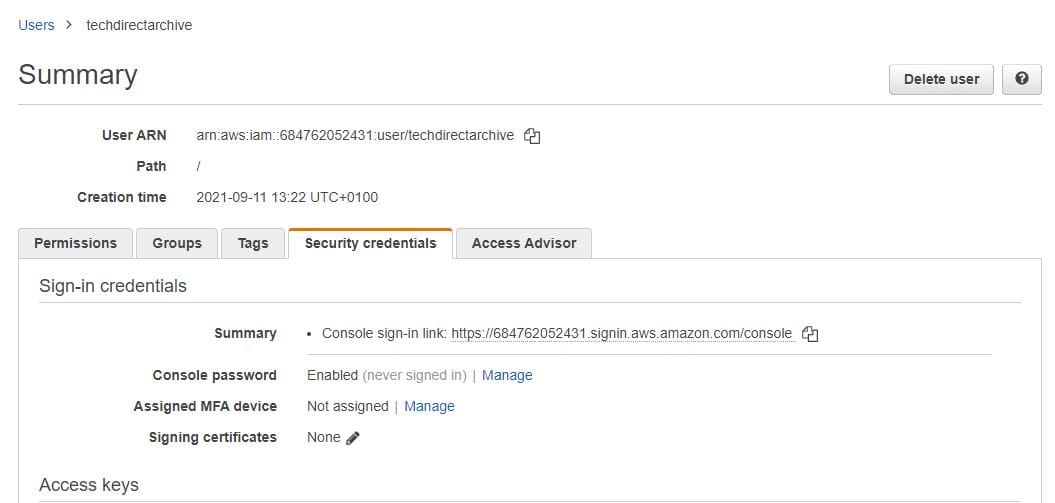
Furthermore, On the User summary page click on the tab Security credentials. In the Assigned MFA device section click on Manage.
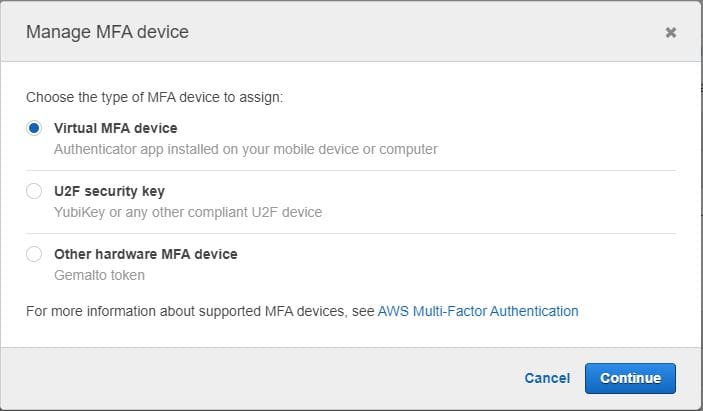
However, Please note that we will only be setting up a Virtual MFA device in this guide.
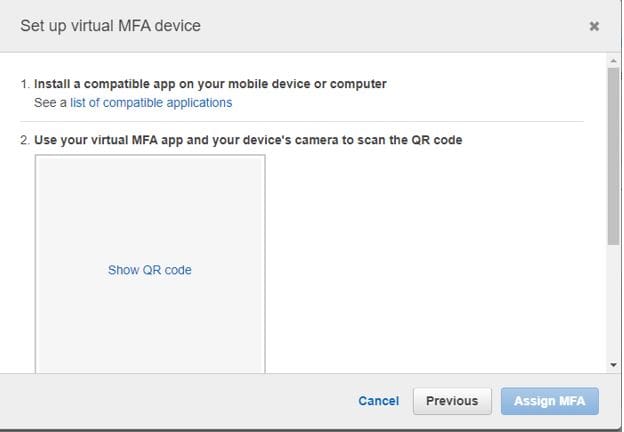
Moreover, We will be using Google Authenticator app for this setup.
In addition, Next click on the Show QR code to display the QR code so that you can scan with an authenticator. Nonetheless, you will be using but in this case we are using Google Authenticator.
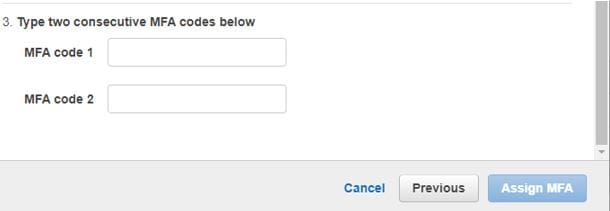
Consequently, Enter the MFA codes that display temporarily on your device as MFA code 1 and MFA code 2.
Similarly, After clicking on the Assign MFA button you will get a successful message. Nevertheless, and you can start using the virtual MFA to sign in to the user account created on AWS.

I hope you found this blog post on how to “Creating IAM Users: Adding MFA and Policies on AWS’ helpful. In case you have any questions do not hesitate to ask in the comment section.


