Azure Resource Manager is the deployment and management service for Azure. It provides a management layer that enables you to create, update, and delete resources in your Azure account. You use management features, like access control, locks, and tags, to secure and organize your resources after deployment. This guide discusses how to create, list, lock, deploy, and delete Azure Resource Group via Azure CLI. Also here are some of my related guides: How to manage azure resource manager resource groups by using Azure CLI, how to configure azure resources with tools, and how to install and configure Ansible on Ubuntu.
In this article, you will learn the following listed below. Please see How to disable Lock Screen on Windows 10, how to disable Lock Screen on Windows 10, and How to solve VMware workstation .lck error.
- What is a resource group?
- Create resource groups using CLI.
- List resource groups using CLI.
- Lock resource groups CLI.
- Deploy resources CLI.
- Delete resource groups CLI.
What is a resource group?
A resource group is a container that holds related resources for an Azure solution. The resource group can include all the resources for the solution or only those resources that you want to manage as a group.
Here are some exciting articles: how to install Ansible on Windows with Cygwin, how to automate infrastructure deployments in the cloud with ansible and azure pipelines, how to install Kerberos packages in Windows via Cygwin, how to configure a remote server (windows) to Support Ansible, and how to deploy Azure VMware solution private cloud.
Create resource groups using CLI
- Go to the Azure Portal
- At the top bar, click on the cloud shell
- Select to open the bash terminal
- Type the following below to create a resource group
az group create --name staggingResourceGroup --location westus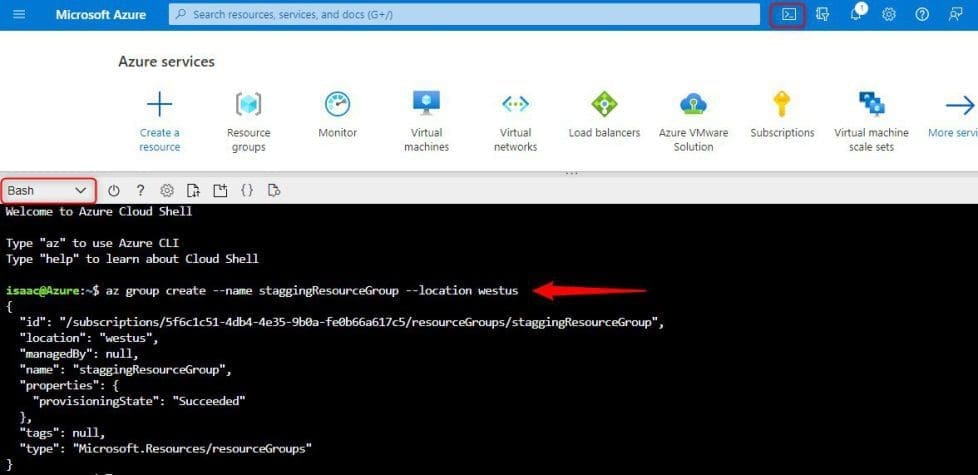
Please see how to fix AWS CLI Error: All commands return Unknown output type [None], How to disable automatic screen lock in Ubuntu Linux, and How to uninstall AWS CLI in Windows.
List resource groups using CLI
- Go to the Azure Portal
- At the top bar, click on the cloud shell
- Select to open the bash terminal
- Type the following below to create a resource group
az group list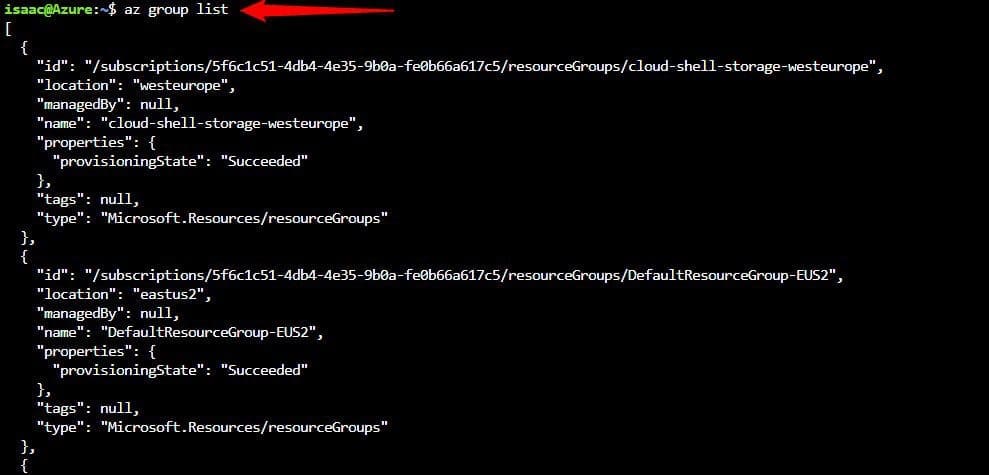
Lock resource groups using CLI
Locking prevents other users in your organization from accidentally deleting or modifying critical resources.
- Go to the Azure Portal
- At the top bar, click on the cloud shell
- Select to open the bash terminal
- Type the following below to create a resource group
az lock create --name LockGroup --lock-type CanNotDelete --resource-group staggingResourceGroup
How to get the locks for a resource group
az lock list --resource-group staggingResourceGroup
How to delete a lock for a resource group
az lock delete --name LockGroup --resource-group staggingResourceGroup
Deploy resources using CLI
Go to the Azure Portal. At the top bar, click on the cloud shell, select to open the bash terminal
Type the following below to create a resource group
az storage account create --resource-group staggingResourceGroup --name staggingstorage2021 --location westus --sku Standard_LRS --kind StorageV2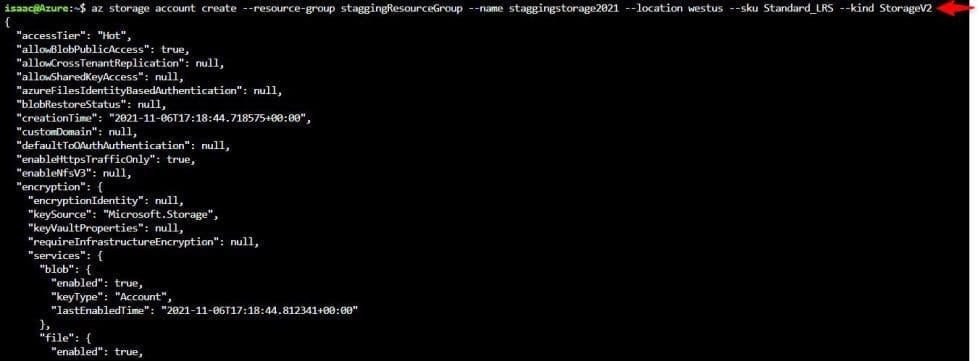
Deploy resources using CLI
Go to the Azure Portal. At the top bar, click on the cloud shell, and Select to open the bash terminal
Type the following below to create a resource group
az group delete --name staggingResourceGroup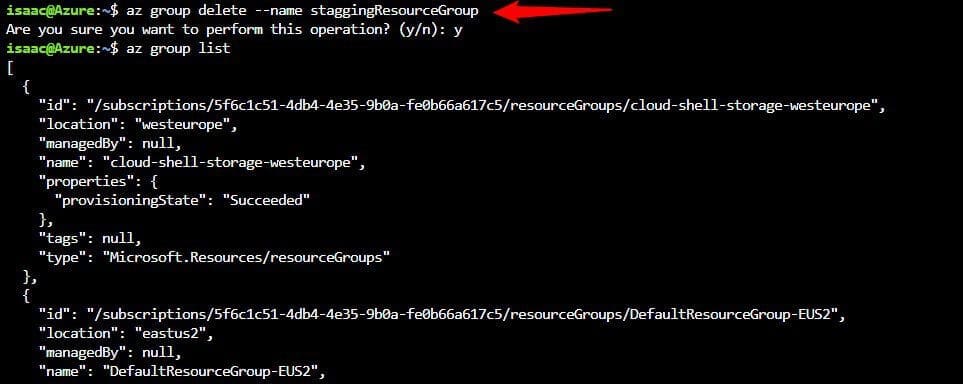
This article provided a step-by-step overview of the steps on how to create, list, lock, deploy, and delete Azure Resource Group via Azure CLI.