A cPanel is a platform where you manage your web hosting, and you will need to push your local code to the cPanel shared hosting environment. A GitHub action is a continuous integration and continuous delivery (CI/CD) platform where you can automate your build, test, and deployment pipeline. In this article, I will be showing you a step-by-step process on how to connect and deploy your local repository to the cPanel shared hosting using a GitHub action. Please see How to Install and Setup WordPress into a cPanel and Configure Your First WordPress Theme, Chef Automate: AWS Opsworks For Chef Automate, and how to install and configure an FTP server on Windows 10.
This integration will help your development project greatly, you will be using a GitHub version control and each time you make a push to GitHub, it gets automatically deployed to your cPanel shared hosting. Please see the YouTube video on how to Deploy GitHub Repositories to cPanel using GitHub Actions.
You can also read about how you can Set Up a Continuous Deployment Pipeline Using AWS CodePipeline and how to use Command-Line on Git Bash and GitHub Desktop to PUSH local code to GitHub.
Steps on integrating your cPanel to GitHub Action
1. Setup an FTP account on cPanel
Login to your cPanel and navigate to FTP

2. Enter the details and create the FTP account

ftp account successfully created. Save your ftp account username and password because it Will be used with the hosting IP Address later.

3. Setup your local GitHub Repository
I want to believe you have already set up your local GitHub repository. But if not you can check How to use GitHub Desktop to PUSH local code to GitHub.

4. Add GitHub Secrets to your repository.
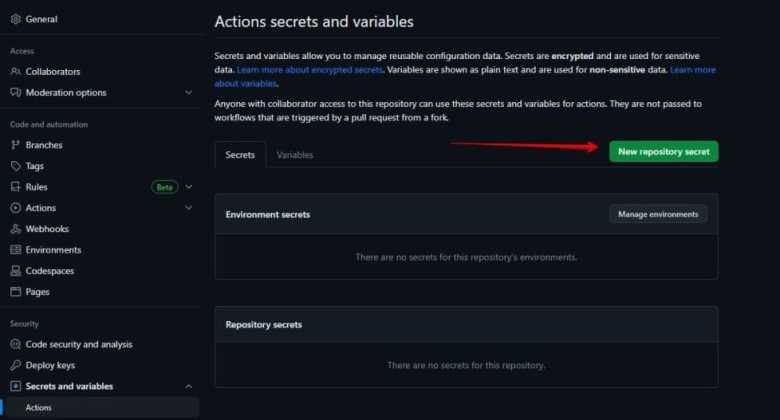
Open your local repository on GitHub. Click SETTINGS and navigate to SECRETS > ACTIONS.

5. Click on New Repository Secret and add the Name and Secret value.
The value is the FTP username and password you created earlier.

Click on Add Secret. You will see the secret added successfully.

Also, see how to install Let’s Encrypt Wildcard SSL Certificate in cPanel using Certify The Web, and how to Disable Touchpad on Windows 11
6. Set up GitHub Actions Workflow for Deployment
Inside the GitHub repository, click on the ACTIONS tab and skip the suggested workflow but click on Set up a workflow yourself.

You can edit the YAML file and change its name. but for the purpose of this guide, I am leaving the name as main.yml.
Now write the configuration code below into the file section: Enter your actual server’s name. Then enter secrets.ftp_username and secrets.ftp_password which will sync with the username and password we earlier defined under Secrets and variables.

You can decide to change the branch if you want it to be set up for other branches.
Click on Commit Change which will now create a new workflow directory and place the configuration code in it. So, each time you push to the main branch or any other branch you set up, it will automatically deploy to the cPanel.
Each time you commit your code you can go to the Actions tab and check the progress status whether it’s running, successfully deployed, or there is a failed deployment.

When you check your cPanel File Manager you will see the code has been deployed and it gets updated on every push from your local repository. That is all that it takes on how to Deploy GitHub Repo to cPanel using GitHub Actions
cPanel File Manager Image

I hope you found this blog post on how to Connect and Deploy Local GitHub Repositories to cPanel Shared Hosting using GitHub Actions Interesting and helpful. In case you have any questions do not hesitate to ask in the comment section.
