Skip to content

TechDirectArchive

Hands-on IT, Cloud, Security, Veeam & DevOps

  • Home
  • About
  • Advertise With US
  • Contact
  • Reviews
  • Toggle search form

Install Let’s Encrypt Wildcard SSL Certificate in cPanel using Certify

Posted on 27/12/202110/06/2026 Temitope Odemo By Temitope Odemo No Comments on Install Let’s Encrypt Wildcard SSL Certificate in cPanel using Certify
  1. Home
  2. Configuration Management Tool
  3. Install Let’s Encrypt Wildcard SSL Certificate in cPanel using Certify
Let's Encrypt

In this guide I will be showing you how to install Let’s Encrypt Wildcard SSL Certificate in cPanel using Certify The Web. With Certify The Web you can easily install and auto-renew free SSL/TLS certificates from letsencrypt.org and other ACME Certificate Authorities for your IIS/Windows servers or cPanel. Please see How to use the DigiCert certificate utility for Windows to create a CSR, Generate a self-signed SSL certificate: How to enable LDAP over SSL with a self-signed certificate.

Certify The Web is one good tool you can use to manage, install, and renew free SSL certificates for your Windows and other servers, it is also a Let’s Encrypt-powered Professional Certificate Management tool for Windows.

For further similar guide on SSL certificate you can check these: How to enable LDAP over SSL with a third-party Certificate such as DigiCert, How to generate your trial SSL Certificate using DigiCert PKI platform, and How to import SSL Certificate to Windows Server using DigiCert Utility. To download this tool go here https://certifytheweb.com/

Navigate to the Settings tab and click on the Certificate Authorities. Furthermore, Make sure the Preferred Certificate Authority is on Let’s Encrypt. Click on New Account

Wildcard SSL Certificate
Creating New Account

Type your email address, agree and click on Register Contact

cPanel
Registering your Email Account

Securing Subdomains: Generating a Wildcard SSL Certificate

However, After registering, click on New Certificate and type *.yourdomain.com in the domain input field where the * means secure all subdomains under the primary domain and click on the plus sign.

Certify The Web
Creating New Certificate

Added a wildcard domain

Let's Encrypt
Pop up message


If you prefer to add a non-wildcard version, you can click on Yes or No

Wildcard SSL Certificate
Pop up message

Nonetheless, Now click on the Authorization section on the right side and select dns-01 in the Challenge Type drop-down. In the DNS Update Method drop-down select (Update DNS Manually)

cPanel
Authorization Section

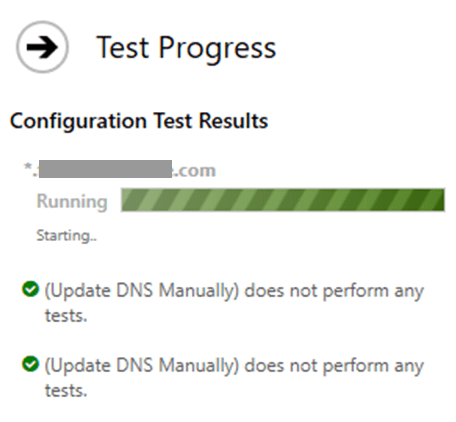
Moreover, Now Click on the Test button to test the domain status if everything appears ok

Let's Encrypt
Authorization Section

However, To move forward you need to create a DNS (TXT) record in your DNS settings, and you will receive a message like the one below in the email account that you configured earlier.

image-81
Email Message

Open the DNS Settings and create your TXT Record.

image-94
DNS Zone

Test in Progress

image-83
Test Progress

Choosing Deployment Mode: Selecting Certificate Store Only After Successful Test

However, Once the test is successful, you can go to the Deployment section, and in the Deployment Mode drop-down, you can select Certificate Store Only.

Moreover, The reason for this selection is that this will store the SSL certificate in your local database. Furthermore, Note that the SSL certificate obtained through the Certify the Web application has a PFX extension that is not compatible with the Apache server by default, so we must convert that file to make it compatible with the Apache server.

After this then Click on Request Certificate.

image-84
Certificate Deployment

The Certificate ordering process.

image-85
Certificate Ordering Process.

SSL Certificate generated successfully

image-86
Success Message

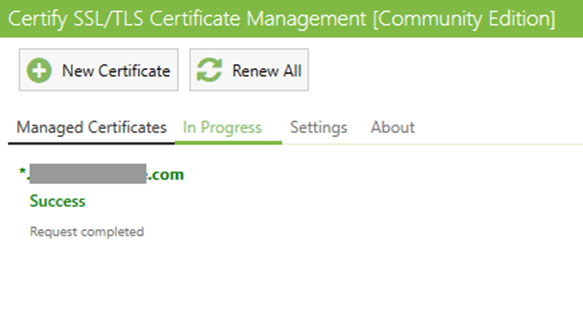
Nonetheless, Now click on the Managed Certificates tab and click on Status to verify the certificate details. However, As mentioned earlier, by default, the certificate is stored in the PFX extension and needs to be converted to be compatible with the Apache server.

So, on your local system create a directory where you will save the certificate and click on Tasks >> (Deployment Tasks) Add >> Deploy to Apache

image-87
Deployment Task

Moreover, Paste your certificate directory path into the first output field and append a back-slash and type “wildcard.crt” or “wildcard.pem”. However, Then in the second output field, paste the directory path and append a back-slash and type “private.key” and in the last output field paste the directory path and type “CA.crt” or “CA.pem”.

image-88
Deployment Task

After clicking on Deploy to Apache,

Note: Before running the deployment task, make sure to save it and run the task

Now open your cPanel to install these certificates.

image-89
Saved Certificate

You can either upload the certificate as a file or as a text.

image-90
Uploading your Generated Certificate

Furthermore, You can now refresh your website check the padlock icon, and see if the site is now secure with Let’s Encrypt

image-91
Secure Connection

I hope you found this blog post on How to install Let’s Encrypt Wildcard SSL Certificate in cPanel using Certify The Web interesting and helpful. However, If you have any questions, do not hesitate to ask in the comment section.

5/5 - (1 vote)

Thank you for reading this post. Kindly share it with others.

  • Share on X (Opens in new window) X
  • Share on Reddit (Opens in new window) Reddit
  • Share on LinkedIn (Opens in new window) LinkedIn
  • Share on Facebook (Opens in new window) Facebook
  • Share on Pinterest (Opens in new window) Pinterest
  • Share on Tumblr (Opens in new window) Tumblr
  • Share on Telegram (Opens in new window) Telegram
  • Share on WhatsApp (Opens in new window) WhatsApp
  • Share on Mastodon (Opens in new window) Mastodon
  • Share on Bluesky (Opens in new window) Bluesky
  • Share on Threads (Opens in new window) Threads
  • Share on Nextdoor (Opens in new window) Nextdoor
Configuration Management Tool Tags:automate ssl renewal cpanel certify the web, Certificate Authority, Certificate Signing Request, Certificates, certify the web wildcard certificate setup, cpanel https ssl management tutorial, cpanel ssl wildcard domain configuration, dns validation lets encrypt wildcard setup, install lets encrypt wildcard ssl cpanel, lets encrypt dns challenge cpanel ssl, secure multiple subdomains ssl cpanel, SSL, ssl certificate, wildcard https certificate installation guide

Post navigation

Previous Post: How to manage and use Amazon S3 access points using the AWS Management Console
Next Post: How to install Apache Tomcat on Ubuntu

Related Posts

  • Create S3 Bucket with Terraform
    Create an S3 Bucket with Terraform AWS/Azure/OpenShift
  • ansible
    KDC reply did not match expectations while getting initial credential Configuration Management Tool
  • ansible logo600 591x296 1
    Ansible_user=UNREACHABLE {Failed to connect to the host via SSH: SSH: Could not resolve hostname (Name or service not known, unreachable true) Configuration Management Tool
  • images 5
    IP Address UNREACHABLE: HTTP connection pool Max exceeded Configuration Management Tool
  • image 117
    Deploy MVC Application to AWS EC2 Using RDP and Web Deploy Configuration Management Tool
  • ansible 1
    How to fix no Python interpreters found for the host Configuration Management Tool

More Related Articles

Create S3 Bucket with Terraform Create an S3 Bucket with Terraform AWS/Azure/OpenShift
ansible KDC reply did not match expectations while getting initial credential Configuration Management Tool
ansible logo600 591x296 1 Ansible_user=UNREACHABLE {Failed to connect to the host via SSH: SSH: Could not resolve hostname (Name or service not known, unreachable true) Configuration Management Tool
images 5 IP Address UNREACHABLE: HTTP connection pool Max exceeded Configuration Management Tool
image 117 Deploy MVC Application to AWS EC2 Using RDP and Web Deploy Configuration Management Tool
ansible 1 How to fix no Python interpreters found for the host Configuration Management Tool

Leave a Reply Cancel reply

You must be logged in to post a comment.

Microsoft MVP

VEEAMLEGEND

vexpert-badge-stars-5

Virtual Background

GoogleNews

Categories

veeaam100

Veeam Vanguard

  • ycx
    Install SysInternals from the Microsoft Store Windows
  • BitLocker MBAM Frequently Asked Questions
    Disable the Sleep Mode: UEFI and TPM and BitLocker FAQs Windows
  • Connect to FTP Server
    Secure FTP Login Issue: NAT Router Configuration for Passive Mode and Port Forwarding Windows Server
  • sshfs
    Mounting remote directory using sshfs Linux
  • Windows Hello with fake fingerprints
    Security researchers bypass Windows Hello with fake fingerprints with Raspberry Pi 4 Security | Vulnerability Scans and Assessment
  • Azure CI CD Pipeline
    CI/CD Pipeline: Your First in Azure DevOps with ASP.Net Core AWS/Azure/OpenShift
  • Feature Image DNF vs APT
    What are the differences between dnf and apt package managers? Linux
  • Veeam Ready Tape
    Enterprise Tape Library Administration: Control Path, Firmware, Media Management and Tape Operations Backup

Subscribe to Blog via Email

Enter your email address to subscribe to this blog and receive notifications of new posts by email.

Join 1,791 other subscribers
  • RSS - Posts
  • RSS - Comments
  • About
  • Authors
  • Write for us
  • Advertise with us
  • General Terms and Conditions
  • Privacy policy
  • Feedly
  • Telegram
  • Youtube
  • Facebook
  • Instagram
  • LinkedIn
  • Tumblr
  • Pinterest
  • Twitter
  • mastodon

Tags

Active Directory Azure Bitlocker Microsoft Windows PowerShell WDS Windows 10 Windows 11 Windows Deployment Services Windows Server 2016

Copyright © 2025 TechDirectArchive

Loading Comments...

You must be logged in to post a comment.