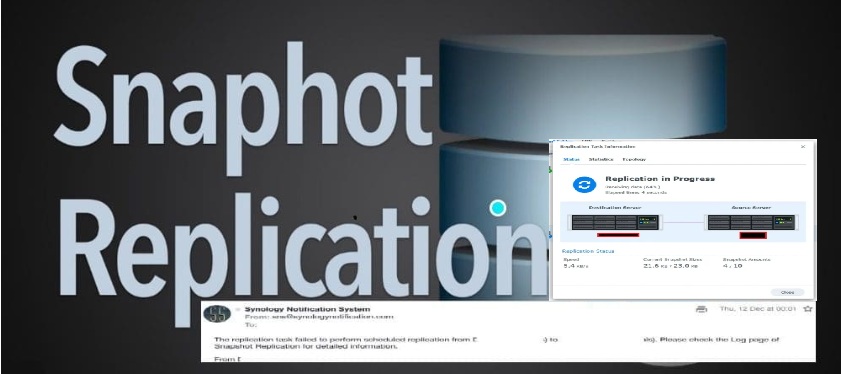
Fix Task failed to perform Scheduled Snapshot Replication [Part 1]

Snap Replication provides schedulable, near-instantaneous data protection. This package helps ensure that your business data located in shared folders or virtual machines located in LUNs remain safe and available in the event of disaster. Therefore, with this solution, snapshot Replication will automatically take snapshots at a pre-determined time and frequency. In this article, we shall discuss how to Fix Task failed to perform Scheduled Snapshot Replication [Part 1]. Please see how to create Synology Snapshot Replication for more information on snapshot replication.
You can either enable application-consistent snapshots or keep the option disabled (unticked) to take crash-consistent snapshots. Please, see a similar error “Inbound connection Error: Failed to Perform Scheduled Replication [Part 2]”.
Also, see How to Create a Snapshot on vSphere Web Client, how to create or delete snapshots on VMware Workstation, and Virtual Machine Snapshot vs Backup.
Why was the error Replication Task Failed” Prompted?

The “Task failed to perform scheduled Snapshot Replication” error in Synology NAS sometimes means one of the following below. This signifies that the scheduled replication task for snapshots was not completed successfully.
- Network Issues: The target device (another Synology NAS or remote server) may be unreachable due to network disconnections or firewall restrictions.
- Insufficient Storage: The destination storage does not have enough free space to store the replicated snapshot.
- Replication Task Conflicts: Another replication task might be running simultaneously, causing conflicts.
- Permission Issues: The replication task may lack the necessary permissions to access the target storage.
- Service Interruption: The Snapshot Replication service may have been stopped or disabled.
Though not directly tied to this issue, some Synology NAS models have a limit on the number of snapshots that can be stored. Also, a DSM update or unexpected restart could have interrupted the scheduled task. But, this will not lead to continuous email alert for days that the replication has failed.
Please see “Manage VMware Snapshots: Delete or Edit or Revert a Snapshot“, how to install Veeam Backup Console on a Jump Server, and how to mitigate Veeam Threat Hunter Service Scanning Interference.
Resolve Snapshot Replication Failure
I already know what the issue was. But as you can see from the email, we were asked to take a look at the logs. When you do in your case, you would be able to pinpoint the issue.
In this case, the issue was network-related. After switching to a new network provider, the Server Name/IP Address field in the Snapshot Replication settings became inconsistent, leading to replication failures. The replication task was unable to reach the target system due to outdated or incorrect network configurations.

As you can see below, there are new IP assigned and this has to be changed.

To do this, launch the Control panel, and navigate to “Network”. Under the Network interfaces, click on Edit. I will be using manual DHCP configuration. Therefore, I will enter the IP address manually as shown below.

When you are done, click on apply.

Perform Manual Sync
Now that the correct IP address is set, launch Snapshot Replication form the Main Menu. Under Shared Folders, click the Actions dropdown and select Sync as shown below.

On the “Sync Now” wizard, click on OK.

As you can see, the shared “Homes Folder” has been successfully replicated while the Essentials Folder is currently in progress..

The log shows that the first two entries no longer contain error messages. Instead, they provide informational messages stating that both replications completed successfully

Also, we can see from the Snapshot Replication overview, the tasks completed successfully.

I hope you found this article very useful on how to Fix Task failed to perform Scheduled Snapshot Replication [Part 1]. Please feel free to leave a comment below.