


Configure Windows Admin Center on Windows Server 2019

Windows Admin Center has become a strategic management platform for modern Windows Server environments, offering a centralized, browser-based experience for administering servers, clusters, and hyper-converged infrastructure. In this guide, we shall discuss how to ‘Install and Configure Windows Admin Center on Windows Server 2019″. Please, see Why Software KVMs such as Synergy is replacing Hardware KVMs, and Migrate Veeam One Database from SQL Server 2017 to 2025.
With Windows Server 2019 still widely adopted across enterprise and hybrid environments, understanding how to correctly install and configure Windows Admin Center remains a critical skill for system administrators and infrastructure engineers.
We will provide you with the entire walkthrough of the deployment process. It covers prerequisites, installation options, initial configuration, and security considerations, with a focus on real-world scenarios rather than theoretical concepts. Whether you are setting up a management gateway for the first time or standardizing your administrative tooling, this guide will help you deploy Windows Admin Center efficiently and with confidence.
By following this guide, readers will gain a solid foundation for leveraging Windows Admin Center to simplify day-to-day operations, improve visibility across their server infrastructure, and align their management approach with modern Windows Server best practices.
Also, see “how to set up Windows Admin Center on a Windows Server“, how to Upgrade Windows Admin Center Manually, and how to Install Windows Admin Center on Windows 10 and Windows 11.
Download and Install Windows Admin Center
Please, you can download Windows Admin center here.

Run msi with Run as administrator

Here, select Mandatory diagnostic data

Choose ‘Use Microsoft Update to check for updates’

Select: ‘Allow Windows Admin Centre to change settings on this computer.
Automatically update WAC
Select HTTPS if you want to use a secure protocol

Permit allow this app to make change

installation in progress

ready for connection from a PC

Please, see “how to Apply and Enable Automatic Windows Admin Center Update“, and “how to schedule and run update via Windows Admin Center“.
Access the management Interface
Open your browser and connect to the WAC web console.

check this warning and Reboot server

We have an interesting notification to secure HTTPS traffic. Please, reboot PC.

Please, see Also, see How to remove Quick Access from Google Drive Online, how to add and Remove Multiple Virtual Desktops in Windows, and Logon Failure Reasons for Windows Event Viewer.
Add Servers to Windows Admin Center
ADD or create resource

Search Active Directory

Search your server

It is possible to create a precompiled file with all the servers to be added, for example:

Select “import from a file”

Check import server and create custom tag

Fix Window Managment Framework (WMF) 5 isn’t installed
Install Window Management Framework (WMF) 5 that are missing or isn’t installed.

On Windows 2012 R2, install WMF

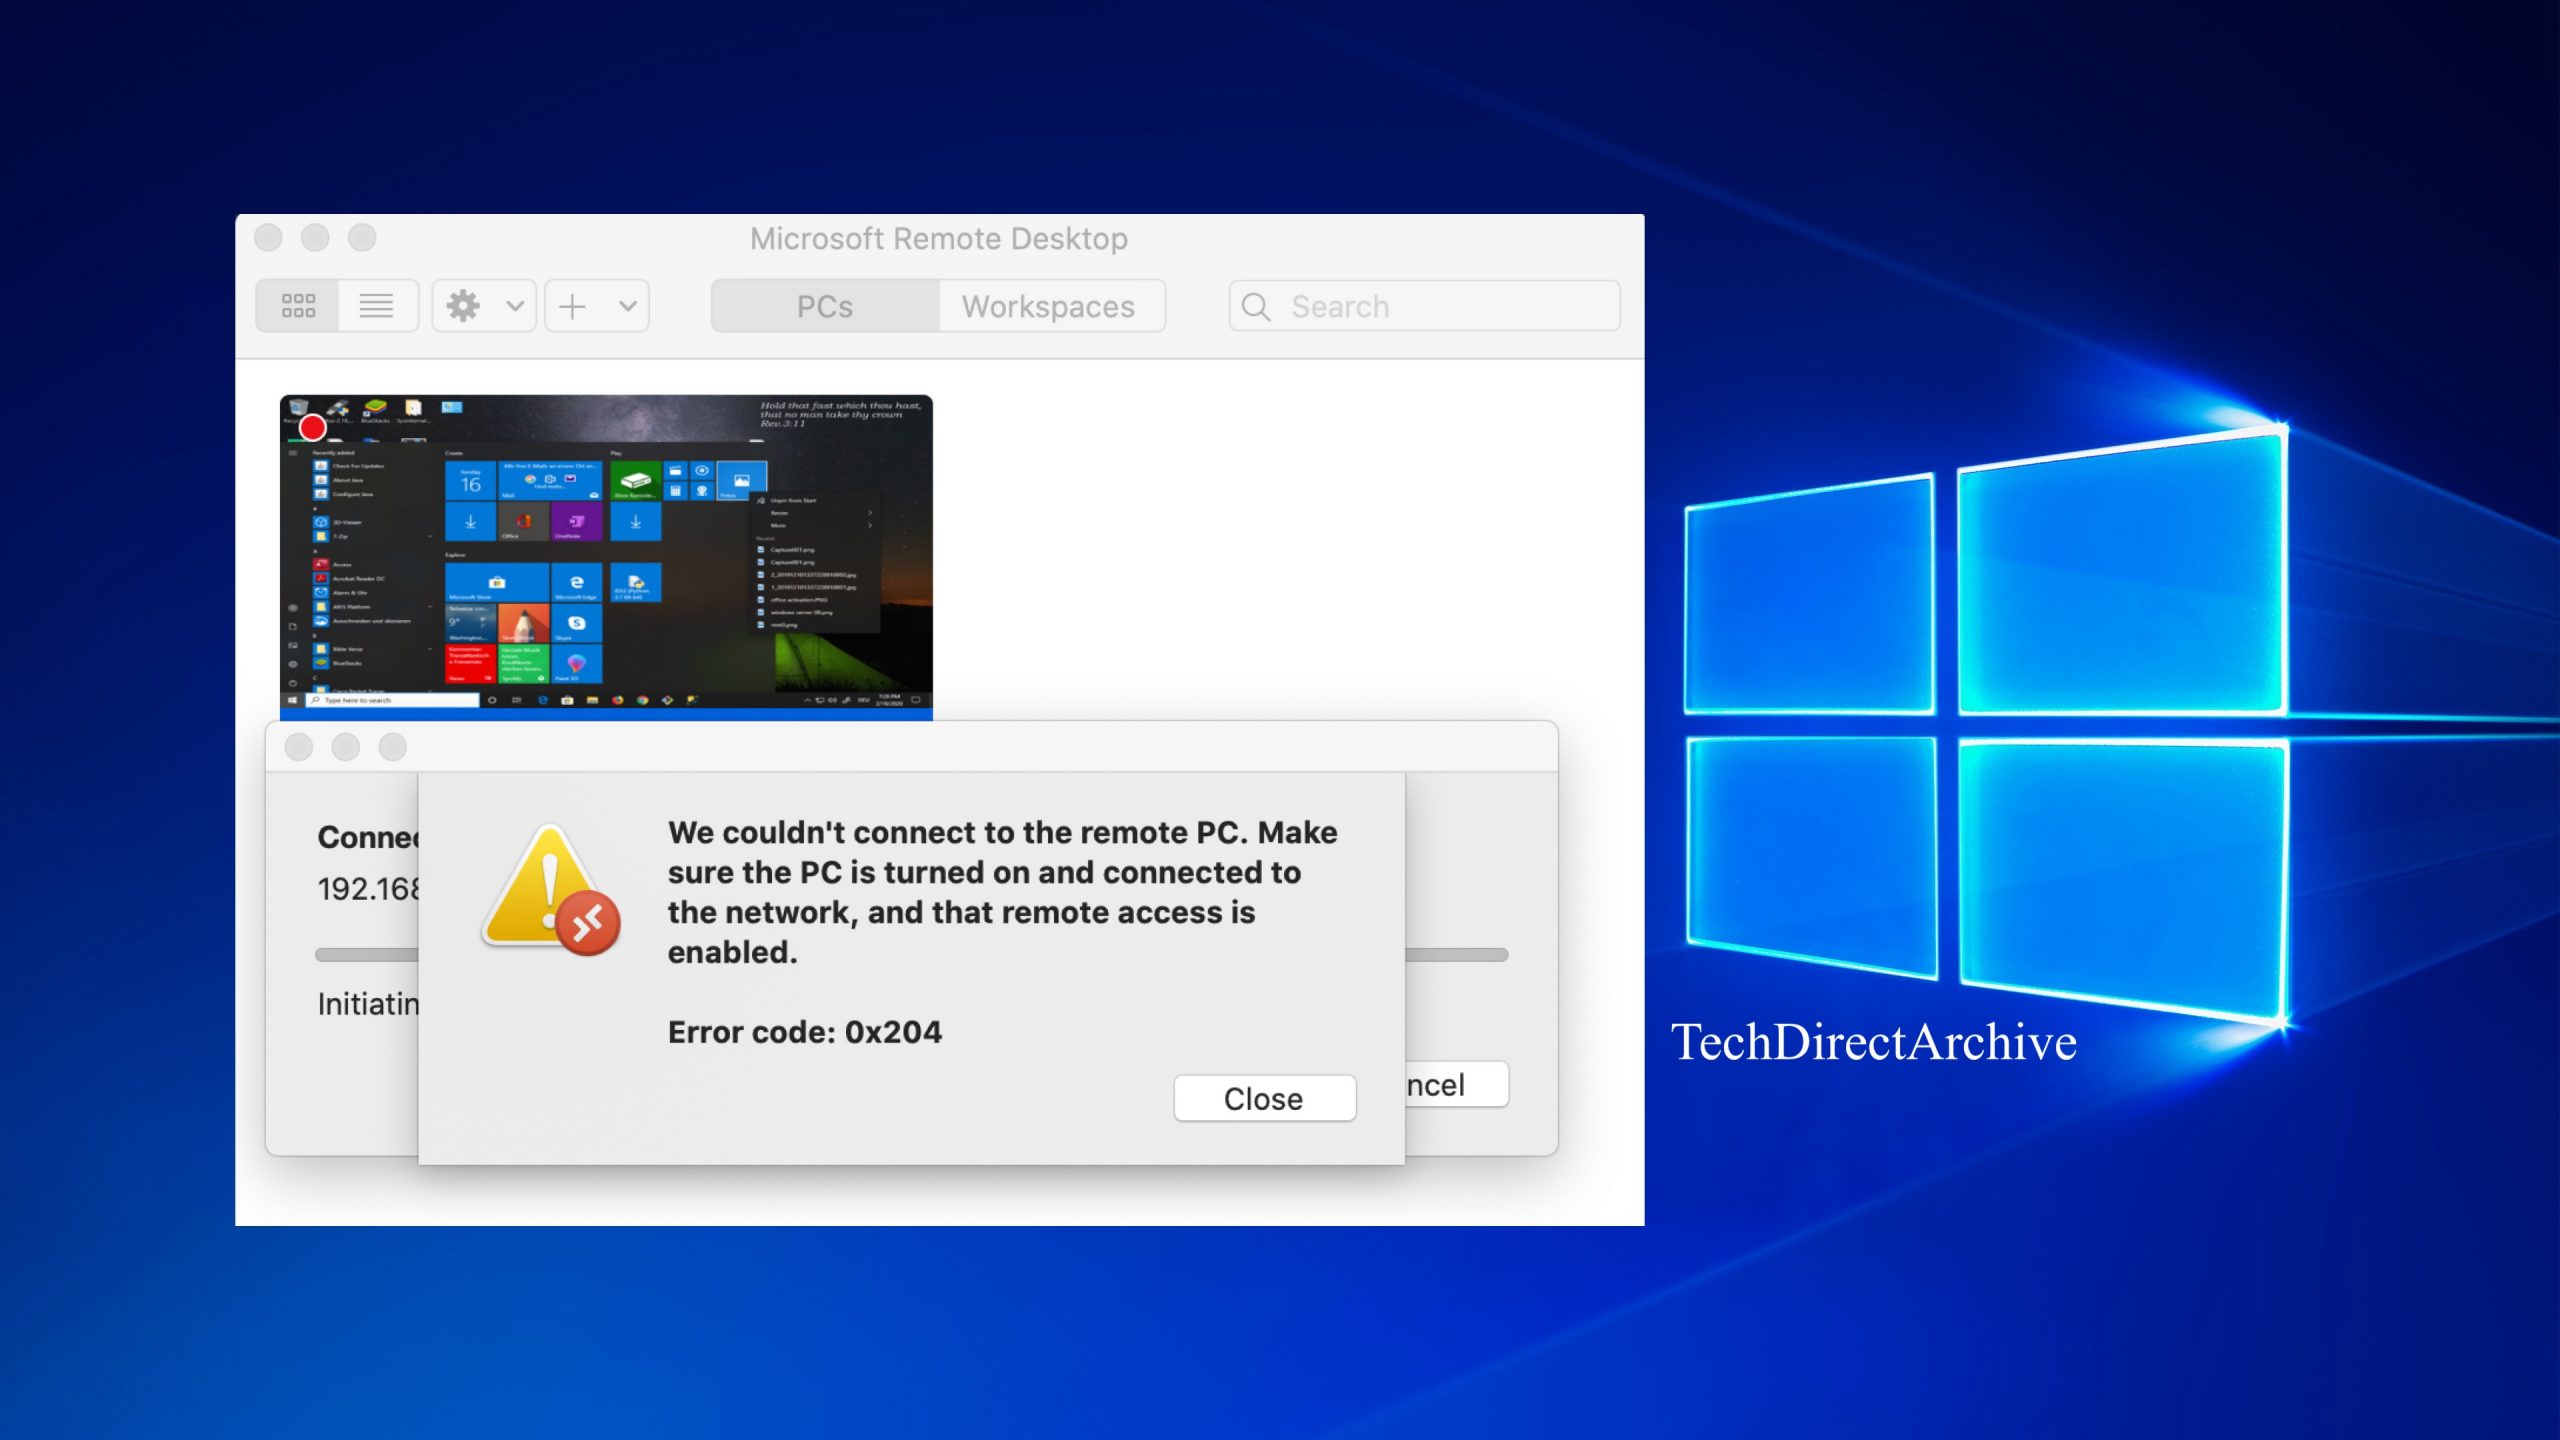
Fix WinRM issue: client cannot connect to the destination specified in the request
THIS ERROR IS DUE TO THE WINRM CONF OVER HTTPS DURING WAC INSTALLATION.

The client cannot connect to the destination specified in the request. Verify that the service on the destination is running and is accepting requests. Consult the logs and documentation for the WS-Management service running on the destination, most commonly IIS or WinRM. If the destination is the WinRM service, run the following command on the destination to analyze and configure the WinRM service: “winrm quickconfig”.
Anyway, couple of quick registry searches and here we have it. If this option was selected during install, the following will return 1:
(Get-ItemProperty -path "hklm:\SOFTWARE\Microsoft\ServerManagementGateway" -name WinRMHTTPS).WinRMHTTPS
And to change this back to 0 also easy from admin PowersShell prompt:
Set-ItemProperty -path "hklm:\SOFTWARE\Microsoft\ServerManagementGateway" -name WinRMHTTPS -value 0
Restart-Service -Name ServerManagementGateway
Please, see Test Network Connection to Windows Admin Center Gateway, Modern Backup Strategy with Veeam and Wasabi: Truly Immutable, and Uninstall Microsoft SQL Server 2025 from Windows.
Configure GPO – Enable WinRm quickConfig
WinRM (Windows Remote Management) is enabled by default on all recent Windows Server operating systems, but it is disabled by default on client operating systems (like Windows 10 and 11).
The WinRM service starts automatically and a listener is configured on port 5985 (HTTP) to accept management requests by default on Windows Server. To enable it on a client OS, you must run the winrm quickconfig command in an elevated command prompt or PowerShell, or use Group Policy. Please, see how to enable or disable WinRM via the command-line.
Create WinRN GPO on top of the domains

Ensure the below policies are enabled

Windows Firewall allow ICMP exemptions also enabled.

Add ICMP exception inbound Allow inbound echo request

Configure WinRm service
To configure, kindly follow the steps below. Right click on Services and click on New and then services.

Enter the below information as you wish

Configure Firewall inboud Rules

Check the rule for domain and private and click Next

Select Allow connection and lick on Finish

WinRM policy enabled

More details of the policies enabled

These are more of the settings enabled

Now you can manage your servers from the WAC.
I hope you found this article on how to Install and Configure Windows Admin Center on Windows Server 2019 very useful. Please feel free to leave a comment below.