Looking to enhance data security? Implement N2WS Veeam, a top-tier solution for backup, recovery, and disaster recovery. In this article, we shall discuss ‘How to implement N2WS Backup & Recovery (CPM)”. Kindly refer to these related guides for more on other Veeam products. How to migrate Veeam MsSQL Database to a new MsSQL Server, the advantage of using a 3rd party software for Backup (N2WS by Veeam) over AMI, and How to recover backup via N2WS Veeam Cloud Protection Manager (CPM).
N2WS offers comprehensive protection for Amazon EC2, Amazon RDS, Redshift, and more. Nonetheless. N2WS Backup & Recovery offers great RPO and RTO with orchestrated recovery for core AWS and Azure services.
Implement N2WS Backup & Recovery (CPM): Setting Up Cloud Protection Manager with N2WS Veeam
However, Implement N2WS Veeam effortlessly with this guide to setting up the Cloud Protection Manager (CPM 2.3.0d). Just follow these steps.
Here are some guides that may interest you: How to set up Veeam ONE 11 Server, What’s new in Veeam Backup and Replication v11?, and how to install and configure Veeam Backup and Replication 11 Community Edition with its default SQL Server Express Edition.
Step 1: Click on the Lunch instance Menu on AWS.
Nonetheless, Implement N2WS Veeam by carefully choosing the appropriate version from AWS Marketplace. However, Opt for the free tier to facilitate testing.
– Cloud Protection Manager Free Edition

Note: Looking to implement N2WS Veeam? However, Choose the edition that suits your needs now. Later, you can switch editions to support your requirements better. When you select this AMI, the prompt below will display product details and more.

- Step 2: Select the instance type:
- Step 3: Select all the right Instance configuration Details, such as Network, subnet, IAM role, etc.
- Step 4: Add storage (Add Tags additionally in the next steps (not applicable to me)).
Step 5: Select an existing Security Group or Create a new Security Group
Step 6: Now review and relaunch. Moreover, This is basically how an EC2 instance is created.
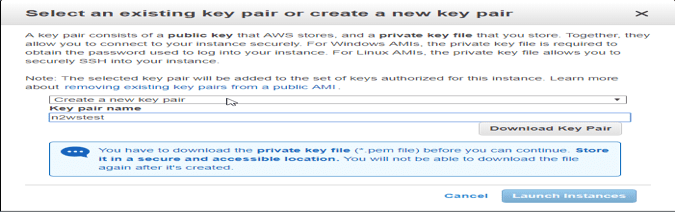
Note: Remember to create a new keypair or select an existing one; otherwise, you can’t access this newly created instance and download this essential pair. Moreover, the username is built in the AMI: which is cpmuser.
Associating EC2 Instance with EIP Address for Internet Connectivity
Step 7: Finally, click on Launch this instance. Locate the newly created EC2 instance and associate it with an EIP Address. However, (This is needed in order to be able to connect to it over the internet).
Here, you will need the PuTTY Key Generator (Load the .pem file in order to be able to download the private key.)
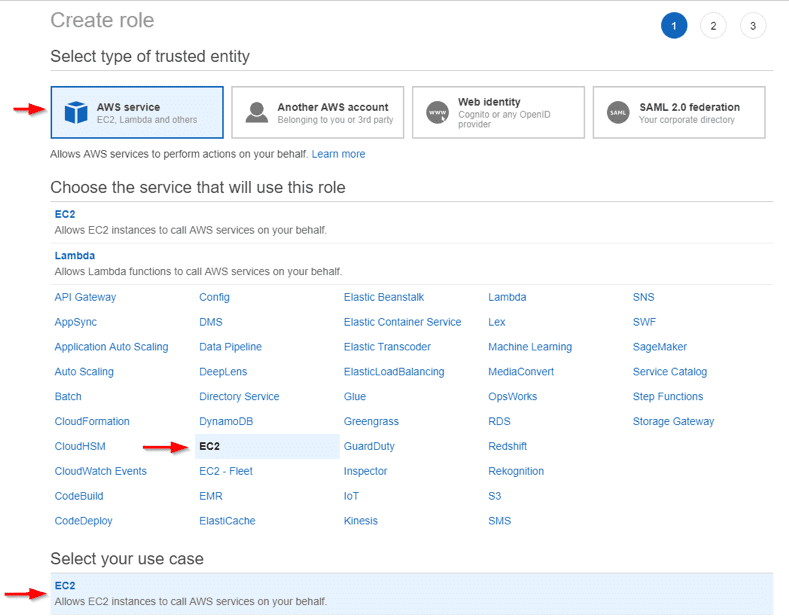
- If you are a Mac OS user, this process is a bit different. (Select the instance and click on connect, here you can see the instructions).Part 2: Create a role for AWS permission/roles for CPM Operation: Moreover, Create a policy, and this policy.
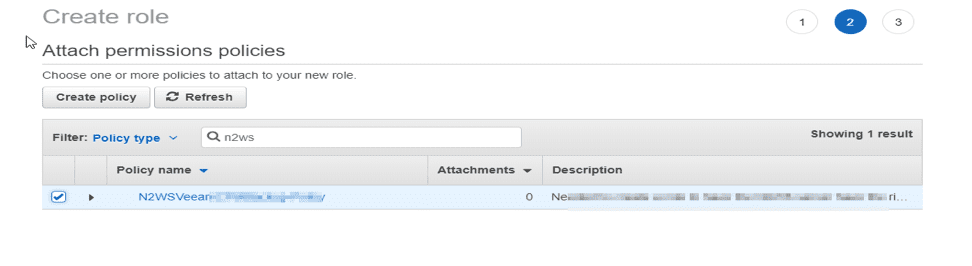
– Create a policy on AWS
– Create an EC2 Role
And attach the policy to it above
Streamlined Setup Process: Configuring N2WS Veeam and Server Integration
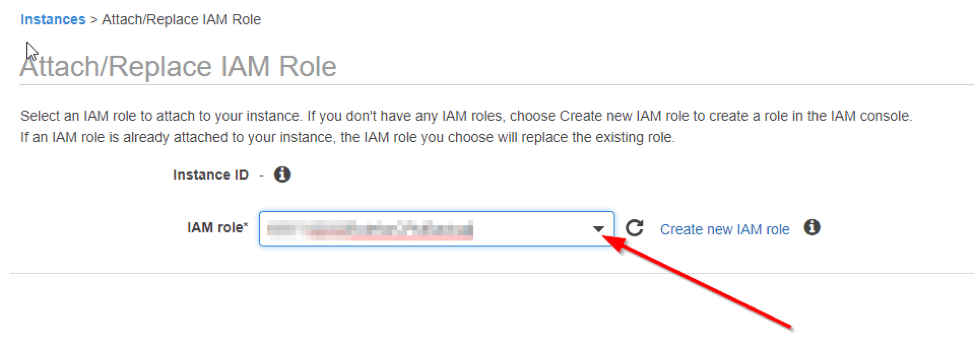
However, To effectively implement N2WS Veeam, click “Next” to enter and create the role name. Afterward, proceed to find the server within EC2. – Moreover Right-click on the server and perform the following steps

Select the role and click on apply
Step 4: Moreover, Next step is to create an IAM user with the Administrative privilege
Part 3: To access the site, simply Implement N2WS Veeam by entering the provided URL: remember to include “https://” for proper access.
However, You can create a DNS record for this to have a human-readable name (FQDN) instead of using just the IP Address.
https://xx.xxx.xx.1xx/ and copy the CPM Instance ID and click on next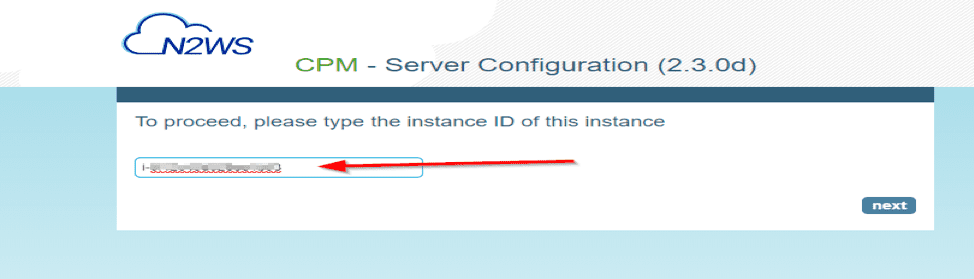
Accept the License Agreement and click on next

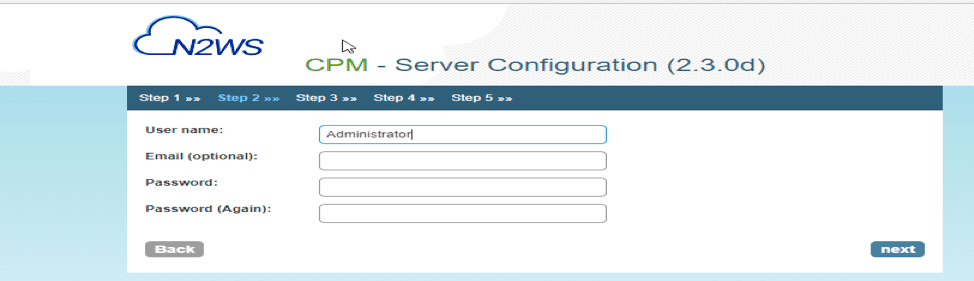
Nonetheless, Enter the account information as shown in step 2 below. However, This will be the administrator’s root account to CPM. PLEASE fill in the information.
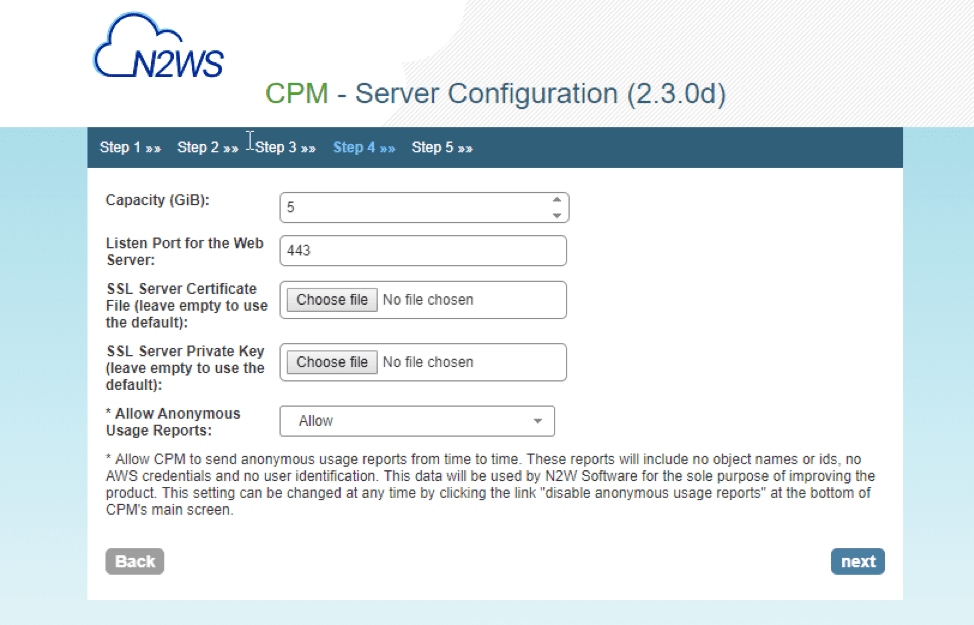
Select the configuration as it suits you below.
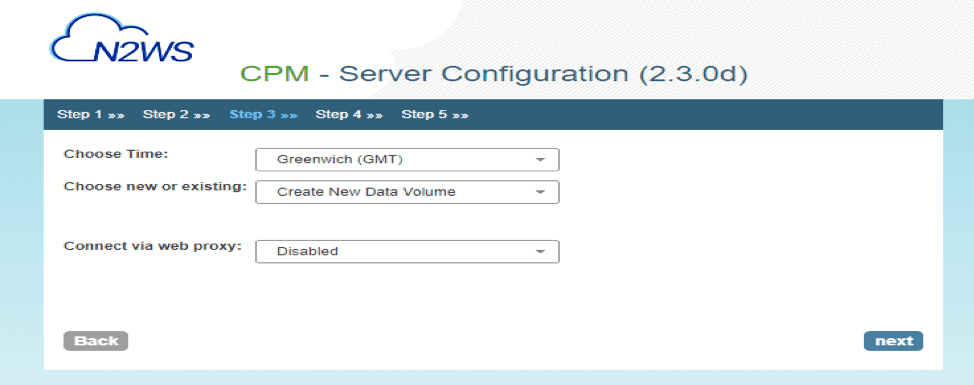
Select according to your need here (I will leave all as default as this is a test server) and come back to finish the configuration.
Note: You are free to choose any port but ensure you have these rules allowed in the NACL and also on the Security Group.
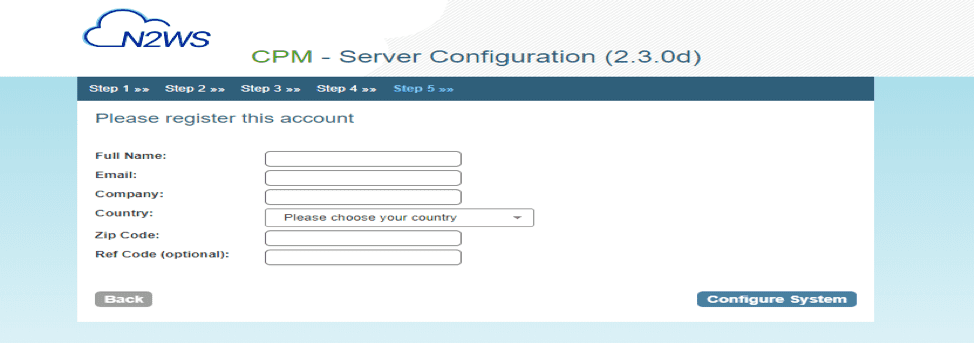
However, The next step is to register the account. This is the account is needed should incase CPM wish to contact you.
Also, see how to migrate Veeam MsSQL Database to a new MsSQL Server, and how to install Veeam Backup and Replication 11 Community Edition with a dedicated SQL Server.
Ensuring Comprehensive Access and Control
If all rights (policies), Role attached to the server and IAM Administrative rights are attached,
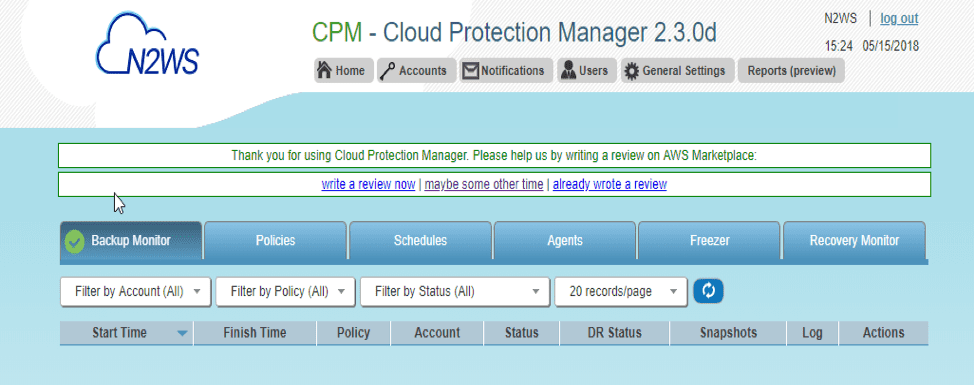
Now sign-in and access the CPM – Cloud Protection Manager
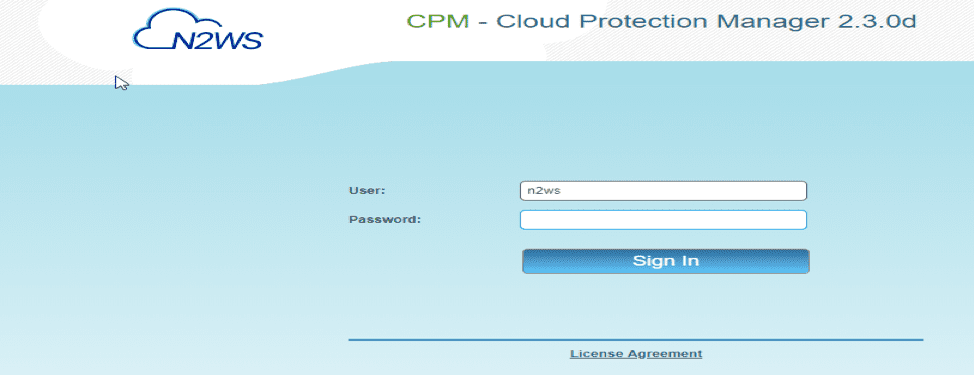
Step 4: After Signing in, you are dropped into this window (console)
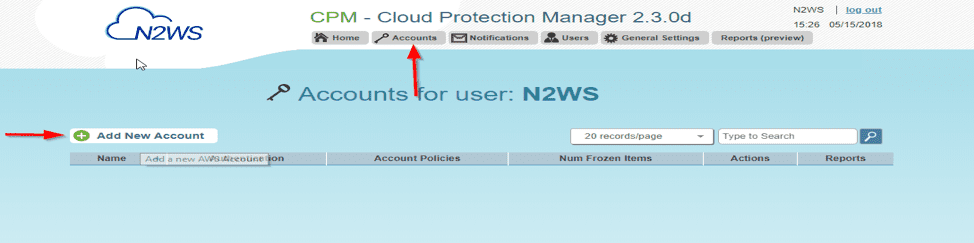
Moreover, Now Assign an account to Cloud Protection Manager, Click on Add Accounts in the console above
However, Enter the information but ensure you chose the role defined to avoid asking for Access Key ID etc. when using the IAM User
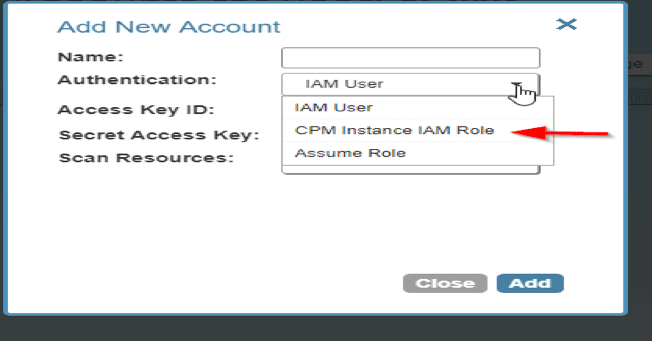
As shown below

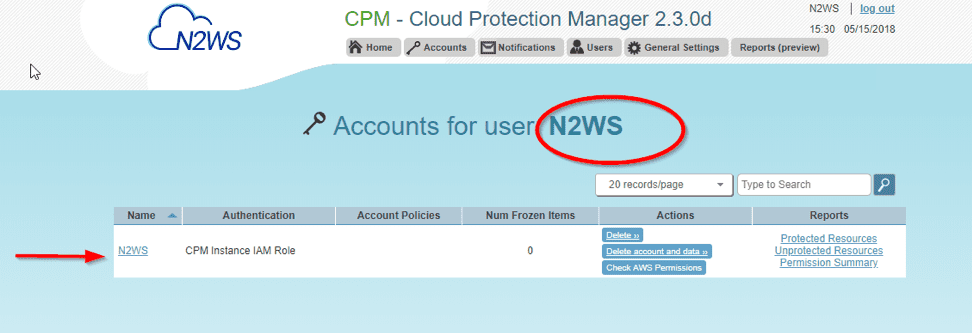
After successful creation, the window below will be displayed
Step 5: Now create a backup scheduler and a policy (What you would like to backup)
– Click on the schedule
– Add new Schedule
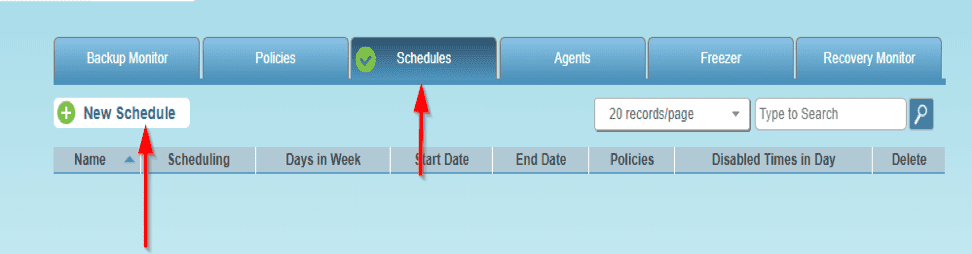
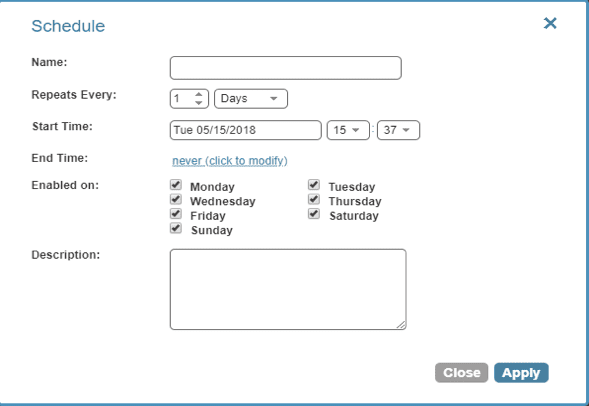
Moreover, Schedule Windows Opens up as shown below
– Enter the name, possible backup days, and start times in the schedule window below and click Apply.
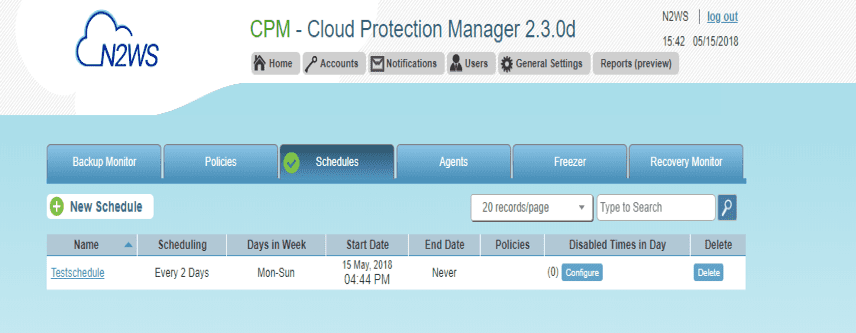
After entering the schedule information above, This window will be displayed
Now create the Policy

Associating Policies with Created Accounts
However, The policy window opens up (Here you can associate the policy to the Account created previously).
Select the generations to be saved and associate the policy also to the schedule). Currently, 34 is the highest generation to save and I will select 7 since we are backing up for seven days
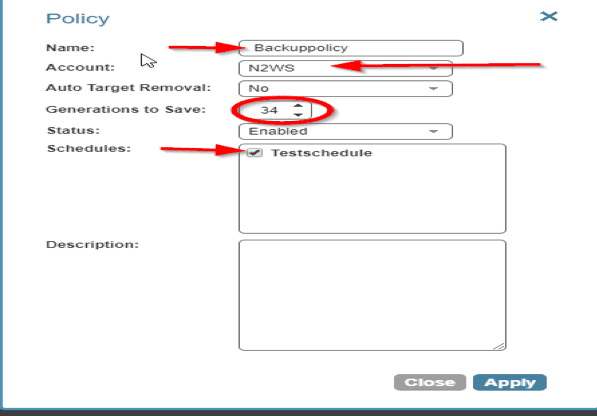
Click on Apply. To have our instances backup, we will configure the policy by selecting the Backup Targets
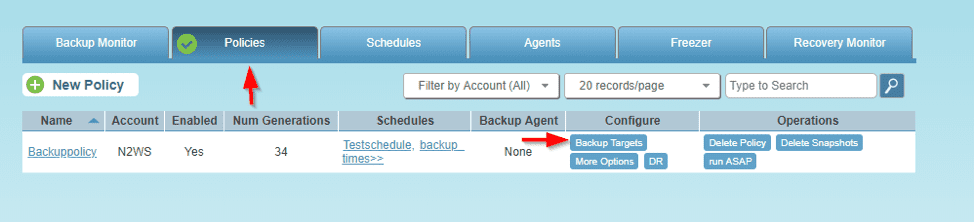
However, Now click on Add Instances or whatever service you wish to backup (My focus is on instances and I will demonstrate this now).
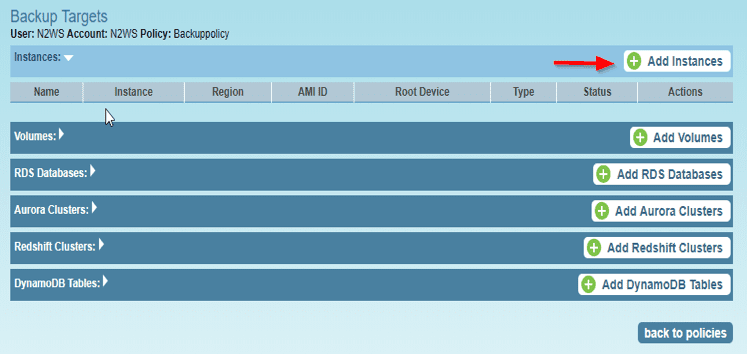
And the Add instance Window Opens up.
Note: You can select any region you wish to backup (We will do this for 6 different regions).
– Lets start with EU(Frankfurt region)
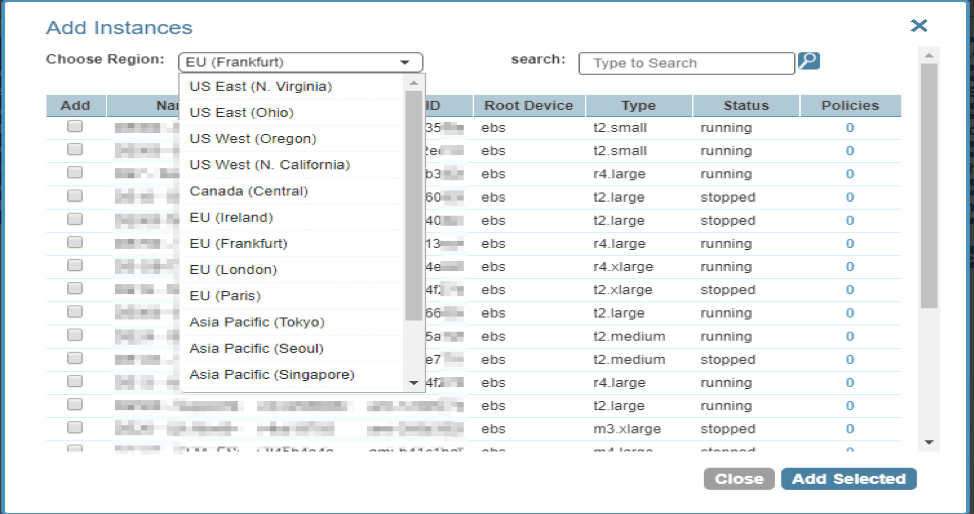
Note: Nonetheless Implement N2WS Veeam by efficiently selecting multiple instances. Utilize the search button above, and then close your selections.
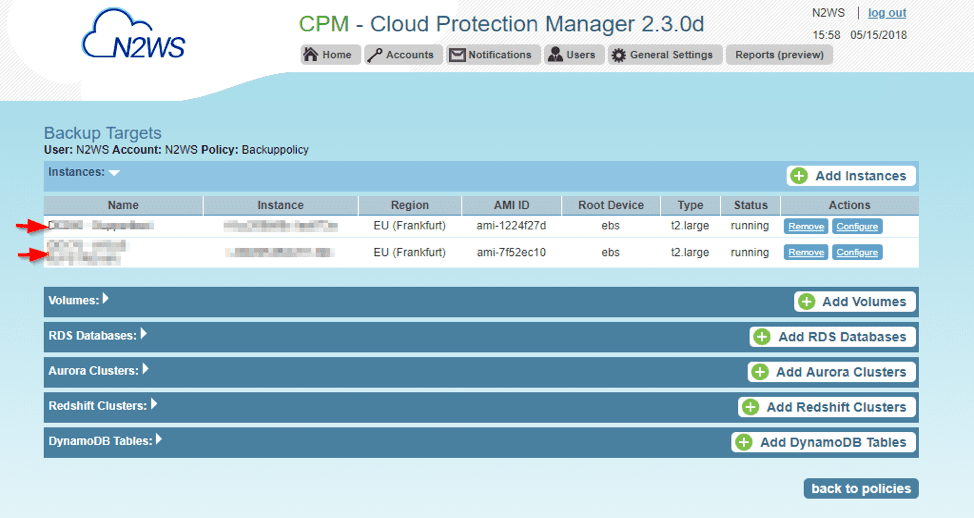
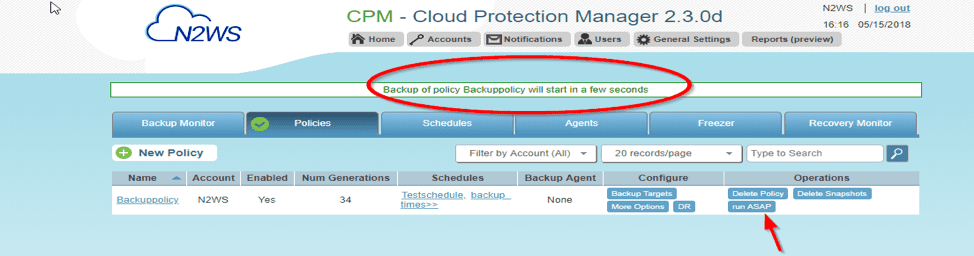
Moreover, Implement N2WS Veeam for seamless operations. From now on, CPM initiates automated backups, so no worries. Access Policies for DR setup. Manual backup? Just follow below. Green status? Backup’s up soon!
Setting Up Disaster Recovery with N2WS CPM
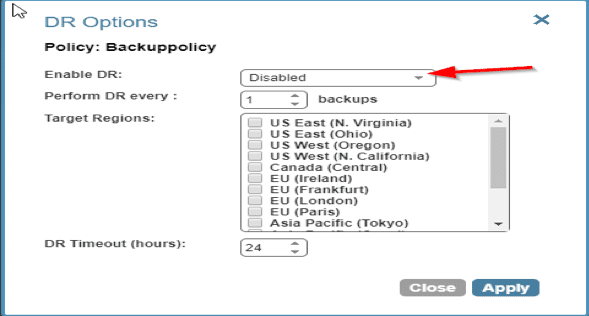
And also, in this window, you can create a Disaster Recovery here by clicking on the DR icon above. So should in case there is a disaster in any region, N2WS CPM will create a DR into another region.
Note: However, Multiple regions can be chosen here. Just have it enabled and select your desired region(s)
To watch the instance backup, we can go to the Backup Monitor and view the status (progress) of our backup
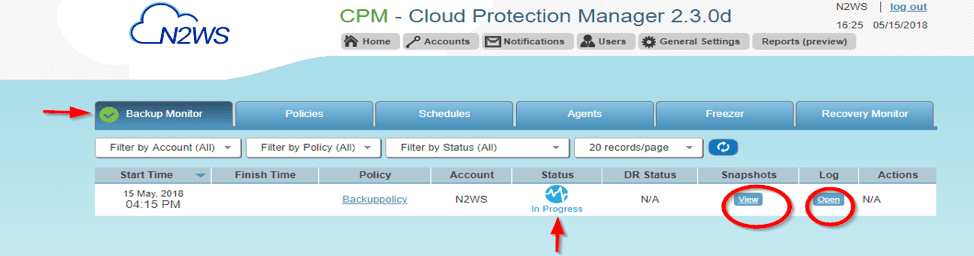
Logs showing backup status

Tue 05/15/2018 04:15:54 PM - Info - Backup is agentless, managed by CPM Server
Tue 05/15/2018 04:15:54 PM - Info - Starting. Fired by schedule: Immediate/ASAP
Tue 05/15/2018 04:15:57 PM - Info - All snapshots started successfully
Tue 05/15/2018 04:16:17 PM - Info - snapshot of instance Server – xxxxxxxx, volume vol-xxxxxxx7 completed successfully.
Tue 05/15/2018 04:23:01 PM - Info - snapshot of instance (Server – xxxxxxxx), volume vol-0xxxxxxxxff completed successfully.
Tue 05/15/2018 04:24:32 PM - Info - instance i-0xxxxxxxxxxxb AMI completed successfully.
Tue 05/15/2018 04:27:34 PM - Info - snapshot of instance Server2 – xxxxxxxx, volume vol-0xxxxxxxxxff completed successfully
After a successful backup, as shown below. The Status ‘backup successful‘ will be displayed.
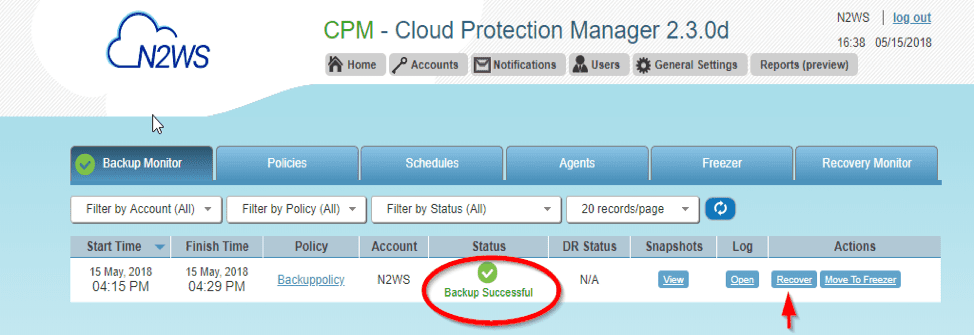
For your information, since this is incremental, the first backup will usually take longer.
I hope you found this blog post on how to implement N2WS Backup & Recovery (CPM) helpful. If you have any questions, please let me know in the comment session.