SonarCloud is an application that you can use to build robust and safe applications. With this application, you can use it to rapidly assess your code health to know where your code stands at every level of the software development life cycle (SDLC). This is an application that you can use to build clean code, detect bugs, vand ulnerability and fix issues in your code very early in your SDLC and thereby make your customers happy. This is an application that meets every security standard and can be used to protect your data from getting exposed to a malicious user.
This application can help analyze your code and can be integrated into the Azure DevOps pipeline. All you need is to push your code to the designated repo and set up your pipeline and start analyzing your code while building it before deployment to either the staging environment or production environment.
SonarCloud stands out in terms of accuracy, it does not waste useful time on false positives but will always help you find the real issue for you to fix. Kindly refer to these related guides: How to create and deploy a local Registry Server with Docker Image, how to Pull your first Nginx Container Image from Docker Hub and deploy it to your local machine, Azure DevOps and GitHub integration for Docker and Kubernetes deployment, how to create a static pod in Kubernetes, and how to install, register and start GitLab Runner on Windows.
In this guide we will learn how to integrate Azure DevOps Services with SonarCloud:
- We will set up an Azure DevOps project and CI/CD Pipeline to integrate with SonarCloud.
- We will Analyze SonarCloud reports
You need the following prerequisites ready:
- A Microsoft account to log in to Azure DevOps.
- Create an Azure DevOps organization
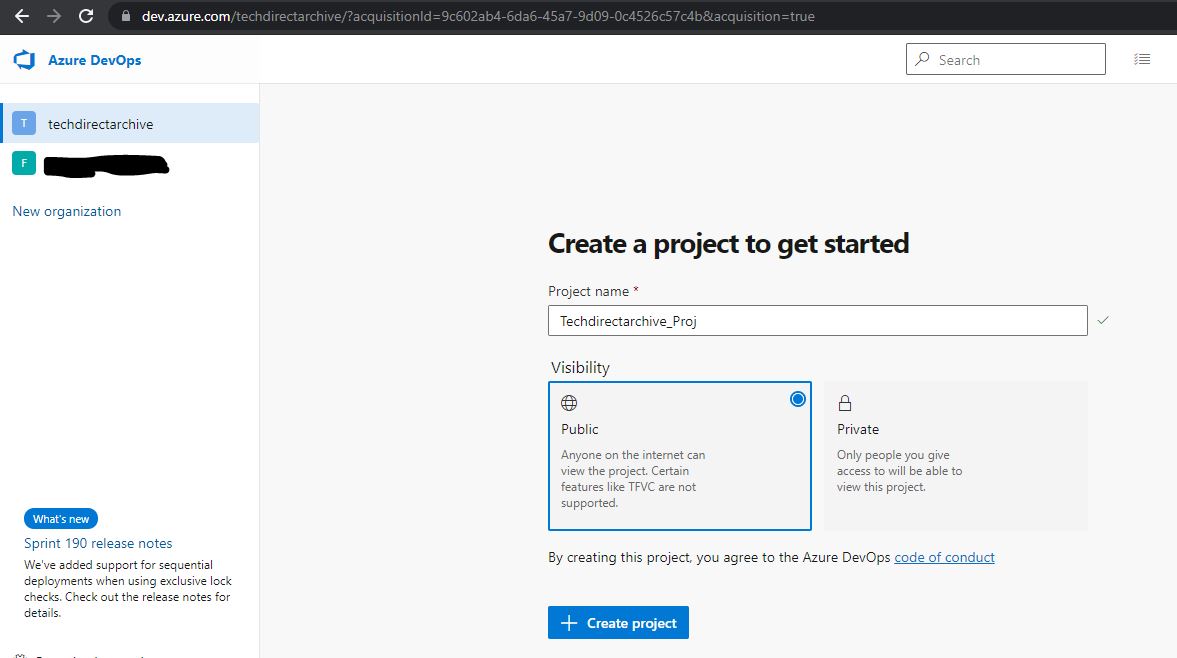
- Create a new Azure DevOps project.
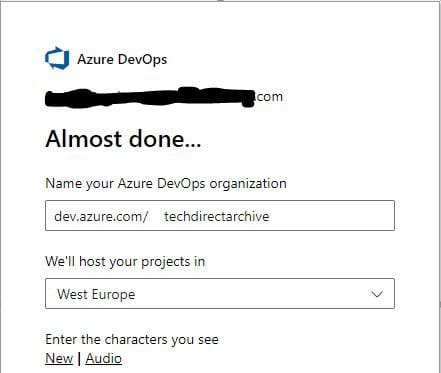
First login into your Microsoft account and continue to Azure DevOps (dev.azure.com).

Create your Azure DevOps Organization. In this guide, we are creating techdirectarchive as the Azure DevOps organization.
If your plan is to sign up for a paid plan with SonarCloud (see below), make sure that you set your Azure DevOps project to private. If your plan is not to sign up for a paid plan then select public. Furthermore, If your project is open source you can select public but if your code is intellectual property then the option of a paid plan and making your project private is the best.
In this project, we will be using the public.
You can either import your repository from Github or from any other Repo. You can as well push your code from your local computer to Azure Repo.
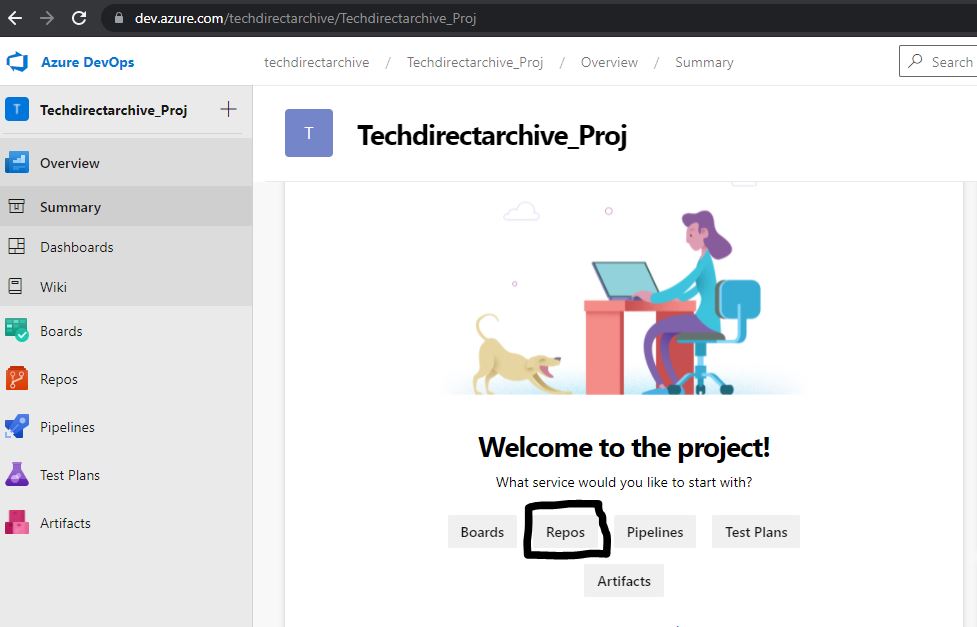
– Select Repos in your project overview:

Follow the below steps if you are importing your repository from GitHub:
– Login to your Github where you have your repository and copy the URL
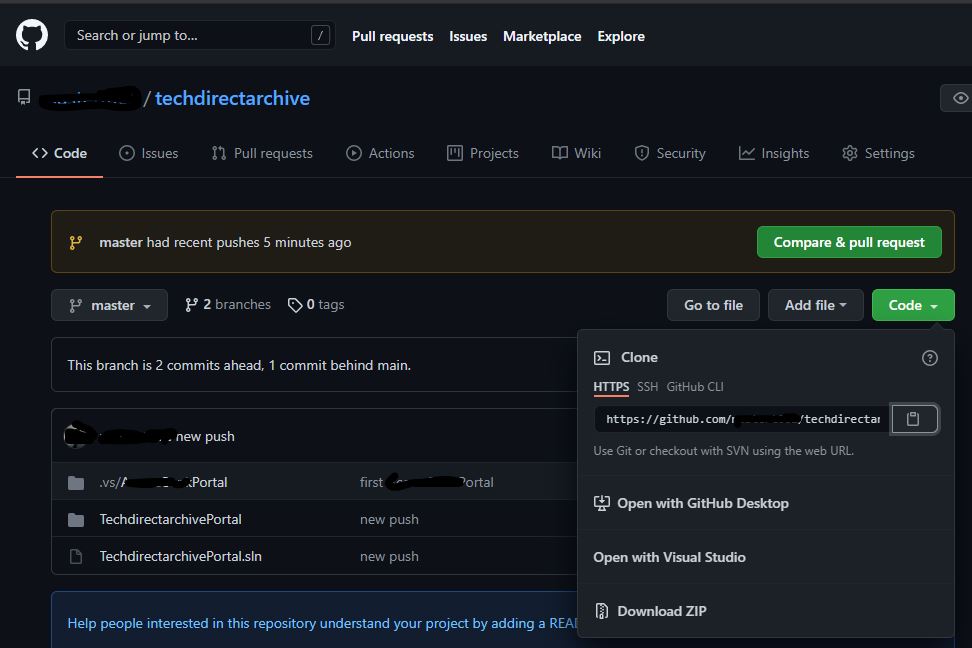
Paste the URL on the Clone URL box and click import.
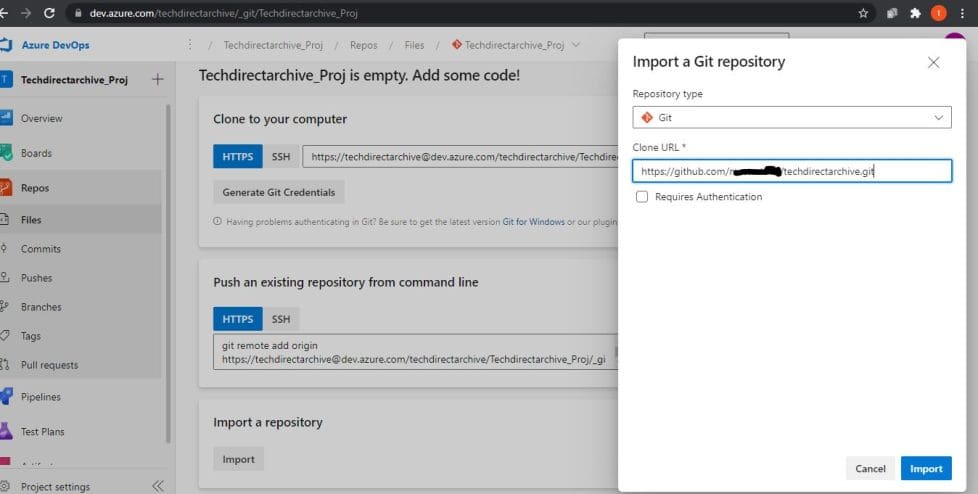
Immediately this is done it gets pushed to the Azure DevOps Repo where you can run a build on it.


You can also use the Push an existing repository from the command line by opening the application project with an IDE and running the following Git commands on the terminal.


Next, you will need to install the SonarCloud extension in your Azure DevOps account. Navigate to the SonarCloud Extension via the Visual Studio Marketplace and click Get it free to install it.
– Then Proceed to the organization once the installation is completed.


Moreover, You can use the same account you used for your Azure DevOps.
– Sign into SonarCloud: https://sonarcloud.io/


Additionally, you will need to create an organization, and within the organization, you will need to create a new Project. Furthermore, The organization and project you set up in SonarCloud must have the same name as the one you set up in Azure DevOps.

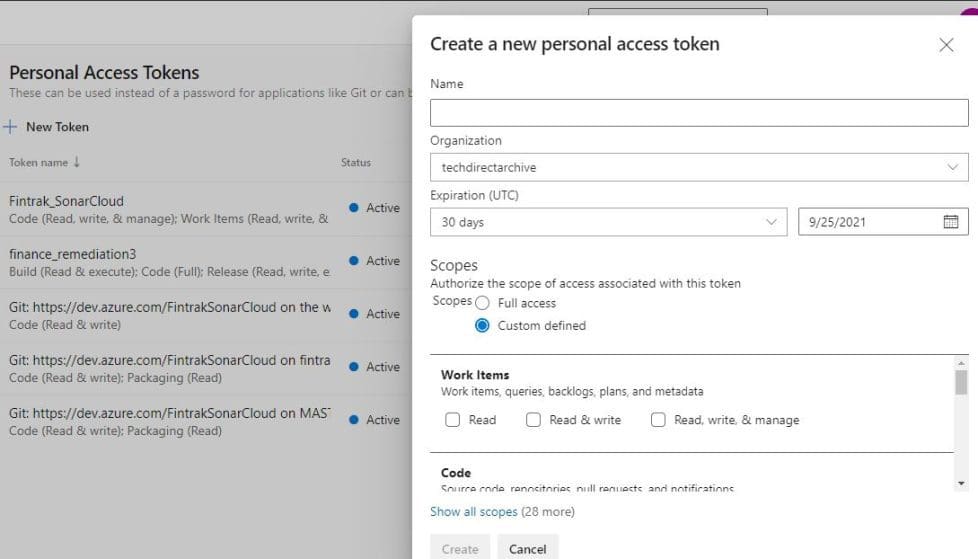
Enter or create a Personal Access Token from your Azure DevOps under the User setting.

Therefore, Once all these are created you will be able to Import organization details from Azure.
– Enter the key you plan to use for your project and click on Continue.

Choose a plan: You can select a Free Plan with all the projects you analyzed in the public. Similarly, anyone can browse the source code because it’s not restricted.
Consequently, The Paid Plan has unlimited private projects, and the source code is restricted to public access.
– Click on Create Organization

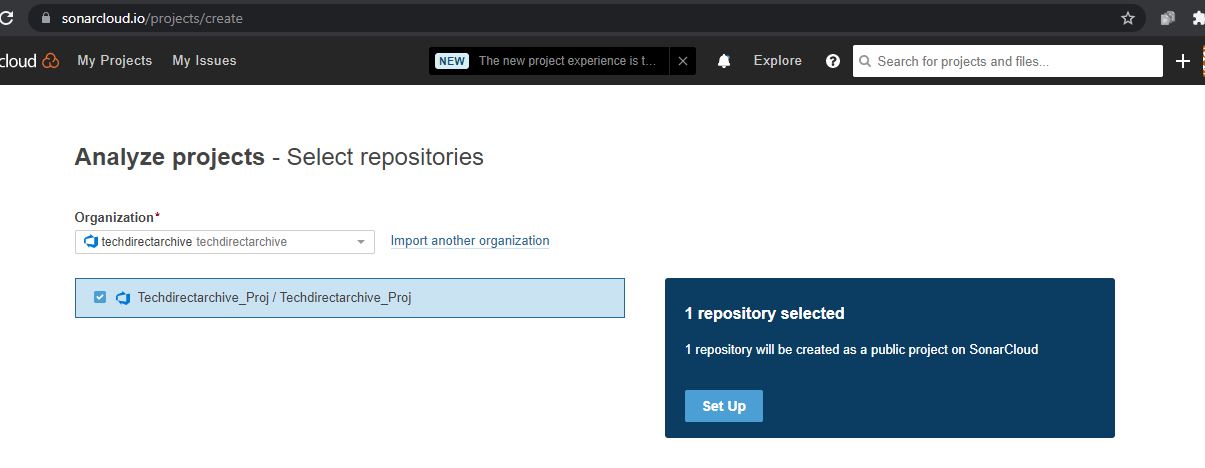
Furthermore, When you click on the Create new project, the Analyze projects – However, Select Repositories page will open that has all the organization and Azure DevOps repositories that exist. Moreover, you can then make your selection.
In addition, Then click Set Up and click on Azure DevOps Pipelines.Nonetheless, On the next page, you can ignore the SonarCloud extension installation if you have earlier installed it.
Therefore, you need to select the stack technology used for your build. Additionally, This is what you will need to configure the Azure Pipeline.

Now, you need to create a new pipeline on your Azure DevOps
Consequently, Follow the below steps on Azure DevOps to initialize your pipeline and link it to your repository.
Add a new SonarCloud Service Endpoint
- Go to Project settings > Service connections
- Similarly, Add a new service connection of the type SonarCloud
- Use this token:
“Enter the token that shows here” - Nevertheless, Click on Verify to check that everything is linked correctly.
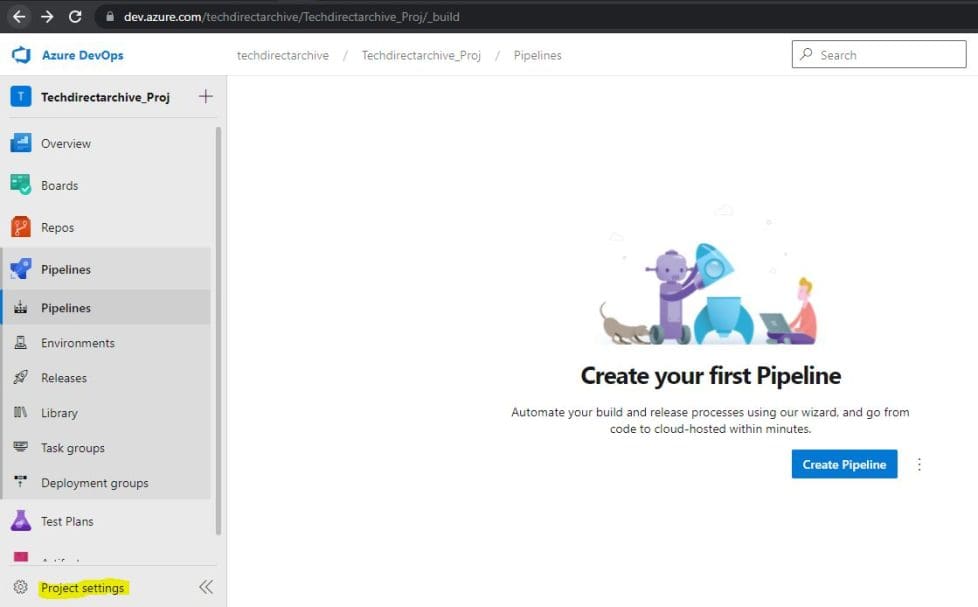


On the Create your first Pipeline page clicks on the Create Pipeline button.
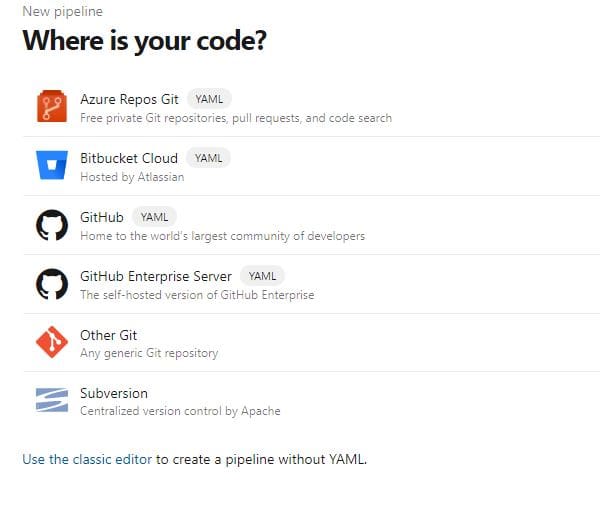
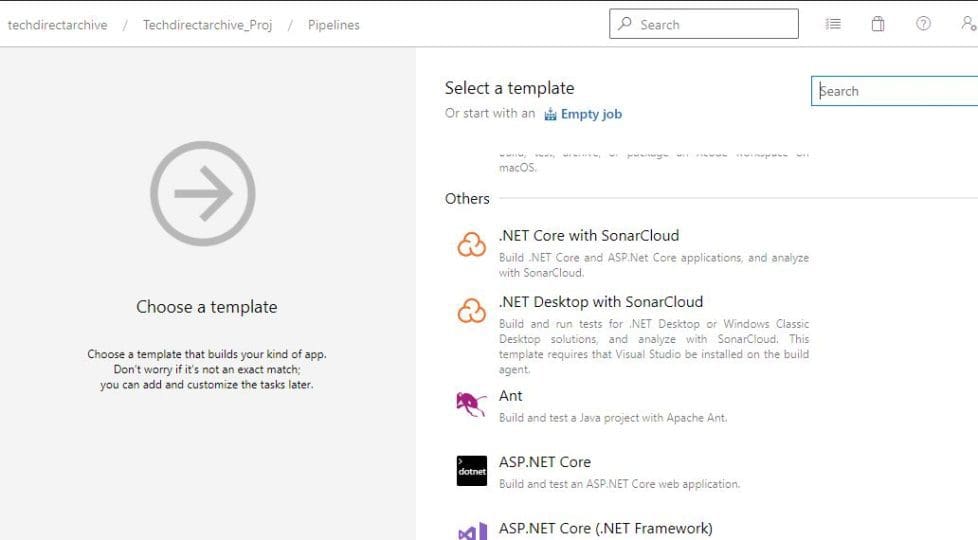
Nonetheless, please Select where your code is situated and use it to create a pipeline, or use the classic editor to create a pipeline. In addition, If your stack technology is .NET Core or ASP.NET Core, you can use a .NET Core with SonarCloud as a template to build your app.
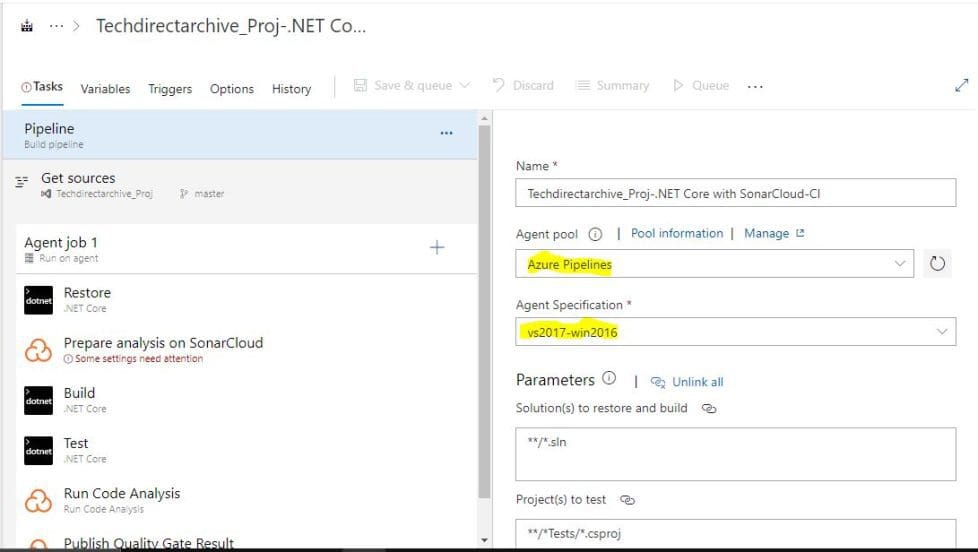
Also, remember to integrate SonarCloud with Azure DevOps Pipeline. The Azure pipelines as the Agent pool and select your Agent Specification for streamlined code quality analysis in your CI/CD workflow.
Follow these three steps to analyze your code in the pipeline
1. Prepare Analysis Configuration
- Select the SonarCloud endpoint.
- Select the SonarCloud organization
techdirectarchive - In Choose the way to run the analysis, select Integrate with MSBuild.
- In the Project Key field, enter
techdirectarchive_Techdirectarchive_Proj - In the Project Name field, enter
Techdirectarchive_Proj - Save and Queue
- Run
Please ensure this task runs before your build step.


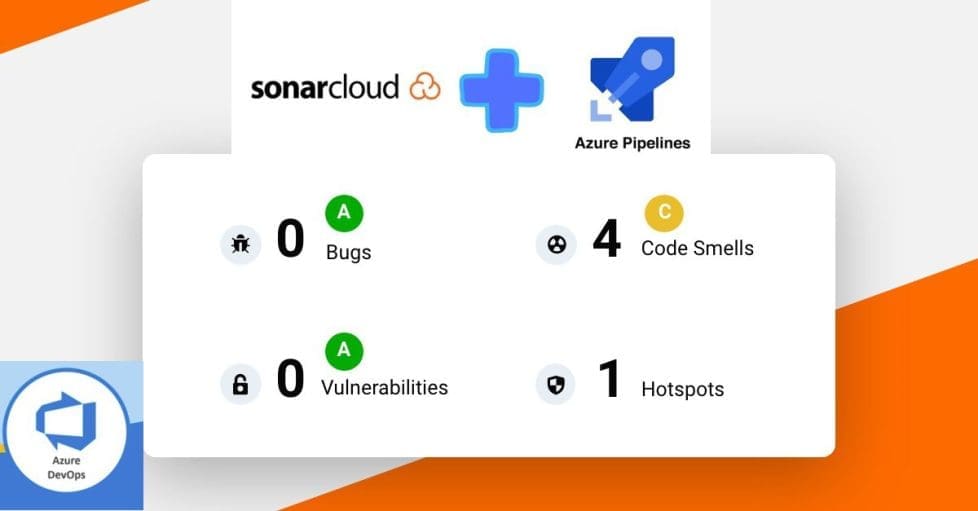
Furthermore, immediately after the Azure DevOps Pipeline is run successfully, you will get the scan report on SonarCloud, showcasing the seamless Integrate SonarCloud with Azure DevOps Pipeline. However, the needed remediation can be performed, and the Pipeline can be re-run after remediation.

2. Run Code Analysis
This task needs to run after your build step.
3. Publish Quality Gate Result
This task is not mandatory but will allow you to decorate your Pull Request.


