
This guide will show you how easy it is in deploying your angular app to Azure right from your IDE-like visual studio code. The integration of Azure with VS Code is very seamless when you put the right things in place and you do the right thing. Azure is a public cloud computing platform from Microsoft. Please see how to build your first CI/CD Pipeline in Azure DevOps using ASP.Net Core Application, and GitLab-runner is not recognized as an internal or external command, operable program, or batch file.
Some of the solutions it offers are infrastructure as a service (IaaS), Platform as a Service (PaaS), and Software as a Service (SaaS). This cloud solution provides you with computing, storage, networking capacity, and many more. Visual Studio Code is an integrated development environment software with a graphical user interface with different development tools that delight any developer.
Create an Azure Web Service in Azure Portal – Login to your Azure portal and click the “Create a resource” button and choose the Web App template.

Select Web App as shown below

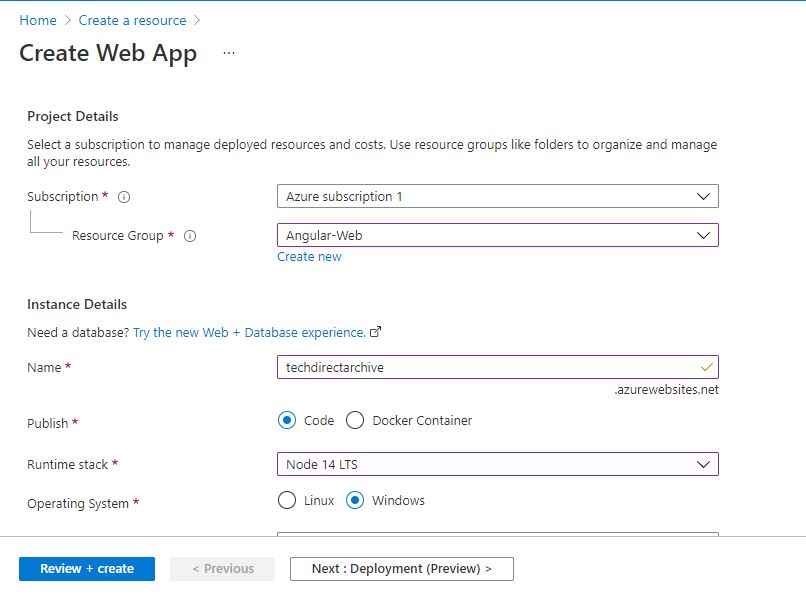
On the next page under your Azure subscription create a Resource Group. Configure your instance details:
- Give it a URL name
- Select Code as the Publish
- Select either Node 14 LTS or Node 12 LTS as the Runtime stack
- Depending on your operating system select either Linus or Windows
- Select Region
Here are some guides: How to create Windows 11 Bootable USB drive, How to fix Windows Task Scheduler Service Greyed Out in Services MMC, The term “git” was not used as the name of a cmdlet, function, script file, or executable Program recognized, and Azure DevOps and GitHub integration for Docker and Kubernetes deployment.
Configure your App Service Plan
Note: App Service plan pricing tier determines the location, features, cost, and compute resources associated with your app.
- Create your windows Plan
Then Click Review + Create and wait for the review page to open,, then click on Create and wait for the Web App to be created for some seconds.
Consequently, Click on Create as shown below

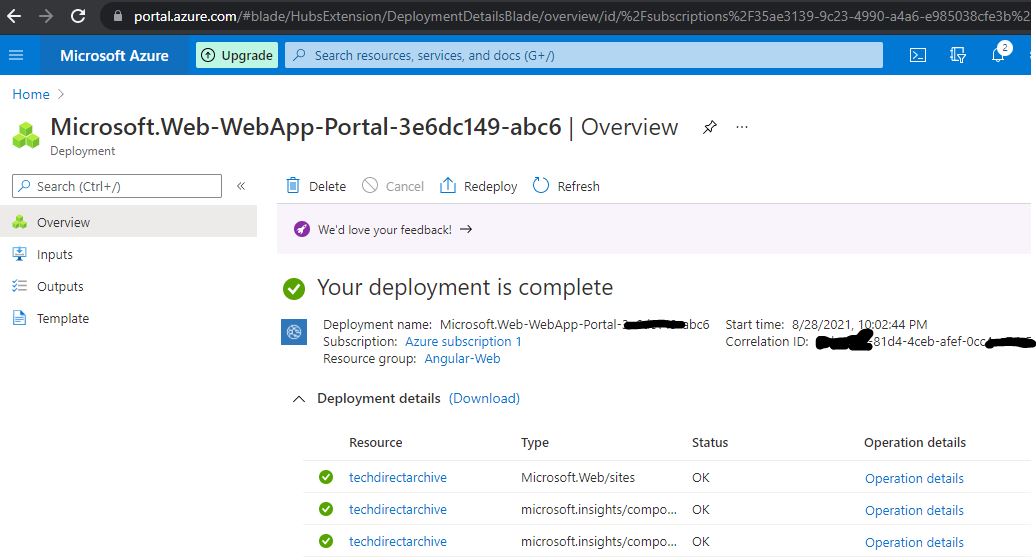
Nonetheless, the deployment, the Web App will be ready for use
It’s now time to create an Angular application using Angular CLI. In addition, Install Angular CLI by opening a terminal window and running the following command:
npm install –g @angular/cli
Then run the CLI command ng new and supply the name you want to use for the app.
ng new techdirectarchiveIn addition, the App is created change the directory to the app folder and run the server in the app directory.
cd techdirectarchive
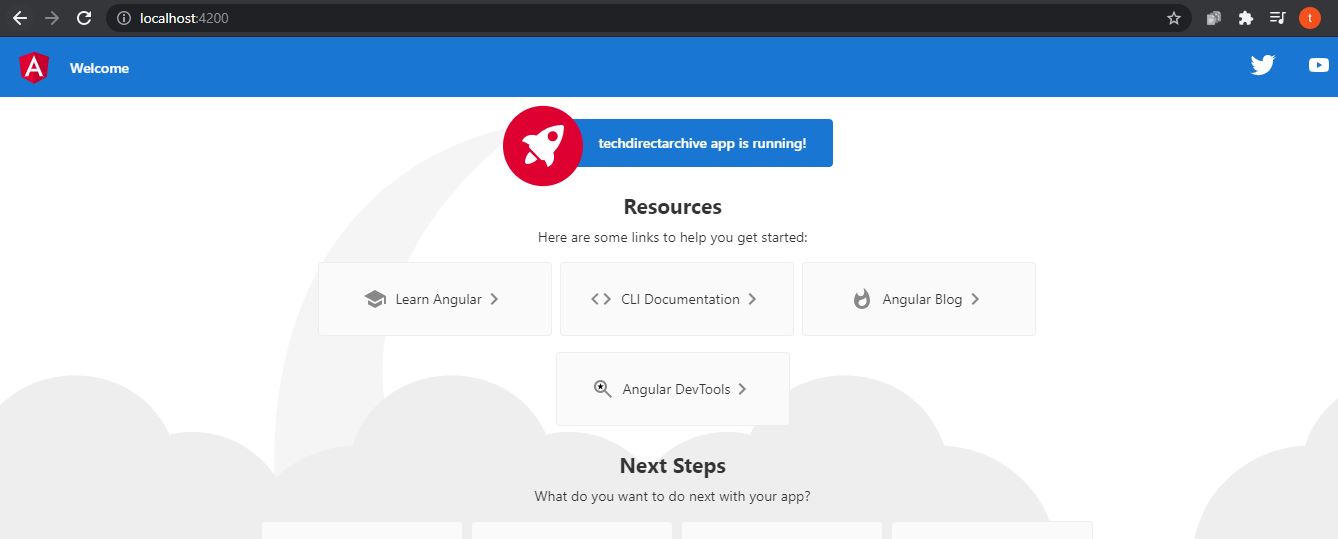
Run the command “ng serve” as shown below.
ng serve
Moreover, creating the Angular application, open it with Visual Studio Code.

However, You must also install the Azure App Service extension in VS Code.

Additionally, Sign in to Azure and see a new Azure workloads button at the bottom. Furthermore, When the button is clicked, you will see all the Azure workloads.
After signing in to the Azure portal from Visual Studio Code, you can see the list of available subscriptions and web apps for that user.

Initially, we created a Web App, “techdirectarchive,” using a node runtime stack. Therefore, It is effortless to deploy our Angular application to this Web App on Azure.
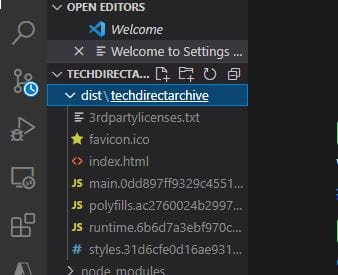
Nevertheless, deploying to Azure, we must build our Angular app using the below command, which will build the Angular project and create all necessary files to a dist folder.
ng build --prodSimilarly, note that sometimes another subfolder may be created in the name of your project.

Consequently, We must deploy this “dist\techdirectarchive” folder to Azure by right-clicking it and choosing the Deploy to Web App option.
Nonetheless, it will display the default Angular project folder, and make sure you select the correct folder.

Go ahead and open the application on the Azure web service


However, Your Angular App is live on Azure. When you make any adjustment in the code you need to deploy again. Moreover, After every adjustment you must build the application again with the same command:
ng build –prodFurthermore, select our Web App and choose the Deploy to Web App option in the visual studio code. In addition, You can reconfirm the Angular App again via Azure to see the changes.


An Angular app that does nothing!, how bout with a .net core api behind it
Many thanks for the article, it helped me a lot!
You are welcome!