In this article, we will discuss the Fix EFI network timeout on VMware Workstation. VMware Workstation Pro is a hosted hypervisor that runs on x64 versions of Windows and Linux operating systems; it enables users to set up virtual machines on a single physical machine and use them simultaneously along with the host machine. UEFI stands for Unified Extensible Firmware Interface. It works in a similar fashion as a BIOS, but with one basic difference. It stores all data about initialization and startup in a .efi file, instead of storing it on the firmware. See how to fix VMware workstation .lck error, and the VM appears to be in use.
This .efi file is stored on a special partition called EFI System Partition (ESP) on the hard disk. This ESP partition also contains the bootloader. UEFI was designed to overcome the limitations of BIOS. In this guide, you will learn how to fix EFI network timeout on VMware Workstation.
Refer to these related VMware Workstation-related errors and Fixes. How to clone a server on VirtualBox, and the virtual machine ran into a non-fatal problem as described below, we suggest that you take appropriate action to prevent the problem from recurring.
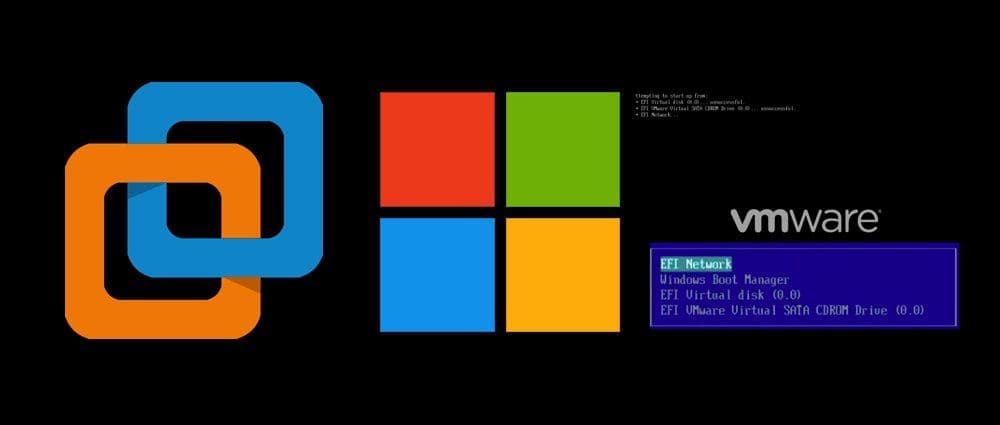
The root cause of “EFI network timeout on the VMware Workstation”
The reason for this error was that the VM was set to boot from the UEFI. See the image below for the error message that was prompted.

Another error I encountered on this VM was “Windows cannot find the Microsoft software license terms“. very unusual.
You may want to see these also: How to enable Hyper-V on a VMware Workstation, How to configure screensaver timeout in Windows 10, How to configure screensaver timeout in Windows 10, How to install Windows Server 2022 on VMware Workstation, and how to fix MsSQL Connection timeout and timeout period expired.
The solution to fixing EFI network timeout on VMware Workstation
We will have to edit the Virtual machine in order to get to the advanced setting as shown below.

This will open the Virtual Machine settings. Click on the options menu as shown below

Navigate the Advanced settings and select BIOS under Firmware type and click on OK.

Click on start to begin the VM installation. This should work effortlessly from now. Please proceed with the steps below to complete your VM installation. Select the Language to install, keyboard, etc and click on Next.

Click on Install as shown below to begin the Windows installation. Please see The security database on the server does not have a computer account for this workstation trust relation [Part 1].

Select the desired OS you wish to install. I will be selecting the Windows Server 2019 Datacenter (Desktop Experience).

Accept the license terms and click on Next to proceed

I have nothing o do on the following page, therefore, I will click on Next. It’s a test VM 🙂

As you can see, Windows has started installing unto the VM

As you can see the process has been completed and is a bit faster than installing Windows on a VirtualBox.
See how to install Windows Server 2019. Next, click on “Finish” to complete the steps. How to set up a VM via PXE boot on a Generation 1 VM, and how to set up a Hyper-V Virtual Machine through PXE boot.

I hope you found this blog post helpful. Now, you have learned how to fix EFI network timeout on VMware Workstation. Please let me know in the comment session if you have any questions.


Awesome thank you!
My thanks, too. I wouldn’t have found that without your tutorial.
Thank you Brian Rogers for your kind words!
You are welcome
what do you do if it doesnt show advanced options?
Kindly see @Mr Franxi’s comment below!
But I need the UEFI boot, because my host drive is GPT and vista cant install to GPT unless it boots from UEFI. what to do?
https://docs.microsoft.com/en-us/windows-hardware/manufacture/desktop/windows-setup-installing-using-the-mbr-or-gpt-partition-style
Advanced settings doesn’t appear for me in the options
Me too! as im running the VM player 16. Any ideas?
You can manual change it by open the file [vm machine name].vmx by any notepad, then find the firmware property (line ~29 on my PC) and update it to “bios”. Save it and turn on you VM.
Hope this can help you.
Thank you very much for sharing
bro thank u there is no solution on youtube for the user who are using free version
Glad you found the guide useful!
Hey, thanks for the great response! This is exactly what I was looking for.
Hi there, I have the same issue, but im using the Vm player 16. I dont see the the advanced tab there? Any ideas?
Hello Mustafa, I am sorry I do not have a VM Player running in order to reproduce this. VMware Player cannot run on the same machine where VMware Workstation is installed.
Switch to BIOS boot mode. That was it. Thank you!
You are welcome!
Thank You.
You are welcome
it doesn’t let me change the setting to bios
Does it prompt an error?
Thank you!!
You are welcome
This is obviusly not solution, especially if you want to use EFI/UEFI.
The reason for this error is that CD ROM drive didn’t power on. Seems to be bug is ESXi. You need to either tick setting box power on and then save setings or remove CD Rom altogehter and then re-add it with correct settings.
Then it should work find and you won’t be stuck using legacy BIOS option. For example hard drive size would be limited to 2TB.
Thank you very much for describing your scenario and also for sharing the solution.
thank you so much
You are welcome
but for free version there is no aoption of advance
Kindly take a look @Mr Franxi’s comment above
This is not the solution! It is a way to get around this error since you simply will not use UEFI but instead the BIOS. I mean, I like that you first include a short explain of the difference between UEFI and BIOS so I guess you know this already.
My proposal for this guide just say after the explanation of UEFI/BIOS: UEFI is sometimes not properly supported or misconfigured. It might even be several problems depending on the setup so no real “one fix for everyone” can be given. In most cases BIOS is working just fine so let’s change this setting.
Your guide itself is great (maybe too far into the Windows setup, since after the installer loads nothing needs to be done differently anymore.) All in all no complain, I’m just annoyed that you say it’s a fix and not a workaround.
PS: Since you will complain that I didn’t create a solution/guide myself:
For me it was possible to start correctely when I press “any key” right after the VM loads. If I miss I can use “control alt delete” to try again. Not sure yet why and what are the implications so your guide might be a better solution if my UEFI is amiss and will create trouble.
I might look around and update if I find the reason why beeing fast is working for me and hopefully how to change this issue.
Firstly, thank you very much for the feedback. It improves us over here. Your suggestion is right and it is obviously a workaround 🙂
If you don’t have the Advanced settings section in your VMWare Workstation you can switch the VM to use BIOS by manually modifying the .vmx file in the VM folder. There is a line in that file: firmware = “bios”
it worked.thank you (Y)
You are welcome, Mihiri.
Thanks , it worked , and you can also try to disconnect the network, then try to install again, it will be working too, and if you want to activate the windows 11 from your VM, you can get a Windows 11 product key from the MS partner Keyingo
I am glad you found this helpful @Henrietta! Thank you for your feedback/input. I am sure, others will find this very helpful.