Skip to content

TechDirectArchive

Hands-on IT, Cloud, Security & DevOps Insights

  • Home
  • About
  • Advertise With US
  • Contact
  • Reviews
  • Toggle search form
Home » Windows » How to decrypt Files and Folders Encrypted with an Encryption File System (EFS) in Windows

How to decrypt Files and Folders Encrypted with an Encryption File System (EFS) in Windows

Posted on 29/11/202105/08/2023 Imoh Etuk By Imoh Etuk No Comments on How to decrypt Files and Folders Encrypted with an Encryption File System (EFS) in Windows
How-to-Decrypt-Files-and-Folders-Encrypted-with-EFS-in-Windows-10

The Encrypting File System (EFS) is a feature of the Windows 2000 operating system that gives you the opportunity to store files and folders in an encrypted form. When files or folders are encrypted with EFS, only an individual user with an authorized recovery agent can decrypt it. EFS enables files to be transparently encrypted to protect confidential data from attackers with physical access to the computer. By default, EFS is a built-in encryption tool in every Windows Operating System used to encrypt files and folders on NTFS drives to protect them from unwanted access. However, with EFS, it is possible to enable transparent encryption and decryption of files for your user account by using advanced, standard cryptographic algorithms. Also, any individual or app that doesn’t possess the appropriate file encryption key cannot open any encrypted files and folders.

Encryption is the strongest protection that Windows provides to help you keep your individual files and folders secure.

You can also check some related posts on how to create and configure a Shared Folder on Windows Server, Network File System: How to install NFS Server on Windows Server, how to block upgrade to Windows 11 through Local Group Policy or Registry Editor from Windows 10, how to Install Windows 11 in Oracle VirtualBox with no TPM Support, and how to block upgrade to Windows 11 through Local Group Policy or Registry Editor from Windows 10.

In this guide, I will show you how to decrypt your files and folders encrypted with Encrypting File System (EFS) in Windows 10.

Note: If you get an unexpected error message like below while trying to decrypt a file or folder, it means that you will need to restore the file encryption key that you backed up for the file or folder before you will be able to decrypt it.
Decrypt-Error_1_folders
Decrypt Error

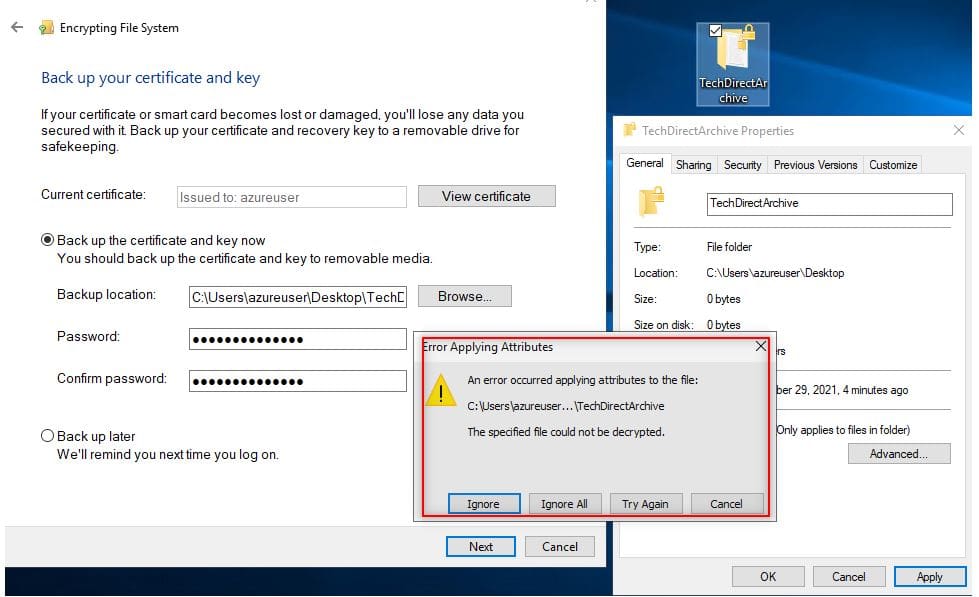
The first method we are going to use in decrypting the folders and file is the Context Menu.

Note: If you decrypt a file using this option, only the file will be decrypted.

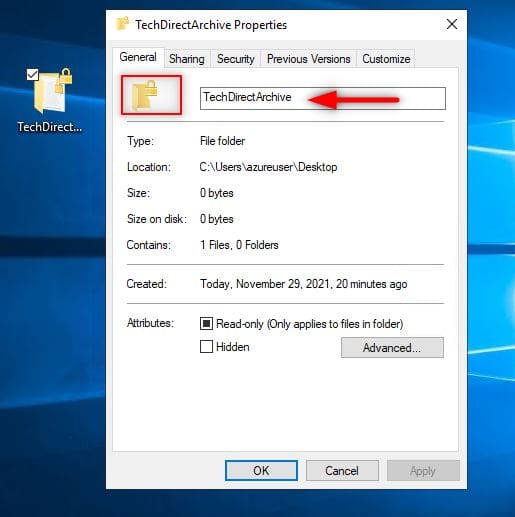
If you decrypt a folder using this option, the folder, subfolders and files will be decrypted.

First, take a look at our folder. You will notice a yellow padlock icon

EFS-Encrypted-Folder
Encrypted folder

To decrypt it using the Context Menu method, do the following:

Right click or press and hold on a file or folder you want to decrypt, click on File ownership, and click on Personal. (see screenshot below)
Decrypt_context_menu
Decrypt_Context_Menu

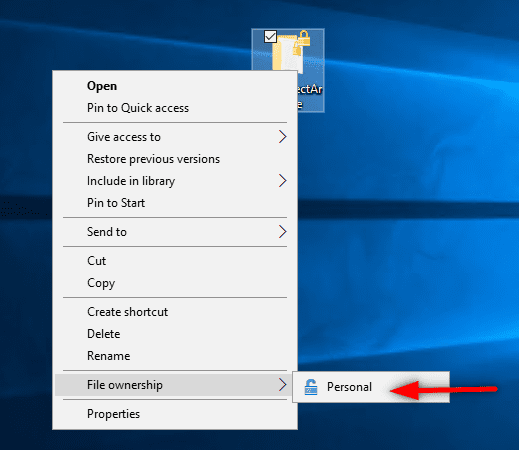
The second option is to Decrypt an Encrypted file or folder is using the Advanced Attributes.

  1. Right click or press and hold on a folder you want to decrypt, and click on Properties.
  2.  In the General tab, click on the Advanced button. (see screenshot below)
Decrypt_advanced_attributes
Decrypt_Advanced_Attributes
Note that decrypting a file also goes through the same process stated above.

The third method of decrypting a file is to use the Command Prompt Terminal

  1. Open the command prompt with the admininistrator’s privilege .
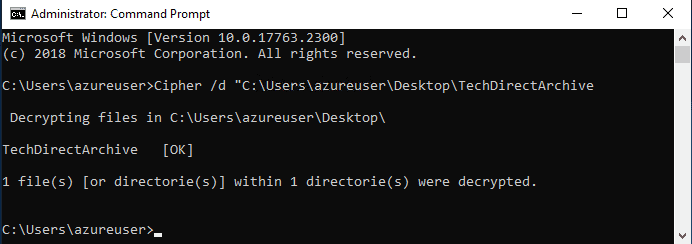
  2. Type the command below into the command prompt, and press Enter. (see screenshots below)

cipher /d "full path of folder" - This applies changes to the folder only. Meaning only the folder containing the file will be decrypted while the files will remain encrypted.

OR

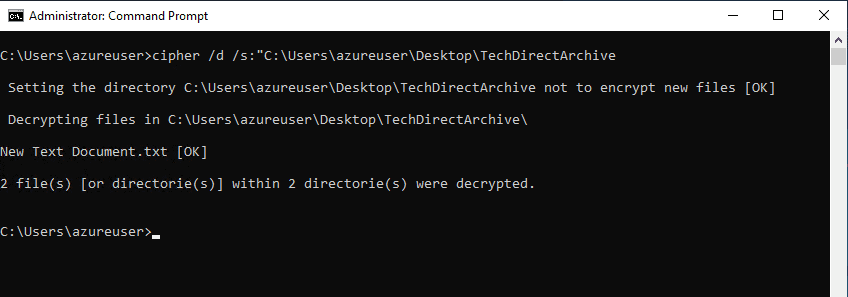
cipher /d /s:"full path of folder"- This applies changes to both folders, subfolders and files.

Remember to substitute the Full path of the folder in the commands above with the actual full path of the folder you want to decrypt.

Decrypting_files
Decrypting Only the File
Decrypting_Folders_Files
Decrypting both Folders, Subfolders, and Files

When you are done, simply close the command prompt

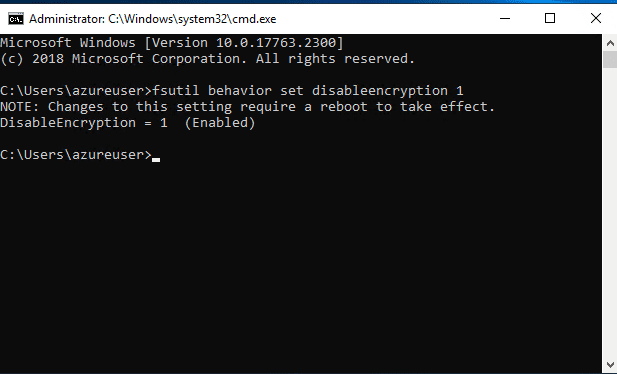
The last method I will like to show is how to completely turn off EFS using the command prompt. To do so, simply run the command fsutil behavior set disableencryption 1 (see the screenshot below).

Note: To enable the EFS back simply replace 1 with 0. The changes will only take effect after rebooting your computer
Turn-off-Encryption
Disable EFS completely

In this quick guide, you have learned the various ways to decrypt files and folders encrypted  on your encrypting file system (EFS) on Windows 10. Why do you need to do this? The reason is sometimes you may need to exchange your files with another computer. In fact, sometimes malware attacks can encrypt your files without permission.

In conclusion, in today’s world of pervasive hacking and data theft, encrypting your files remains one of the few effective ways to protect them from misuse or unauthorized access. But there’s an exception in some cases that you too might want to access these files in the future, and this is where you’ll need decryption.

Rate this post

Thank you for reading this post. Kindly share it with others.

  • Share on X (Opens in new window) X
  • Share on Reddit (Opens in new window) Reddit
  • Share on LinkedIn (Opens in new window) LinkedIn
  • Share on Facebook (Opens in new window) Facebook
  • Share on Pinterest (Opens in new window) Pinterest
  • Share on Tumblr (Opens in new window) Tumblr
  • Share on Telegram (Opens in new window) Telegram
  • Share on WhatsApp (Opens in new window) WhatsApp
  • Share on Mastodon (Opens in new window) Mastodon
  • Share on Bluesky (Opens in new window) Bluesky
  • Share on Threads (Opens in new window) Threads
  • Share on Nextdoor (Opens in new window) Nextdoor
Windows, Windows Server Tags:files, Microsoft Windows, Windows 10

Post navigation

Previous Post: Create a new Azure Disk: How to create and attach an extra Disk to Azure Virtual Machine
Next Post: Install and configure Active Directory Domain Services on Windows Server

Related Posts

  • Prevent Standard Users from Changing BitLocker Password
    How to Prevent Standard Users from Changing BitLocker Password Windows
  • WindowsServer2022
    Windows Server 2022 Capabilities: Register Windows Admin Center with Azure Windows Server
  • MBAM
    Fix MBAM Client Deployment is only supported on MBAM 2.5 SP1 Windows
  • fix windows activation 0x87E10BC6 error
    Fix Error 0x87E10BC6 on a PC running Windows non-core Edition Windows
  • Screenshot 2022 04 27 at 17.51.48
    Remote Desktop Services Setup on Windows Server Windows Server
  • Featured image IE mode.
    How to Enable Internet Explorer Mode in Edge in Windows 11 Windows

More Related Articles

Prevent Standard Users from Changing BitLocker Password How to Prevent Standard Users from Changing BitLocker Password Windows
WindowsServer2022 Windows Server 2022 Capabilities: Register Windows Admin Center with Azure Windows Server
MBAM Fix MBAM Client Deployment is only supported on MBAM 2.5 SP1 Windows
fix windows activation 0x87E10BC6 error Fix Error 0x87E10BC6 on a PC running Windows non-core Edition Windows
Screenshot 2022 04 27 at 17.51.48 Remote Desktop Services Setup on Windows Server Windows Server
Featured image IE mode. How to Enable Internet Explorer Mode in Edge in Windows 11 Windows

Leave a Reply Cancel reply

You must be logged in to post a comment.

Microsoft MVP

VEEAMLEGEND

vexpert-badge-stars-5

Virtual Background

GoogleNews

Categories

veeaam100

Veeam Vanguard

  • image 54
    How to enable Amazon S3 default bucket encryption using S3 Console AWS/Azure/OpenShift
  • control panel
    Enable or Disable Control Panel and Windows Settings App Windows
  • How to Fix Scanning and Repairing Drive on Every Boot
    How to Fix Scanning and Repairing Drive on Every Boot Windows
  • Was ist Windows Server und wie unterscheidet er sich vom normalen Windows
    Create a certificate template for BitLocker Network Unlock Windows Server
  • Smartscreen defender blocking application
    Unable to run downloaded Programs due to Defender SmartScreen Windows
  • Check Hard Drive Health (SMART) in Windows
    How to check Hard Drive Health (SMART) in Windows Windows
  • How to Migrate Windows Servers from Hyper V to Proxmox Correctly
    Migrate Windows Servers from Hyper V to Proxmox Correctly Backup
  • any
    Install AnyDesk on Windows for remote Connections Windows

Subscribe to Blog via Email

Enter your email address to subscribe to this blog and receive notifications of new posts by email.

Join 1,808 other subscribers
  • RSS - Posts
  • RSS - Comments
  • About
  • Authors
  • Write for us
  • Advertise with us
  • General Terms and Conditions
  • Privacy policy
  • Feedly
  • Telegram
  • Youtube
  • Facebook
  • Instagram
  • LinkedIn
  • Tumblr
  • Pinterest
  • Twitter
  • mastodon

Tags

AWS Azure Bitlocker Microsoft Windows PowerShell WDS Windows 10 Windows 11 Windows Deployment Services Windows Server 2016

Copyright © 2025 TechDirectArchive

Loading Comments...

You must be logged in to post a comment.