In this write-up, I will take you through the step-by-step guide on how to install and configure Active Directory Domain Services on Windows Server 2022. Before we delve into the hands-on session of this write-up, let’s take a look at some of the amazing new features that Windows Server 2022 brings. A quick peep into when Windows Server 2022 was released as it that a preview program started in March 2021. Please see Setup a Domain Controller as Recommended by Microsoft.
Note: The general availability of Windows Server 2022 was announced on 1 September 2021, with a launch event as part of the Windows Server Summit on 16 September.
Please see these related guides: Active Directory Forest – Trees and Domain and Sites, and how to replicate MDT Deployment Share: How to create a Selection Profile and a Linked MDT Deployment Shares.
Windows Server 2022 Security capabilities
Windows Server 2022 is built on the strong foundation of Windows Server 2019 and brings new security capabilities to combine with other security capabilities in Windows Server across multiple areas to provide defense-in-depth protection against advanced threats.
Advanced multi-layer security in Windows Server 2022 provides the comprehensive protection that servers need today.
In addition, it brings many innovations on three key themes: security, Azure hybrid integration and management, and application platform.
Also, Windows Server 2022 Datacenter: Azure Edition helps you use the benefits of the cloud to keep your VMs up to date while minimizing downtime. You can get the evaluation copy which is valid for 180 days of Windows Server 2022 here.
Kindly refer to some of these related guides: How to delete and restore objects using Active Directory Administrative Center, Active Directory Ports: Service and network port requirements for Windows, How to find disabled Active Directory User accounts, What are Active Directory Forest, Trees, Domain, and Sites, and how to Setup a Domain Controller.
What is Active Directory Domain Services (ADDS)?
Active Directory Domain Services is a technology that allows us to build and centrally manage a scalable Microsoft Enterprise network. Looking at the overview of the lab session we’re going to carry out in this post, we are going to do the following:
- Installing a new instance of Active Directory
- Adding and configuring a new forest which is the overall container for Active Directory Domain Services and all its subjects
- We will create the first Domain in the Forest which is known as the
Forest Root Domain. We will give a fully qualified domain name (FQDN). Here, I am going to useblog.techdirectarchive.comas domain. - We will install DNS because we must have the Microsoft Active Directory Integrate with the DNS Server.
After we have successfully installed and configured the Active Directory Domain Name Services, the Server will become a Domain Controller which is popularly codenamed DC.😀
So let’s get started. Please see MDT Driver injection: How to import drivers in .exe format into Microsoft Deployment Toolkit, and how to fix “Enter connection information for your on-premise directory or forests: Azure AD connect unable to connect directory forest not available“.
Download Windows 2022
All you need to get started with me in the demo session is a copy of Windows Server 2022 installed on your PC. To download the ISO file under the evaluation copy click here. Don’t forget you can also try a copy of it directly on Azure (see screenshot below). To get started on Azure, signup for a 30-days free subscription here.

You can also install a copy of the Windows Server 2022 via Oracle VirtualBox or VMWare. To learn how to do this, kindly refer to these related posts how to Install Windows 11 in Oracle VirtualBox with no TPM Support.
In case you run into the failed to open session error while trying to launch your VM Image on VirtualBox, kindly refer to this post on how to fix “Failed to open session in VirtualBox to install Windows 11 Image” .
How to install and configure Active Directory Domain Services on Windows Server 2022
As confirmed by the screenshot below, we have our Windows Server 2022 set up completely on our PC.
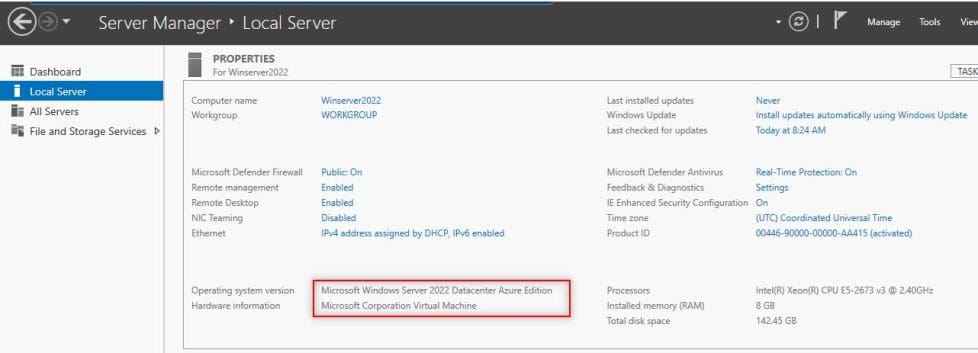
Now let’s take the following steps to have the Active Directory Domain Services (ADDS) installed.
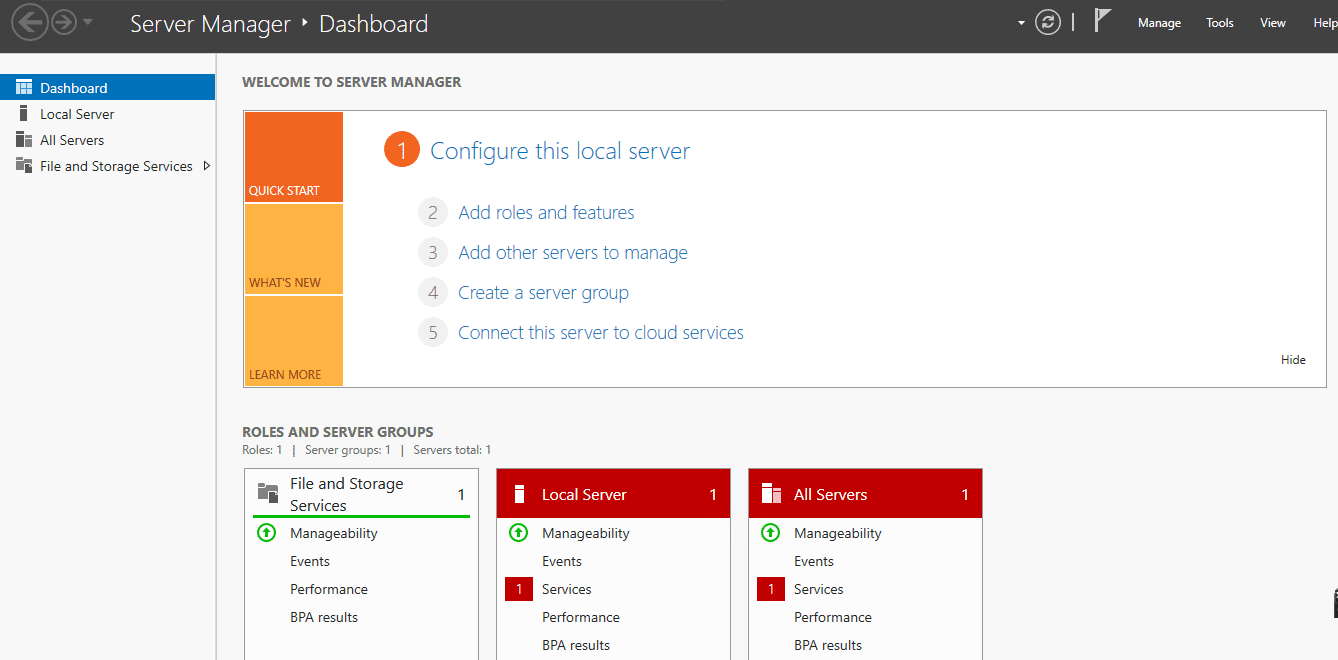
Step 1. Open Server Manager – To open the server manager, hit the Windows key on your keyboard and type “Server Manager” to search for the application. Once it is open as illustrated by the figure below, we would proceed to the next step of installing Active Directory Domain Services.
Please see these exciting articles: Driver management in Windows: How to download and install Fujitsu DeskUpdate and DeskUpdate Manager, and how to fix “we cannot sign you with this credential because your domain isn’t available: Make sure your device is connected to your organization’s network and try again“.
Step 2: Add Roles and Features
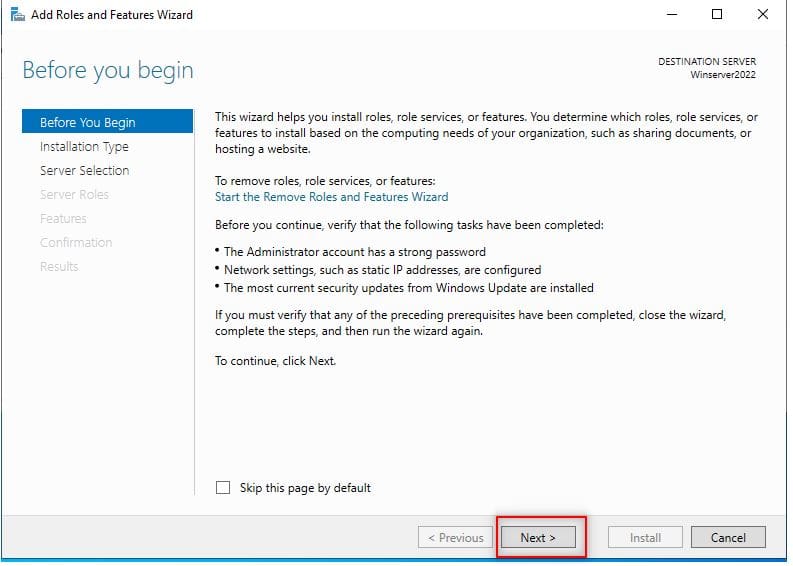
Right-click on “Manage” on the “Server Manager” window and choose “Add Roles and Features“. This will open the “Add Roles and Features Wizard” which ushers us to the part where we install Active Directory Domain Services. Click on next.

On the before you be
Step 3: Installation Type
On the “Installation Type”, leave “Role-based or feature-based installation” radio button selected and click on next (see screenshot below).

Please see How to Back Up and Restore Microsoft Entra ID with Veeam Backup & Replication v13, Azure Resource Inventory (ARI) for Engineers: Improving Control and Compliance, and Azure Load Balancer: Configuring for SQL Server Always On Availability Group Listener on Azure Virtual Machines.
Step 4: Server Selection
On this interface titled “Select destination server“, select the server you are to install AD DS and click next. I am going to choose my local server.

Step 5: Server Roles
The previous step will lead you to the next page as shown below. Here, you will see many options with square checklist box beside them. As you can see, we are choosing “Active Directory Domain Services“.

You can read about my other previous topics of interest such as how to block upgrade to Windows 11 through Local Group Policy or Registry Editor from Windows 10, how to back up an Azure VM from the VM settings, Azure virtual networks: How to prepare Azure and on-premises virtual networks using Azure CLI commands and Network File System: How to install NFS Server on Windows Server.
Step 6: Add Features
Immediately you choose that option, a new part pops up. On the page, just click on “Add Features” tab and hit “Next“.

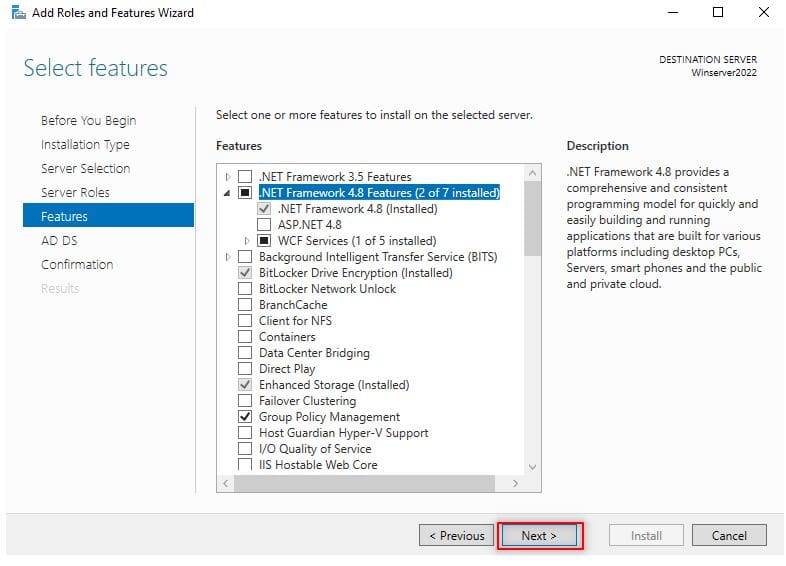
Step 7: Select Features
On the next page after Step 6 titled “Select features“, just hit “Next” to lead you to installations of AD DS.
Step 8: AD DS
As shown below, you will be presented with the next page titled “Active Directory Domain Services“. Here, click on “Next“

Step 9: Confirm your selections
The next page is about Confirming that you want to install AD DS before actually installing it. Here, if you are sure about the installation, click on install.
You can optionally choose the option that restarts the server whenever required which we are not choosing it in our own case. Click on close once it is done.

Close the Installation Compete Screen Wizard or go ahead with the next configuration of promoting the server to a domain controller which will be our next step as shown on the screenshot below

Configuring Active Directory Domain Services (ADDS)
Now that the installation has completed successfully. We going to go ahead to configure the AD DS following the steps below:
Step 1: Promote to Domain Controller and Add the Forest
After you have finished installing Active Directory Domain Services, the next step is to promote it to a Domain Controller (DC). On the same “Installation Complete Window” as shown on the screenshot above, Click on "Promote this server to a domain controller".
Since this is a brand new Active Directory Domain Name Services, so we’re going to choose "Add a New Forest" (see the screenshot below).

Since a forest is the overall container for AD DS and its services, we are going create the first domain within the forest which is known as the "Forest Root Domain" and specify a name which must be a fully qualified domain name (FQDN) as blog.techdirectarchive.com.
You are free to specify your fully qualified domain name based on your organization’s needs. Remember to specify the Active Direct Domain Services restored mode password as well.
Note: One suggested methods is to use a subdomain of a public registered domain. In my case techdirectarchive.com is my public registered domain name while blog.techdirectarchive.com is the subdomain. In some situations, you may see something like techdirectarchive.local. Now, one thing to note here is the .local is an unofficial top-level domain name which is not supported by internet standard and unofficial domain name should really only be used in a test lab environment. Avoid using it in the production environment because it causes issue with certificates. But for he purpose if the demo session in this post, if you don't have your public registered domain name you can go ahead and use the .local.
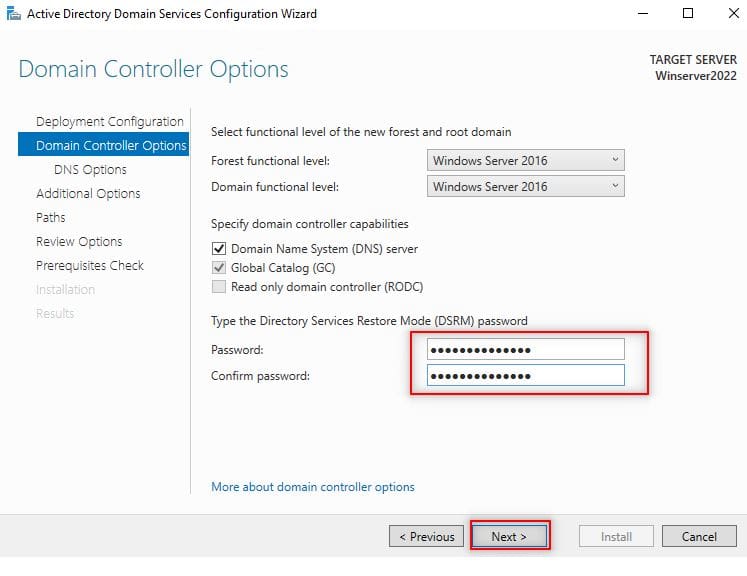
At this stage, this is where you are to specify the forest and domain functional levels. This determines the AD DS and forest capabilities as well as determine which operating system can be run in the controller.
Note one time that as shown on the screenshot above, the current functional level is Windows Server 2016. This means that all Domain Controller within the forest must have Windows Server 2016 and above because Windows Server 2016 is the latest we can choose because there have not been any significant changes since the Windows Server 2016 version.
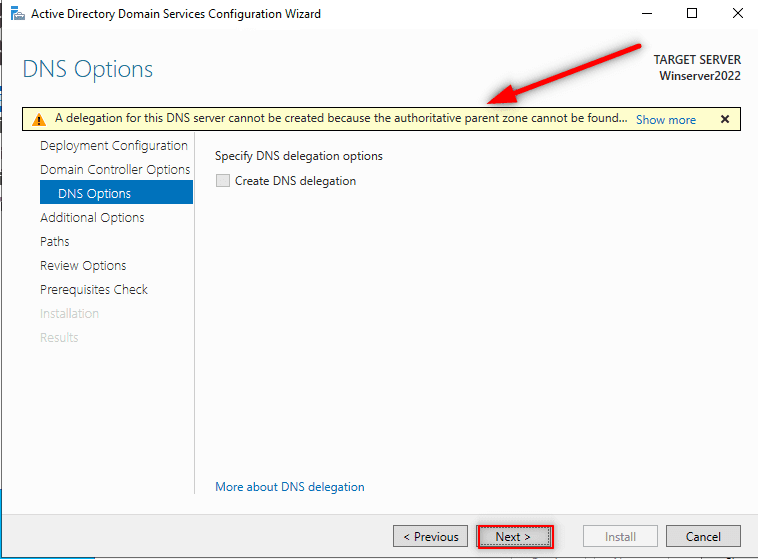
Step 2: DNS Options
On the next page ( DNS Options ), you will probably see an error on top with the words “A delegation for this DNS server cannot be created because the authoritative parent zone nameserver cannot be found” (see the screenshot below). Ignore it and click “Next“
Step 3: NetBIOS domain name
On the next page, leave the NetBIOS domain name as default or you can change it as long as it is not longer than 15 characters. Click “Next” after that.

Step 4: Paths
Leave paths as default and click “Next” as shown below.

Step 5: Review Selections
In this step, the server allows you to review what you have done so far. If you are good with the selections you have done, click “Next” to proceed to the next stage.

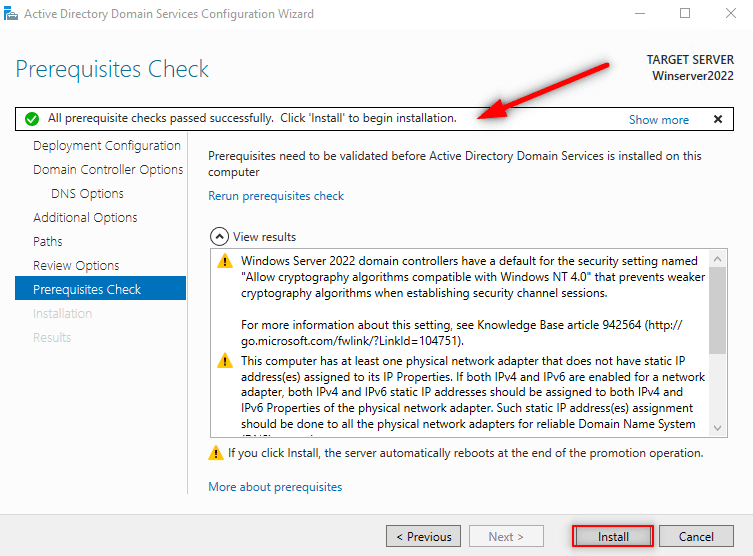
Step 6: Prerequisites Check
In the prerequisites step, the system will be validated before Active Directory Domain Services is installed. If you get any errors here, please look at it and fix anything in the previous steps. If all is okay, click “Install“. In our own case as shown in the screenshot below, all prerequisite check have been passed.
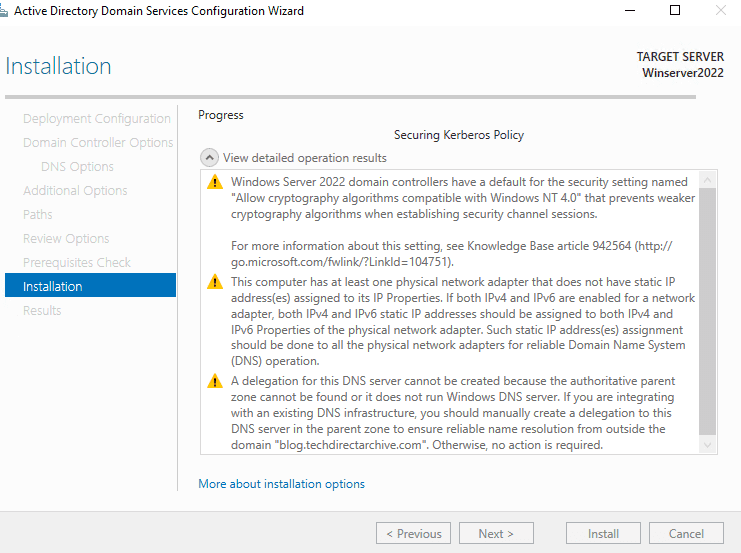
The configuration of the ADDS is in progress
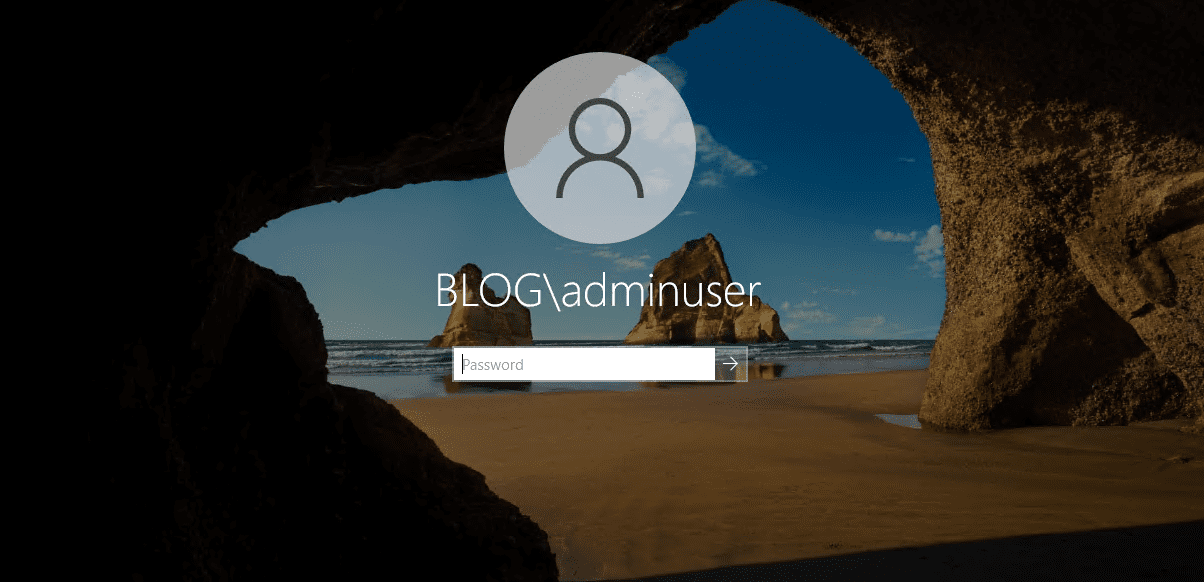
After that, the Server will reboot and you can then log into the Domain with the credentials you set in Step 1 as shown below:
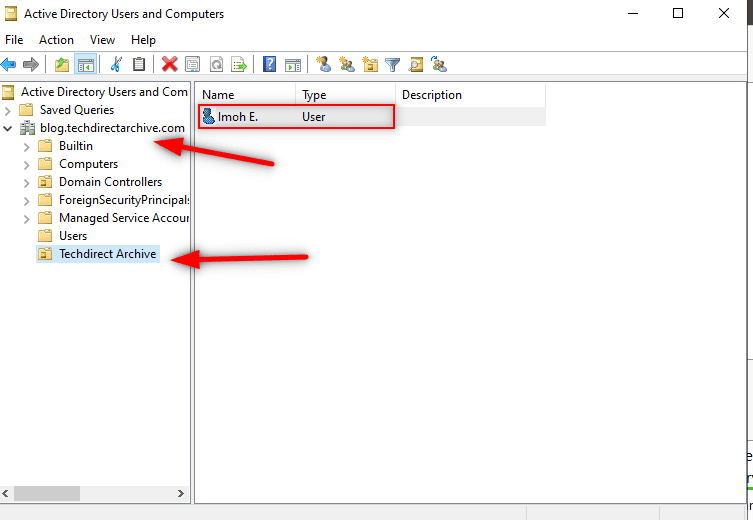
Finally, if we check through the Server Manager and click on the “Tools” then select the “Active Directory Users and Computers” you will see that our domain name is there.
In our case we have created on Organizational Unit (OU) which serves as department and created an account for myself as the user (see the screenshot below).

Conclusion on how to Install and Configure Active Directory Domain Services on Windows
In conclusion, one of the best features that make Windows Server to be widely adopted in the Enterprise environments is Active Directory.
This single Sign-on feature that seamlessly and easily integrates with most of Microsoft products makes user management among other tasks quite easy and fun. Congratulations, in this articles you have learnt how to set it up from start to finish on Windows Server 2022.
I hope you found this blog post helpful on how to install and configure Active Directory Domain Services on Windows Server 2022. If you have any questions, please let me know in the comment section.