
The LAMP stack is a collection of open-source tools for developing web applications. In addition, an operating system, a web server, a database, and a programming language are all required for a web application to function. For a database-driven and dynamic website, each layer of software is critical. So, here’s a step-by-step tutorial on how to install LAMP Stack on Ubuntu 18.04. In this guide, I will walk you through how to install each of the components as it is important that we install each component of the stack separately. You can view similar guides from here: How to Configure Advanced PAM in Linux/ and How to locate directory file context and restore it with SELinux/ also differences between dnf and apt package managers/ and How to create and deliver a report on System Utilization on a Linux based OS
The acronym LAMP stands for the following programs:

Linux which is a free and open-source operating system.
Apache which is an HTTP Server
MySQL which is a relational database management system.
PHP which is a scripting language. Please also take a look at this guide: How to setup and configure a lamp stack on CentOS.
Requirements for installing LAMP Stack on Ubuntu 18.04
Ubuntu user with sudo rights in Ubuntu 18.04 Bionic Beaver
The ability to use a terminal/command line
The apt package manager, which comes pre-installed in Ubuntu and other Debian-based distributions.
Steps to Install LAMP Stack on Ubuntu 18.04
Step 1: Update Package Repository Cache
Update the package repository cache to guarantee that the software is installed with the most recent versions. Therefore, to successfully install LAMP Stack on Ubuntu, you need to update package repository to the latest version. To do so, enter the command below.
sudo apt updateStep 2: Install Apache Server on Ubuntu 18.04
Run the following command in the terminal to install Apache:
sudo apt install apache2Hit y which means yes & enter on your keyboard when prompted

It is alright but just to be sure we will run another command to check the status
sudo service apache2 status
Next, type the following command to see if the UFW firewall has an application profile for Apache:
sudo ufw app info "Apache Full"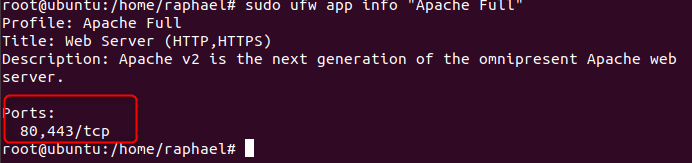
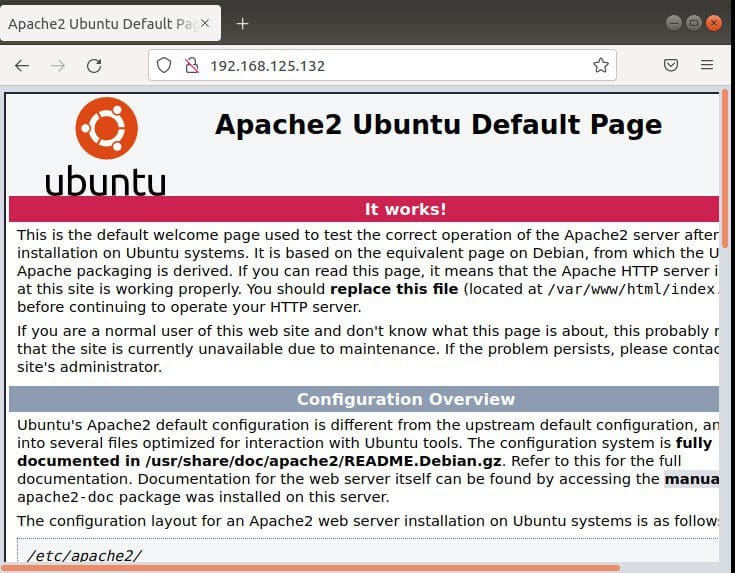
To know how if installation works, we need to run the local IP address and specify the port highlighted above. Hence, we can get the IP by running the command.
curl http://icanhazip.com
Step 3: Install MySQL and Create a Database
sudo apt install MySQL-serverTo check if our MySQL-server has been installed, run the following commands below
#systemctl start MySQL. Service
#systemctl status MySQL. Service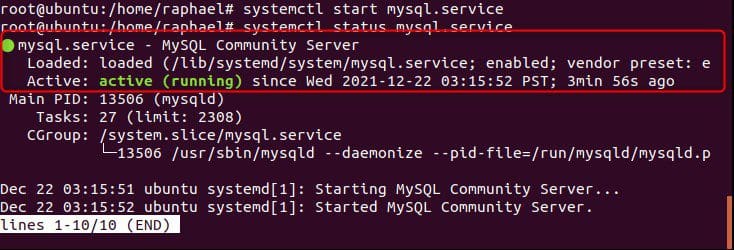
Step 4: Install PHP
sudo apt install php libapache2-mod-php php-mysql 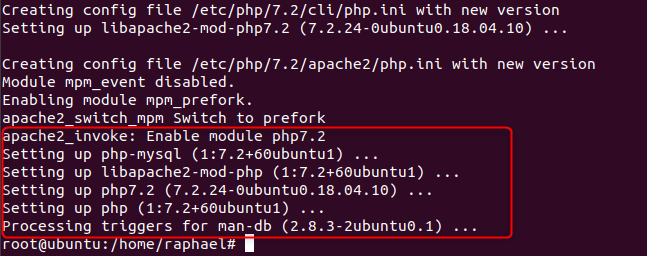
The next step to install LAMP Stack on Ubuntu 18.04 is to change how Apache serves files when directories are needed. Thus, Apache scans for a file card named index.html by default. Rather than searching for the index.html file, we want it to look for the index.php file.
sudo nano /etc/apache2/mods-enabled/dir.conf
The command we ran gave us the output above, we need to swap the position of index.html and index.php so that index.php is number 2. After the swap we save and close the file.

Press CTRL + X to save and close the file. Then, press y and ENTER to confirm.
Step 5: Restart Apache
We need to restart the Apache service for the modifications to take effect.
sudo systemctl restart apache2Step 6: Test PHP Processing on Web Server
To confirm that you’ve installed LAMP Stack on Ubuntu 18.04, create a simple PHP script and save it in the “web root” folder. Meanwhile, this is required for Apache to correctly locate and serve the file. /var/www/html/ is the location of this directory.
Type the following command to generate a file in that directory:
sudo nano /var/www/html/info.phpThis opens an empty nano file

To install LAMP Stack on Ubuntu 18.04, we need to type in the PHP code below:
<?php
phpinfo ();
?>
Then, press CTRL + X to save and close the file. Press y and ENTER to confirm.
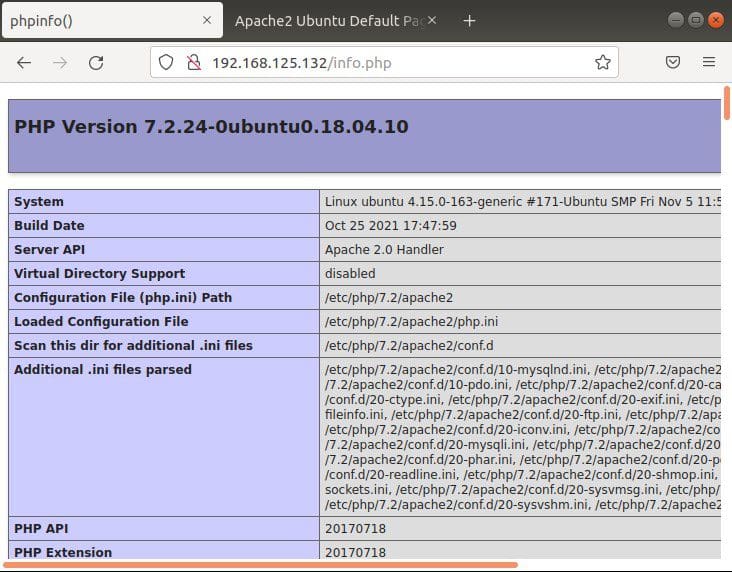
To confirm that our LAMP stack on Ubuntu 18.04 is installed and working, Open a browser and type in your IP address/info.php
NOTE: only the IP address of the VM will make this work so run ip addr show in terminal and copy the ip.
Summary
Congratulations, we have successfully installed the LAMP stack on Ubuntu 18.04. This we did by installing each of the components individually and this is especially important for web development.


