
In this article, I will show you how to setup Public Load Balancer in Azure. Where it can distribute the incoming traffic over multiple servers. It will split up the load over two Virtual Machines. IPAM enables the administration and monitoring of DHCP and DNS and provides a comprehensive view of where IP addresses are used, it also collects information from domain controllers and Network Policy Servers (NPSs), and then stores that information in the Windows Internal Database.
Also here are some of my related guides: How to configure Network Load Balancing (NLB), how to create a load balancer for Azure Stack Hub, and how to fix we couldn’t find a Camera compatible with Windows Hello Face on Windows 11.
What is Azure Load Balancer?
Azure Load Balancer operates at layer 4 of the Open Systems Interconnection (OSI) model. It’s the single point of contact for clients.
A load balancer distributes inbound flows that arrive at the load balancer’s front end to backend pool instances. These flows are according to configured load-balancing rules and health probes.
The backend pool instances can be Azure Virtual Machines or instances in a Virtual Machine Scale Set.
In order to reiterate, Load balancing refers to evenly distributing load (incoming network traffic) across a group of backend resources or servers.
Please refer to these exciting posts: how to deploy a load balancer from scratch and adding backend servers, how to use Aws to deploy, schedule and run playbooks, how to configure azure resources with tools, how to install and configure Ansible on Ubuntu, how to install Kerberos packages in Windows via Cygwin and how to deploy Azure VMware solution private cloud.
Create Public Load Balancer in Azure
Create Virtual Machines
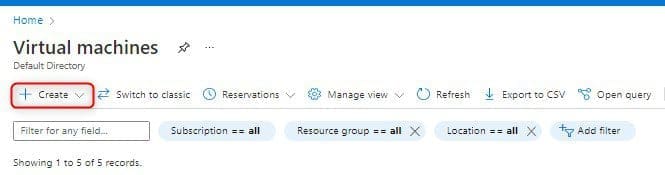
We’ll create VMs in each virtual network (VNet) so that we can communicate between them. Let’s Create 1st VM. On the Azure Portal menu tab, select Virtual machines

Select the + Create button to create the virtual machine.
Please see these fantastic articles: How to disable power plan in Windows via GPO and Windows, and Virtual Machine Scale Set: Demonstrating High Availability in Azure
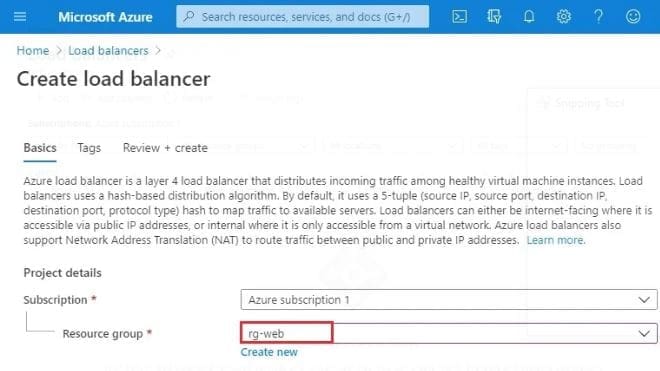
From the Resource group section, select create new.
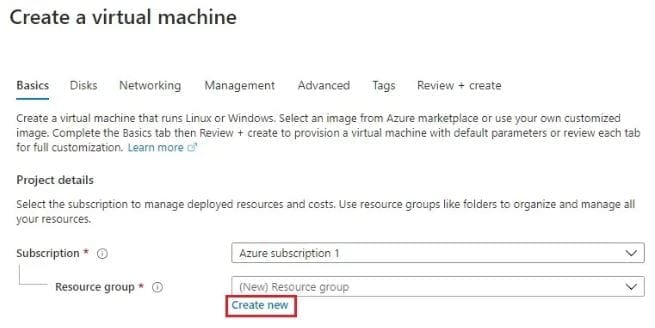
Select the Resource Group
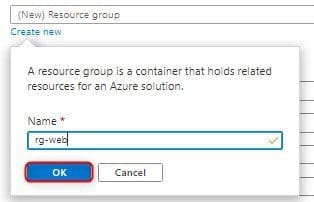
Type the resource group name (rg-web) and then click OK
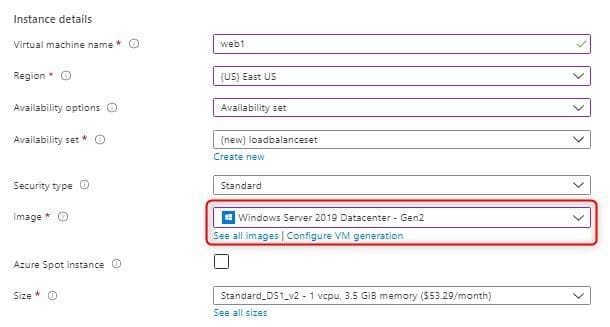
Enter the Instance details
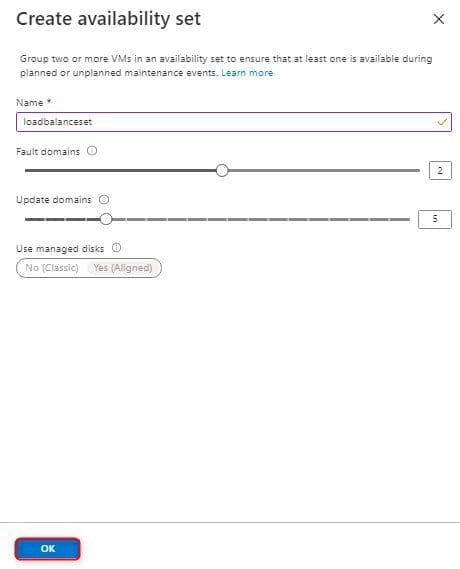
Enter a virtual machine name (web1), Region select (East US), Availability options – select Availability set. On the Availability set, select to create new.

Enter an Availability set name loadbalanceset and then click OK
in the Image section, please select Windows Server 2019 Datacenter. You can select various operating systems, but the remaining steps assume you selected Windows Server 2019 Datacenter.
Set the Administrator account
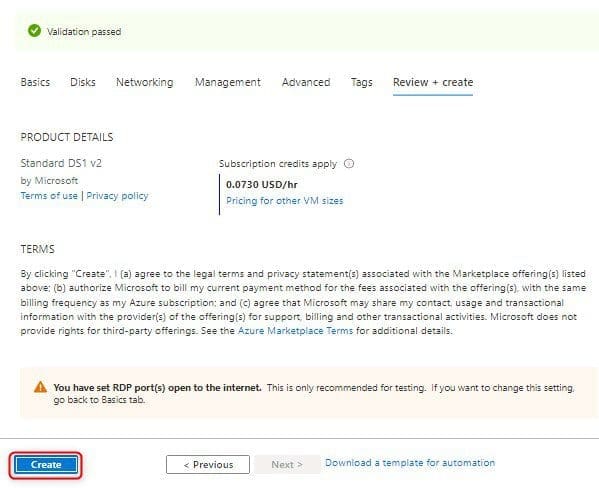
Enter a username, Password for your account. Public inbound ports choose to allow selected ports. Select inbound ports (HTTP, HTTPS, RDP) and then click on Review + create >

Select create
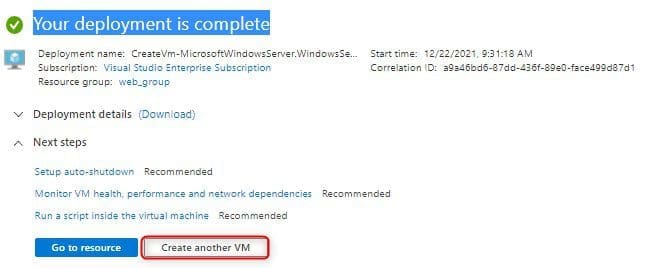
Your deployment is complete
Create the second Virtual Machine
Complete by creating the second VM by using the following changes below:
Name: Value
Resource group: rg-web
Virtual machine name: web2
Region: (US) West US
Availability options: Availability set
Availability set: loadbalanceset
Image: Windows Server 2019 Datacenter
Administrator account: username & password
Public inbound port: allow selected ports
Select inbound ports: HTTP, HTTPS, RDP
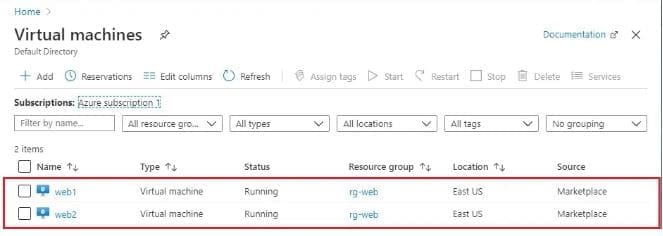
Click CreateThe Virtual Machines take a few minutes to create. Now we have created both Virtual Machines (web1, web2) successfully.
Create a Network Load Balancer in Azure
From the Microsoft Azure menu, select Load Balancers

Select Create a load balancer
Select resource group rg-web
Kindly ensure the following details below are filled.
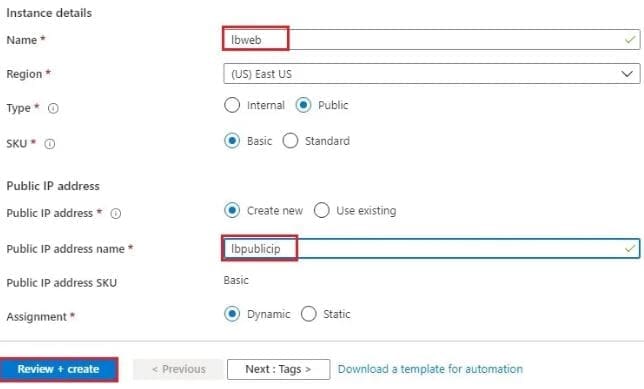
- Enter the name of the Load Balancer.
- Select Region (East US).
- keep it Public and SKU Basic.
- Set the Public Address.
- Create new, enter a name lbpublicip keep it dynamic and then select Review + create >
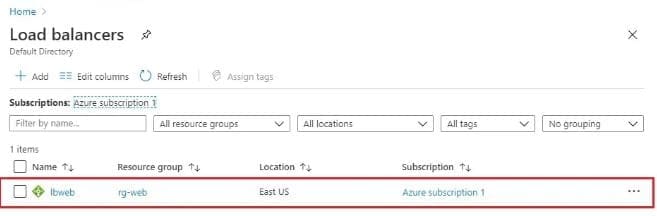
In the window below, you can see the validation has passed. Kindly click on Create!

Now you can see the load balancer successfully created, click on lbweb
Here, I will be configuring the Health Probes for our Load Balancer. So, we can specify how many servers we want to make the Load Balancer.
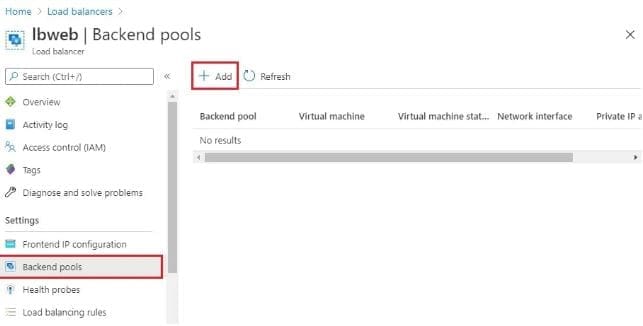
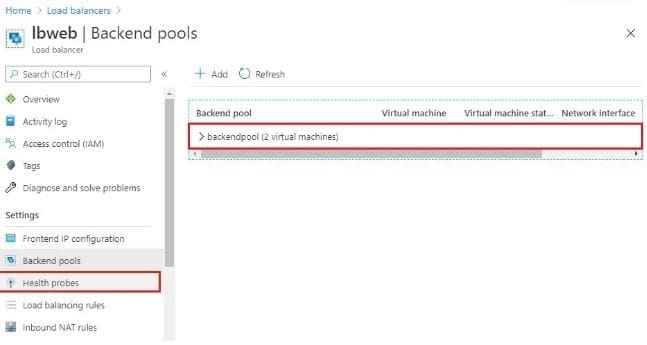
In the Backend Pools, we specify the servers which we are going to use in the Load Balancer.
Backend Pools
Click on Backend Pools and then click on + Add
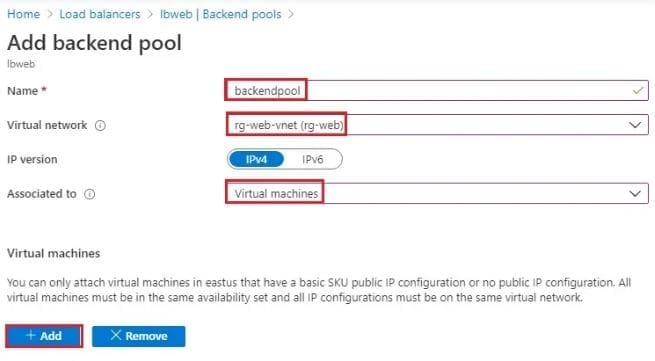
Enter the following information below.
- Add backend pool wizard, Type a name
- Virtual network (rg-web)
- Associate to select virtual machines and then click the add button under a virtual machine.
Then add the virtual machine to the backend pool wizard. Select the VMs and then click add.
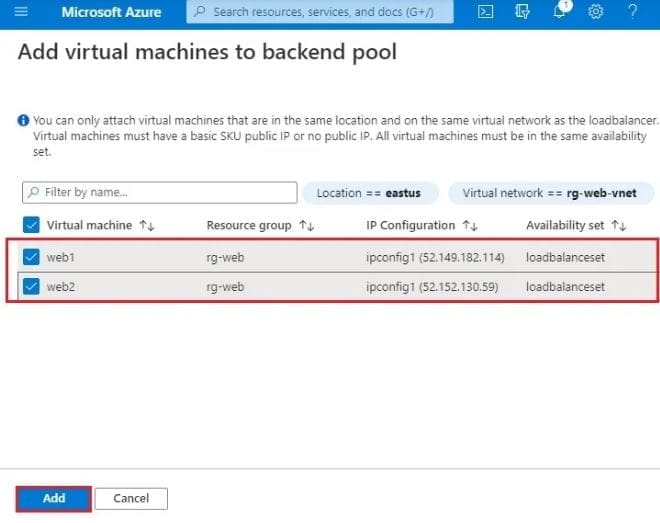
After selecting the VMs, then click on i.
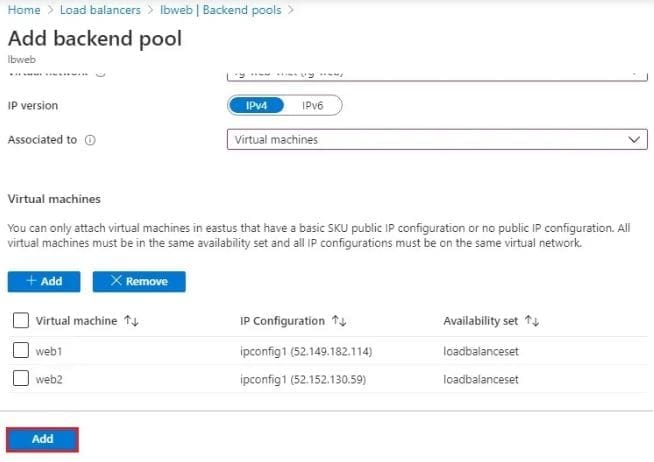
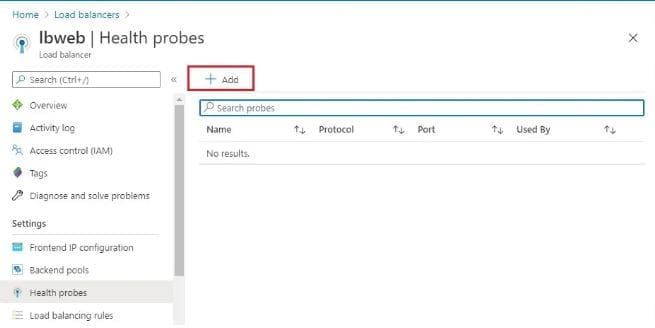
The backend pool has been configured successfully. Inside Load Balancer, go to Health Probes
Click on Add
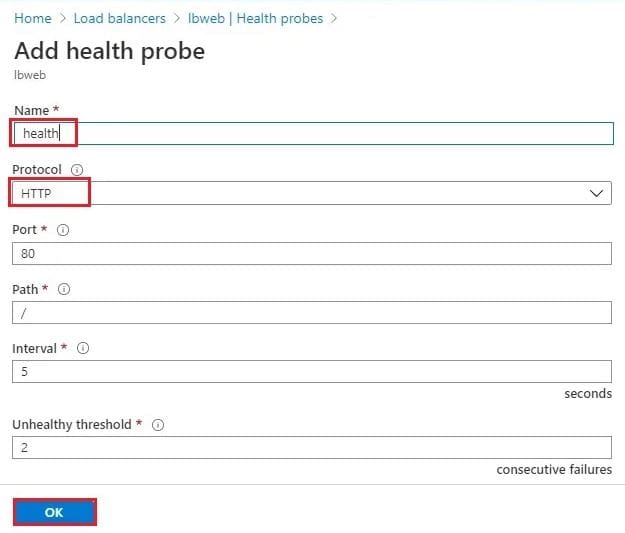
Enter a name to the Health Probe, and the Protocol (HTTP)
NOTE: The interval shows that it is going to make a probing attempt at 5-second intervals. The unhealthy threshold shows that after 2 attempts of the failed probe, it is going to declare it as an unhealthy server. Click ok
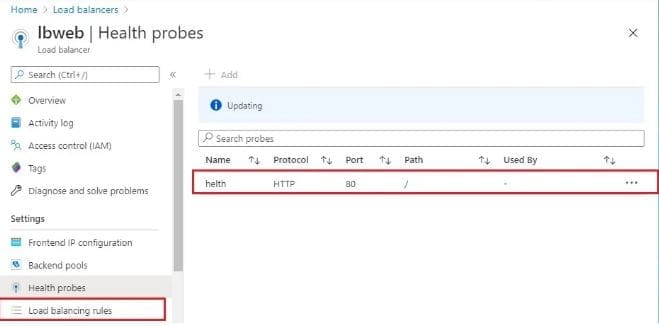
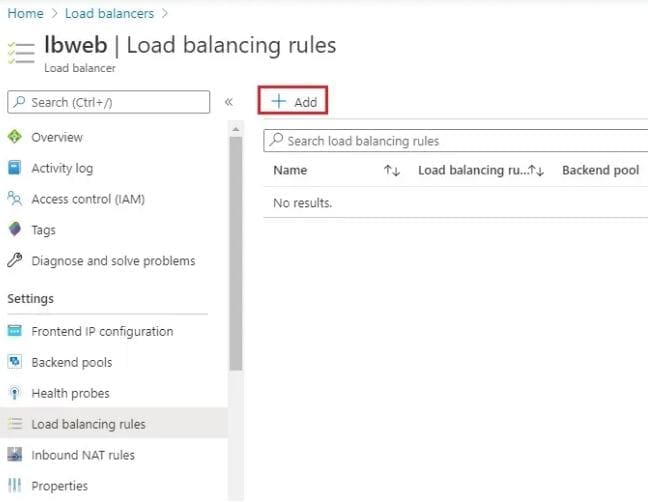
Health probe successfully created, click on Load Balancing Rules.
Click on + Add button
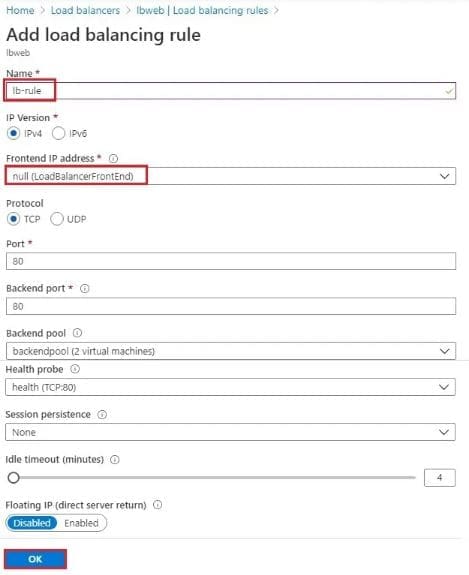
Also, ensure the following parameters are filled in correctly.
- Add load balancing rule wizard, The IP version is IPv4
- Select frontend IP Address
- The protocol is TCP, the port number is 80
- The backend port is 80, the backend pool is one that we have just created and the health probe is one that we have created.
- Session persistence is by default – None
- Idle timeout is by default – 4 minutes.
- Floating IP disabled. Click on OK.
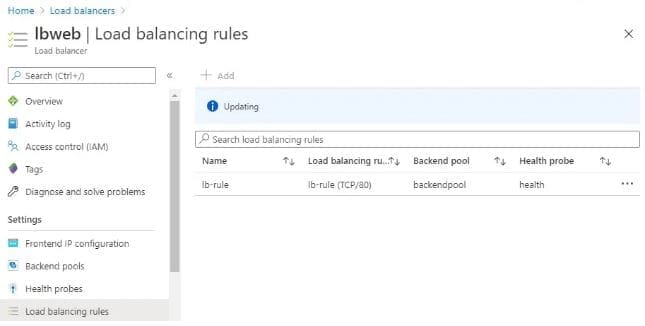
The load Balancing Rule has been created.
Test Network Load Balancer
Now that we have Setup Public Load Balancer in Azure, it is time to test it. Please follow the steps below to do this.
After remoting to both VMs. Right-click, select new, and then click text documents\ on each VM and then delete these files.

Open the text file
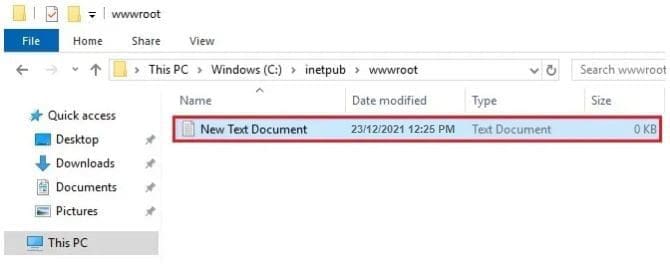
Type this is windows server web1. Select file and then save as.
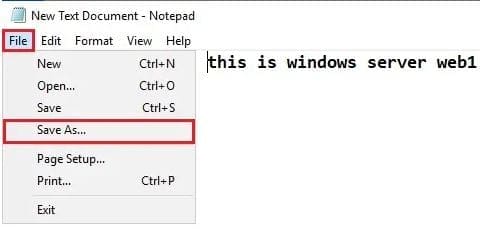
Type index.html Save as type All Files and click save.

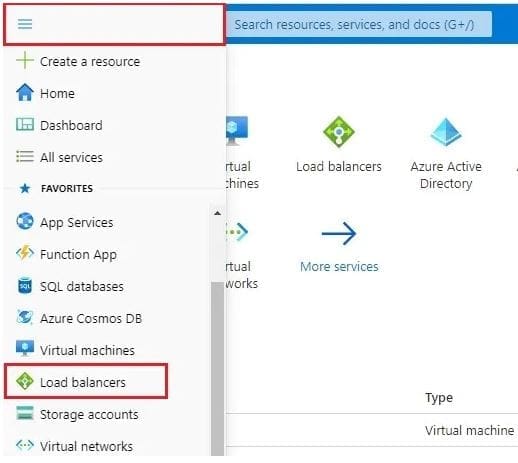
Select the Azure menu and then load balancers.
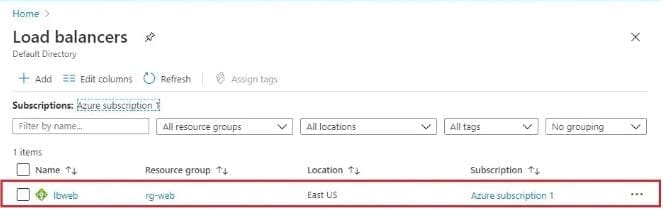
Click on load balancer lbweb
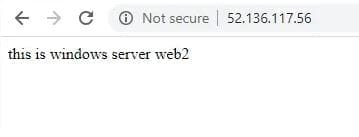
In the Load Balancer, Copy and paste your Public IP address, then paste it in the explorer address bar.

On the first hit, it takes me to the web1 server, then waits for some minutes again press enter key and it will open the web2 server just as it is shown below.

I hope you found this blog post helpful on how to setup Public Load Balancer in Azure. Please let me know in the comment section if you have any questions.


