As system administrators, we encounter countless system problems on a daily basis. These problems could be Linux, Windows, or macOS related, but what matters most is finding a quick way to fix them asap so as not to impact the overall productivity of the business. In this post, I will show you how to quickly fix the Sudo: unknown uid 1000: who are you? error on Ubuntu. In Linux, every user has a unique user ID, with the root user account assigned the default UID 0. Please see How to fix DISM Error 87: The package is unknown.
In addition, Linux users also have unique group ids (GID) assigned to them. You may also be interested in learning about how to fix similar errors and carry out some administrative tasks such as how to fix Su: Authentication Failure and Sudo: Permission denied Prompt in Ubuntu, how to Create Multiple Users and Set Password for each User in Linux, how to create Symbolic Links in Linux, how to install Docker Engine on Ubuntu, and warning useradd: the home directory already exists. Not copying any file from skel director into it.
What is UID?
Linux assigns a unique number, called a uid (user identifier), to each user on the system. The system uses this number to identify the user and determine their access to system resources. UIDs are stored in the /etc/passwd file.
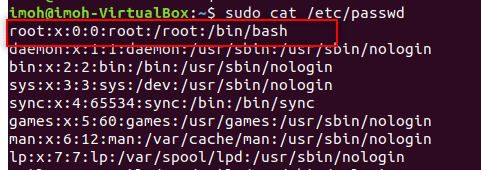
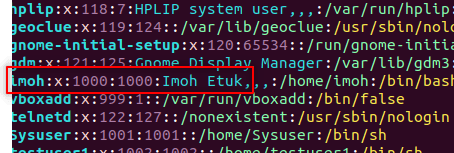
The third field represents the UID. Notice that the root user has the UID of 0 as shown in the screenshot above. Most Linux distributions reserve the first 100 UIDs for system use. New users are assigned UIDs starting from 500 or 1000. For example, new users in Ubuntu start from 1000. See the screenshot below for clarity.
Here are some exciting guides: Nslookup unknown: Fix cannot find non-existent domain, Change your root password: How to enable and disable the root user on your macOS, and how to fix Unknown Hard Error on Windows Server and Windows 10.
The Cause of Sudo Error on Ubuntu: “unknown uid 1000: who are you?” Problem
This problem is caused if you edit the /etc/passwd directory without sudo elevated privileges and attempt to assign the root user ID (0) to a regular user in order to enable them execute high-level commands without being prompted for a password. See the screenshot below:
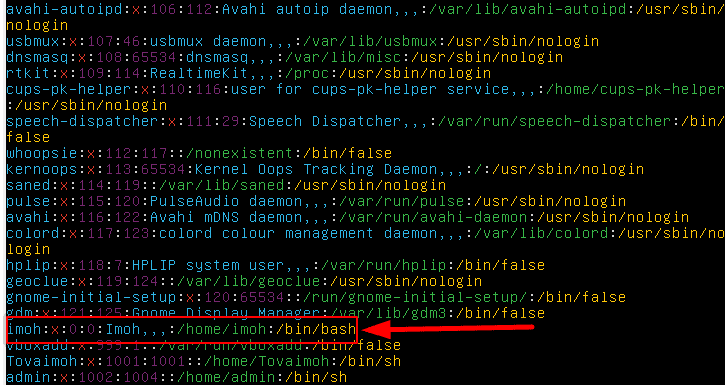
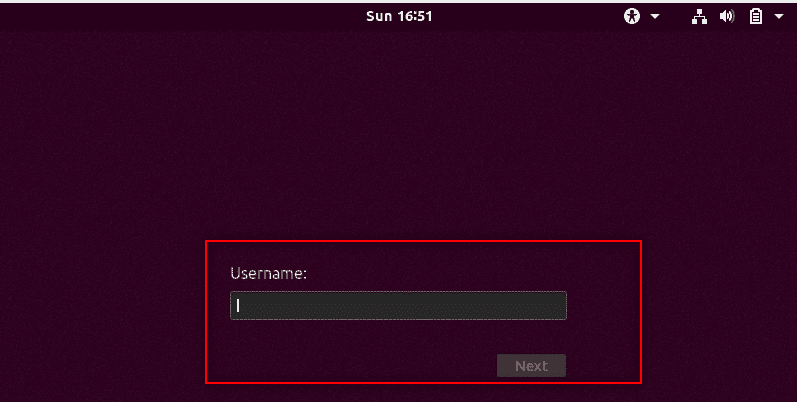
The aftereffect of this error is that it will disable the regular user account completely, and you will be left with no user account to log into your system. See the screenshot below:
Here is how to fix How to Fix “Unknown hard error” on Windows Server and Windows 10, and How to use WonderFox Video Watermark.
Fix Sudo Error on Ubuntu: “unknown uid 1000: who are you?” Problem
Two ways you can resolve this problem are either creating a new account in the recovery mode using the Root account or by editing the /etc/passwd file and changing the UID back to the previous UID or assigning a new UID entirely.
In our case, the previous UID was1000. So we’re going to re-assign the same UID number to the user right away.
Step 1 – Boot into Ubuntu Console Menu by pressing the SHIFT key and selecting the advanced option

Step 2 – Select the option with the Kernel Recovery Mode and drop down to root, and then press Enter
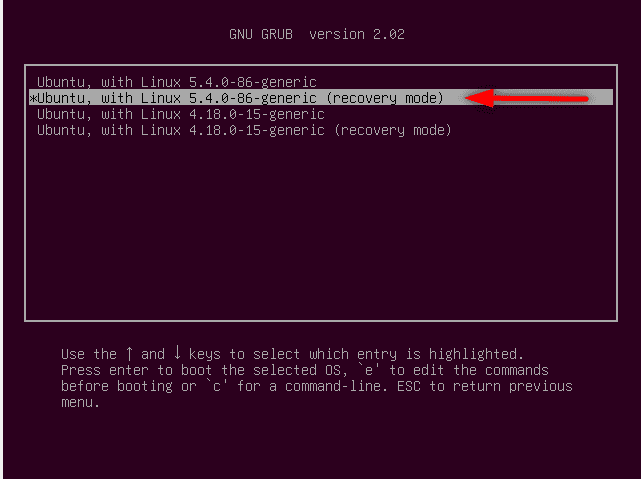

Step 3 – Edit the /etc/passwd file and re-assign a new or an existing UID to the user with the command below:
$sudo vim /etc/passwd


Step 4 – Run $su username to confirm that the user account is back and can switch user to root

Creating a New User Account to Resolve the Issue
The second mathod of solving this issue is by creating a new user. Why do you need to create a new? The reason is so you have atleast a user account to be able to sign back into your system. With a new user account you will be able rectify the above issue using the normal GUI.
To create a new user and update its password, follow the steps below:
1: While still at the Root console, run the useradd $username command and press enter as shown below:
$useradd <username>

To assign a password to the new user account, run the below command and repeat the password to complete the process. Refer to the above screensghot.
#passwd <username
Next, let’s go ahead and verify that the two user account exist. That is, the newly created user account and the old account that was disabled by running the commands shown in the screenshot below.

Note: When creating a new user account, don't use the same username for the disabled account becasue the old account is still in existence despite being reportedly disabled. See the screenshot below:

Lastly, let’s go ahead and reboot our system so we can boot into the normal graphical mode to verify the user accounts by running:
$sudo reboot

As you can see from the screenshot above, the old user account is back and we also have the newly created user with a username as admin added.
I hope you found this blog post helpful. Please let me know in the comment section if you have any questions.