How to install and configure Tripwire on Ubuntu

Tripwire is an application (IDS) that monitors your vital system files and reports in real-time to see if they’ve been tampered with or destroyed by a hacker (or by mistake). It enables the system administrator to quickly determine what has been compromised and remediate the situation. When it comes to managing internet servers, security is a huge issue. While firewalls, fail2ban policies, secure services, and application lockdown can all be configured, it’s difficult to tell for sure if you’ve successfully prevented every threat. This guide will show you how to install and configure Tripwire on Ubuntu. Please see how to troubleshoot and fix Windows 11 blue screen, and how to Protect Microsoft Defender Settings with Tamper Protection.
A host-based intrusion detection system (HIDS) collects information about the file system and configuration of your computer. It then saves this data to reference and validate the system’s present status. If there are differences between the known-good state and the present state, your security may have been compromised. This code in this guide will work on almost all versions of Ubuntu except those below 18. Other guides can be found here: How to install Node.js on Ubuntu/, How to install MariaDB on Ubuntu/, How to install Apache Tomcat on Ubuntu/, also How to Install Terraform on Linux
Tripwire is a host-based Intrusion Detection System that is open source. Tripwire can check for file integrity and monitor and notify of changes to files and directories. Please see these exciting guides: What are the Differences between Directory Services and Databases, Email notifications for MBAM Enterprise and Compliance and Recovery Audit reports, how to Query MBAM to display the BitLocker Recovery report, and How to Clear Cache on Windows 10.
Step 1: Install and Configure Tripwire on Ubuntu
Tripwire is available in Ubuntu’s default repository. We may use apt-get to install it by typing:
$sudo apt-get update
$sudo apt-get install tripwire
The process is interactive as we can see from the gallery:


This installation will require a significant amount of configuring of the required packages. It will set up the mail program first that has been added as a dependency. Select “Internet site” if you wish to set up email notifications.
During installation, it will ask if you want to choose your passwords. Answer “yes” to both of these questions. It will inquire if the configuration file may be rebuilt. “Yes” should be selected. It will inquire about the policy file in a comparable manner.
Afterwards, you’ll be prompted to select and confirm a site key passphrase. Tripwire’s configuration files are protected by two keys. This key is used to safeguard the configuration files on the server. We need to make sure the configuration files aren’t tampered with, else our entire detection system will be compromised. This key can be used on different servers because the same configuration files can be utilized.
Local identifier: This key is used to run the binaries on each machine. This is required in order to prevent our binaries from being run without our permission. You’ll choose and confirm a pass for the site key first, followed by the local key. Make sure to pick strong passwords.
Step 2: Create Tripwire keys and initialize the database
Now that the installation is complete, we must set up the database so that tripwire can begin working. Please see how to fix you are not allowed to view this folder on SSRS: MBAM reports cannot be accessed because it could not load folder contents.
$ cd /etc/tripwire/
$ ls -l
We’ll set REPORTLEVEL to 4 in the twcfg.txt file, which is the maximum.

After the change, create a configuration file:
$ sudo twadmin -m F -c tw.cfg -S site.key twcfg.txt
Step 3: Optimize the Tripwire Policy file
Make a file called twpolmake.pl with the following content:
$ sudo vim twpolmake.plAdd the policy into the vim file:
#!/usr/bin/perl
# Tripwire Policy File customize tool
# ----------------------------------------------------------------
# Copyright (C) 2003 Hiroaki Izumi
# This program is free software; you can redistribute it and/or
# modify it under the terms of the GNU General Public License
# as published by the Free Software Foundation; either version 2
# of the License, or (at your option) any later version.
# This program is distributed in the hope that it will be useful,
# but WITHOUT ANY WARRANTY; without even the implied warranty of
# MERCHANTABILITY or FITNESS FOR A PARTICULAR PURPOSE.  See the
# GNU General Public License for more details.
# You should have received a copy of the GNU General Public License
# along with this program; if not, write to the Free Software
# Foundation, Inc., 59 Temple Place - Suite 330, Boston, MA  02111-1307, USA.
# ----------------------------------------------------------------
# Usage:
#     perl twpolmake.pl {Pol file}
# ----------------------------------------------------------------
#
$POLFILE=$ARGV[0];

open(POL,"$POLFILE") or die "open error: $POLFILE" ;
my($myhost,$thost) ;
my($sharp,$tpath,$cond) ;
my($INRULE) = 0 ;

while (<POL>) {
    chomp;
    if (($thost) = /^HOSTNAME\s*=\s*(.*)\s*;/) {
        $myhost = `hostname` ; chomp($myhost) ;
        if ($thost ne $myhost) {
            $_="HOSTNAME=\"$myhost\";" ;
        }
    }
    elsif ( /^{/ ) {
        $INRULE=1 ;
    }
    elsif ( /^}/ ) {
        $INRULE=0 ;
    }
    elsif ($INRULE == 1 and ($sharp,$tpath,$cond) = /^(\s*\#?\s*)(\/\S+)\b(\s+->\s+.+)$/) {
        $ret = ($sharp =~ s/\#//g) ;
        if ($tpath eq '/sbin/e2fsadm' ) {
            $cond =~ s/;\s+(tune2fs.*)$/; \#$1/ ;
        }
        if (! -s $tpath) {
            $_ = "$sharp#$tpath$cond" if ($ret == 0) ;
        }
        else {
            $_ = "$sharp$tpath$cond" ;
        }
    }
    print "$_\n" ;
}
close(POL) ;
You’ll be requested to enter the password you set up before.
This converts the plain text policy file in the /etc/tripwire/ directory to an encrypted policy file. When tripwire runs its tests, it really reads this encrypted file.
Tripwire will utilize this database to validate our system, so we can now set it up. This verifies the points that are provided within the policy file that we just started.
We’ll get a lot of warnings, false positives, and problems because this file hasn’t been adapted for our system yet. In a minute, we’ll utilize these as a guide to fine-tune our configuration file.
You will have to create configs with the commands below:
 $perl twpolmake.pl twpol.txt > twpol.txt.new
$twadmin -m P -c tw.cfg -p tw.pol -S site.key twpol.txt.new 
Create Tripwire database:
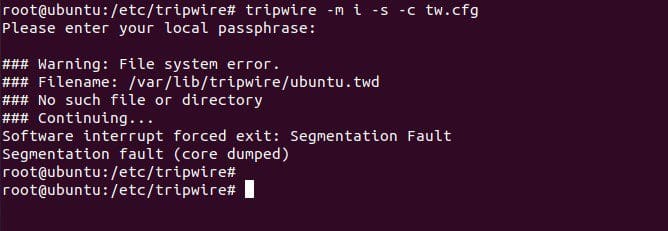
tripwire -m i -s -c tw.cfgas expected false error but just continue
You can print database using the command:
# twprint -m d -d /var/lib/tripwire/server-01.twdStep 4: Updating the database
# tripwire --update --accept-allexecuting checking manually
root@ubuntu:~# tripwire -m c -s -c /etc/tripwire/tw.cfg Since there are no errors encountered, Tripwire data files are located on /var/lib/tripwire/<servername>.twd Scan results are saved under /var/lib/tripwire/report/ directory:
# ls /var/lib/tripwire/report/
To print this report, use the syntax:
twprint -m r -t [0-4] -r /path/to/reportfile.twrThe -t measure indicates the report verbosity, with 0 displaying a single-line summary of the contents and 4 displaying all gathered characteristics for all altered objects.
If no report level is supplied on the command line or via the REPORTLEVEL config file option, the report level defaults to 3. Example: we used our path from the screenshot above
twprint -m r -t 4 -r /var/lib/tripwire/report/ubuntu-20220324-115138.twrreport is shown below:
oot@ubuntu:~# twprint -m r -t 4 -r /var/lib/tripwire/report/ubuntu-20220324-115138.twrAlso, note that you can update this report manually:
tripwire -m u -a -s -c /etc/tripwire/tw.cfg -r /var/lib/tripwire/report/ubuntu-20220324-115138.twrStep 5: Updating a policy
Policy update mode allows you to make changes to your current Tripwire policy without sacrificing your previous baselines.
tripwire --update-policy updated-policy.txtAs part of the update process, this will do a check against the new policy. If this check finds changes, the default approach is to show the changes and then quit without altering the policy or database.
Step 6: Testing email configuration
To test email configuration:
tripwire --test --email user@domain.tld
This sends a test email to the supplied address, using the config file’s email settings.

Summary
In this article, you have learned how to install and configure Tripwire on Ubuntu. We went through the steps to install Tripwire, which is an open-source intrusion detection system it monitors your vital system files and reports in real-time to see if they’ve been tampered with or destroyed by a hacker or by accident.


