
Azure Key Vault is a cloud service for securely, storing and accessing secrets. A secret is anything you want to strictly control access to, such as .B. API keys, passwords, certificates, or cryptographic keys. Vaults support the storage of software and HSM-based keys, secrets, and certificates. Managed HSM pools that support only HSM-based keys. Azure Key Vault allows users to securely store, manage, and access sensitive information. In this article, you will learn how To Use Azure Key Vault secrets in Azure Pipelines. kindly refer to some of my contents: How to configure and install Ansible on Azure VM, how to Add or Remove Network Interface from a VM in Azure, how to use Azure key vault secrets in Azure pipelines, and understanding the overview concept of Azure cloud shell.
The following areas below will be addressed.
- Create an Azure Key Vault using Azure CLI
- Add a secret and configure access to Azure key vault, and
- Use secrets in your pipeline.
Please see How to back up an Azure VM from the VM settings, how to Secure a Web Server on a Windows VM in Azure using TLS/SSL Certificates Saved in Azure Key Vault, Setting Up your Amazon S3 Glacier and FastGlacier for Your Online Vault, and how to Create a Service Fabric Cluster using the Azure Stack Hub portal and the CLI.
Create an Azure Key Vault
Azure key vaults can be created and managed through the Azure portal or Azure CLI. We will use Azure CLI in this tutorial to create our Azure Key vault. Sign in to the Azure Portal, and then select the Cloud Shell button in the upper-right corner.

Just in case you have more than one Azure subscription associated with your account, use the following command az account list to specify a default subscription.

Then Copy and run this command az account set –subscription <your_subcription_name_or_ID>

Then run the following command to set your default Azure region
- Use az account list-locations to generate a list of available regions.
- Run this command “az config set defaults.location=<your_region>“
- This can be set to example “az config set defaults.location=westus2“

To create a new resource group
What is a resource group: A resource group is a container that holds related resources for Azure solutions. Kindly run this command to create a resource group from the shell.
az group create --name <your-resource-group>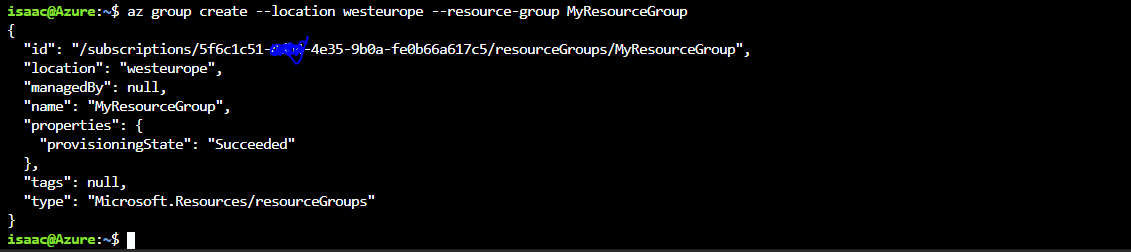
Run the following command to create a new key vault from the shell.
az keyvault secret set --name <your-key-vault> --resource-group <your-resource-group>Run the following command to create a new secret in your key vault. Secrets are stored as a key-value pair. from the below command, Password is the key and mysecretpassword is the value.
az keyvault secret set --name "Password" --value "mysecretpassword" --vault-name <your-key-vault-name>Create an Azure Project
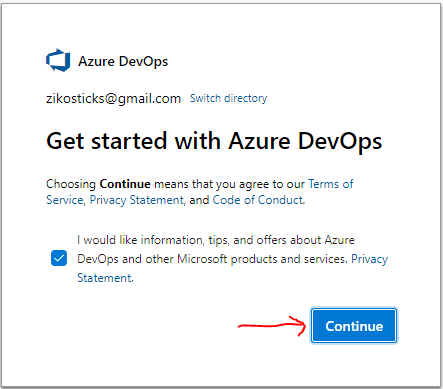
Sign in to Azure Pipelines. Your browser will then navigate to https://dev.azure.com/your-organization-name and displays your Azure DevOps dashboard.

Click on continue as shown below
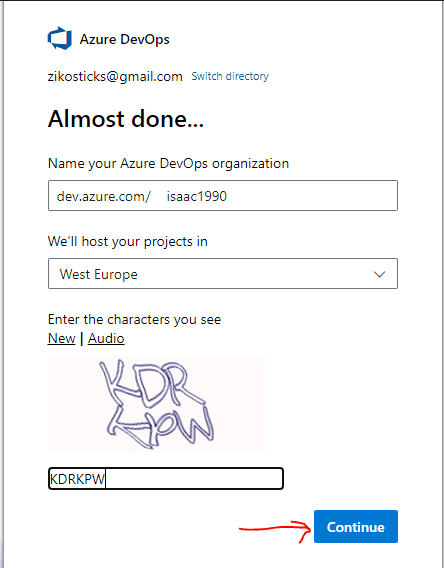
Enter the Caption (Character) as shown below and click on continue
If you don’t have any projects in your organization yet, select Create a Project to get started to create a new project. Otherwise, select the New project button in the upper-right corner of the dashboard.

Create a repo
We will use YAML to create our pipeline but first, we need to create a new repo. Sign in to your Azure DevOps organization and navigate to your project. https://dev.azure.com/your-organization-name
Go to Repos, and then select Initialize to initialize a new repo with a README.

Click on setup build as shown below

Select Starter pipeline.

The default pipeline will include a few scripts that run echo commands. Those are not needed so we can delete them. Your new YAML file will now look like this:
# Starter pipeline
# Start with a minimal pipeline that you can customize to build and deploy your code.
# Add steps that build, run tests, deploy, and more:
# https://aka.ms/yaml

trigger
- main

pool
  vmImage: ubuntu-latest

steps:
- script: echo Hello, world!
displayName: 'Run a one-line script'

- script: |
echo Add other tasks to build, test, and deploy your project.
echo See https://aka.ms/yaml
displayName: 'Run a multi-line script'
Select Show assistant to expand the assistant panel.

This panel provides a convenient and searchable list of pipeline tasks. Please see how to Automate Infrastructure Deployments in the Cloud with Ansible and Azure Pipelines.
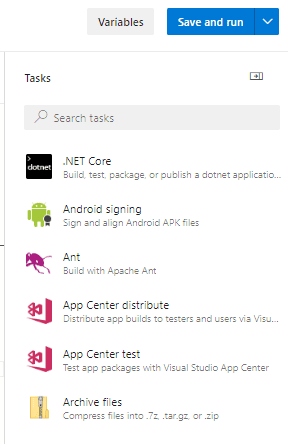
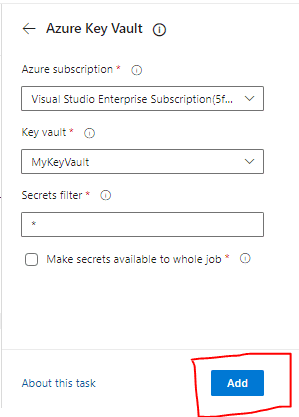
Search for vault and select the Azure Key Vault task.

Select and authorize your Azure subscription then select the Azure key vault task and select Add to add it to your pipeline. With the help of this task, it will allow the pipeline to connect to your Azure Key Vault and retrieve secrets to use as pipeline variables.
trigger:
- main

Pool:
vmImage: ubuntu-latest

Steps:

task: AzureKeyVault@2
inputs:
azureSubscription: '5f6c1c51-4db4-4e35-9b0a-fe0b66a617c5'
KeyVaultName: 'MyKeyVault'
SecretsFilter: '*'
RunAsPreJob: falsetask:
CmdLine@2
inputs:
script: 'echo $(MySecret) > secret.txt'task:
CopyFiles@2
inputs:
Contents: secret.txt
targetFolder: '$(Build.ArtifactStagingDirectory)'
task: PublishBuildArtifacts@1
inputs:
PathtoPublish: '$(Build.ArtifactStagingDirectory)'
ArtifactName: 'drop'
publishLocation: 'Container'
Do not save or run your pipeline just yet. We must first give our pipeline the right permissions to access Azure Key Vault. Keep your browser tab open, as you will resume the remaining steps once we set up the key vault permissions.
Set up Azure Key Vault access policies
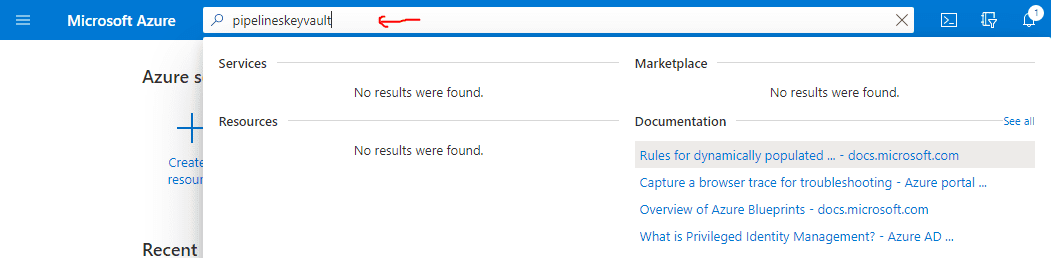
In order to access our Azure Key Vault, we must first set up a service principal to give access to Azure Pipelines. Go to Azure portal. Use the search bar to search for the key vault you created earlier.
- Under Settings Select Access policies.
- Select Add Access Policy to add a new policy.
- For Secret permissions, select Get and List.
- Select the option to select a service principal and search for the one you created in the beginning of this section.
- Select Add to create the access policy, then Save.
- Click on Save and Run
Run and review the pipeline
Return to the previous tab where we left off.

As you can see below, the profile is being created

Select Save then Save again to commit your changes and trigger the pipeline. Please understand you may be asked to allow the pipeline access to Azure resources if prompted select Allow. You will only have to approve your pipeline once.
Select the CmdLine job to view the logs.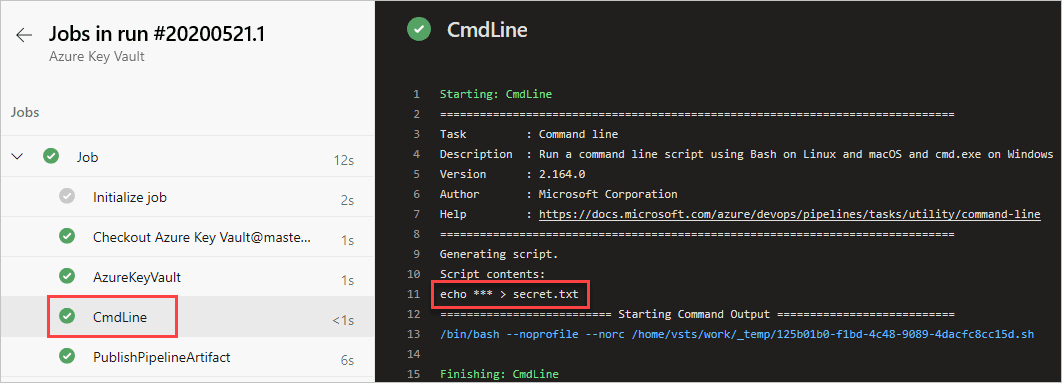
Return to pipeline summary and select the published artifact.

Under Job select the secret.txt file to open it.
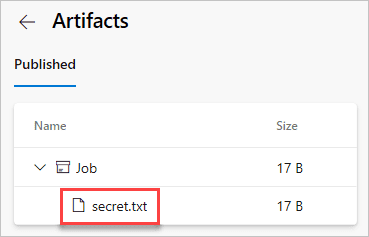
The text file should contain our secret: mysecretpassword from earlier.I hope you found this article helpful on how To Use Azure Key Vault secrets in Azure Pipelines. Please let me know in the comment section if you have any questions.