
Temp files can be used to retrieve data in the event of a crash while working on our PCs. They can protect your files from being lost. It could be disastrous if, however, they’re accidentally erased. In this write-up, we’ll go over what temp files are, where to find them, and how to recover them. Temp files save data to be recovered if a program crashes. In this article, we shall discuss how to recover Temp Files using Disk Drill on Windows 10 and 11. See also how to install Veeam Backup and Replication 11 Community Edition with a dedicated SQL Server
Moreover, if an application lacks sufficient memory to complete a task, it can utilize them as temporary storage sites. Temp files are a built-in security feature in Windows that can come in handy in an emergency.
Many of us have probably had the experience of having to rescue a Microsoft Office document after a crash. Transient files, which keep our data safe, are typically erased once the application that produced them has been ended. However, deleting them too soon may cause data loss.
If you’re looking for ways to clear the cache on your Windows 10 PC to make it faster and more efficient, check out this post how to Clear Cache on Windows 10. If you’re looking forward to changing your user’s password on Windows, refer to how to change your Windows Computer login Password.
Location of Temp Files on Windows 10 & 11
In Windows 10 or 11, accessing temp or temporary files is simple. In Windows 10, they can be found in one of two places. These are they:
C:\Windows\Temp
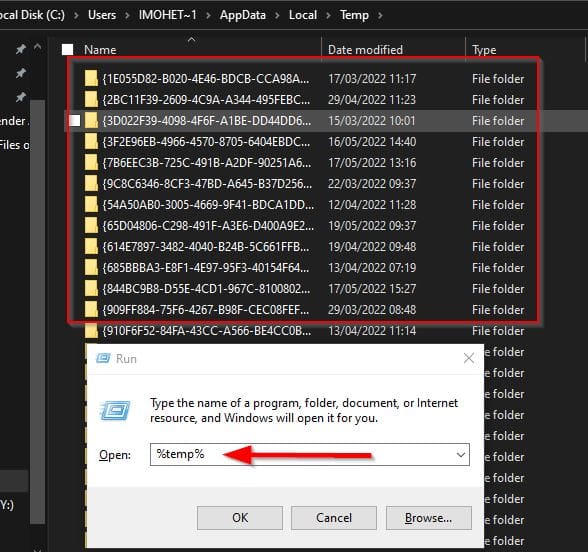
C:\Users\username\AppData\Local\TempTo access temporary files, simply use Windows Explorer to navigate to one of these places.

Accessing the Temp Files through C:\Windows\Temp looks exactly as shown below:

Another way to access C:\Usersusername\AppData\Local is to use Windows Explorer. Temp files may be found by pressing Win + R and typing per cent temp per cent (%temp%) and hitting the enter key.
While these are the two default locations for Windows’ transient folder, there are other options. The following steps can be used to transfer the temp folder:
Step 1 – Browse System and Security in the Control panel.

Step 2 – Next, navigate to System

Step 3 – While in the System option, click Advanced system settings

Step 4: Now, go to the Advanced tab and select Environment Variables in the window that pops up.
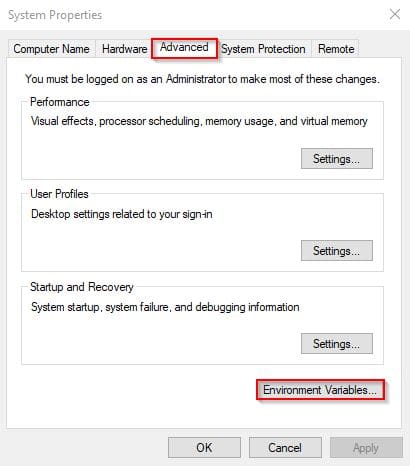
Step 5: In both the User variables and System variables sections, you will need to edit both the TEMP and TMP variables.
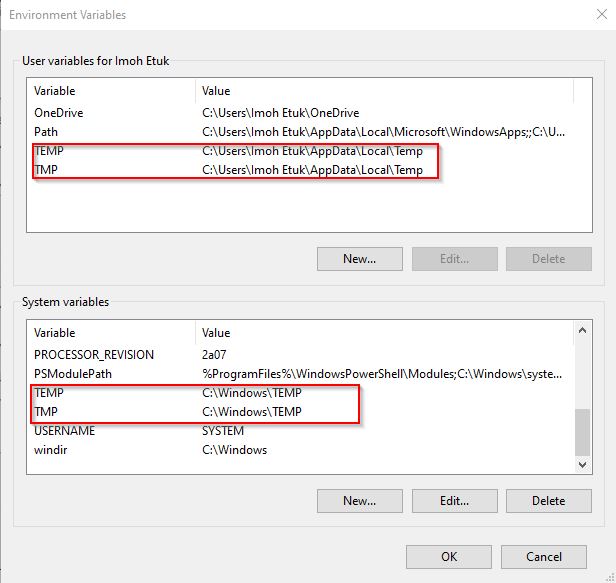
Step 6: After selecting Edit, you must edit the Variable value field to reflect the path that you want to be your new temporary file location

How to Recover Temporary Files in Windows 10 and 11
If you delete temporary files in Windows 10, one of the most effective ways to recover them is to use data recovery software. Data recovery software can recover files that have been deleted from your computer’s recycle bin or ‘permanently deleted.’
Disk Drill is one of the best data recovery programs on the market because it is simple to use while providing professional-level functionality. It can recover over 400 different file types and even perform backups. This means you could even recover an Excel temp file if necessary.
Using Disk Drill to Recover Temporary Files in Windows 10 and 11
To recover deleted Temp files using Disk Drill, follow the steps below:
Step 1 – Download Disk Drill and install it on your computer.
When running Disk Drill for the first time, it will request administrator permissions to execute its powerful data recovery algorithms. Select the drive you want to recover from after opening Disk Drill, and then select All Recovery Methods.
All Recovery Methods uses all of Disk Drill’s recovery algorithms to find as many files as possible, although it takes longer than using only one.

Step 2 – After that, choose Search for lost data. This will initiate the search process and allow you to begin looking for the transient files you require.

Step 3 – After the scan, Disk Drill will provide you with a list of retrievable files, which includes hidden temporary files. You will likely find temporary files under the ‘Other’ category.
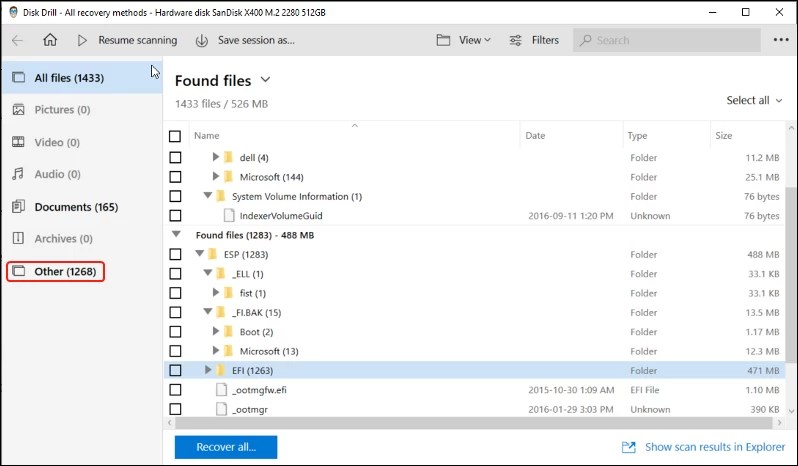
Step 4 – Review the files and select the ones you wish to restore before pressing the Recover button. Disk Drill will provide a notification indicating whether or not the recovery was successful.

Using File History to Recover Temporary Files on Windows 10 and 11
You can also recover deleted files using Windows’ built-in File History tool. You must, however, have included the temporary file folders in your backup.
We’ll go through how to set up file history so that you can use it as a recovery option in the future if necessary, as well as how to restore deleted files.
Setting Up File History in Windows 10 and 11
Get started with File History by following the steps below:
Step 1 – In Windows 10, open the Settings app and go to Update & Security.

Step 2 – Select Backup from the left-hand sidebar

Step 3 – Now you must choose the drive that you want to utilize to back up your files. To do so, select Add a drive.

Step 4 – Toggle the Automatically back up my files option to enable automatic backups with File History after you’ve finished this.

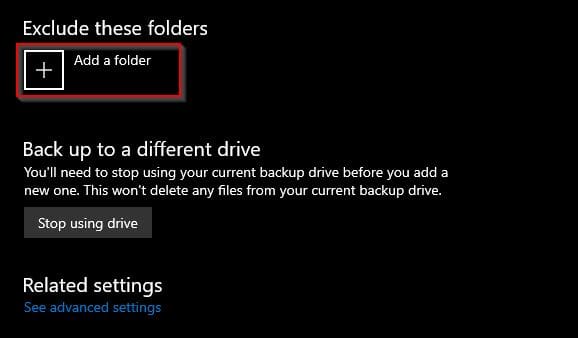
Step 5 – In the Backup section of the Settings app, navigate to More Options and choose Add a folder to ensure that your File History backups include your temp file locations.”Add the locations of your temp files.
Using File History to Recover Temp Files
You can restore temp files if you have File History set up on your PC with your temp file folder included as shown in the previous steps above. To use the File History feature to restore transient files, follow these steps:
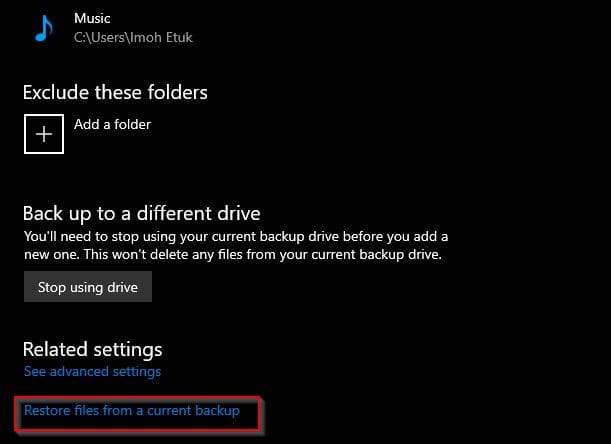
Step 1 – Go to Update & Security > Backup from the Settings app. Choose to Restore files from a previous backup.
Step 2 – Now you can browse to your temporary file directories and select the files you want to restore. Click the green Restore button after selecting the files you want to restore
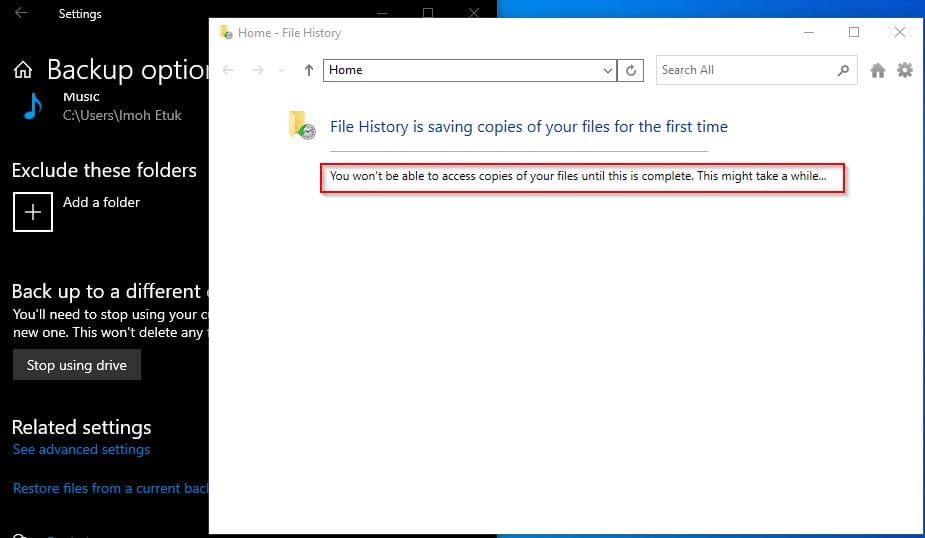
As shown on the screenshot above, when the file history has finished saving copies of my files a restore button will display. Click on the restore button to restore your files
To stop using the selected drive for back up, simply click on stop using drive
In this post, you have learned how to locate TEMP Files on your computer. You have also learned how to recover temp files using Disk Drill and how to set up File History to back up your temp files as well as how to restore these temp files. All the steps stated above apply to both Windows 10 and 11.
I hope you found this post useful on how to recover Temp Files using Disk Drill on Windows 10 and 11. In case you have any questions do not hesitate to ask in the comment section.


I really appreciate this post. I’ve been looking all over for this! Thank goodness I found it on google. You have made my day! Thx again