Skip to content

TechDirectArchive

Hands-on IT, Cloud, Security & DevOps Insights

  • Home
  • About
  • Advertise With US
  • Contact
  • Reviews
  • Toggle search form
Home » Windows » Add Registry Keys via DISM in Windows
  • powershell
    How to install the Microsoft PSWindowsUpdate module silently Scripts
  • Azure VM Creation With CLI 1
    Deploy a Linux virtual machine (VM) on Azure using the Azure CLI AWS/Azure/OpenShift
  • Fix Failed to Connect a Hyper V Standalone to Veeam Backup
    Invalid Credentials “Fix Failed to Connect a Hyper-V Standalone to Veeam Backup” Backup
  • Password Migration to ICloud Keychain
    How to import your Chrome or Firefox passwords into your iCloud Keychain Mac
  • Uninstall MicrosoftDefenderUpdate
    Remove Microsoft Defender Update on Windows 10 & Server Windows
  • You are currently signed in as
    How to fix “You are currently signed in as: Use a different account-this account is managed by your organisation” Microsoft Exchange/Office/365
  • Logon fsilure errors
    Logon Failure Reasons for Windows Event Viewer Windows Server
  • fix Client Certificate Mapping Authentication error
    How to fix Client Certificate Mapping Authentication error Backup

Add Registry Keys via DISM in Windows

Posted on 10/06/202231/07/2024 Matthew By Matthew No Comments on Add Registry Keys via DISM in Windows
Featured-Image_new

Adding Registry Keys via DISM in Windows involves modifying the default Windows install image, the install.wim file, which includes servicing an offline image, mounting an image, and committing changes made to the image. The offline image is serviced using DISM (Deployment Image Servicing and Management), a native Windows program. DISM is a command-line program for servicing and preparing Windows images, including those needed for Windows Preinstallation Environment (PE), Windows Recovery Environment (RE), and Windows Setup.

Please see: Install Wim: How to Add Packages to Windows image the DISM Tool and Remove Windows 10 Apps with DISM: How to remove pre-provisioned apps from Windows Image.

Using the DISM command options in Windows, you can not only manage registry keys but also make impactful changes. Add Registry Keys via DISM in Windows to modify drivers, install language packs for multilingual Windows, and ensure your installation stays updated with Windows Updates.

Here are other related guides: Install Wim: How to Add Packages to Windows image the DISM Tool, Remove Windows 10 Apps with DISM: How to remove pre-provisioned apps from Windows Image, for common DISM errors see: Error 183: The specified image is currently being serviced by another DISM operation, and DISM Error 87: The package is unknown​.

In this guide, I will show you how to service or modify the Windows Registry on an offline image. I will be using a Windows 11 ISO image file in this example, but the technique is the same whether you use a Windows 10 ISO image.

Step 1: Adding Registry Keys via DISM in Windows for Offline Image Mounting

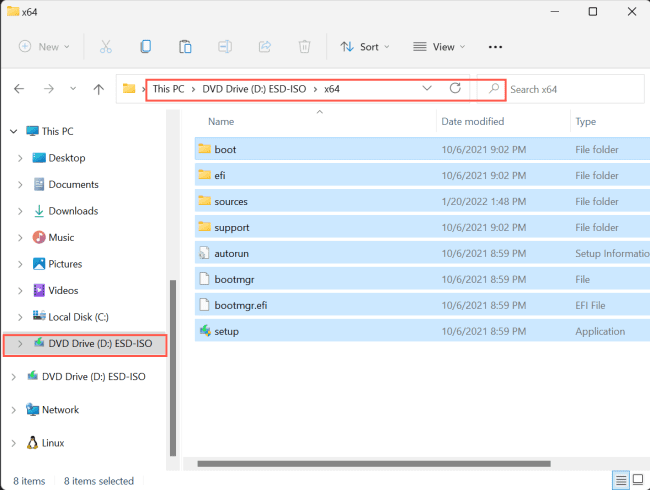
Extract the ISO image to a folder and name it whatever you want.

Managing registry keys

In this example, after extracting, I move it to the root folder on disk C: and name the folder ISO.

DISM command

Alternatively, you can Add Registry Keys via DISM in Windows by mounting a Windows ISO image as a virtual DVD. Begin by double-clicking, opening the ISO in Explorer. Select all, then copy and paste content into the ISO folder.

Windows registry

If you have Windows install media on a USB flash drive, no need for the steps above.

Craft a dedicated space for the offline image by setting up a directory. I creatively made a ‘Mount’ folder in C:\Mount. This is crucial when exploring Adding Registry Keys via DISM in Windows.

Registry modification

Open the Windows Start Menu and search for PowerShell, then run as administrator.

Managing registry keys

Enter the following command to check what editions are included in the image:

Dism /Get-WimInfo /WimFile:C:\ISO\Sources\install.wim
DISM command

Add Registry Keys via DISM in Windows: Note your chosen PRO edition’s index number (e.g., 6) for registry editing.

Mount the image of your preferred Windows edition using its index number, index 6 in this example:

Dism /Mount-Wim /WimFile:C:\ISO\Sources\install.wim /index:6 /MountDir:C:\Mount
Windows registry

The mounting image process will take some time to complete. You can check the Mount folder in C: Mount to see the offline image files.

image0.10-1

Please keep in mind that the disk where the Mount folder is situated requires some free space. It is recommended to utilize a machine with a disk that has more than 15 GB of free space.

Step 2: Add Registry Keys via DISM in Windows: Offline Registry Editing

To edit an offline registry hive, first import it to a temporary hive in your host registry. In this example, I will import the HKLM\Hardware hive from the offline registry to a temporary hive called OFFLINE in the host registry:

reg load HKLM\OFFLINE C:\Mount\Windows\System32\Config\Hardware
image0.11


The command above creates a new hive HKLM\OFFLINE in the host registry and imports the HKLM\HARDWARE hive from the offline image into it. You can import SOFTWARE, DEFAULT, DRIVERS, SAM, or SYSTEM hives.

To see the changes, open the Windows Start Menu and search for Registry Editor, then run as administrator on the host computer.

You will notice it now contains a temporary hive HKLM\HARDWARE\OFFLINE:

image0.12

Step 3: Commit (save) changes

When you’re ready to apply the changes made through Add Registry Keys via DISM in Windows, use the following command to unload the temporary hive:

reg unload HKLM\OFFLINE
image0.13

The Add Registry Keys via DISM in Windows process involves unloading the temporary hive from the host registry.

image0.14

Unmount the offline image and commit (save) changes using the following command:

Dism /Unmount-Image /MountDir:C:\mount /Commit
image0.15

The /Commit switch saves all modifications to the install.wim file. You’re done if you were using a Windows image on an USB drive. You may now install Windows, which includes your modification by default. If you were using an image transferred from an ISO image to an ISO folder, you can now make a new ISO with your preferred utility.

I trust you found this guide on how to add registry keys via DISM in Windows valuable. If you have any questions, please feel free to share in the comment section.

5/5 - (1 vote)

Thank you for reading this post. Kindly share it with others.

  • Click to share on X (Opens in new window) X
  • Click to share on Reddit (Opens in new window) Reddit
  • Click to share on LinkedIn (Opens in new window) LinkedIn
  • Click to share on Facebook (Opens in new window) Facebook
  • Click to share on Pinterest (Opens in new window) Pinterest
  • Click to share on Tumblr (Opens in new window) Tumblr
  • Click to share on Telegram (Opens in new window) Telegram
  • Click to share on WhatsApp (Opens in new window) WhatsApp
  • Click to share on Pocket (Opens in new window) Pocket
  • Click to share on Mastodon (Opens in new window) Mastodon
  • Click to share on Bluesky (Opens in new window) Bluesky
  • Click to share on Threads (Opens in new window) Threads
  • Click to share on Nextdoor (Opens in new window) Nextdoor
Windows Tags:DISM, ISO, ISO Files, ISO Image, Microsoft Windows, Registry Keys, RegistryEditor, Windows 10, Windows 11, Windows Registry, Windows Server 2016

Post navigation

Previous Post: Convert a PEM Key to a PPK Key on a Linux and Windows
Next Post: Microsoft OneDrive Setup: Files On-Demand & Key Features

Related Posts

  • username
    Is my AD user or service account password correct? Run App as a different User and switch Users in Windows Windows
  • ghm
    Single App Kiosk Mode Configuration using MDM Bridge WMI Provider Windows
  • How to Turn Off Windows 11 Tips and Suggestions Notifications
    How to Turn Off Windows 11 Tips and Suggestions Notifications Windows
  • windows 10 s splash 100720578 large
    Open the location of a Program: How to search in Windows 10 to find a file, folder, or program in File Explorer Windows
  • Featured image BSOD
    How to troubleshoot and fix Windows 11 blue screen Windows
  • feature functionapp
    Deploy a function app from Visual Studio to Azure Platform AWS/Azure/OpenShift

More Related Articles

username Is my AD user or service account password correct? Run App as a different User and switch Users in Windows Windows
ghm Single App Kiosk Mode Configuration using MDM Bridge WMI Provider Windows
How to Turn Off Windows 11 Tips and Suggestions Notifications How to Turn Off Windows 11 Tips and Suggestions Notifications Windows
windows 10 s splash 100720578 large Open the location of a Program: How to search in Windows 10 to find a file, folder, or program in File Explorer Windows
Featured image BSOD How to troubleshoot and fix Windows 11 blue screen Windows
feature functionapp Deploy a function app from Visual Studio to Azure Platform AWS/Azure/OpenShift

Leave a Reply Cancel reply

You must be logged in to post a comment.

Microsoft MVP

VEEAMLEGEND

vexpert-badge-stars-5

Virtual Background

GoogleNews

Categories

veeaam100

sysadmin top30a

  • powershell
    How to install the Microsoft PSWindowsUpdate module silently Scripts
  • Azure VM Creation With CLI 1
    Deploy a Linux virtual machine (VM) on Azure using the Azure CLI AWS/Azure/OpenShift
  • Fix Failed to Connect a Hyper V Standalone to Veeam Backup
    Invalid Credentials “Fix Failed to Connect a Hyper-V Standalone to Veeam Backup” Backup
  • Password Migration to ICloud Keychain
    How to import your Chrome or Firefox passwords into your iCloud Keychain Mac
  • Uninstall MicrosoftDefenderUpdate
    Remove Microsoft Defender Update on Windows 10 & Server Windows
  • You are currently signed in as
    How to fix “You are currently signed in as: Use a different account-this account is managed by your organisation” Microsoft Exchange/Office/365
  • Logon fsilure errors
    Logon Failure Reasons for Windows Event Viewer Windows Server
  • fix Client Certificate Mapping Authentication error
    How to fix Client Certificate Mapping Authentication error Backup

Subscribe to Blog via Email

Enter your email address to subscribe to this blog and receive notifications of new posts by email.

Join 1,841 other subscribers
  • RSS - Posts
  • RSS - Comments
  • About
  • Authors
  • Write for us
  • Advertise with us
  • General Terms and Conditions
  • Privacy policy
  • Feedly
  • Telegram
  • Youtube
  • Facebook
  • Instagram
  • LinkedIn
  • Tumblr
  • Pinterest
  • Twitter
  • mastodon

Tags

AWS Azure Bitlocker Microsoft Windows PowerShell WDS Windows 10 Windows 11 Windows Deployment Services Windows Server 2016

Copyright © 2025 TechDirectArchive


Loading Comments...
 

You must be logged in to post a comment.