Skip to content

TechDirectArchive

Hands-on IT, Cloud, Security, Veeam & DevOps

  • Home
  • About
  • Advertise With US
  • Reviews
  • Tech News
  • Contact
  • Toggle search form

How to Move OneDrive Folder to a different location in Windows

Posted on 27/06/202223/03/2024 Temitope Odemo By Temitope Odemo No Comments on How to Move OneDrive Folder to a different location in Windows
  1. Home
  2. Windows
  3. How to Move OneDrive Folder to a different location in Windows
Moving OneDrive Folder

Looking to streamline your files? Easily move OneDrive Folder, a default Microsoft service in Windows 10 (that is, Move OneDrive Folder to a different location in Windows). Sync and access files across devices seamlessly. Looking to optimize your file management? Easily move OneDrive Folder to a new location. Accessible on any device once logged in, OneDrive offers a default storage spot. However, situations may arise where relocating the OneDrive location becomes beneficial. Please see how to Stop OneDrive from Starting Up Automatically on Windows 11.

In this guide, I will be showing you how to change the default location to your desired location. If you want to read more guides on OneDrive, you can check these: How to Disable or Uninstall OneDrive on Windows 10 and 11, and how to Share Files, Stop Sharing and Restore Previous Versions of Files on Microsoft OneDrive.

Accessing the Default OneDrive Location on Windows 10

Open your Windows 10 system and locate the User’s folder or use this “C:\Users\Your User Account\OneDrive.”, you will see the OneDrive icon inside this location and when you click, it will open the OneDrive service where you can save your files.

This is the default location that comes with Windows 10.

Change OneDrive Folder Location
OneDrive Location

An alternative way to open OneDrive is by checking the right side of the taskbar, you would see OneDrive’s icon that looks like a cloud.

Relocate OneDrive Folder
OneDrive Icon

Another way you can access it is through the search box and type OneDrive
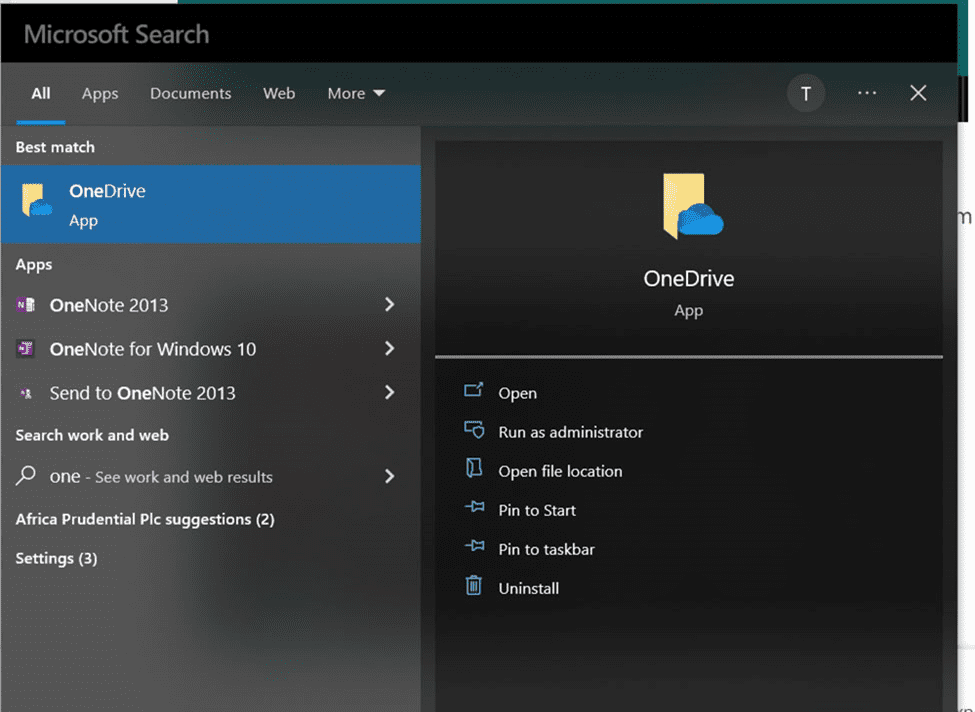
Transfer OneDrive Folder
OneDrive Shortcut

To access the setting right-click on the OneDrive icon and click on Settings

Moving OneDrive Folder
OneDrive Settings

Unlink OneDrive from Windows

On the next page called Microsoft OneDrive you need to select the Account tab, and then click Unlink this PC.

Change OneDrive Folder Location
Unlinking OneDrive

Immediately you click on the Unlink this PC OneDrive will inform you of all the actions that will be carried out once you click the button that will confirm the action.

This will make OneDrive to stop syncing your files, and this is a compulsory steps that must be carried out for you to be able to move the OneDrive folder to another location.

image-12
Unlinking your Account

Once this is done then the next step is to move your OneDrive folder from its original location to the location that you prefer. Open the default location for the OneDrive which is “C:\Users\Your User Account\OneDrive.”

Then select the OneDrive icon and click on Move to which will now open different folders or you can click on Choose location to select a new location for your OneDrive.

Also, see Files On-Demand with OneDrive: Microsoft OneDrive Setup On Windows 10 and 11 and Key Features Explained, and How to remove OneDrive from Windows.

Selecting Destination and Initiating OneDrive Move

Now make your choice of the folder or drive you to want for your OneDrive and click on the Move button to start moving the OneDrive. The time spent on the movement is dependent on the number of files available in the OneDrive.

image-13
Moving Items

Now go ahead to re-login to your Microsoft OneDrive account

image-14
OneDrive Login

Since we want to use a different location for the OneDrive, click “Change location” link.

You can now “Choose your OneDrive location.” Find and select the location where you moved the OneDrive folder on your system and click the Select Folder button.

image-15
OneDrive Folder

Moreover, OneDrive immediately detects that the OneDrive folder already exists on this PC before, you only need to confirm you still want to continue to use the folder.

image-16
OneDrive folder exist

Here are some intersting guides: Microsoft Phone Link: Connect Android to Windows 11, How to Disable or Uninstall OneDrive on Windows 10 and 11, and how to share Files and Restore Previous versions of Files in Microsoft OneDrive.

I hope you found this blog post on How to move OneDrive Folder to a Different Location in Windows 10 interesting and helpful. In case you have any questions do not hesitate to ask in the comment section.

Rate this post

Thank you for reading this post. Kindly share it with others.

  • Share on X (Opens in new window) X
  • Share on Reddit (Opens in new window) Reddit
  • Share on LinkedIn (Opens in new window) LinkedIn
  • Share on Facebook (Opens in new window) Facebook
  • Share on Pinterest (Opens in new window) Pinterest
  • Share on Tumblr (Opens in new window) Tumblr
  • Share on Telegram (Opens in new window) Telegram
  • Share on WhatsApp (Opens in new window) WhatsApp
  • Share on Mastodon (Opens in new window) Mastodon
  • Share on Bluesky (Opens in new window) Bluesky
  • Share on Threads (Opens in new window) Threads
  • Share on Nextdoor (Opens in new window) Nextdoor
Windows Tags:Microsoft Windows, OneDrive, Windows 10, Windows 11, Windows Server 2016

Post navigation

Previous Post: Focus on Tasks: Limit Distraction & Get Things Done on Windows
Next Post: SSH into a VM created using Azure CLI or GUI

Related Posts

  • WMi tools   WMI Explorer
    Query and display Windows information via WMI Explorer Network | Monitoring
  • banner 3
    How to Create a React App with Vite Version Control System
  • iso10
    Mount an ISO image in Windows 10 and 11 Windows
  • image 63
    What to do when your Remote Desktop Licensing Manager Server Crashes Windows
  • Data drive is locked by BitLocker and not OS drive Fastboot Option
    Fast Boot Options: Fix specific Drive issue with BitLocker [MBAM] Windows
  • Interactive logon Message for Users via Windows Registry
    Display logon banners for Windows PCs via Windows Registry Windows

More Related Articles

WMi tools   WMI Explorer Query and display Windows information via WMI Explorer Network | Monitoring
banner 3 How to Create a React App with Vite Version Control System
iso10 Mount an ISO image in Windows 10 and 11 Windows
image 63 What to do when your Remote Desktop Licensing Manager Server Crashes Windows
Data drive is locked by BitLocker and not OS drive Fastboot Option Fast Boot Options: Fix specific Drive issue with BitLocker [MBAM] Windows
Interactive logon Message for Users via Windows Registry Display logon banners for Windows PCs via Windows Registry Windows

Leave a Reply Cancel reply

You must be logged in to post a comment.

Microsoft MVP

VEEAMLEGEND

vexpert-badge-stars-5

Virtual Background

GoogleNews

Categories

veeaam100

Veeam Vanguard

  • proxmox
    Clone a Proxmox Container: CT Restoration Guide Virtualization
  • Nakivo windows server backup
    How to perform Windows Server backup with Nakivo or Windows Server backup utility Windows Server
  • Set a Resource Delete Lock
    How to Add a Delete Lock on Azure Resources AWS/Azure/OpenShift
  • Convert MP4 to MP3
    2 Free Ways to Convert MP4 to MP3 Reviews
  • Downgrade
    Downgrade VMware Workstation: Fix the Processor does not support xsave on VMware Workstation Virtualization
  • Featured image
    How to use the voice input instead of typing on Windows Windows
  • Screenshot 2020 11 17 at 02.06.58
    The PA Server Monitor review and product details Reviews
  • veeam.n2ws
    How to implement N2WS Backup & Recovery (CPM) Backup

Subscribe to Blog via Email

Enter your email address to subscribe to this blog and receive notifications of new posts by email.

Join 1,779 other subscribers
  • RSS - Posts
  • RSS - Comments
  • About
  • Authors
  • Write for us
  • Advertise with us
  • General Terms and Conditions
  • Privacy policy
  • Feedly
  • Telegram
  • Youtube
  • Facebook
  • Instagram
  • LinkedIn
  • Tumblr
  • Pinterest
  • Twitter
  • mastodon

Tags

Active Directory Azure Bitlocker Microsoft Windows PowerShell WDS Windows 10 Windows 11 Windows Deployment Services Windows Server 2016

Copyright © 2026 TechDirectArchive

Loading Comments...

You must be logged in to post a comment.