In this post, I will show you how to set up and use an upstream branch in Git. Git, the leading and widely used distributed version control system surpasses other systems like GitLab, BitBucket, and more. A version control system enables users to keep track of changes in software projects and collaborate on them. Please see How to Setup HTTPS users using Git credentials and Pushing Code to AWS CodeCommit and Git config –global init.defaultBranch: Error cannot lock ref ‘refs/remotes/origin/windows’, not a directory, and how to Configure SSL: WSUS Upstream & Downstream Servers,
Developers collaborate on code and separate their tasks via branches using it. There can be several branches in a version control system, according to the number of collaborators. Because the code changes remain in a specific branch, the branches retain their copies When necessary, developers can combine the code changes.
They can also view the history of changes, go back to previous version(s), and use/manage code as desired. GitHub allows software teams to collaborate while also keeping track of all code changes.
You can track code changes, go back in time to undo mistakes, and collaborate with other team members. It serves as a repository for Git projects. You might like to ask, what is Git?
What is Git?
It is an open-source version control system that features local branching, multiple workflows, and convenient staging areas. Git version control allows for faster operation. To learn more about Git and GitHub, please review the following related posts: Git command not found: How to fix Git is not recognized as an internal or external command.
GIT Vs GitHub
Many people sometimes misinterpreted Git and GitHub to mean the same thing. In actuality, they mean different things. To put it simply, Git is a version control system that allows you to manage and track the history of your source code.
GitHub, a cloud-based hosting service, enables you to manage Git repositories. If you have open-source projects that use Git, GitHub is the right hosting platform to manage them with you.
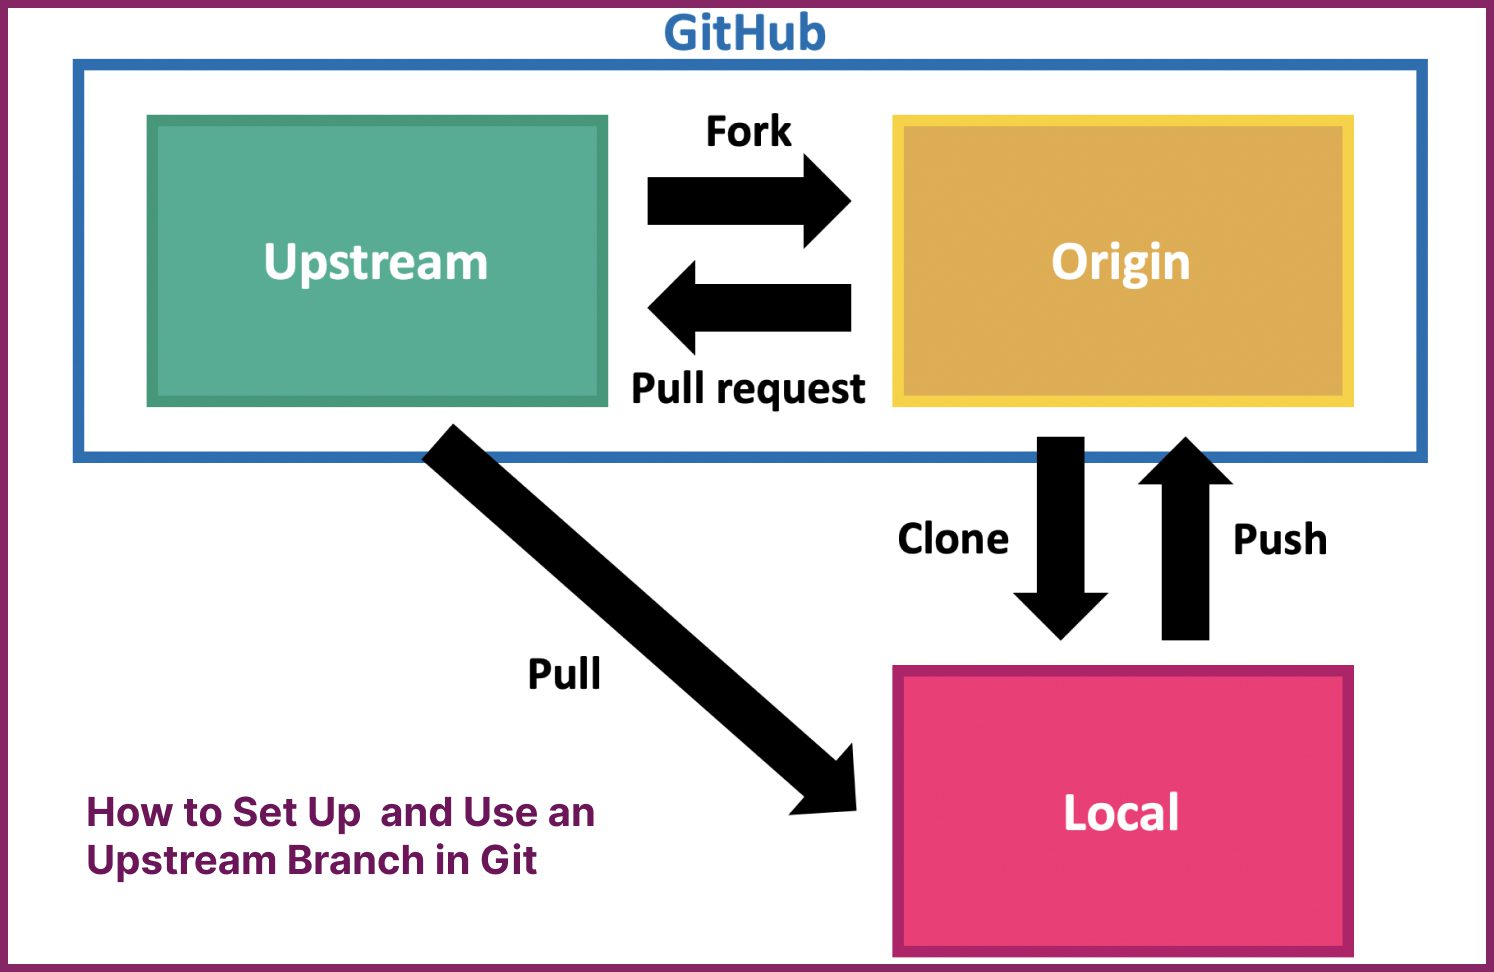
Understanding an Upstream Branch
To clone a new repository or work with various feature branches, you must grasp working with upstream branches and their setup. Remote branches are closely connected with upstream branches.
Upstream branches define which branch your local remote branch follows on the remote repository, commonly known as the remote tracking branch.

Here are some excellent articles: Git Vulnerability: Git for Windows uninstaller is vulnerable to DLL hijacking when run under the SYSTEM user account, and how to Install Git on Windows: The term “git” was not used as the name of a cmdlet, function, script file, or executable Program recognized,
Setting Up An Upstream Branch
When creating a new branch or working with existing branches, knowing how to set upstream branches on Git can be very helpful.
There are various methods of setting up Upstream branches in Git. The methods are:
Method 1- Using the git push command
The simplest method is to use the “git push” command with the “-u” option for upstream branch. We are going to do this by creating a local folder and initialize it for git using the Git Bash Terminal. To install Git Bash terminal click here.
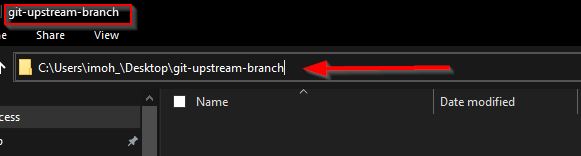
First, create a folder on your Desktop or any other location within your system preferable to you. Here, I have created one called git-upstream-branch and it’s currently empty.
To be able to use the folder to set up an upstream branch in Git, we need to run the git init command to initialize the empty folder and make it git-ready.
Open your git bash terminal and navigate to the empty folder created you before and run:
git init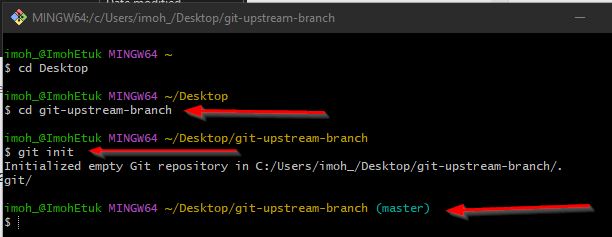
git init CommandAs you can see from the screenshot above, we’re directly on the master branch.
Now add a file. It can be any txt file e.g. file1.txt to the folder. To create a file type:
touch file1.txt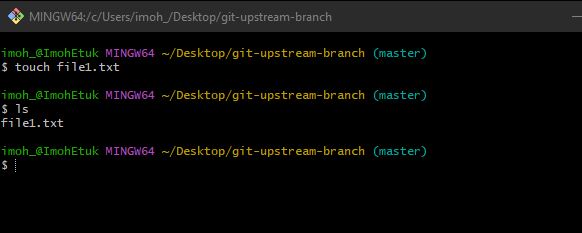
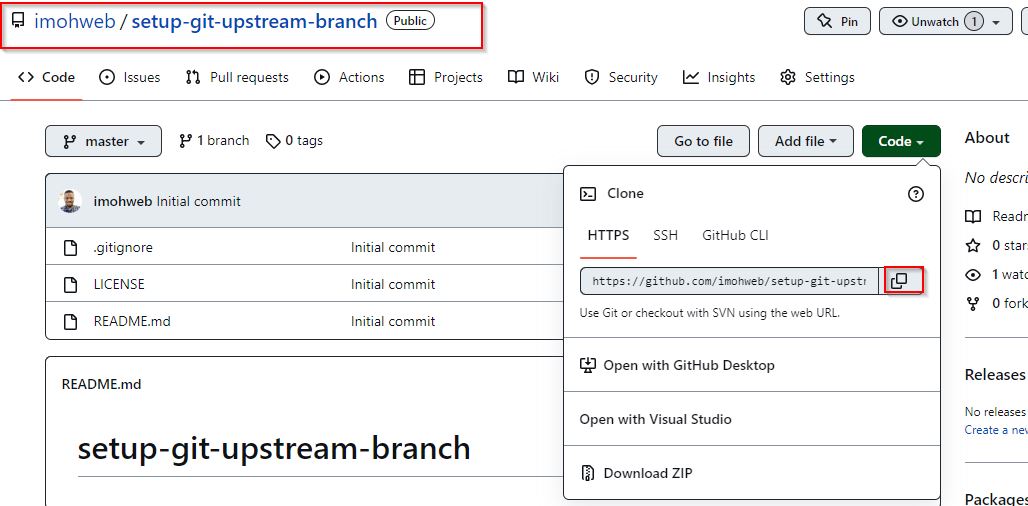
Now, add, commit and push the file to your remote GitHub repository. Review this post to learn how to create your first remote repository on GitHub. I have created my remote repo already as shown in the screenshot below:
Now to set upstream branches, run any of the command below:
$git push -u <remote> <branch> OR $git push --set-upstream <remote> <branch>
Let’s create a branch called upstreamb with the command git branch <branchname> or git checkout -b <branchname>. After creating the branch, run the below command to switch to it:
$git switch <branchname>

Running the git branch command with the -vv flag allows you to inspect tracking branches.

Setting Up and Tracking for ‘upstreamb’
As you can clearly see, the branch upstreamb has no tracking branches compared to master and no upstream branches as well.
Now we can setup the upstream branch using the “git push” command for the new branch "upstreamb".
To so, I created a file called file3.txt added and committed it and then run either of the commands below:
$git push -u <remote> <branch> OR $git push --set-upstream <remote> <branch>
"upstreamb"Let’s have a look at the tracking branches again with the branch command, "git branch -vv".
Now you have successfully set the upstream branch for your newly created branch and git is tracking it.
Method 2 – Set upstream branch using an alias
You can configure the upstream branch by creating an alias for the “git push” command. Note, pushing to HEAD is actually the same as pushing to a remote branch with the same name as your current branch. To setup upstream branch using alias, run:
$git config --global alias.pushd "push -u origin HEAD"After adding and committing files to your repository, utilize the command below with your defined alias to set the upstream branch.
git pushd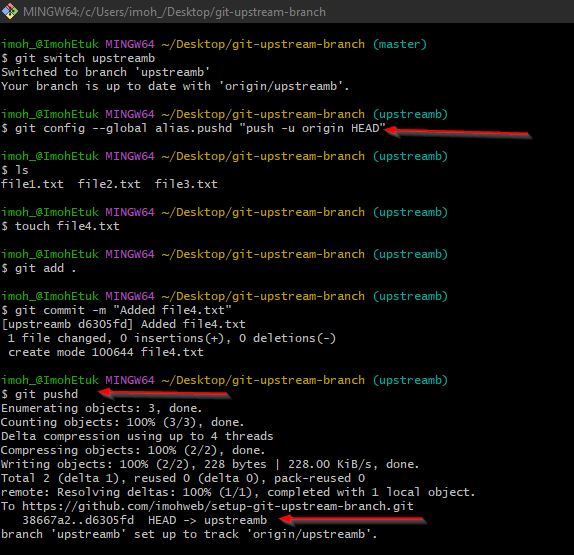
As you can the upstream branch has been set to "HEAD -> upstreamb"
Method 3 – Set up Upstream Branch using a bash alias
If you don’t want to change your existing git commands, you can use a bash alias. To do this, create a new bash alias with the "alias" command and give it a name, run:
$alias gp='git push -u origin HEAD'Create a new branch and use our alias to easily push our code and create the upstream branch with the command below:
$git checkout -b <branchname>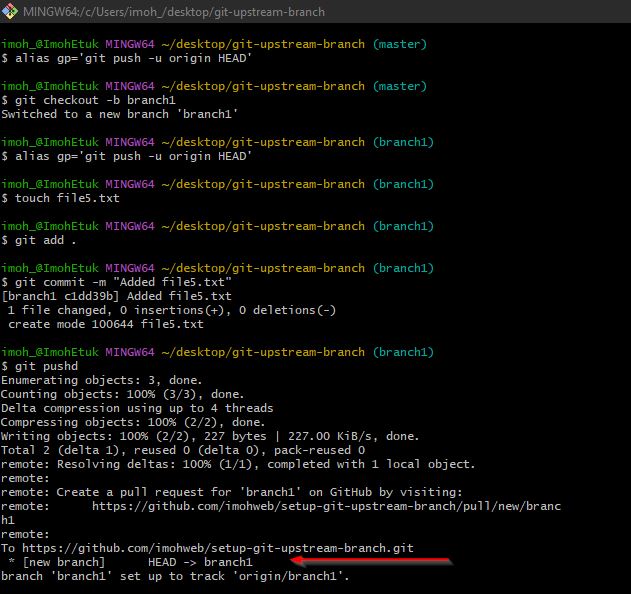
Please see How to install Git on macOS, How to Overlay two files with UnionFs in a Linux System, and How to Migrate Azure Web Apps.
Method 4 – Set upstream branch for an existing remote branch
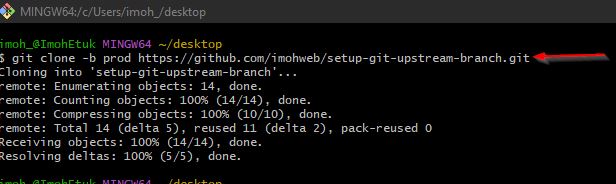
In some cases, you may want to connect your local branches to remote branches that you have just pulled or cloned from the main repository. Assuming you pulled a branch named the "prod" branch from the "origin" remote. As a result, the tracking branch is known as "origin/prod".

Set new local branches as tracking branches
Use the "-track" option to switch to the local "prod” branch and set the "origin/prod" as the tracking branch or upstream branch by typing the command below:
$ git checkout --track origin/prod

Branch 'prod' set up to track remote branch 'prod' from 'origin'.
Switched to a new branch 'prod'
Use the "git branch" command to confirm that you linked 'prod' to the tracking branch "origin/prod" which upstream branch is the remote prod.
$git branch -vv
Set existing local branches as tracking branches
You may, on the other hand, have chosen to work on a local branch while creating the upstream branch (or the remote tracking branch later on). Consider a scenario where you have created a "feature" branch to work with.

Let’s assume you made some commits in your branch and want to make the tracking branch master by running the command below:
$ git branch -u origin/master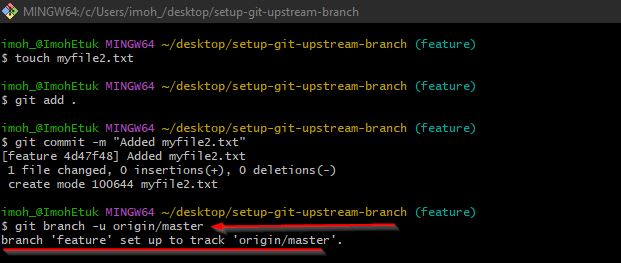
You can see from the screenshot the 'feature' branch have set up to track 'origin/master'
Why are upstream branches important in Git?
Setting Upstream branches is important for the following reasons:
- It allows you to set the default remote branch for your current local branch.
- Upstream branches are extremely useful for collaboration. They simplify pushing and pulling from remote branches by allowing us to use the Git Push and Git Pull commands without specifying the remote or branch name.
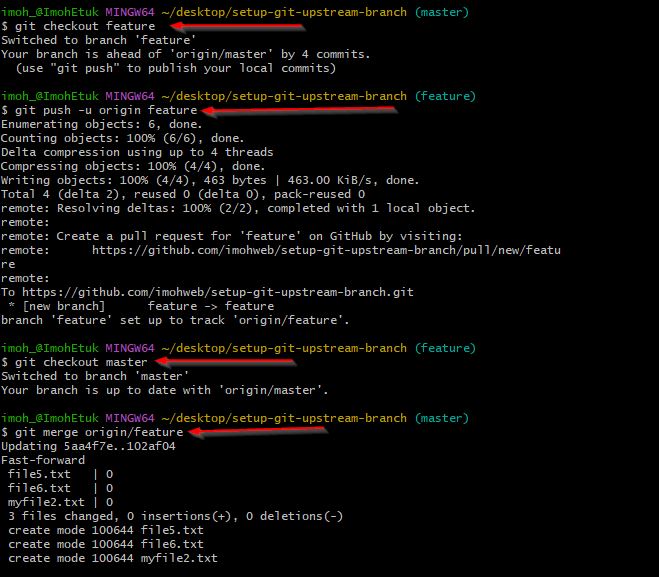
- Another significant benefit of establishing Source is that we can easily compare our local branch to the remote branch. Git displays information such as the number of commits ahead or behind the remote branch and makes it easy for us to merge them together as shown in the images below:

Congratulations! You’ve learnt how to set up and use upstream branches in Git.
I hope you found this blog post helpful. Please let me know in the comment section if you have any questions.


