Skip to content

TechDirectArchive

Hands-on IT, Cloud, Security, Veeam & DevOps

  • Home
  • About
  • Advertise With US
  • Contact
  • Reviews
  • Toggle search form

How to install WireShark on a Linux Ubuntu System

Posted on 28/09/202215/07/2023 Raphael Gab-Momoh By Raphael Gab-Momoh No Comments on How to install WireShark on a Linux Ubuntu System
  1. Home
  2. Linux
  3. How to install WireShark on a Linux Ubuntu System
WireShark

Wireshark is a free and open-source packet analyzer. In addition, it is utilized for network troubleshooting, analysis, software development, communications protocol development, and instruction. Whether you’re a network administrator, developer, or security professional, installing Wireshark on your system will provide valuable insights into your network’s activities This article will show you how to install Wireshark on Linux. The commands will also work for older versions of Ubuntu as well. Other valuable articles can be found here: How to Install PlayonLinux on a Linux System and How to install Windows Server 2022 on VirtualBox and How to Set Up and Use an Upstream Branch in Git andHow to install and Uninstall Discord in a Linux System and How to install Unison on a Linux System also How to install Redis on a Linux System.

Prerequisites to Install Wireshark on Linux

  1. Ubuntu machine any version from 14.01 but for this exercise, we shall be using 22.04
  2. A user account with sudo privileges
  3. Command line interface

To install Wireshark on Linux, follow the steps below:

Step1. Update Package Index and System Dependencies

Run the following command on command line to update the core libraries:

sudo apt update 
How to install WireShark on a Linux-packagesu
packages

Step2: Install Wireshark on Linux

Run the following command on command line to install wireshark on ubuntu system:
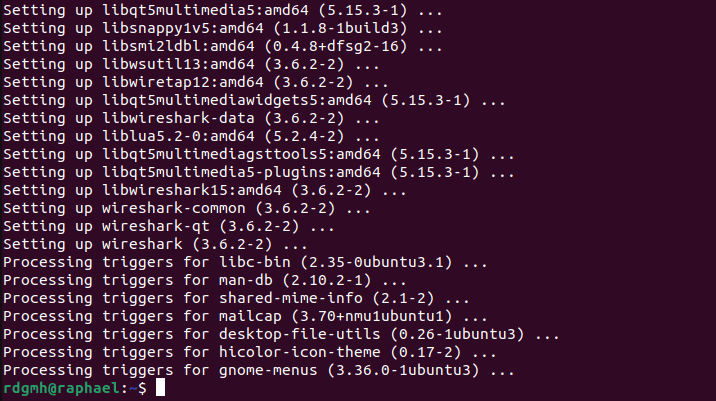
sudo apt install wireshark

When prompted for a yes or a no, leave it in the default settings.

How to install WireShark on a Linux-promo
wireshark configuration
How to install WireShark on a Linux-wireshack-installation-complete
wireshark installation complete

Step3: Verify Wireshark Installation on Linux Ubuntu

Use the command line to check if Wireshark was successfully installed on Ubuntu 22.04:

wireshark --version
wirev
wireshark version

Step4: Launch Wireshark

After installation, proceed to launch Wireshark on Ubuntu system. Thus, by default, Wireshark requires root privileges to capture network traffic. However, running Wireshark with root permissions is not recommended due to security concerns. To allow non-root users to capture packets, you need to grant them the necessary permissions.

Run the following command on command line to launch Wireshark on Ubuntu:

sudo wireshark
launw
wireshark launched

Step5 : Uninstall Wireshark

Run the following command on command line to remove Wireshark from Ubuntu:

removed
wireshark removed

Summary

In conclusion, by following the steps above, you’ll be able to install Wireshark on your Linux successfully.

Rate this post

Thank you for reading this post. Kindly share it with others.

  • Share on X (Opens in new window) X
  • Share on Reddit (Opens in new window) Reddit
  • Share on LinkedIn (Opens in new window) LinkedIn
  • Share on Facebook (Opens in new window) Facebook
  • Share on Pinterest (Opens in new window) Pinterest
  • Share on Tumblr (Opens in new window) Tumblr
  • Share on Telegram (Opens in new window) Telegram
  • Share on WhatsApp (Opens in new window) WhatsApp
  • Share on Mastodon (Opens in new window) Mastodon
  • Share on Bluesky (Opens in new window) Bluesky
  • Share on Threads (Opens in new window) Threads
  • Share on Nextdoor (Opens in new window) Nextdoor
Linux

Post navigation

Previous Post: How to Install PlayonLinux on a Linux System
Next Post: How to Install and Uninstall Yarn on Ubuntu Linux

Related Posts

  • SUBVERSION FEATURE
    How to Install Apache Subversion on a Linux System Linux
  • How to create edit save exit file
    Mastering Vim in Linux: How to Create, Edit, Save, and Quit Files Linux
  • Slide2 1
    SU Authentication Fix: Sudo Permission Denied in Ubuntu Linux
  • image 36
    Keepalive Settings: Understanding keepalive configuration Linux
  • feature photo quit vim
    How to Exit Linux Vim or Vi Editor Linux
  • fimage2
    How to install and configure JIRA on Linux Linux

More Related Articles

SUBVERSION FEATURE How to Install Apache Subversion on a Linux System Linux
How to create edit save exit file Mastering Vim in Linux: How to Create, Edit, Save, and Quit Files Linux
Slide2 1 SU Authentication Fix: Sudo Permission Denied in Ubuntu Linux
image 36 Keepalive Settings: Understanding keepalive configuration Linux
feature photo quit vim How to Exit Linux Vim or Vi Editor Linux
fimage2 How to install and configure JIRA on Linux Linux

Leave a Reply Cancel reply

You must be logged in to post a comment.

Microsoft MVP

VEEAMLEGEND

vexpert-badge-stars-5

Virtual Background

GoogleNews

Categories

veeaam100

Veeam Vanguard

  • Veeam Agent Error Fix
    Fixing AIX Veeam agent job startup delay issue Network | Monitoring
  • Azure VMware Solution Private Cloud
    How To Deploy Azure VMware Solution Private Cloud AWS/Azure/OpenShift
  • Linux basic commands Linux
  • Configure SQL Server to listen on a specific TCP port
    Configure SQL Server Instance to listen on a specific TCP Port Oracle/MSSQL/MySQL
  • Featured image BSOD
    How to troubleshoot and fix Windows 11 blue screen Windows
  • maxresdefault 2 4
    Setup RAID 5 and 10 with MegaRAID Storage Manager on RX300 S5 Network | Monitoring
  • what is winrm
    WinRM cannot complete the operation, verify that the specified computer name is valid Windows
  • 785509289 780x439
    Errors associated with Pleasant Password Password Manager

Subscribe to Blog via Email

Enter your email address to subscribe to this blog and receive notifications of new posts by email.

Join 1,796 other subscribers
  • RSS - Posts
  • RSS - Comments
  • About
  • Authors
  • Write for us
  • Advertise with us
  • General Terms and Conditions
  • Privacy policy
  • Feedly
  • Telegram
  • Youtube
  • Facebook
  • Instagram
  • LinkedIn
  • Tumblr
  • Pinterest
  • Twitter
  • mastodon

Tags

Active Directory Azure Bitlocker Microsoft Windows PowerShell WDS Windows 10 Windows 11 Windows Deployment Services Windows Server 2016

Copyright © 2025 TechDirectArchive

Loading Comments...

You must be logged in to post a comment.