Skip to content

TechDirectArchive

Hands-on IT, Cloud, Security, Veeam & DevOps

  • Home
  • About
  • Advertise With US
  • Reviews
  • Contact
  • Toggle search form

Create a Password-Protected VHD Using BitLocker on Windows

Posted on 31/07/202329/05/2026 Matthew By Matthew No Comments on Create a Password-Protected VHD Using BitLocker on Windows
  1. Home
  2. Windows
  3. Create a Password-Protected VHD Using BitLocker on Windows
Feature image_Password protect a virtual hard disk
How to Create a Password-Protected VHD Using BitLocker on Windows 11

Windows 11 provides users with a robust set of security features to safeguard their data. While the operating system doesn’t offer a native option to password-protect individual folders, you can leverage Windows’ built-in encryption tools to achieve a similar level of security. In this guide, you will learn how to Create a Password-Protected VHD Using BitLocker on Windows 11. Please see how to Integrate Jira Software with GitHub Cloud, How to convert VHDX file to VHD, and BitLocker System Partition: Detailed steps to troubleshoot and fix System Partition not available or large enough [Part 2].

By combining a virtual hard disk with BitLocker encryption, you can effectively protect your valuable files, important documents, and personal data from unauthorized access. This comprehensive guide will walk you through the step-by-step process of setting up password protection for your folders on Windows 11.

Please see the Complete Guide on TestRail as a Test Management Tool, and How to Solve the error “Group Policy Settings for BitLocker Startup Options are in Conflict and cannot be Applied”.

Steps to Password Protect a Folder with BitLocker in Windows 11

Please follow the steps below to create a Password-Protected VHD Using BitLocker on Windows 11.

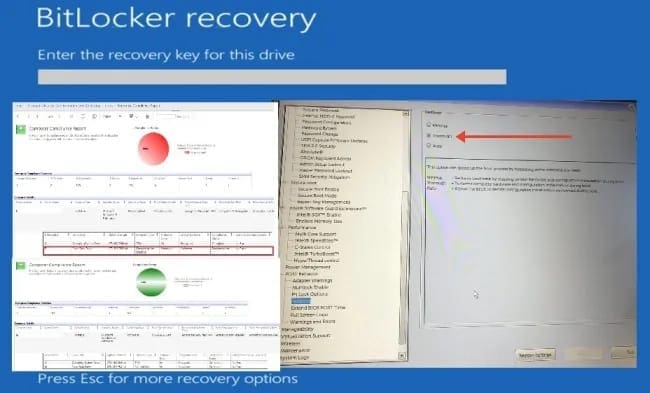
Other related guides to read: How and where to find your BitLocker recovery key on Windows, How to Disable BitLocker on Windows 10, the Reasons for BitLocker Recovery Mode Prompt, and Unable to find my BitLocker Recovery Key.

Step 1: Creating a Virtual Hard Disk

Type “diskmgmt.msc” in the Start menu and select Disk Management app from the search results.

How to Create a Password Protected VHD Using BitLocker on Windows 11: Open disk management in Start menu
Open disk management in Start menu

In the Disk Management window, click on the “Action” menu, and then select “Create VHD” (Virtual Hard Disk).

How to Create a Password Protected VHD Using BitLocker on Windows 11: Create a virtual disk folder
Create a virtual disk folder

Click the Browse button to choose a suitable location to store the virtual disk folder and give it a name (e.g., “Private_vault”).

How to Create a Password Protected VHD Using BitLocker on Windows 11: Select folder location for Virtual Hard Disk
Select folder location for Virtual Hard Disk

Specify the amount of storage space you want to reserve for the virtual disk. The size will depend on the content you wish to protect (e.g., 2GB or more).

How to Create a Password Protected VHD Using BitLocker on Windows 11: Specify size for the virtual hard disk
Specify size for the virtual hard disk

Optionally, select the VHDX format for the virtual hard disk, which provides better performance and reliability. Also, choose the “Dynamically expanding” option to allow the storage to grow as you add files. Click “OK” to create the virtual hard disk.

Please see how to Embed Microsoft Forms into Your Website Page, Master Your Sound Experience: How to Manage Audio Settings on Windows 11, and 3 Ways to Convert VMware VMs to Hyper-V.

Initialize Disk

Right-click on the newly created virtual disk and select “Initialize Disk.”

How to Create a Password Protected VHD Using BitLocker on Windows 11: Initialize virtual disk
Initialize virtual disk

Choose the “MBR (Master Boot Record)” option and click “OK.”

How to Create a Password Protected VHD Using BitLocker on Windows 11: Select the partition style
Select the partition style

Next, right-click on the “Unallocated space” and select “New Simple Volume.”

Create a new volume
Create a new volume

On the Welcome screen, click Next. On the Specify Volume Size, use the default settings for the volume size.

Specify Volume Size
Specify Volume Size

Assign a drive letter to the virtual space or leave the default settings.

Assign Drive Letter or Path

In the Format Partition table, change the Volume label to the virtual disk name (e.g. Private_vault). Leave the other settings and click Next.

Format partition
Format partition

On the “Completing the New Simple Volume Wizard“, click Finish.

Create virtual disk partition

Please see “How to create and add a new virtual disk to a VM on VMware Workstation_oldPost“, and Initialize and format a virtual disk: How to add and remove a new virtual disk from a VM on VMware Workstation.

Step 2: Enabling BitLocker Encryption

Type “Manage BitLocker” in the Start menu and BitLocker from the search result.

Open BitLocker Settings

Under the “Fixed data drives” section, locate and select the virtual hard disk named “Private_vault.” Click on the “Turn on BitLocker” option to enable encryption for the virtual disk.

Turn on BitLocker Encryption

Choose the “Use a password to unlock the drive” option and create a strong password. Ensure you save the recovery key to a secure location or link it to your Microsoft account for recovery options.

Choose the virtual disk unclock type

Select the “Encrypt used disk space only” option for faster encryption.

Encrypt used disk space only

Click “Start encryption” to initiate the BitLocker encryption process.

Click Start encrypting

Please see “Hyper V Disk allocation: Why Veeam reports full size after Shrinking, and how to Increase Disk Size in Hyper-V.

Step 3: Locking and Unlocking Protected Folders

To unlock folders protected with a password, open File Explorer and navigate to the location containing the “Private_vault.vhd” file.

Navigate to the virtual drive location

Double-click the “Private_vault.vhd” file to mount it as a virtual drive. You will be prompted to enter the password you set during the BitLocker setup.

Access your virtual space

Upon entering the correct password, the virtual drive will be unlocked, allowing you to access your important files and folders.

To lock the folder again, simply eject the virtual drive (BitLocker encrypted drive) from File Explorer.

Eject virtual drive
Eject virtual drive

If you want to disable BitLocker, read How to Disable BitLocker on Windows 10.

Conclusion:

By following step-by-step guide, you can effectively protect your sensitive data with password encryption on Windows 11. The combination of a virtual hard disk and BitLocker encryption offers a secure and built-in solution to keep your valuable files safe from unauthorized access.

Remember to keep the password and recovery key secure, as losing them may result in permanent data loss. With this powerful encryption method, you can confidently protect your folders and maintain control over who can access your private data.

I hope you found this blog post helpful on how to Create a Password-Protected VHD Using BitLocker on Windows 11. Please let me know in the comment section if you have any questions.

5/5 - (1 vote)

Thank you for reading this post. Kindly share it with others.

  • Share on X (Opens in new window) X
  • Share on Reddit (Opens in new window) Reddit
  • Share on LinkedIn (Opens in new window) LinkedIn
  • Share on Facebook (Opens in new window) Facebook
  • Share on Pinterest (Opens in new window) Pinterest
  • Share on Tumblr (Opens in new window) Tumblr
  • Share on Telegram (Opens in new window) Telegram
  • Share on WhatsApp (Opens in new window) WhatsApp
  • Share on Mastodon (Opens in new window) Mastodon
  • Share on Bluesky (Opens in new window) Bluesky
  • Share on Threads (Opens in new window) Threads
  • Share on Nextdoor (Opens in new window) Nextdoor
Windows Tags:Bitlocker, BitLocker Backup, BitLocker Drive Encryption Tools, bitlocker key, BitLocker Key Recovery, BitLocker Recovery Keys, bitlocker vhd, bitlocker virtual drive setup guide, create vhd, disk, Disk Partition, encrypted virtual disk windows guide, how to create a password protected vhd using bitlocker on windows 11, how to encrypt vhd with bitlocker windows 10, Microsoft Windows, mount encrypted vhd windows, protect vhd file with password windows, secure virtual hard disk bitlocker tutorial, step by step bitlocker vhd creation windows, vhd encryption, vhdx password protection, Windows 10, Windows 11, windows disk image encryption, windows virtual hard disk protection

Post navigation

Previous Post: How to Embed Microsoft Forms into Your Website Page
Next Post: How to Fix Windows Update Error Code 0xC1900101 – 0x30018

Related Posts

  • Prevent Local Administrators from turning off BitLocker 1
    Prevent Local Administrators from managing BitLocker with the manage-bde command Windows
  • blog banner 1
    Reset and reinstall Windows 10 from the cloud and how to recover your Windows 10 when you cannot boot to Windows Windows
  • screenshot 2020 02 09 at 21.47.28
    How to find Computer Model and Serial Number Windows
  • RDP
    The connection was denied because the user is not authorized for remote Login: Enable Remote Desktop Connection on Windows 11 for non-administrators or selected users Windows
  • image 41
    INACCESSIBLE BOOT DEVICE: Fix Your PC ran into a problem and needs to restart Windows
  • Prevent Standard Users from Changing BitLocker Password
    How to Prevent Standard Users from Changing BitLocker Password Windows

More Related Articles

Prevent Local Administrators from turning off BitLocker 1 Prevent Local Administrators from managing BitLocker with the manage-bde command Windows
blog banner 1 Reset and reinstall Windows 10 from the cloud and how to recover your Windows 10 when you cannot boot to Windows Windows
screenshot 2020 02 09 at 21.47.28 How to find Computer Model and Serial Number Windows
RDP The connection was denied because the user is not authorized for remote Login: Enable Remote Desktop Connection on Windows 11 for non-administrators or selected users Windows
image 41 INACCESSIBLE BOOT DEVICE: Fix Your PC ran into a problem and needs to restart Windows
Prevent Standard Users from Changing BitLocker Password How to Prevent Standard Users from Changing BitLocker Password Windows

Leave a Reply Cancel reply

You must be logged in to post a comment.

Microsoft MVP

VEEAMLEGEND

vexpert-badge-stars-5

Virtual Background

GoogleNews

Categories

veeaam100

Veeam Vanguard

  • Perform Site Maintenance or reset this site greyed out
    Fix “Perform Site Maintenance or reset this site” greyed out Windows Server
  • screenshot 2020 05 03 at 18.30.44
    How to Activate Cisco ASA 5505 License Network | Monitoring
  • Veeam Data cloud   VDC Enrollment
    A-Z on Veeam Data Cloud: Workload Enrollment and Onboarding Backup
  • sshfs
    Mounting remote directory using sshfs Linux
  • Veeam
    Install and configure Veeam Backup and Replication Community Edition Backup
  • scandium
    How to Test Web Applications Using Scandium Configuration Management Tool
  • 1 kajkbmlyehn0inifwrh 8w 1
    What to note when settings up Ansible to work with Kerberos Configuration Management Tool
  • preometheus
    Monitoring Synology with Prometheus and Grafana Reviews

Subscribe to Blog via Email

Enter your email address to subscribe to this blog and receive notifications of new posts by email.

Join 1,796 other subscribers
  • RSS - Posts
  • RSS - Comments
  • About
  • Authors
  • Write for us
  • Advertise with us
  • General Terms and Conditions
  • Privacy policy
  • Feedly
  • Telegram
  • Youtube
  • Facebook
  • Instagram
  • LinkedIn
  • Tumblr
  • Pinterest
  • Twitter
  • mastodon

Tags

Active Directory Azure Bitlocker Microsoft Windows PowerShell WDS Windows 10 Windows 11 Windows Deployment Services Windows Server 2016

Copyright © 2025 TechDirectArchive

Loading Comments...

You must be logged in to post a comment.