Dockerizing a NodeJs Express Application

This post will walk you through a step-by-step demonstration of Dockerizing a NodeJs Express application. In the world of containerization, Docker has constantly played a huge role in helping us shape the way modern software is developed. When an application is “dockerized,” its dependencies, environment variables, and other requirements are all included in a Docker image. A Docker container is then created for the application based on the image. Please see how to Download and install MSSQL 2019 Express Edition and SSMS on Windows Server.
While a Docker container is a running instance of a Docker Image, an Image serves as its blueprint or a recipe for creating a Docker container. An image is a self-contained package that includes everything needed to run an application. Such things include code, runtime, system tools, system libraries, and settings.
You can think of it as a pre-configured template that you can use to create multiple containers quickly and easily. This guide will show you how to containerize your Node.js applications with Docker, otherwise known as Dockerizing Node.js applications.
You may want to see how to delete ADFS Windows Internal Database without access credentials, How to manually update Docker desktop, and how to install Node.js on Ubuntu.
Why Dockerize Your Node.js or Any Other Type of Application?
Are you building an application that will be available anywhere aside from your local machine? Are you planning to share your application images with other collaborators? Do you want to introduce automation into your application development process?
If your answer to the above questions is yes, then Dockerizing or containerizing your application is the best thing to do. By the end of this post, you will be able to:
- What is Docker, and what is it used for?
- Create and use a Dockerfile
- Run a Node.js application using Docker
- Create and push your codes to a GitHub Repository
- Tag your Docker Image and push it to the Docker Hub
- Pull the Docker Image back to your local machine
Prerequisites for Dockerizing a NodeJs Express Application
To follow along every step of the way in this tutorial, you will need to have the following:
- A recent version of Node.js v20.11.0 LTS
- Docker version 24.0.7. Refer to the previous post on how to install Docker on Windows by clicking here. For Linux users, see how to install the Docker engine on Ubuntu.
- npm v9.5.0 or higher. npm is a package manager for JavaScript and the default package manager for Node.
- Your own Git repository.
- A Docker Hub account.
Get started by cloning the repository for the project if you want to get started with my code already in my GitHub repository. If you are not cloning the repo and wish to do it from scratch, follow the steps below:
Step 1: Create a Git Repository
To create an empty repository, go to GitHub.

Step 2: Install ExpressJS
In my case, I have Node.js and Docker already installed. So I will just get started with the installation of npm and ExpressJs since we will be using the basic Express application.
Run the below command to install the basic ExpressJs application into a sub-directory called src:
npm express-generator --no-view 
Setting the folder structure for your project
In this project, I set the root directory to new-docker-app on my local system with a sub-directorysrc.
Now change the directory to the src sub-directory and run the ls command to view the available files generated while installing the ExpressJs application.

As you can see, several files were created when we installed the ExpressJS application. Ensure that you run npm install so that it can get all of your Node.js modules set up and ready to use. Run npm install.

The purpose of this application is to develop an API app that stores people’s names in an addressbook that uses a Postgres database.
Also, see how to stop Docker from automatically starting on Mac, How To Encrypt Email Sent In Microsoft Outlook, and “Enable or Disable hibernation: How to fix the missing fast startup option on Windows“.
Step 3: Add a Route
Routes are used to manage each HTTP request in the Express starter project. The initial project includes some sample routes, and we’ll be adding an additional one specifically for handling our API calls.
To add a route, create a file known as person.js in the route directory. Add the below code to the file.
// persons.js

var express = require('express');

var router = express.Router();

var db = require('../database');
router.get("/all", function(req, res) {

    db.Person.findAll()

        .then( persons => {

            res.status(200).send(JSON.stringify(persons));

        })

        .catch( err => {

            res.status(500).send(JSON.stringify(err));

        });
});
router.get("/:id", function(req, res) {

    db.Person.findByPk(req.params.id)

        .then( person => {

            res.status(200).send(JSON.stringify(person));

        })

        .catch( err => {

            res.status(500).send(JSON.stringify(err));

        });
});
router.put("/", function(req, res) {

    db.Person.create({

        firstName: req.body.firstName,

        lastName: req.body.lastName,

        id: req.body.id

        })

        .then( person => {

            res.status(200).send(JSON.stringify(person));

        })

        .catch( err => {

            res.status(500).send(JSON.stringify(err));

        });

});
router.delete("/:id", function(req, res) {

    db.Person.destroy({

        where: {

            id: req.params.id

        }

        })

        .then( () => {

            res.status(200).send();

        })

        .catch( err => {

            res.status(500).send(JSON.stringify(err));

        });

});
module.exports = router;
This file incorporates all the API methods that our application will endorse, allowing us to:
Retrieve information for all persons, create a new person entry, retrieve details for a specific person by their ID, and remove a person’s record.
Each route provides person information encoded in JSON format. See the Missing Windows Defender? Install and manage Microsoft Defender via Windows Security on Windows Server
Step 4: Setting up the Database
A database is required to store all person data. Here, we will use a PostgreSQL database to store the contact details. To do this, we will do the following:
1: Install the PostgreSQL node driver and sequelize ORM using the below command:
$ npm install --save pg sequelize
Sequelize creates the first tables in the database and manages all of our SQL code.
2. The next step is to create a file called database.js with the below codes:
// database.js


const Sequelize = require('sequelize');

const sequelize = new Sequelize(process.env.DB_SCHEMA || 'postgres',

                                process.env.DB_USER || 'postgres',

                                process.env.DB_PASSWORD || '',

                                {

                                    host: process.env.DB_HOST || 'localhost',

                                    port: process.env.DB_PORT || 5432,

                                    dialect: 'postgres',

                                    dialectOptions: {

                                        ssl: process.env.DB_SSL == "true"

                                    }

                                });

const Person = sequelize.define('Person', {

    firstName: {

        type: Sequelize.STRING,

        allowNull: false

    },

    lastName: {

        type: Sequelize.STRING,

        allowNull: true

    },
});

module.exports = {

    sequelize: sequelize,

    Person: Person

};
The database file specifies the PostgreSQL and person model connection parameters. FirstName, lastName, DOB, and City are the only four fields in the model; if you want to experiment, you can add other fields.
Create a new file for database migration at bin/magrate.js. The bin directory should be placed under the src directory. Add the following codes to the migrate.js file:
// bin/migrate.js


var db = require('../database.js');

db.sequelize.sync();
3. Add a database test to the database using Jest, a JavaScript testing library. Run the below code to install Jest in your project.

Now create a file called database.test.js and add the codes below:
const db = require('./database');


beforeAll(async () => {

    await db.sequelize.sync({ force: true });

});


test('create person', async () => {

    expect.assertions(1);

    const person = await db.Person.create({

        id: 1,

        firstName: 'Imoh',

        lastName: 'Etuk'

    });

    expect(person.id).toEqual(1);

});


test('get person', async () => {

    expect.assertions(2);

    const person = await db.Person.findByPk(1);

    expect(person.firstName).toEqual('Imoh');

    expect(person.lastName).toEqual('Etuk');

});


test('delete person', async () => {

    expect.assertions(1);

    await db.Person.destroy({

        where: {

            id: 1

        }

    });

    const person = await db.Person.findByPk(1);

    expect(person).toBeNull();

});


afterAll(async () => {

    await db.sequelize.close();

});
4. Modify the package.json file to include the below codes:
 "scripts": {
    "start": "node ./bin/www",
    "test": "jest",
    "migrate": "node ./bin/migrate.js"
  },
The test code will go through all the basic database operations, such as creating an initial table with sync(), creating a person, getting the person and deleting the person.
Step 5: Start the Application
It is time to start the application, but before then, we need to add new routes to the main file: app.js.
To do this, create persons router object near the index router and app.use near the second index router:

Now let’s start the application by running:
npm start
Step 6: Dokerizing the NodeJs Express Application
To Dockerize the app, we will do the following:
Creating a Dockerfile
A Dockerfile is a text file that contains the instructions needed to create a new container image. Docker builds images automatically by reading the instructions from a Dockerfile. We create a Dockerfile with the following codes:
# Dockerfile


FROM node:18.16.0-alpine3.17

RUN mkdir -p /opt/app

WORKDIR /opt/app

COPY src/package.json src/package-lock.json .

RUN npm install

COPY src/ .

EXPOSE 5000

CMD [ "npm", "start"]
Add a Docker Ignore File
In the dockerignore file, add the following files:
.git
.gitignore
It is recommended to add all the Node modules to the Docker Ignore file.
src/node_modules/
Building a Docker Image
To build the Docker image, run the code below. If you’re using the Git Bash Terminal to run the command, add the winpty command:
winpty docker build -t addressbook .
Create a Docker Compose File
A Docker Compose file is a YAML (Yet Another Markup Language) file used to define and configure multi-container Docker applications.
Docker Compose allows you to define a group of interconnected containers, their configurations, networks, and volumes in a single file, making it easier to manage and deploy complex applications with multiple services.
Create a file called docker-compose.yml with the below codes:
# docker-compose.yml
# docker-compose.yml
version: "3.9"

services:

  postgres:

    image: postgres:latest

    environment:

      POSTGRES_USER: postgres

      POSTGRES_PASSWORD: postgres

    ports:

      - '5432:5432'

    volumes:

      - addressbook-db:/var/lib/postgresql/data
  addressbook:

    build:

      context: .

    environment:

      DB_SCHEMA: postgres

      DB_USER: postgres

      DB_PASSWORD: postgres

      DB_HOST: postgres

    depends_on:

      - postgres

    ports:

      - '3000:3000'


volumes:

  addressbook-db:
Now run the Docker Compose file using the below commands:
docker compoose run addressbook npm test
Now you can run the app using Docker Compose using the below command:
docker compose up -d
Step 7: Push Project Codes to GitHub
Initialize and Stage Your Project Files
Now it’s time to commit and push all the project codes to GitHub. Run git init to initialize the project directory and git add . to stage the codes.

Commit and push your codes to GitHub
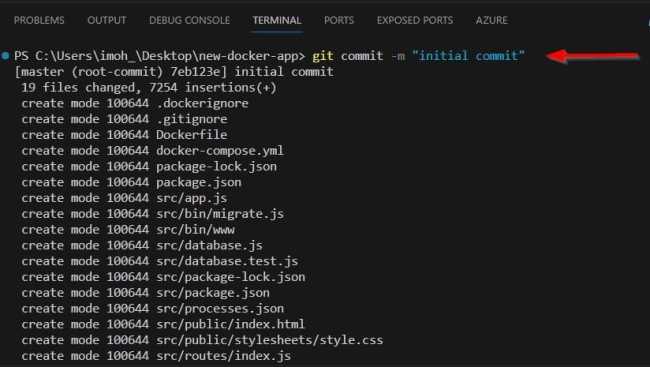
Run git commit -m "initial commit" to commit your codes.
Now, run git push –mirror <remote github remote URL>. Remember to copy the URL of the GitHub repository you created in step 1.

Step 8: Sharing Docker images with other People
After building and running your Docker image, you might want to make it available to others or to a different computer. This enables them to easily run the application without having to start from scratch.
To get started with this, you need to log into Docker Hub by running docker login and then use the docker tag command to tag your image, as shown below:

The next step is to push the Docker image. Run docker push <username/image_name> and enter.

You can also share an image by exporting it as a .tar file and then transferring it through whatever means to the people you wish to share it with. That’s where the command,"docker save address > addressbook.tag" as shown above, comes into play.
As a way of testing if we can pull the image, let’s simply run the command:
docker pull <username/image_name>
Lastly, let’s check Docker Hub to see our image.

I hope you found this article useful on how to Dockerize a NodeJs Express application. Please feel free to leave a comment below.


