
Docker is an open-source containerization platform that enables developers to package apps into containers and standardized executable components combining application source code with the operating system (OS) libraries and dependencies required to run that code in any environment. The Docker Engine and client aren’t included with Windows and need to be installed and configured individually. You need Docker in order to work with Windows Containers. Docker consists of the Docker Engine (dockerd.exe), and the Docker client (docker.exe). In this article, you’ll explore how to install and uninstall Docker Desktop in Windows.
To run containers on Windows Server, you need a physical server or virtual machine running Windows Server 2022, Windows Server (Semi-Annual Channel), Windows Server 2019, or Windows Server 2016 as of the time of writing this article. More on this later. Kindly refer to these related guides: How to create and deploy a local Registry Server with Docker Image, how to Pull your first Nginx Container Image from Docker Hub and deploy it to your local machine, Azure DevOps and GitHub integration for Docker and Kubernetes deployment, how to create a static pod in Kubernetes, and how to install, register and start GitLab Runner on Windows.
Windows Requirements
GitLab Runner only supports the following versions of Windows as of the time of writing this piece which follows the support lifecycle for Windows. You can use the following hyperlink for more information.
- Windows Server 20H2.
- Windows Server 2004.
- Windows Server 1809.
This means that Docker only supports Docker Desktop on Windows for those versions of Windows 10 that are still within Microsoft’s servicing timeline:
- Long-Term Servicing Channel, versions for 5 years after their release date. Note that we don’t support versions that are on extended support.
- Furthermore, Semi-Annual Channel versions for 18 months after their release date. We don’t support these versions after mainstream support ends.
This is the case for both the Windows binaries that we distribute and also for the Docker executor.
You can create a free Docker account for personal or small business users, however, for larger businesses, there is a monthly fee. For more details, see the
- However, Our Docker Subscription Service Agreement includes a change to the terms of use for Docker Desktop
- It remains free for small businesses (fewer than 250 employees AND less than $10 million in revenue), personal use, education, and non-commercial open-source projects.
- It requires a paid subscription for professional use in larger enterprises.
- The effective date of these terms is August 31, 2021. There is a grace period until January 31, 2022 for those that will require a paid subscription to use Docker Desktop.
- Moreover, The existing Docker Free subscription has been renamed Docker Personal and we have introduced a Docker Business subscription .
- The Docker Pro, Team, and Business subscriptions include commercial use of Docker Desktop.
Key Features of Docker Desktop
Some of the key features of Docker Desktop include:
- In addition, Ability to containerize and share any application on any cloud platform, in multiple languages and frameworks
- Easy installation and setup of a complete Docker development environment
- Includes the latest version of Kubernetes
- Automatic updates to keep you up to date and secure
- Nonetheless, On Windows, the ability to toggle between Linux and Windows Server environments to build applications
- Consequently, Fast and reliable performance with native Windows Hyper-V virtualization
- Similarly, Ability to work natively on Linux through WSL 2 on Windows machines
- Volume mounting for code and data, including file change notifications and easy access to running containers on the localhost network
- In-container development and debugging with supported IDEs.
System requirements for Installing and Uninstalling Docker Desktop on Windows
Below are the hardware prerequisites are required to successfully run Client Hyper-V on Windows 10:
– Nevertheless, 64-bit processor with Second Level Address Translation (SLAT),
– 4GB system RAM, and
– BIOS-level hardware virtualization support must be enabled in the BIOS settings. And, If this is not done, you will be prompted with the following error “Please enable the Virtual Machine Platform Windows Feature and ensure Virtualization is enabled in the BIOS“.
Your Windows machine must meet the following requirements to successfully install and uninstall Docker Desktop on Windows.
1: Therefore, Windows 10 64-bit: Pro 2004 (build 19041) or higher, or Enterprise or Education 1909 (build 18363) or higher.
2: For the WSL2 backend, please enable the WSL 2 feature on Windows. Additionally, For detailed instructions, refer to these guides: What is Windows Subsystem for Linux (WSL), how to install WSL on Windows Server via Server Manager and PowerShell, and how to install WSL on Windows 10. You can install WSL with the following command wsl --install by entering the command either in PowerShell or the Command Prompt.

Alternatively, you can use the following command to install it very quickly as well.
dism.exe /online /enable-feature /featurename:Microsoft-Windows-Subsystem-Linux /all /norestart
3: Download and install the WSL2 Linux kernel update package for x64 machines. You can also see this guide for more information Linux kernel update package.


4: Hyper-V and Containers Windows features must be enabled. Here is a similar guide to work you through how to install RSAT on Windows 10 via Windows features, and on a server, see how to install RSAT on Windows Server. You may also want to see this very detailed guide discussing “how to enable or disable DotNet Framework (NetFx3) via PowerShell, Control Panel, and DISM in Windows“.
5: To do this, launch the Windows Control Panel and click on Programs, and then on “Turn Windows features on or Off”.


Note:
As you can see, we already have the Hyper-V feature installed. We will have to check the “Container” feature as shown below.

Ensure both the Hyper-V and Containers Windows features must be enabled. When you are done, click on OK.

After these steps, Windows will search and apply the settings and you will be required to restart afterward.


Windows Server Containers use Hyper-V isolation by default on Windows 10 in order to provide developers with the same kernel version and configuration that will be used in production.
Install Docker Desktop
You need Docker in order to work with Windows Containers. Docker consists of the Docker Engine (dockerd.exe), and the Docker client (docker.exe). You can install Docker on Windows 10 Professional and Enterprise editions by using the following steps.
The Docker Desktop can be downloaded from the following link as shown below.

It typically downloads to your Downloads folder, or you can run it from the recent downloads bar at the bottom of your web browser.
– To install the Docker Desktop, double-click on the Docker Desktop Installer.exe to run the installer.
Ensure you install the latest version of the Docker engine to avoid vulnerabilities
Accept the User Account Control. You may want to learn how to turn UAC on or off in Windows.

When prompted, ensure the install required Windows components for WSL 2 option is selected on the Configuration page.


This will unpack and install as shown below


As you can see below, the installation has succeeded. Just Close and Logout

If you get this window close and restart, you may run into issues which means, the prerequisites defined above were not correctly follwed. I just had to simulate this on a different PC in my Lab. You have to click on close and restart and ensure you install WSL, the package update etc as defined above.
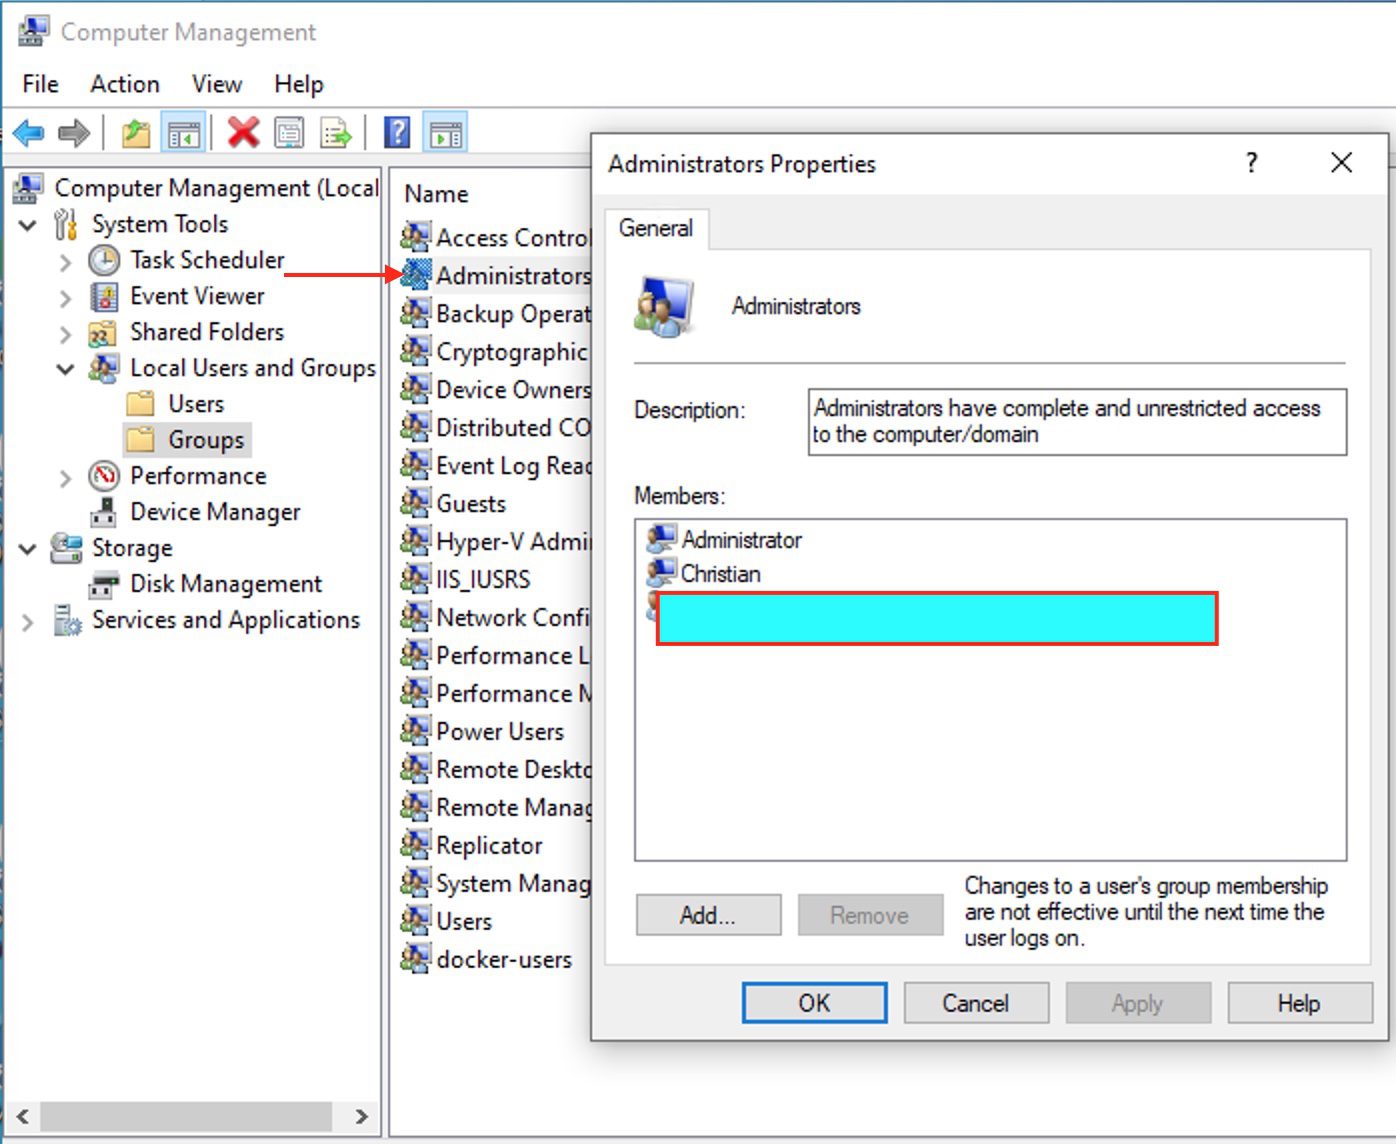
Note: If your admin account is different from your user account, you must add the user to the docker-users group. Run Computer Management as an administrator and navigate to Local Users and Groups > Groups > docker-users. Right-click to add the user to the group. Log out and log back in for the changes to take effect.
Start Docker Desktop
The Docker Desktop does not start automatically after installation. To start Docker Desktop, search for Docker, and select Docker Desktop in the search results.
Note: You can just click on the Docker Desktop available on the desktop of your PC because we selected to have it installed on the Desktop.

The Docker menu displays the Docker Subscription Service Agreement window. It includes a change to the terms of use for Docker Desktop. Please refer to the 3rd paragraph above for more information.

As you can see, Docker is now installed and started.

You may want to sign into Docker Hub with your Docker IDas shown below

If you wish to check for updates after logging in, please navigate to the Software Updates and click on Check for Updates.

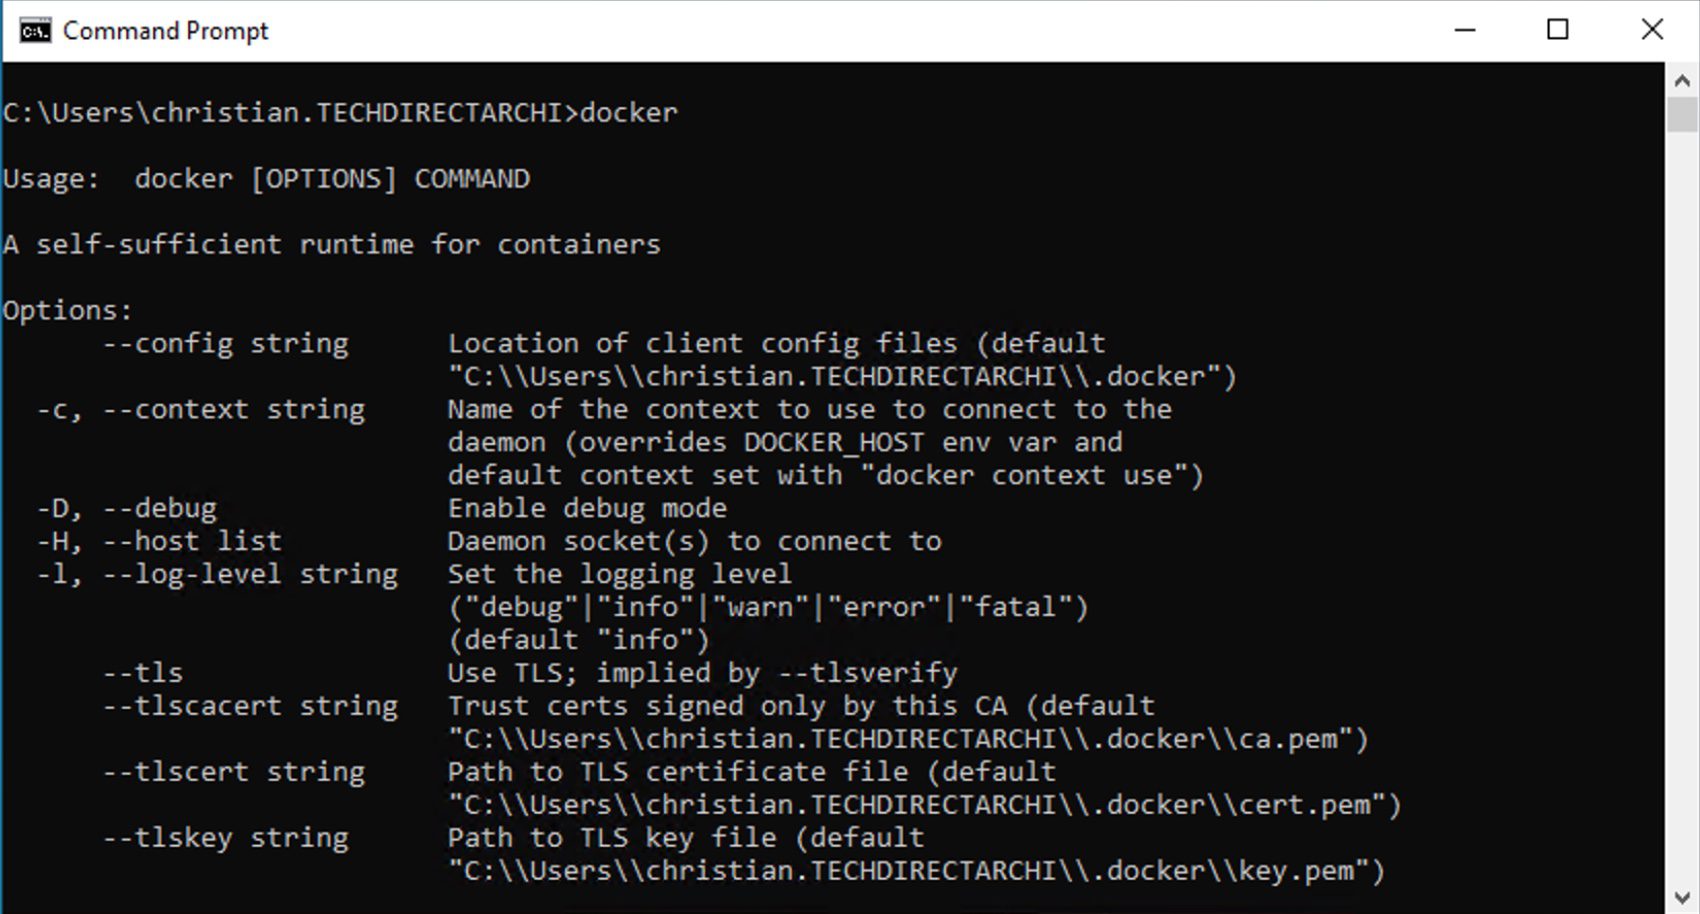
Now, let’s run some Docker commands. Below are some possible commands that you can run.

Currently, this is the version of Docker Desktop we are running

Before you can use Docker, you will need to install the container images. For more information, see docs for our container base images.
Containers and images created with Docker Desktop are shared between all user accounts on machines where it is installed. This is because all Windows accounts use the same VM to build and run containers. Note that it is not possible to share containers and images between user accounts when using the Docker Desktop WSL 2 backend. Nested virtualization scenarios, such as running Docker Desktop on a VMWare or Parallels instance might work, but there are no guarantees [Reference: Docker Docs].
Uninstall Docker Desktop
While you’ve learned how to install, let’s discuss how to uninstall Docker Desktop on Windows. Uninstalling Docker Desktop destroys Docker containers, images, volumes, and other Docker-related data local to the machine, and removes the files generated by the application. To uninstall Docker Desktop from your Windows machine, please follow the steps discussed below.
From the Windows Start menu, select Settings > Apps > Apps & features as shown below
– Select Docker Desktop from the Apps & features list and then select Uninstall.
Alternatively, you could also launch Windows Control Panel, click on programs and Features and have the Docker Desktop uninstalled. Click Uninstall to confirm your selection.

To uninstall Docker on Windows Server 2016
From an elevated PowerShell session, use the Uninstall-Package and Uninstall-Module cmdlets to remove the Docker module and its corresponding Package Management Provider from your system, as shown in the following example:
Uninstall-Package -Name docker -ProviderName DockerMsftProvider
Uninstall-Module -Name DockerMsftProvider
You can find the Package Provider that you used to install Docker with PS C:\> Get-PackageProvider -Name *Docker*
Clean up Docker data and system components
After you uninstall Docker, you’ll need to remove Docker’s default networks so their configuration won’t remain on your system after Docker is gone. You can do this by running the following cmdlet:
Get-HNSNetwork | Remove-HNSNetworkTo remove Docker’s default networks on Windows Server 2016.
Get-ContainerNetwork | Remove-ContainerNetworkRun the following cmdlet to remove Docker’s program data from your system:
Remove-Item "C:\ProgramData\Docker" -RecurseRemove features associated with Docker/containers on Window
This includes the “Containers” feature, which is automatically enabled on any Windows 10 or Windows Server 2016 when Docker is installed. It may also include the “Hyper-V” feature, which is automatically enabled on Windows 10 when Docker is installed but must be explicitly enabled on Windows Server 2016.
Note: The Hyper-V feature is a general virtualization feature that enables much more than just containers. Before disabling the Hyper-V feature, make sure there are no other virtualized components on your system that require Hyper-V.
To remove Windows features on Windows 10:
- Go to Control Panel > Programs > Programs and Features > Turn Windows features on or off.
- Find the name of the feature or features you want to disable—in this case, Containers and (optionally) Hyper-V.
- Uncheck the box next to the name of the feature you want to disable.
- Select “OK”.
To remove Windows features on Windows Server 2016: From an elevated PowerShell session, run the following cmdlets to disable the Containers and (optionally) Hyper-V features from your system:
Remove-WindowsFeature Containers
Remove-WindowsFeature Hyper-V
Reboot your system
To finish uninstallation and cleanup, run the following cmdlet from an elevated PowerShell session to reboot your system:
Restart-Computer -ForceI hope you found this blog post helpful. By now, you should have ample knowledge on how to install and uninstall Docker Desktop on Windows. If you have any questions, please let me know in the comment session.


salut jaime le paté en croute