Skip to content

TechDirectArchive

Hands-on IT, Cloud, Security, Veeam & DevOps

  • Home
  • About
  • Advertise With US
  • Contact
  • Reviews
  • Toggle search form

Resolve the Update Package Database failure on Proxmox VE

Posted on 02/06/202506/10/2025 IT Expert By IT Expert No Comments on Resolve the Update Package Database failure on Proxmox VE
  1. Home
  2. Virtualization
  3. Resolve the Update Package Database failure on Proxmox VE
Update proxmox package database

Proxmox Virtual Environment provides a complete open-source platform for enterprise virtualization. Its built-in web interface enables you to manage VMs and containers, configure software-defined storage and networking, set up high-availability clustering, and use multiple out-of-the-box tools all in a single solution. In this guide, we shall discuss the steps to resolve the Update Package Database failure on Proxmox VE. Please, see Remote Desktop Connection behaviour over UDP and TCP, and Guide to Remote Desktop Connection Properties for Secure Access.

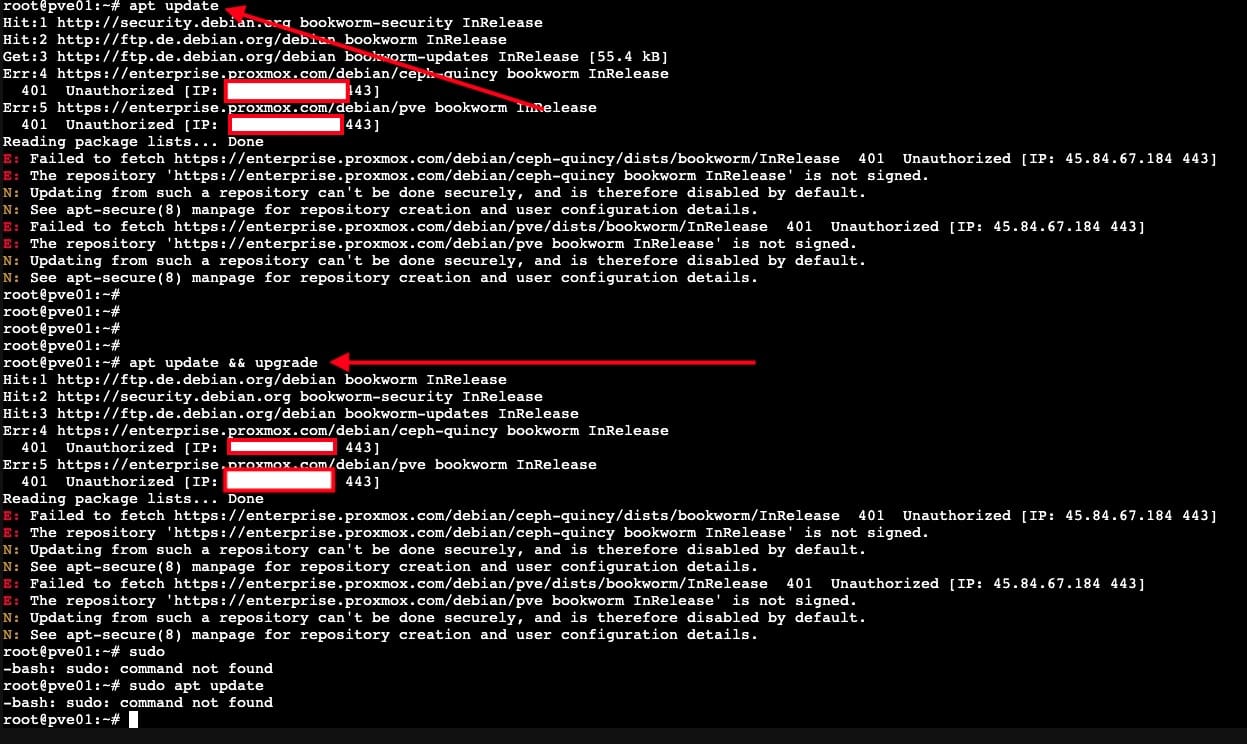
The following error occurs because Proxmox attempts to access enterprise repositories without a valid subscription, resulting in a “401 Unauthorised” response.

Update package database

Also, see Create a bootable USB on Mac: Proxmox VE Setup, Install Proxmox VE on a Beelink EQ12 Mini PC, and Cluster creation in Proxmox VE.

Reason for error “Enterprise repositories require valid subscription”

You’re seeing the 401 Unauthorized error because Proxmox is trying to access the Enterprise repositories, which require a valid subscription. If you’re using Proxmox without a subscription, you need to disable the enterprise repositories and enable the no-subscription repository instead.

No active subsription for enterprise repository proxmox

Therefore, when you run the command below to update the package database. You will get the following error.

Unauthorised - failed to fetch

Here is a guide on “Veeam backup for aws Processing postgres rds failed: No valid combination of the network settings was found for the worker configuration“, and “WinRM cannot complete the operation, verify that the specified computer name is valid“.

Switch to the No-Subscription Repositories

You can either do this from the Proxmox GUI or the Terminal. Below are the two repositories I wish to disable, as I will not be subscribing to them for my lab.

Enterprise repo

Please see Deep Dive into Protecting AWS EC2, RDS Instances and VPC, What is the difference between iDRAC, IPMI, and ILO, and How to configure Windows LAPS.

Disable Enterprise Repositories on Proxmox

Edit the Proxmox repository file with the command below

nano /etc/apt/sources.list.d/pve-enterprise.list
enterprise list

Comment out the line by adding a # at the beginning. Next, save and exit “Ctrl+O” and hit the Enter button on your keyboard.

comment out repository

As you can see, the line has been saved successfully.

line saved

Since I am not using a licensed version of Ceph, I can also disable it by uncommenting the enterprise Ceph line as shown below.

nano /etc/apt/sources.list.d/ceph.list

Do not forget to save before quitting. But this time, I will show you how to do this over the Proxmox console.

Disable Ceph - Repo

As you can see below, both enterprise repos have been disabled.

Repositories disabled

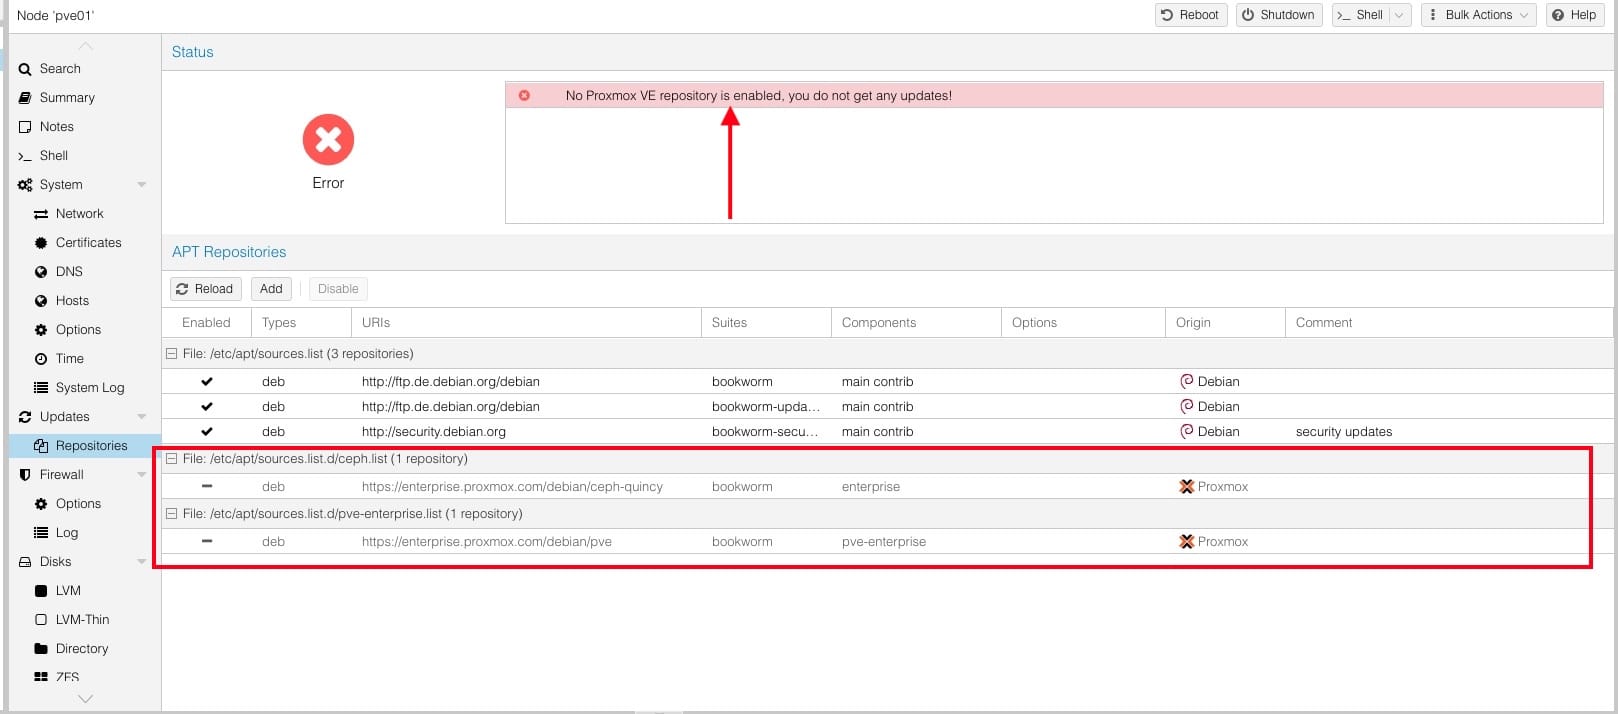
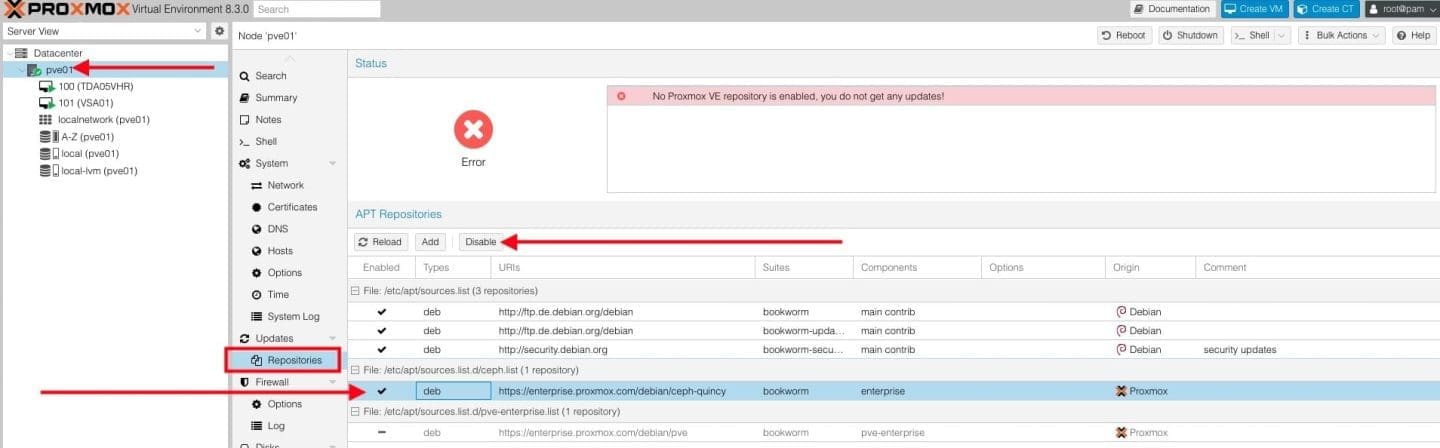
Also, you will see that there is no Proxmox VE repository enabled. We have to fix this by adding a no-subscription repository.

Enable No-Subscription Repo to fix update package database

From the Data Centre, select your PVE node and then click on Repositories under “updates”. Under the API Repositories, click on Add.

Add repo

When the No valid subscription is prompted, click on OK.

Okay

From the drop-down, select “No-subscription”.

No-subscription

Click on Add as shown below

Add proxmox repo

As you can see below, we have successfully added an APT Repository to Proxmox.

repo added to proxmox

Alternatively, if you would like to do this over the terminal, create or edit the following file below

nano /etc/apt/sources.list
edit source list

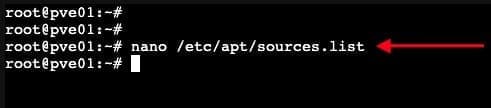
Add the following line if not present already. Please, do not forget to save and exit.

deb http://download.proxmox.com/debian/pve bookworm pve-no-subscription
No subscrription

Here is how to install Java Runtime Environment on Mac OS, and how to Disable Hardware Acceleration in Browsers and Windows.

Initiate the Package Update and Upgrade

To do this, run the command below from the Proxmox Shell or Terminal

apt update && apt full-upgrade -y
Applying updates

As you can see below, the updates && upgrade have been applied and there is nothing to do anymore.

Updates applied

If you have updated to Proxmox VE 9.0 now Supported by Veeam, it should look like the below. Do not forget to disable the enterprise repository.

Proxmox Enterprise

I hope you found this article on how to resolve the Update Package Database failure on Proxmox VE very useful. Please, feel free to leave a comment below.

5/5 - (1 vote)

Thank you for reading this post. Kindly share it with others.

  • Share on X (Opens in new window) X
  • Share on Reddit (Opens in new window) Reddit
  • Share on LinkedIn (Opens in new window) LinkedIn
  • Share on Facebook (Opens in new window) Facebook
  • Share on Pinterest (Opens in new window) Pinterest
  • Share on Tumblr (Opens in new window) Tumblr
  • Share on Telegram (Opens in new window) Telegram
  • Share on WhatsApp (Opens in new window) WhatsApp
  • Share on Mastodon (Opens in new window) Mastodon
  • Share on Bluesky (Opens in new window) Bluesky
  • Share on Threads (Opens in new window) Threads
  • Share on Nextdoor (Opens in new window) Nextdoor
Virtualization Tags:disable enterprise repository proxmox, Disable Proxmox Repository, proxmox, Proxmox Server, Proxmox VE

Post navigation

Previous Post: Remote Desktop Connection behaviour over UDP and TCP
Next Post: How to set up the OOTBI Virtual Appliance on Proxmox VE

Related Posts

  • copy and paste between host machines and VirtualBox VM
    How to copy and paste between host machines and VirtualBox VM Virtualization
  • Domain
    Connectivity to a writable domain controller from a node could not be determined because of an error Virtualization
  • MAP virtual disk error
    Install Workstation Pro 17: Fix failed to initialise library for mounting and unmounting virtual disks Virtualization
  • Deploy Web App from GitHub
    Deploy Code from GitHub to Azure Apps Services via the Command line AWS/Azure/OpenShift
  • Resize Proxmox VM
    How to Resize or Expand Proxmox Hard Drive Virtualization
  • sandbox
    How to Configure Windows Sandbox Virtualization

More Related Articles

copy and paste between host machines and VirtualBox VM How to copy and paste between host machines and VirtualBox VM Virtualization
Domain Connectivity to a writable domain controller from a node could not be determined because of an error Virtualization
MAP virtual disk error Install Workstation Pro 17: Fix failed to initialise library for mounting and unmounting virtual disks Virtualization
Deploy Web App from GitHub Deploy Code from GitHub to Azure Apps Services via the Command line AWS/Azure/OpenShift
Resize Proxmox VM How to Resize or Expand Proxmox Hard Drive Virtualization
sandbox How to Configure Windows Sandbox Virtualization

Leave a Reply Cancel reply

You must be logged in to post a comment.

Microsoft MVP

VEEAMLEGEND

vexpert-badge-stars-5

Virtual Background

GoogleNews

Categories

veeaam100

Veeam Vanguard

  • Featured image 2
    How to delete Windows old folder in Windows 11 Windows
  • Syncing Files  and photos with Synology Drive
    Sync file and photos from iOS and Mac with Synology Drive Backup
  • Container insights
    How to use Container Insights for Azure Kubernetes Workload Network | Monitoring
  • WDS
    An error occurred while trying to start the Windows deployment services error 0x906 Windows Server
  • SQL Server Management Studio 1
    How to manually check and update SQL Server Management Studio Oracle/MSSQL/MySQL
  • Featured Image 1
    System Drive Conversion: MBR to GPT on Windows 10 Storage
  • MFA
    Rolling out Multi-factor Authentication – Recommendations Security | Vulnerability Scans and Assessment
  • image 63
    Protect Remote Desktop credentials with Windows Defender Remote Credential Guard or Restricted Admin Mode Windows

Subscribe to Blog via Email

Enter your email address to subscribe to this blog and receive notifications of new posts by email.

Join 1,795 other subscribers
  • RSS - Posts
  • RSS - Comments
  • About
  • Authors
  • Write for us
  • Advertise with us
  • General Terms and Conditions
  • Privacy policy
  • Feedly
  • Telegram
  • Youtube
  • Facebook
  • Instagram
  • LinkedIn
  • Tumblr
  • Pinterest
  • Twitter
  • mastodon

Tags

Active Directory Azure Bitlocker Microsoft Windows PowerShell WDS Windows 10 Windows 11 Windows Deployment Services Windows Server 2016

Copyright © 2025 TechDirectArchive

Loading Comments...

You must be logged in to post a comment.