In this article, we shall discuss “How to install Proxmox VE on a Bare metal Server [Beelink EQ12] :-)”. The source code of Proxmox VE is licensed under the GNU AGPLv3 and free to download and use. With the bare-metal installation, you’ll get a complete operating system based on Debian GNU/Linux, 64-bit, a Proxmox VE kernel with KVM and container support, great tools for backup/restore and HA clustering, and much more. Please see How to install ESXi on a Bare-metal server [Beelink EQ12], and how to Cluster creation in Proxmox VE.
Proxmox Virtual Environment (VE) is a powerful, open-source platform for managing virtual machines (VMs) and containers. It combines two virtualization technologies, KVM (Kernel-based Virtual Machine) for virtual machines and LXC (Linux Containers) for lightweight containerization. Installing Proxmox VE on bare metal provides a solid foundation for building a virtualization infrastructure that can efficiently manage your workloads.
Proxmox VE is based on Debian GNU/Linux with additional repositories to provide the Proxmox VE-related packages. This means that the full range of Debian packages is available including security updates and bug fixes. Proxmox VE uses APT as its package management tool like any other Debian-based system.
Note: You can deploy and manage virtualized environments through a web console or a command line, ensuring simple and fast accessibility
Please see how to Install Proxmox VE: Fix Volume Group Creation Error, and How to “Administer LXC Containers: Easy Guide“.
Beelink EQ12
Below is the Beelink EQ12 Mini PC, along with the form factor, interface design, and features. If you are looking at desktop computers or home lab servers, this little box is great!
Note: The Beelink Mini PC comes with Windows 11 pre-installed, ensuring a familiar environment for all users. Beelink EQ12 mini PC has an Intel 12th Alder Lake-N100 processor with 4 Cores, 4 Threads and 6MB L3 cache.
The processor’s TDP can reach 25W, and the Max Turbo Frequency is 3.4GHz. Furthermore, it has a 16G DDR5, 500G PCIe SSD Mini Computer W11 Pro, TDP/WiFi 6/BT5.2/Triple Display”. EQ12 delivers 25% more power than N5105. The low power consumption makes this mini-computer the top choice for light office work, 4K video playback, online education, design, and much more.
You may want to visit the Proxmox webpage to learn more about the recommended Hardware, and browser requirements. These hardware recommendations will help to ensure a smooth and reliable Proxmox VE installation and operation.


Note: For production servers, high-quality server equipment is needed.
Download Proxmox ISO image
Navigate to the official Proxmox Downloads page and select Proxmox Virtual Environment.
Download the Proxmox VE ISO, and use Rufus to write the Image to a USB Flash Drive. Select your image as shown below and click start At the time of writing this piece, Proxmox 8.1-1 is the latest version.

Click on Ok to confirm that you are fine with the data destruction.

Select OK to “write in DD Image mode”.

Wait for the writing process to complete. The status shows ready and can be used in setting up Proxxmox on Beelink EQ12 Mini PC. Click on Close to complete this step.

Install Proxmox
To boot from USB, plug the USB drive into the USB port of EQ12. Press the F7 key to select the USB disk as a boot device.
Note: For other Servers, they are either Esc, F2, F10, F11, or F12 for DELL.
Press ‘Enter’ to start the installation wizard on your dedicated hardware

Choose “Install Proxmox VE (Graphical)” and press enter.

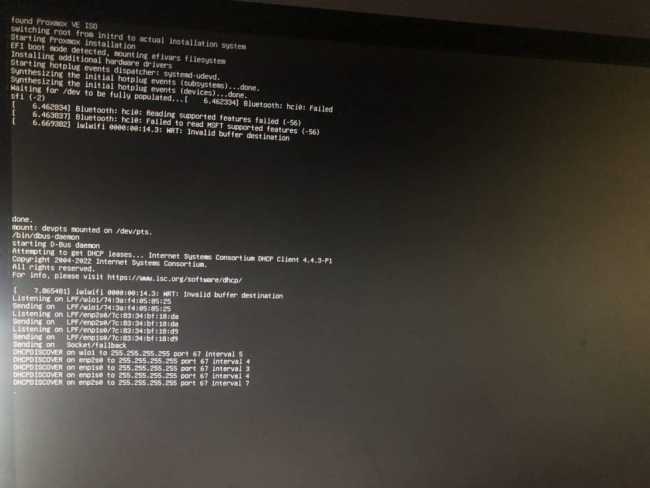
Currently loading the installer!
Read and accept the EULA to continue.

Choose the target drive for PVE. If there is only one drive by default, click “Next” to go to the next step.

I will enter the right country and time zone. You can skip selecting Country and Time Zone. Simply click “Next

Set password and Email and click “Next”.

Proxmox management Network Configuration
The final step in installing Proxmox is setting up the network configuration. Select the management interface, a hostname for the server, an available IP address, the default gateway, and a DNS server. During the installation process, use either an IPv4 or IPv6 address. To use both, modify the configuration after installing.
Note: The Management Interface selection is for host machines with multiple Ethernet jacks. Choose the one you need.

Go through the summary page and confirm the displayed information and click “Install


Note: The EQ12 Mini PC will reboot itself after the installation is complete. Please unplug the USB drive when the PC is rebooting.
Configure the host machine
After the Beelink EQ12 Mini PC boots up, an IP address will appear on the screen. Type this URL into your browser from another computer on the same LAN and then you can access the PVE control panel

Also, the Proxmox VE welcome message appears. It includes an IP address which loads Proxmox. Navigate to that IP address in a web browser of your choice.
Note: Please ensure you are using the supported browser.

Note: You can configure the host easily via the web browser. No need to install a separate management tool.
The browser may prompt a privacy error. Ignore it and continue to visit. The User name is root, and the Password is “what you set during the system installation”. Select your desired language and click login.

Now you have entered the PVE system management interface. PVE System was installed successfully.

I hope you found this article useful on how to Install Proxmox VE on a Bare-metal [Beelink EQ12]. Please feel free to leave a comment below.