Skip to content

TechDirectArchive

Hands-on IT, Cloud, Security, Veeam & DevOps

  • Home
  • About
  • Advertise With US
  • Reviews
  • Contact
  • Toggle search form

System Drive Conversion: MBR to GPT on Windows 10

Posted on 28/05/202221/03/2024 Matthew By Matthew No Comments on System Drive Conversion: MBR to GPT on Windows 10
  1. Home
  2. Storage
  3. System Drive Conversion: MBR to GPT on Windows 10
Featured-Image-1

In this article, we shall discuss System Drive Conversion: MBR to GPT on Windows 10. Upgrading your System Drive from MBR to GPT is crucial for Windows 10 to Windows 11 transition on older hardware with UEFI support. This change ensures proper booting, especially when “Secure Boot State” is Off and “BIOS Mode” is set to Legacy. In that case, you should make a backup of your System Drive, follow the instructions below to convert the installation from MBR to GPT and proceed with the procedures to enable Secure Boot.

To convert the partition type from MBR to GPT without reinstalling Windows 10, use the MBR2GPT command-line program. Here are some exciting guides: A brief Introduction to Linux and how to create disk partition in Ubuntu Linux, and How to encrypt a partition with Cryptsetup.

Here are other related guides: How to convert a GPT disk into an MBR disk – Error: Windows cannot be installed on drive 0 Partition 1, how to extend System Drive Partition on Windows, and to create a disk volume see: How to create volumes via the Command Prompt in Windows.

How to check the Partition Style on a System Drive

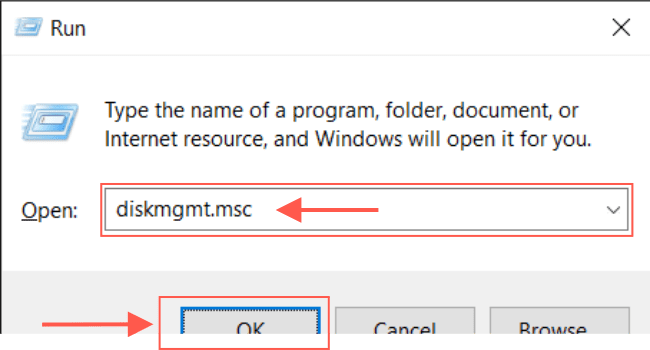
Follow these steps to determine the current disk partition style. To open Disk Management, press the Windows key + R to bring up Windows Run, then type diskmgmt.msc and click Ok for the System Drive.

Partition conversion

Right-click the drive on which Windows 10 is installed and choose Properties of System Drive.

Windows 10 drive upgrade

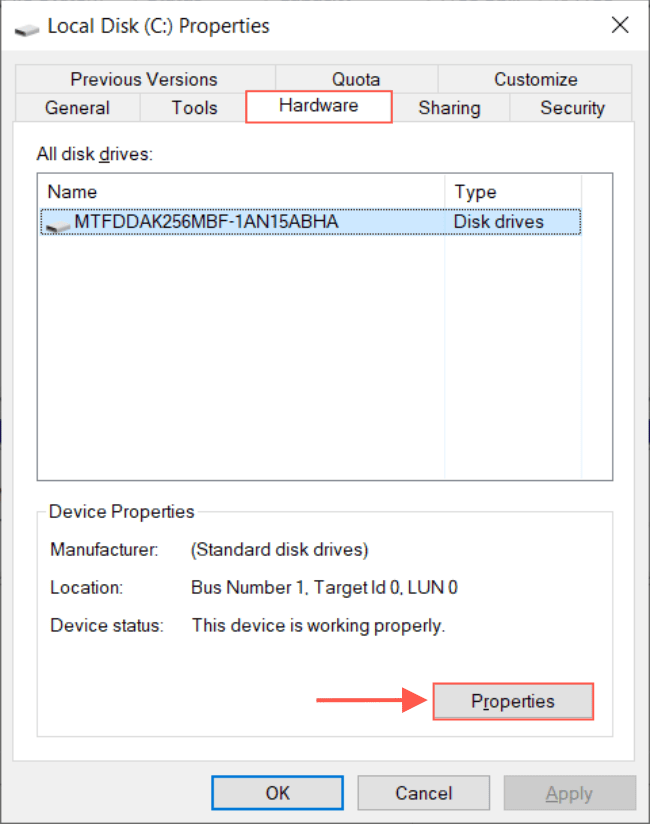
Click on the Hardware tab of the System Drive, and in the lower-right corner of the page, click on Properties.

GPT migration

On the Properties page, click on the Volumes tab. To view the Disk Information, click on Populate.

In the “Partition style” section, if it says GUID Partition Table (GPT), the disk does not need to be converted; however, if it says Master Boot Record (MBR), you can use the System Drive conversion tool to convert.

Disk format change

Press the Cancel button and exit the Disk management. Once you’ve completed the procedures, follow the instructions below if the System Drive requires conversion.

How to Convert MBR to GPT Partition Style

To convert an MBR partition to a GPT partition in Windows 10 System Drive, follow these steps:

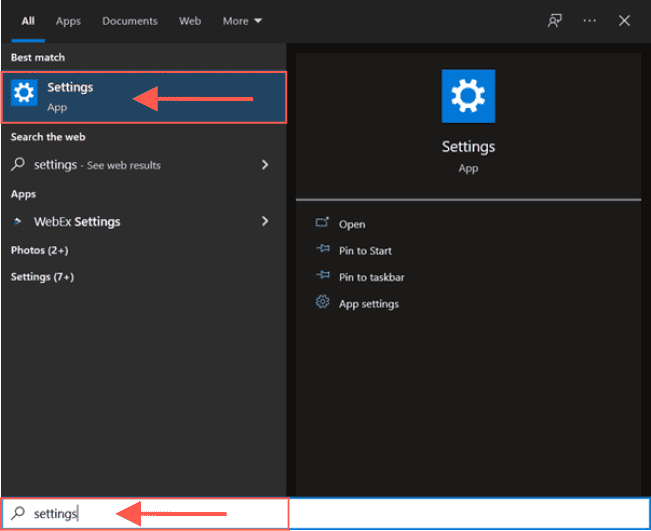
Press the Windows Key to access the Start menu and look for the Settings option.

Partition conversion

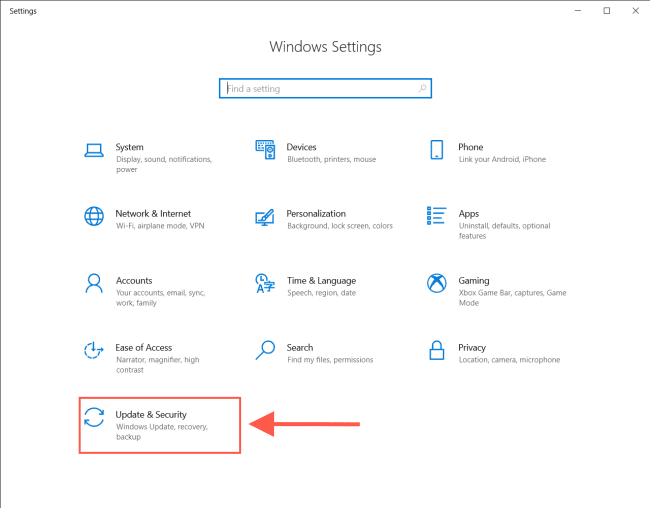
Click on Update & Security.

Windows 10 drive upgrade

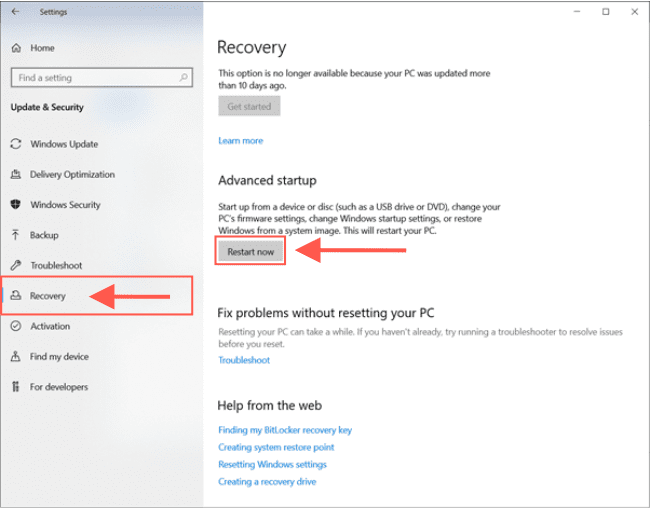
Click on the Recovery tab. Under the “Advanced Startup,” click on Restart now.

Image6-3

After the system restarts, click on Troubleshoot.

Img2

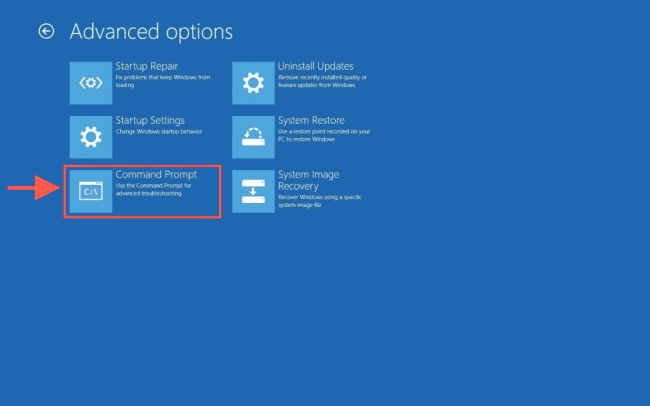
Click on Advanced options.

Img3

Click the Command Prompt option.

Image11-2

Select your administrator account and sign in if required. Enter the following System Drive command to confirm that the drive meets the requirements: mbr2gpt /validate

Use the mbr2gpt /? command to examine all of the possible choices.

Image5-3

Enter the following command to convert the disk from MBR to GPT: mbr2gpt /convert

Image6-4

Close the Command prompt and click the Turn off your computer option.

After completing the System Drive conversion, the command-line program will alter the partition type to GPT to meet the system requirements for installing Windows 11.

I hope you found this blog post on System Drive Conversion: MBR to GPT on Windows 10 helpful. Please let me know in the comment session if you have any questions.

5/5 - (1 vote)

Thank you for reading this post. Kindly share it with others.

  • Share on X (Opens in new window) X
  • Share on Reddit (Opens in new window) Reddit
  • Share on LinkedIn (Opens in new window) LinkedIn
  • Share on Facebook (Opens in new window) Facebook
  • Share on Pinterest (Opens in new window) Pinterest
  • Share on Tumblr (Opens in new window) Tumblr
  • Share on Telegram (Opens in new window) Telegram
  • Share on WhatsApp (Opens in new window) WhatsApp
  • Share on Mastodon (Opens in new window) Mastodon
  • Share on Bluesky (Opens in new window) Bluesky
  • Share on Threads (Opens in new window) Threads
  • Share on Nextdoor (Opens in new window) Nextdoor
Storage Tags:Disk Partition, drive, harddrive, Microsoft Windows, Partitions, Windows 10, Windows 11

Post navigation

Previous Post: Configure AWS Command Line Interface
Next Post: How to enable Secure Boot on PC to install Windows 11

Related Posts

  • Synology NAS as a Backup Repository for VBR
    Setup DS923+ Synology NAS as a Backup Repository for VBR Reviews
  • Snapshot replication fix on synology
    Fix Task failed to perform Scheduled Snapshot Replication [Part 1] Storage
  • Repository time shift detected
    Fix Repository time shift detected: Immutability flag cannot be set Backup
  • Object First Honeypot OOTBI
    OOTBI Security Best Practices: Enable Honeypot on Object First Backup
  • Object First Appliance unboxing
    Object First OOTBI Appliance Unboxing and Quick Setup Backup
  • Fix invalid backup repostory and delete not needed repo via Veeam Backup Repository
    Fix missing path and delete a Veeam Backup Repository Backup

More Related Articles

Synology NAS as a Backup Repository for VBR Setup DS923+ Synology NAS as a Backup Repository for VBR Reviews
Snapshot replication fix on synology Fix Task failed to perform Scheduled Snapshot Replication [Part 1] Storage
Repository time shift detected Fix Repository time shift detected: Immutability flag cannot be set Backup
Object First Honeypot OOTBI OOTBI Security Best Practices: Enable Honeypot on Object First Backup
Object First Appliance unboxing Object First OOTBI Appliance Unboxing and Quick Setup Backup
Fix invalid backup repostory and delete not needed repo via Veeam Backup Repository Fix missing path and delete a Veeam Backup Repository Backup

Leave a Reply Cancel reply

You must be logged in to post a comment.

Microsoft MVP

VEEAMLEGEND

vexpert-badge-stars-5

Virtual Background

GoogleNews

Categories

veeaam100

Veeam Vanguard

  • Fix Failed To Connect To The Backup Serve
    Fix failed to connect to the backup server: Make sure it is online Backup
  • Slide1 1
    Enable or disable Secure Boot in Windows via UEFI Firmware Settings Windows
  • Virtual Desktop
    Add and Remove Multiple Virtual Desktops in Windows Windows
  • systemd services
    How to use Systemd Timers on Linux Linux
  • windows 1
    How to set up a VM via PXE boot on a Generation 1 VM Virtualization
  • Azure App Service
    How to Restore Deleted Azure App Service Using PowerShell Automation
  • windows 10 creators update wallpaper
    Run or Edit and Delete Tasks via Windows Task Scheduler Windows
  • image 129
    Using Awx to deploy, schedule and run playbooks Linux

Subscribe to Blog via Email

Enter your email address to subscribe to this blog and receive notifications of new posts by email.

Join 1,800 other subscribers
  • RSS - Posts
  • RSS - Comments
  • About
  • Authors
  • Write for us
  • Advertise with us
  • General Terms and Conditions
  • Privacy policy
  • Feedly
  • Telegram
  • Youtube
  • Facebook
  • Instagram
  • LinkedIn
  • Tumblr
  • Pinterest
  • Twitter
  • mastodon

Tags

Active Directory Azure Bitlocker Microsoft Windows PowerShell WDS Windows 10 Windows 11 Windows Deployment Services Windows Server 2016

Copyright © 2025 TechDirectArchive

Loading Comments...

You must be logged in to post a comment.