Perform continuous ping on OSes and network Appliances

In this article, we shall discuss “Perform continuous ping on OSes and network Appliances (macOS, Linux, Windows, Juniper and Cisco devices)”. Ping is referred to as “Packet Internet Groper”. It is used to troubleshoot the accessibility of devices between two endpoints i.e., to ensure data packet is transmitted to its destination successfully. Please see how to Analyse Disks with Treesize: Defragment and Shrink VMware Workstation VM Disks, and how to Ping from Source IP Address from all environments.
This utility uses a series of Internet Control Message Protocol (ICMP) echo messages to determine whether a remote host is active or inactive. The round-trip delay in communicating with the host, and packet loss. The ping command first sends an echo request packet to an address and then waits for a reply.
Furthermore, the ping is successful only if the echo request gets to the destination. The destination gets an echo reply back to the source within a predetermined time called a timeout.
The ping utility is available to the following platforms such as Windows, Linux, and macOS as a network administration tool. As well as to networking platforms such as Cisco, Cisco ASA, etc.
Also, see Ping request could not find the host: Verify if the name is entered correctly. Here is an article on “what is transit failed, general failure, request timed out and destination host unreachable“.
How to perform a continuous ping on macOS
As System and Network Administrators, it is inevitable that we must test network connectivity. That is, test connectivity between different components of our network or between systems and VMs as well.
This protocol accomplishes this by sending 32 bytes of packet to the destination server. Below is an example of the ping command in action. When you ping a server that is very close to you. The reaction time in (ms) will considerably be lower than a server that is further away. Thereby leading to higher reaction time (ms).
The ping command sends an echo request to a destination server or device and waits for a response, known as the echo reply packet. If the source server, client, or network device does not receive an echo reply within a predefined timeout period, it indicates a connectivity issue. By default, this timeout period is set to two seconds on Cisco routers.
If the ping command successfully receives the echo reply within this timeframe, it confirms that connectivity is intact.
Note: The Time to leave (TTL) value of a ping packet cannot be changed.

As you can see. It does not provide data about routing or hops. But it is a very useful metric for gauging the latency between two devices as you can see in the two pings performed in the image above.
Note: The ping utility is a simplified version of traceroute. It will test the speed of the connection between two devices and report how long it takes for the packet to reach its destination and return to the sender’s device as seen in the screenshot above.
What is ICMP and how does it work?
We have referred to ICMP a lot in this article and I will therefore be discussing it in detail. ICMP is a network layer protocol used by network devices to diagnose and report network issues back to the source. It sends control messages such as destination network unreachable, source route failed, and source quench to the source device.
ICMP is mainly used to determine whether or not data is reaching its intended destination in a timely manner. See this guide on how to configure TCP/IP on a Server and other Windows Server properties.
This means, ICMP is used for reporting a service that is not reachable (available) or when a host can not be found on the network. But it can also be used in distributed denial-of-service (DDoS) attacks.
Note: ICMP is not associated with a transport layers protocol such as TCP or UDP, thereby making ICMP a connectionless protocol. No device is required to initiate a connection with another device before sending an ICMP message.
Normal IP traffic is sent using TCP. This means any two devices that exchange data will first carry out a TCP handshake to ensure both devices are ready to receive data. ICMP does not open a connection in this way. The ICMP protocol also does not allow for targeting a specific port on a device.
Here are some related troubleshooting guides: Ansible error: Server unreachable, ssl: auth method ssl requires a password, and the module ping was not found in configured module paths: Additionally core modules are missing.
How to initiate a continuous ping
Continuous ping is a common debugging method to check whether IPv4 and IPv6 network devices are reachable. It uses Internet Control Message Protocol (ICMP) Echo messages to check Whether the remote device is available, the Round-trip delay in communicating with the remote host, and Whether packets are lost. But this can lead to an ICMP flood attack.
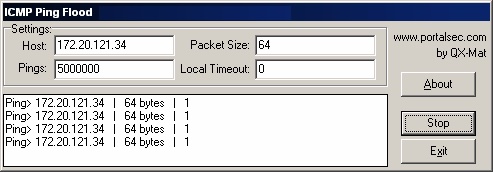
ICMP flood also known as Ping flood is when the attacker attempts to overwhelm a targeted device with ICMP echo-request packets. The target has to process and respond to each packet, consuming its computing resources.
This causes the target to become inaccessible to normal traffic and will cause legitimate users cannot to receive service. Others types of ICMP request attacks may involve custom tools or code, such as hping and scapy. The image below is an example of software used to perfom ping flood.
Please see why can’t I ping the Public IP Address an EC2 instance?, and how to resolve request timed out when pinging and how to create a Firewall rule.
Perform Continuous ping on Windows
Continuous ping can be realized in the following ways. Open Command Prompt and type the command ‘ping’ followed by the IP Address and followed by ‘-t’ flag. To stop the ping, after seeing enough results, press Ctrl + C.
Ping -t 192.168.2.1
or
ping 192.168.2.1 -t
For Mac OSX
The command ping is used to test whether your computer can communicate with another device (computer/server/printer) connected to your network or the internet. To initiate a ping test in Mac OS, please follow the steps below.
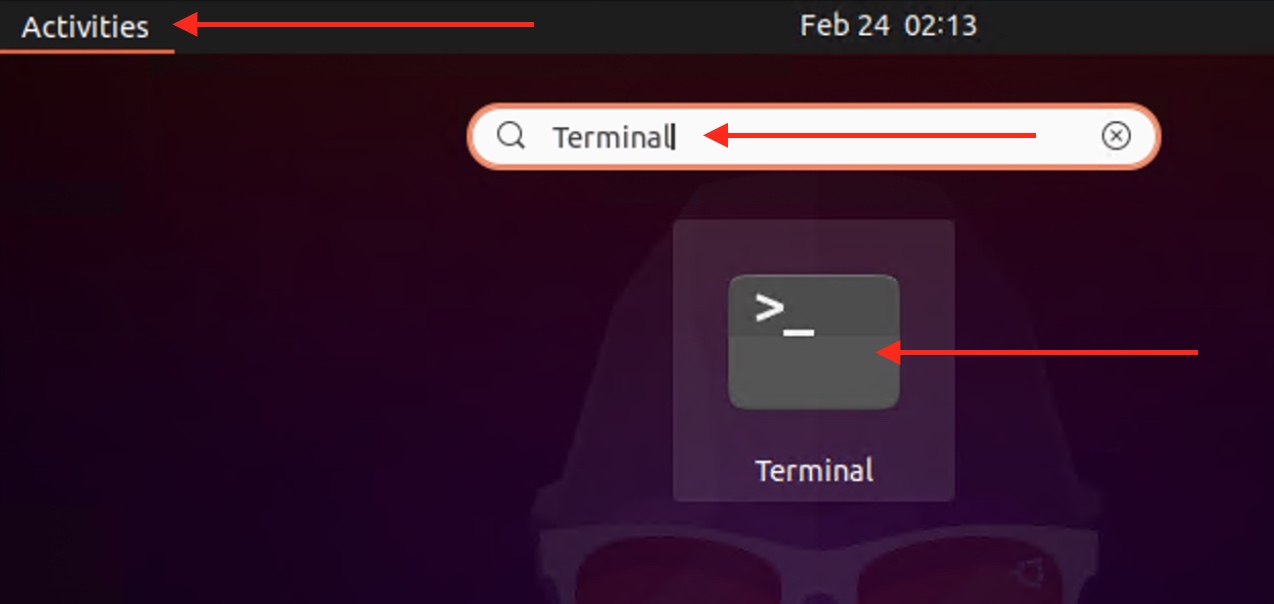
- Click on the “Launchpad” and from the search window,
- Type “Terminal” as shown below. Kindly refer to this how to change the default screen capture format in macOS on the various methods to launch the Terminal on macOS.
- Double click on the Terminal to launch it.

In the Terminal window type ping <followed by the server name or IP> that you want to ping. The command should look like the command below and press Enter. A successful ping response is similar to the following:
Ping google.com
A successful response has a few notable elements: Repeating lines showing that bytes were sent, and the time the trip took (in milliseconds (ms)) and statistics that the packets transmitted were also received, with minimal to no packet loss.
Note: If this is also not continuous by default, simple run it this way for MacOSX
/sbin/ping google.comFor Linux
The Ping command line is configured by default for looping in Linux . To execute the continuous ping command in Linux, proceed as follows. Open the console of your Linux distribution, and search for terminal. When open, simply type as shown below, but your IP 🙂
Please run the command below
ping google.com
High count rate can also be indicated for a long period of time. See example below. This example will ping about 333 times.
ping 192.168.1.1 -c 333If this continuous ping does not work by default, there is probably an alias for the ping command that changes how you invoke the ping utility. The solution would be to find the ping command by using the command below.
which pingNext call the ping program from the path and it should be continuous.
/bin/ping 192.168.2.1For Juniper
This is by default as well. Simply run
ping 192.168.2.1For Cisco Devices
Ranging from ASA, Switches and Router, continuous ping is not possible but can be repeated as shown below
ping 192.168.2.1 repeat 333If this repeat command does not work, simple enter the ping command. To stop or kill the ping session in most environments, please hit the Ctrl + C on your keyboard.
ctrl + cIf you do not see a response when pinging by the hostname of the server, initiate a ping to the IP address. Initiating a ping to the IP address instead allows you to determine if the problem is a result of an issue with hostname resolution.
Below is a table showing the possible lists of ICMP-type values for results on how to perform continuous ping on OSes and network Appliances.
| ICMP Type | Literal |
|---|---|
| 0 | echo-reply |
| 3 | destination unreachable code 0 = net unreachable 1 = host unreachable 2 = protocol unreachable 3 = port unreachable 4 = fragmentation needed and DF set 5 = source route failed |
| 4 | source-quench |
| 5 | redirect code 0 = redirect datagrams for the network 1 = redirect datagrams for the host 2 = redirect datagrams for the type of service and network 3 = redirect datagrams for the type of service and host |
| 6 | alternate-address |
| 8 | echo |
| 9 | router-advertisement |
| 10 | router-solicitation |
| 11 | time-exceeded code 0 = time to live exceeded in transit 1 = fragment reassembly time exceeded |
| 12 | parameter-problem |
| 13 | timestamp-request |
| 14 | timestamp-reply |
| 15 | information-request |
| 16 | information-reply |
| 17 | mask-request |
| 18 | mask-reply |
| 31 | conversion-error |
| 32 | mobile-redirect |
Furthermore, I hope you found this blog post on “Perform continuous ping on OSes and network Appliances (macOS, Linux, Windows, Juniper and Cisco devices)” helpful. Please let me know in the comment session if you have any questions.