PowerShell Deployment Extension for MDT (PSD) enables you to extend your MDT Lite Touch Installation capabilities beyond the traditional IT boundaries. The purpose of PowerShell Deployment for MDT is to create a new deployment solution that provides the same level of automation as MDT but built on a more modern framework “PowerShell”. Explore PowerShell Deployment Extension for MDT. See the following guides: WDS/DHCP scenarios: How to configure DHCP Server option 60, 66, and 67 for Windows Deployment Services, Uninstall WDS: How to remove Windows Deployment Services role via the GUI and PowerShell, What happens when WDS and DNS is installed on the same server: DNS issues with WDS, and how does WDS work: How to configure Windows Deployment Services on Windows Server 2019.
PowerShell is the tool of choice, so it makes sense to use that for Windows deployment too as "against the traditional VBscript, ActiveX and lots of other command-line tool used previously". PSD is not a "replacement" or "the new MDT." It is an add-on to the existing MDT and does not replace the Deployment Workbench. it's only provides new task sequences and scripts to use within the existing framework. Therefore, it is an extension, not a replacement!Microsoft Deployment Toolkit (MDT)
Microsoft Deployment Toolkit (MDT) was previously referred to as “Business Desktop Deployment (BDD) Solution Accelerator”. MDT is a FREE tool that provides you with a framework to create custom images for deployment in your environment. These images can be for servers or client computers. The tool helps you put together all the necessary components (such as the operating system, applications, and drivers) into a standard image. Additionally, you can create task sequences to make sure your deployment is run in the proper order and correctly. Then MDT will put all the pieces together in a custom image that you can deploy in your infrastructure. For a detailed scenario on how MDT helps in accomplishing this task, please see the following guide “ADK, MDT, and WDS: How to deploy Windows using Microsoft Deployment Toolkit, and Windows Deployment Services“.
The major components and functionality are built on PowerShell alone but still leverage the MDT Workbench and layout. The goal is to support deployment shares by using PSD extensions as well as legacy MDT deployment shares. Supported deployment scenarios include deployment from the following content repositories.
– IIS over HTTP using WebClient (Native PS) or
– IIS over HTTP with BITS & BranchCache using 2Pint Software’s OSD Toolkit, and,
– UNC (\server\share)
Requirements for PowerShell Deployment Extension for MDT
To proceed with his tool, regardless of the scenario you are using, ensure you have the following prerequisites met.
– Download and then install Windows ADK 10, if not running previously.
– Downloads and then Installs MDT as well if not running previously.
– Download the PSD GitHub repository, and follow the installation guides in the PSD Documentation.
Follow the steps below to initiate PowerShell Deployment Extension for MDT.
Step 1- Download and then install Windows ADK 10, if not running previously
To install Windows ADK 10, please proceed to the following link . Note: When you wish to install a new ADK, an old ADK must be uninstalled before installing a new one (If this is not uninstalled, you will get an error). With this, you will lose some configuration as well.

Double click on the downloaded adksetup.exe file and follow the link for further steps. You may be asked to accept the UAC. For more on UAC, please see this guide “User Account Control: How to turn UAC on or off in Windows“.

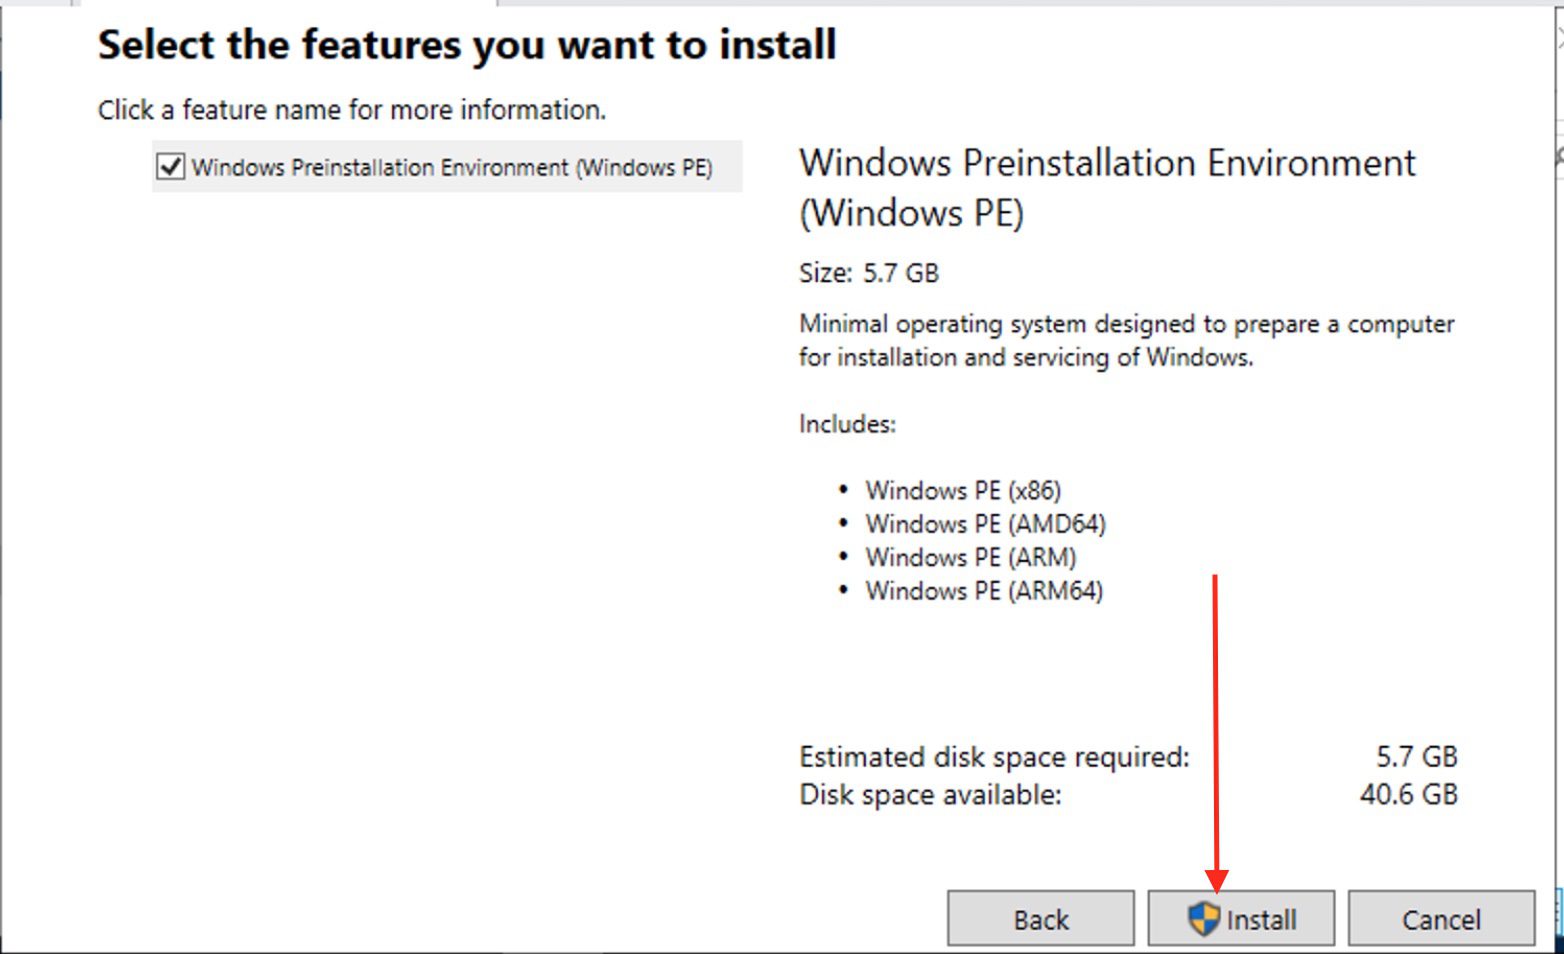
Now that you have completed the adksetup installation, you must have noticed that theWindows PE was not included. To do this, we will have to Download the Windows PE add-on for the MDT server. Please see this link for further steps

Double click on the downloaded adkwinpresetup.exe as shown above and work through the process and select install as shown below. You may be asked to accept the UAC.
Step 2 – Downloads and then Installs MDT as well if not running previously
You will have to click on the hyperlink to download the Microsoft Deployment Toolkit (MDT). I will be installing MDT 64bits as shown below. Click on Next to continue the download.

Double click on the installer (downloaded MDT setup file) and Please see this link for further steps. After the installation is complete, you should be able to access the Deployment Work Workbench as shown below. 

Step 3 - Install PSD for MDT: The PSD installation script is used to either create a new, or extend an existing MDT deployment share. It is also possible to use the Hydration script on a new server to setup a PSD lab environment. For the Hydration scenario 2 below. Scenario 1 – PSD Installation:
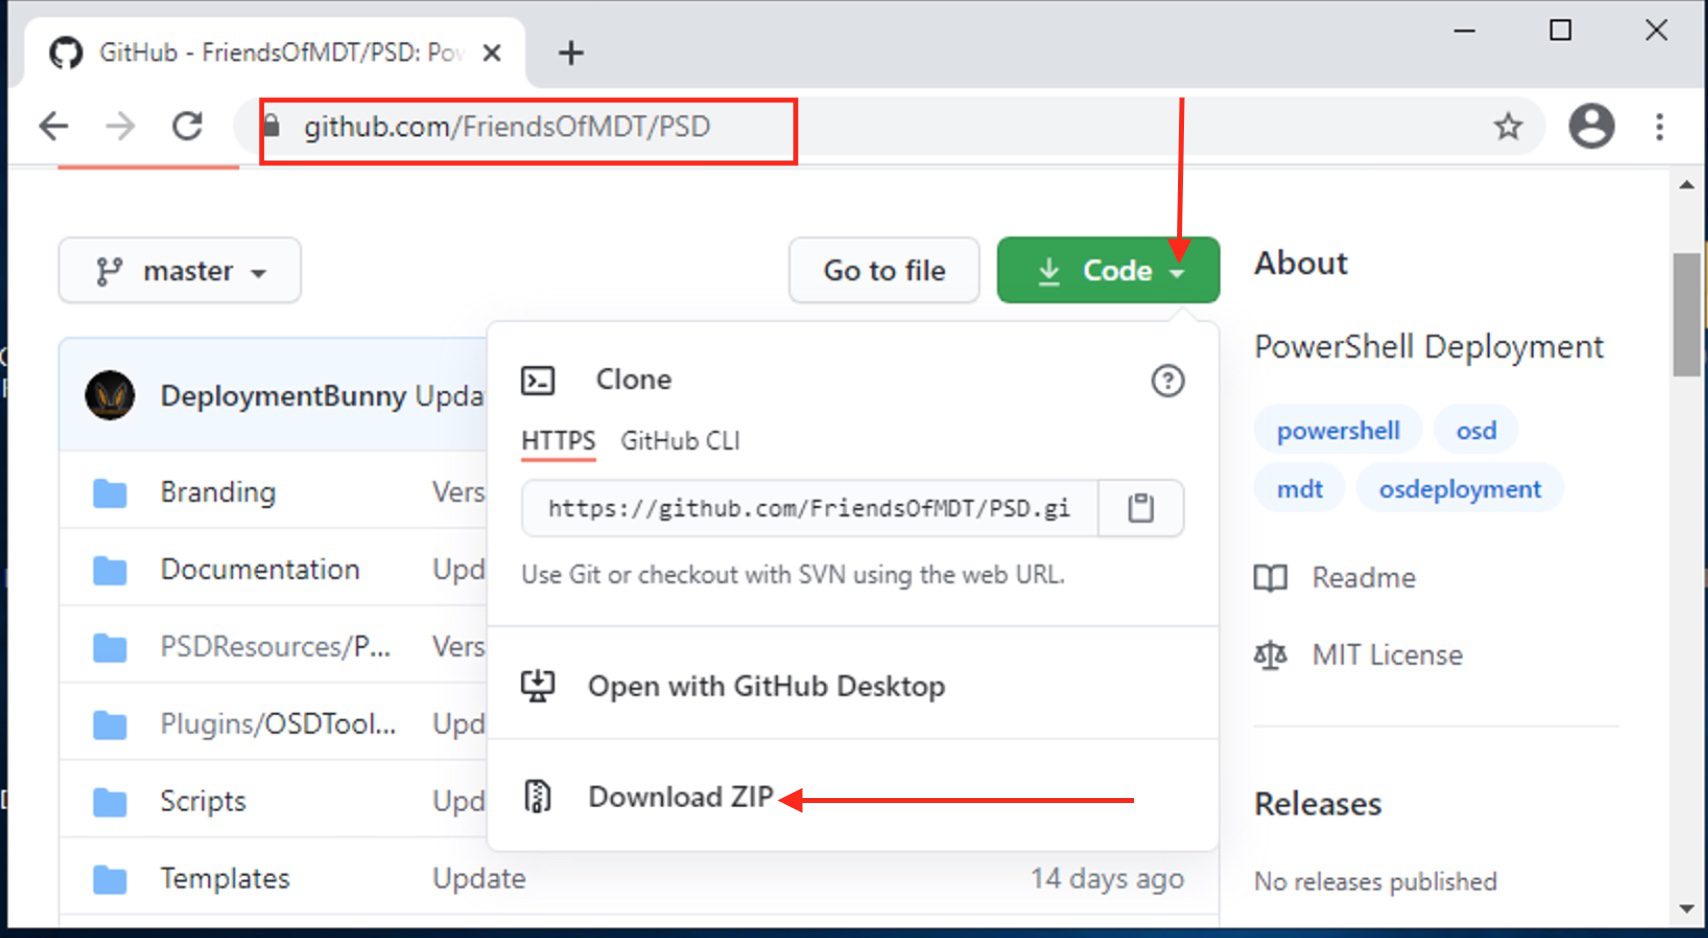
To do this, we will have to launch the PowerShell window as an administrator. Please refer to this official guide and download the Tool as shown below. You can do this in a professional way by installing GIT and cloning the repository. I will be showing you these steps in a new blog post.
– Click on Download ZIP as shown below.
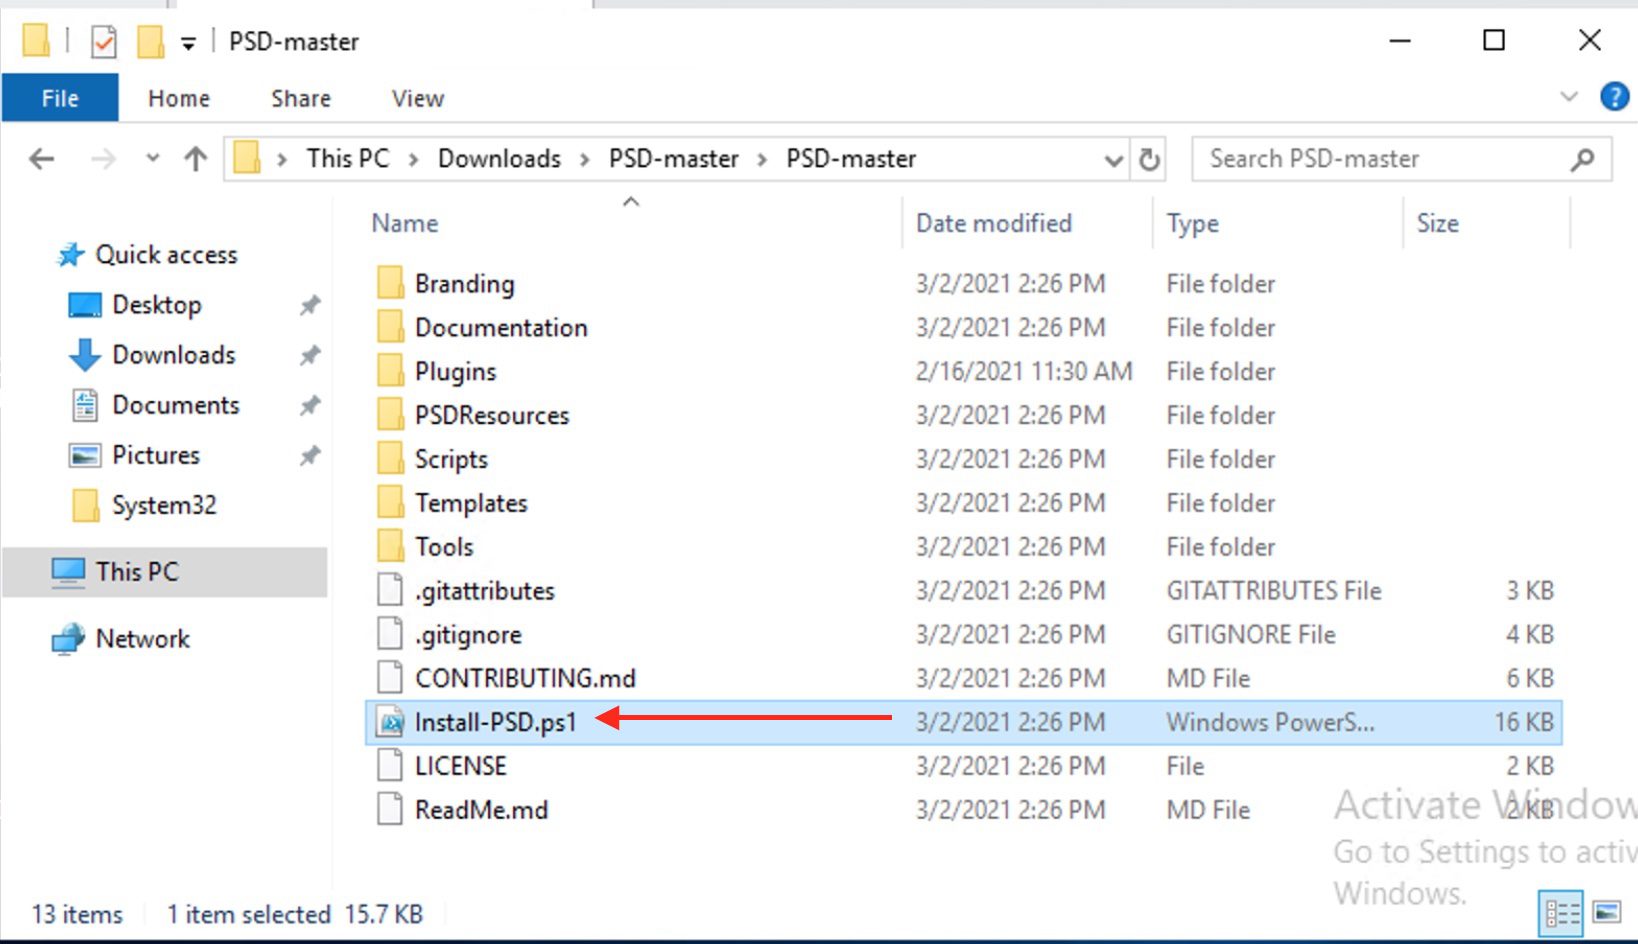
Locate the downloaded Tool (ZIP file) as shown below and right click on it to extract it.

Upon clicking on “Extract All”, the following Window below will appear. Click on extract.
– Note: You can use 7zip or any other tool for extraction.

This will open the extracted files automatically because we have the option checked. We will be using the following script below.
Note 1: It is recommend that you create a new deployment share for PSD, and copy an existing resources (applications, drivers, images) to it. Once a deployment share is extended with MDT, standard MDT task sequences will no longer work!
Note 2: This will ensure that existing MDT scripts are moved to a backup folder as shown below in the specified deployment share. Please see this link for further steps.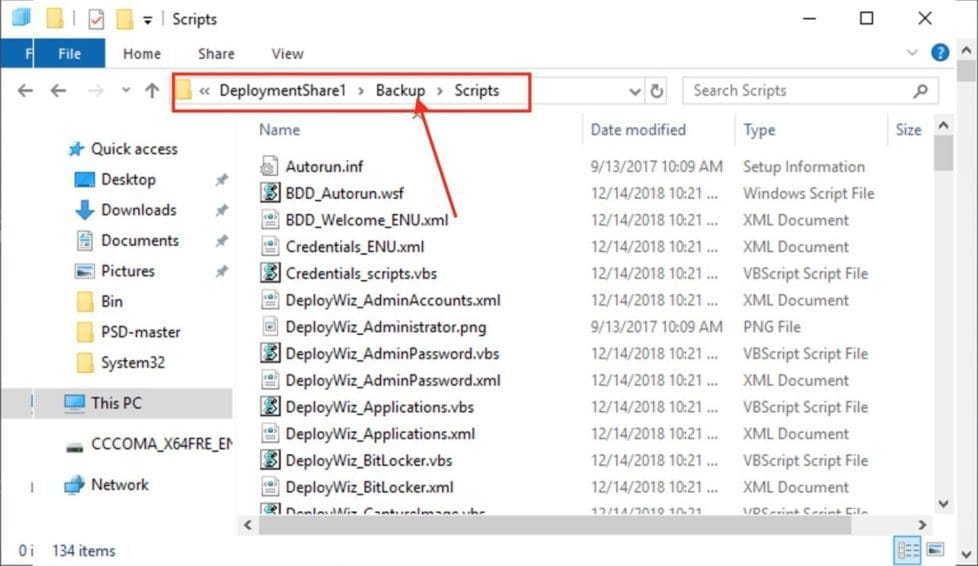
Note:
When initiating PowerShell Deployment Extension for MDT, ensure you have the PowerShell execution policy configured in order to permit the script. Here are various ways to set Windows execution. How to Set Execution Policy via Windows PowerShell, how to set the PowerShell Execution Policy via the Windows Registry settings, and how to set PowerShell Execution Policy via Windows Settings.

Now that we have prepared our environment to support PSD installation. There are two possible scenarios to follow.
1: For NEW installations of PSD run the following command below. I pre-created a directory “DeploymnetShare” and the following command below completed the task for me.
.\Install-PSD.ps1 -psDeploymentFolder <your folder path> -psDeploymentShare <your share name>
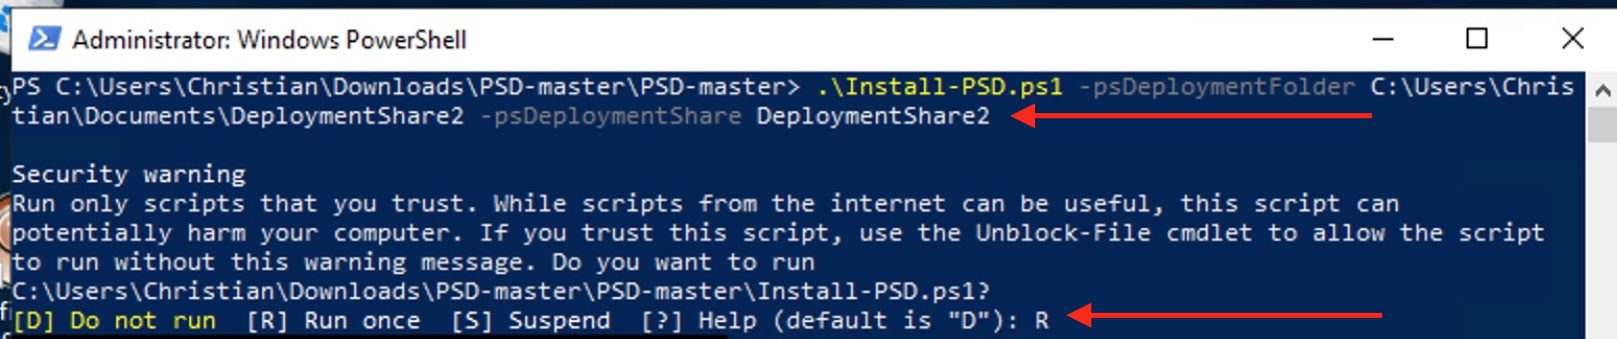
As you can see, we have our Deployment Share created by the PSD command as shown below.

2: To UPGRADE an existing MDT/PSD installation runs the following command below. This is used when you have an existing deployment share you wish to convert to PSD.
.\Install-PSD.ps1 -psDeploymentFolder <your folder path> -psDeploymentShare <your share name> -upgrade
I have created an existing deployment SHare to this example as shown below. To create a deployment share, right-click on the deployment share as shown below and follow the prompts. Now we have our deployment share we will be using for this test as shown below.


Upgrade Deployment Share
To upgrade this existing deployment share, please run the command as described above. Here is a screenshot of how it would look like for you. As you can see, the process completed successfully. This will ensure that existing MDT scripts are moved to a backup folder in the deployment share specified.

Regardless of the method, you are using above, kindly follow this guide to complete your Windows deployment. Nothing has changed other than you are working with a more modern framework “PowerShell” instead of VBScript.
Note: Unlike the normal MDT behavior, for PSD, after importing drivers to the Deployment Workbench, you need to run the New-PSDDriverPackage.ps1 script to generate the compressed driver packages used by PSD. You may also want to see from this link, “How to use Powershell with Task Sequences”. Henceforth, MDT takes care of the Execution Policy for you by running the script unrestricted. See this guide for the differences between MDT and WDS and What are the differences between High-Touch, Lite-Touch, and Zero-Touch installation?
Scenario 2 – Hydration Kit Installation
See the following guide on “how to install PSD with the Hydration Kit on Windows“: While the native PSD installation script as described in scenario 1 is used to either create a new or extend an existing MDT deployment share. It is also possible to use the Hydration script on a new server to set up a complete PSD lab environment from scratch, fully automated.
I hope you found this guide on PowerShell deployment extension for MDT helpful. If you have any questions, please let me know in the comment session.