Virtual Switch (vSwitch) are software constructs that are responsible for receiving and transmitting Ethernet frames into and out of their assigned virtual machine or the management operating system. vSwitch allows communication between virtual machines and they d not just forward packets, they also intelligently direct the communication on a network by checking packets before moving them to a destination. Kindly refer to the following related guides: How to install and configure iSCSI Target Server and iSCSI Initiator on a Windows Server, and how to install and Configure Hyper-V on Windows Server on Windows Server 2019, and 2022 via the Server Manager, PowerShell or DISM.
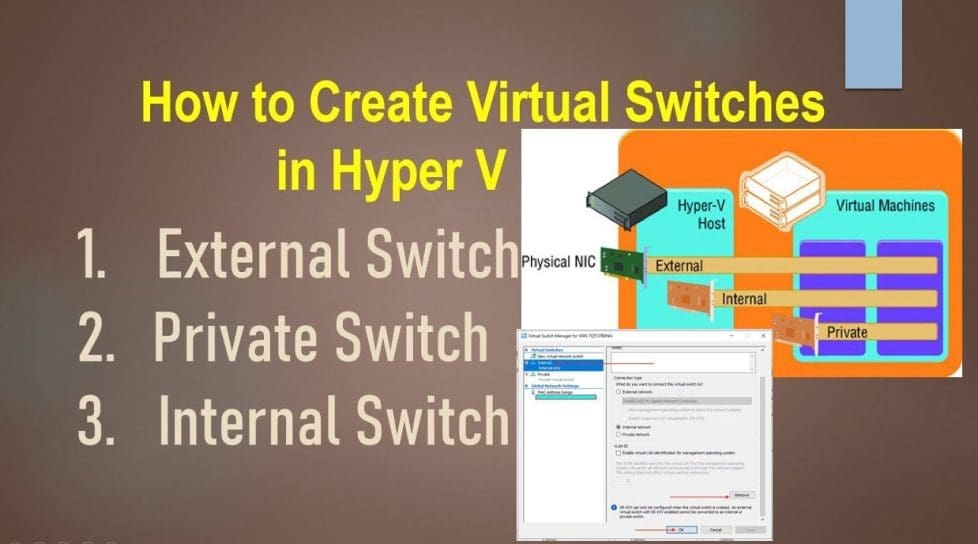
vSwitch Modes for the Hyper-V: The Hyper-V virtual switch presents three different operational modes.

- Private Virtual Switch: A Hyper-V virtual switch in private mode allows communications only between virtual adapters connected to virtual machines.
- Internal Virtual Switch: A Hyper-V virtual switch in internal mode allows communications only between virtual adapters connected to virtual machines and the management operating system.
- External Virtual Switch: A Hyper-V virtual switch in external mode allows communications between virtual adapters connected to virtual machines and the management operating system. It uses single or teamed physical adapters to connect to a physical switch, thereby allowing communications with other systems.

Kindly refer to the following guides: Why does the legacy PXE not does work on Generation 2 VM, How to set up a VM via PXE boot on a Generation 1 VM, and Generation 2 VM: How to set up a Hyper-V Virtual Machine through PXE boot.
Virtual Machine Network Adapters
The most prevalent virtual network adapters are found in virtual machines and they can be seen in both PowerShell (Get-VMNetworkAdapter) and in Hyper-V Manager’s GUI.
– Furthermore, To delete Virtual Switches from Hyper-V, kindly follow the same steps used in creating vSwitches. To do this, launch the Server Manager, click on Tools and click on the Hyper-V Manager as shown below.

However, Click on the Virtual Switch Manager as shown below to proceed.

This will open the Virtual Switch Manager for the server. Under the Virtual Switches, click on the External vSwitch and click on Remove.

As you can see, the virtual switch is being deleted. The External vSwitch is deleted.

To delete the Internal vSwitch, click on the Internal vSwitch and click on Remove.

To delete the Private Switch, select the Private vSwitch and click on Remove as shown below.

In the Virtual Switch Properties window, click on External and click on Ok as shown below.

In the Apply Networking change window, click on YES as shown below. Afterward, a new dialog window will appear showing the settings are being applied.

I hope you found this blog post helpful. If you have any questions, please let me know in the comment session.